- Dec 20, 2011
- 434
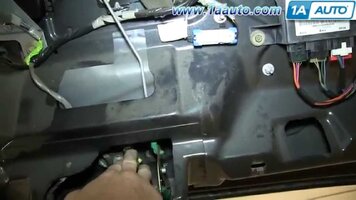
This thing can be a PIA to figure out what is wrong, and now that I've fixed my own three times, I decided to come up with a troubleshooting document, if only to help myself in the future when I fix it again  So grab your meter, get ready to take that rear molding off of the liftgate, and let's have at it. Skip to the troubleshooting steps if you are in a hurry.
Description of the circuit:
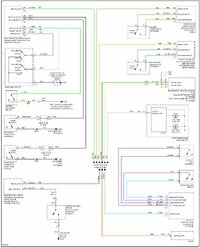
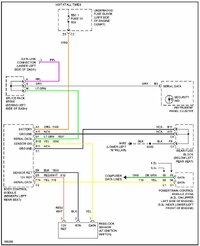
It isn't just a matter of turning on the wiper and straight voltage being sent to the motor. There is a controller board on the motor and a signal wire involved, and a few stops in between. That's right, there is a computer on the wiper motor. What could go wrong with that? Especially in the northeast when ice and snow cause this thing to freeze up, and the designers at GM put an actual circuit breaker in the wiring setup because apparently the current can rise often enough causing overloads now and then. Let's put a computer next to that thing prone to overdraw, I'm sure it will be fine! This is yet another reminder to me that the engineers for the trailblazer lived in the south or west
- switch on the dashboard (0..3). This switch uses resistors to send different voltage amounts back to the motor, depending on the switch setting. For example, on 0 my motor was receiving 2 volts DC, on 3 my motor receives 8.8 volts.
- relay in the front engine fuse box location, which doesn't go bad very often.
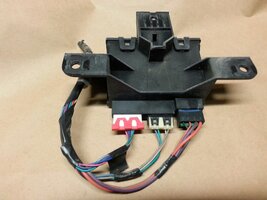
- next stop is the body control module (BCM), that fuse box under the rear passenger seats (or 2nd row if EXT)
- in the BCM is not a fuse, but a circuit breaker, which can reset itself once it trips.
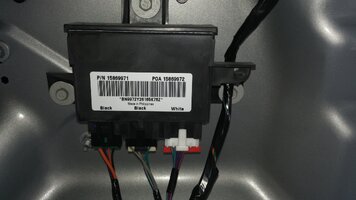
- next stop is the lift gate module (LGM), which controls the wiper along with the other things like liftgate locking and unlocking
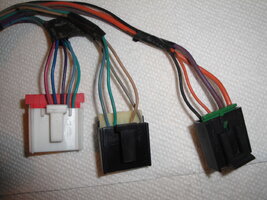
- finally you get to the wiper motor, and the connector has 3 wires, orange, green, and black. (on my application)
Note: the rear window washer pump, which supplies fluid when you press the button, is a completely separate system. The pump is in the front engine bay with the reservoir, and a long tube runs to the back window. (there are actually 2 pump motors, one for the front and one for the rear) So it's not uncommon for the wiper to not turn, but the pump to work just fine and spray fluid all over your liftgate when tested with a non-working motor.
Liftgate module notes:
- the wiper will not run if the liftgate is open, the back glass is open, or any of the switches that tell the computer that the liftgate or liftgate window is open. A telltale sign that you have an open liftgate or switch is the dome light being on.
Troubleshooting steps:
1) First make sure that the liftgate is working correctly. Open the liftgate, and close it. Do you hear it latch once closed ? Do all the interior dome lights turn off within a few seconds? Does the lock, unlock, work ok with your remote? Turn on your headlights, and check to make sure that the license plate lights turn on (hopefully you have good bulbs). If the answer is no to any of these, you either have a bad liftgate module, or more likely a wiring problem going to the liftgate module, or maybe a grounding problem with the liftgate closing.
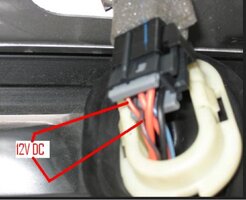
2) Get your meter, and let's go to the wiper motor connector. For the orange and black wire, you can test without even having a key in the ignition. Also, the orange and black you can test with the connector disconnected from the motor.
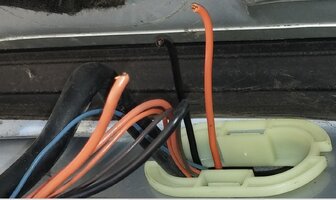
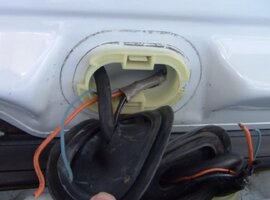
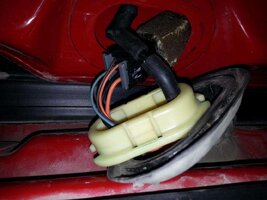
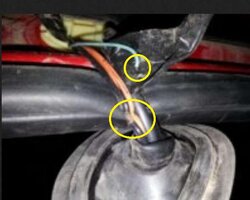
a) orange: always has battery voltage on it, 12v regardless of switch position. If you have no voltage,you have a problem. Start working your way backwards to find the break. A very common failure point is where the wiring goes through the grommet in the lift gate hinge area, all that opening and closing can eventually cause it to break. I would say if the orange wire has no voltage, you probably have other liftgate problems as well like the latch not working. If you want you can run a separate feed of 12v to test this out.
b) black: this is the ground wire. First connect a test wire to a good known ground source on your vehicle. (I used the bolt that connects the rear seat belt strap up high) You can also use this for testing the other wires. With your meter check for continuity at the black wire in the connector. If no tone, you have a grounding problem somewhere upstream from there. Wiring in the grommet area, maybe even liftgate latching assembly, but it's there somewhere. One of my rear wiper problems involved a loose connector and intermittently not working, I put some dielectric grease in that connector to fix that. You can run a separate ground wire to troubleshoot or even fix this problem.
c) green: this is the signal or data wire. Pulsed voltage is sent across this wire, hundreds of times per second, and there is feedback from the control module on the wiper motor involved. If you have a tech 2, you can send commands etc to make this troubleshooting a LOT easier, but I do not, and you probably don't either. My meter, an old fluke, can measure voltage here, and what you are looking for are voltage changes.
1) put the key in the engine and put on accessory or run.
2) make sure the wiper motor connector is connected. Put your meter on DC volts. Back probe the connector. Black goes on the black wire, and your meter red test lead into the green wire. I used paper clips to get in there and leave connected.
Voltage measurements I had with switch positions:
0) 2.04 volts DC
1) 3.74
2) 7.15
3) 8.84
What you are looking for: is voltage being sent, and are there changes in voltage as you turn the switch. ( By the way, you can also measure this with the connector disconnected, but you are dealing with small changes. I had -.065, -.114, -.205, -.247)
So if orange has power, black has ground, and green tries to send different voltages to the motor when switch changes happen, you are left with a bad wiper motor (or controller on the motor, or frozen gear etc). It's also possible the motor isn't in the "park" position. I suppose I would try removing the wiper blade, and then turning on the switch to see if it starts working again. I bought a knock off motor off of rockauto that failed in less than 2 years. (new gm motor is $140) So my latest replacement is a junk yard pull for $45, they pulled it for me and verified it worked.
Anyway, hope this helps and good luck. When you put your replacement motor on, make sure you run it once without having a blade on, so that it goes into the park position correctly.
 So grab your meter, get ready to take that rear molding off of the liftgate, and let's have at it. Skip to the troubleshooting steps if you are in a hurry.
Description of the circuit:
It isn't just a matter of turning on the wiper and straight voltage being sent to the motor. There is a controller board on the motor and a signal wire involved, and a few stops in between. That's right, there is a computer on the wiper motor. What could go wrong with that? Especially in the northeast when ice and snow cause this thing to freeze up, and the designers at GM put an actual circuit breaker in the wiring setup because apparently the current can rise often enough causing overloads now and then. Let's put a computer next to that thing prone to overdraw, I'm sure it will be fine! This is yet another reminder to me that the engineers for the trailblazer lived in the south or west

- switch on the dashboard (0..3). This switch uses resistors to send different voltage amounts back to the motor, depending on the switch setting. For example, on 0 my motor was receiving 2 volts DC, on 3 my motor receives 8.8 volts.
- relay in the front engine fuse box location, which doesn't go bad very often.
- next stop is the body control module (BCM), that fuse box under the rear passenger seats (or 2nd row if EXT)
- in the BCM is not a fuse, but a circuit breaker, which can reset itself once it trips.
- next stop is the lift gate module (LGM), which controls the wiper along with the other things like liftgate locking and unlocking
- finally you get to the wiper motor, and the connector has 3 wires, orange, green, and black. (on my application)
Note: the rear window washer pump, which supplies fluid when you press the button, is a completely separate system. The pump is in the front engine bay with the reservoir, and a long tube runs to the back window. (there are actually 2 pump motors, one for the front and one for the rear) So it's not uncommon for the wiper to not turn, but the pump to work just fine and spray fluid all over your liftgate when tested with a non-working motor.
Liftgate module notes:
- the wiper will not run if the liftgate is open, the back glass is open, or any of the switches that tell the computer that the liftgate or liftgate window is open. A telltale sign that you have an open liftgate or switch is the dome light being on.
Troubleshooting steps:
1) First make sure that the liftgate is working correctly. Open the liftgate, and close it. Do you hear it latch once closed ? Do all the interior dome lights turn off within a few seconds? Does the lock, unlock, work ok with your remote? Turn on your headlights, and check to make sure that the license plate lights turn on (hopefully you have good bulbs). If the answer is no to any of these, you either have a bad liftgate module, or more likely a wiring problem going to the liftgate module, or maybe a grounding problem with the liftgate closing.
2) Get your meter, and let's go to the wiper motor connector. For the orange and black wire, you can test without even having a key in the ignition. Also, the orange and black you can test with the connector disconnected from the motor.
a) orange: always has battery voltage on it, 12v regardless of switch position. If you have no voltage,you have a problem. Start working your way backwards to find the break. A very common failure point is where the wiring goes through the grommet in the lift gate hinge area, all that opening and closing can eventually cause it to break. I would say if the orange wire has no voltage, you probably have other liftgate problems as well like the latch not working. If you want you can run a separate feed of 12v to test this out.
b) black: this is the ground wire. First connect a test wire to a good known ground source on your vehicle. (I used the bolt that connects the rear seat belt strap up high) You can also use this for testing the other wires. With your meter check for continuity at the black wire in the connector. If no tone, you have a grounding problem somewhere upstream from there. Wiring in the grommet area, maybe even liftgate latching assembly, but it's there somewhere. One of my rear wiper problems involved a loose connector and intermittently not working, I put some dielectric grease in that connector to fix that. You can run a separate ground wire to troubleshoot or even fix this problem.
c) green: this is the signal or data wire. Pulsed voltage is sent across this wire, hundreds of times per second, and there is feedback from the control module on the wiper motor involved. If you have a tech 2, you can send commands etc to make this troubleshooting a LOT easier, but I do not, and you probably don't either. My meter, an old fluke, can measure voltage here, and what you are looking for are voltage changes.
1) put the key in the engine and put on accessory or run.
2) make sure the wiper motor connector is connected. Put your meter on DC volts. Back probe the connector. Black goes on the black wire, and your meter red test lead into the green wire. I used paper clips to get in there and leave connected.
Voltage measurements I had with switch positions:
0) 2.04 volts DC
1) 3.74
2) 7.15
3) 8.84
What you are looking for: is voltage being sent, and are there changes in voltage as you turn the switch. ( By the way, you can also measure this with the connector disconnected, but you are dealing with small changes. I had -.065, -.114, -.205, -.247)
So if orange has power, black has ground, and green tries to send different voltages to the motor when switch changes happen, you are left with a bad wiper motor (or controller on the motor, or frozen gear etc). It's also possible the motor isn't in the "park" position. I suppose I would try removing the wiper blade, and then turning on the switch to see if it starts working again. I bought a knock off motor off of rockauto that failed in less than 2 years. (new gm motor is $140) So my latest replacement is a junk yard pull for $45, they pulled it for me and verified it worked.
Anyway, hope this helps and good luck. When you put your replacement motor on, make sure you run it once without having a blade on, so that it goes into the park position correctly.

