How To; Restore Ugly Gray Trim back to Factory Black - for FREE! *With Video*

Shabba

Original poster
Member
Dec 1, 2011
43
Tools Needed;

1 Heat Gun - $20 for a cheap one like mine, or borrow from a friend.


Time Needed;

Approximately 40 minutes from start to finish for the three pieces on the rear bumper. Your mileage may vary.

Instructions;

A) Turn heat gun on highest setting and let it warm up for a few minutes. Tip will be glowing red when it's ready

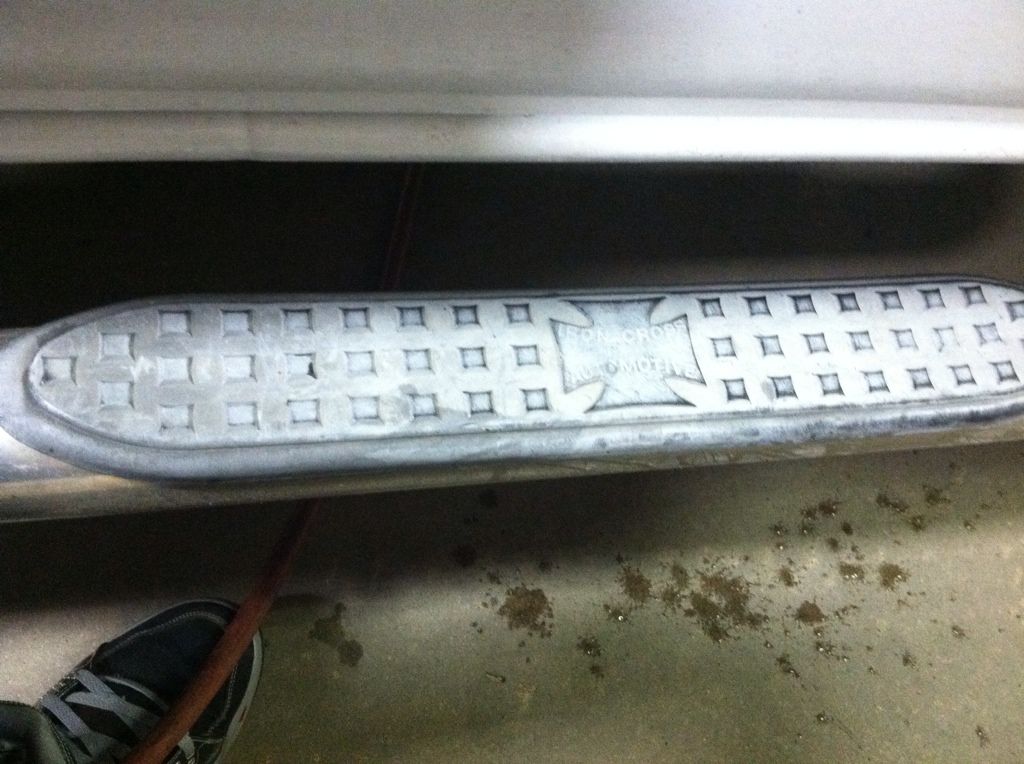
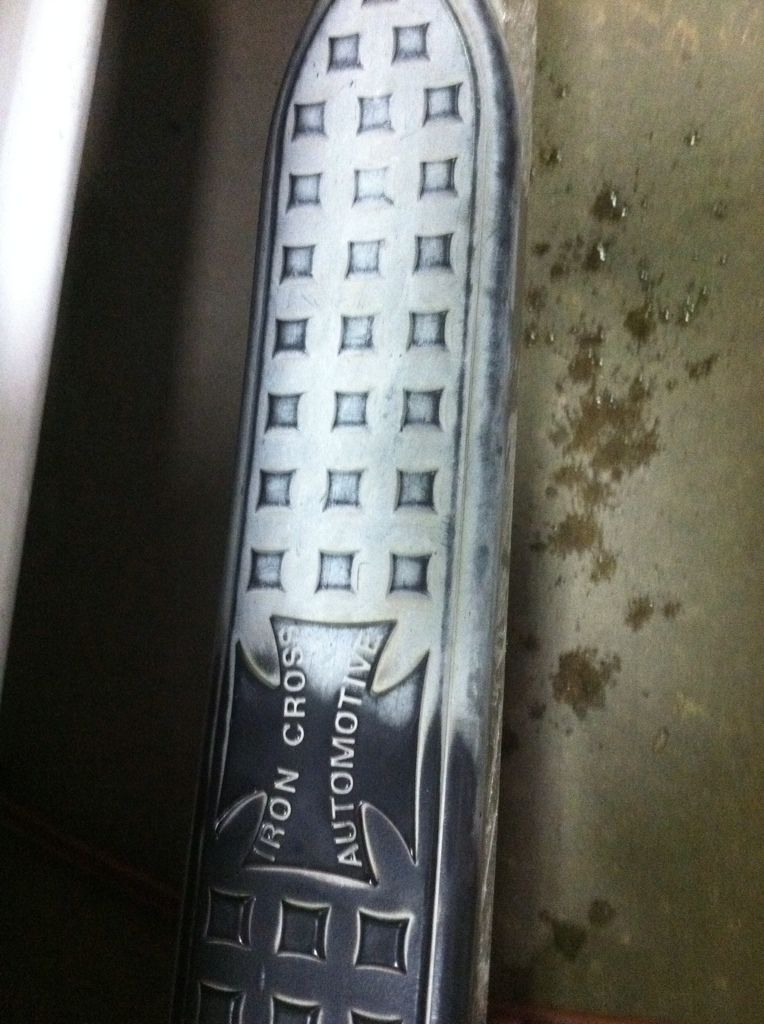
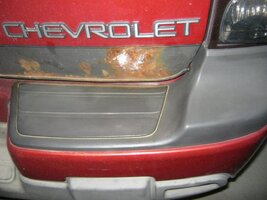
B) Slowly and methodically (or not) pass heat gun back and forth over the ugly grey plastic trim.

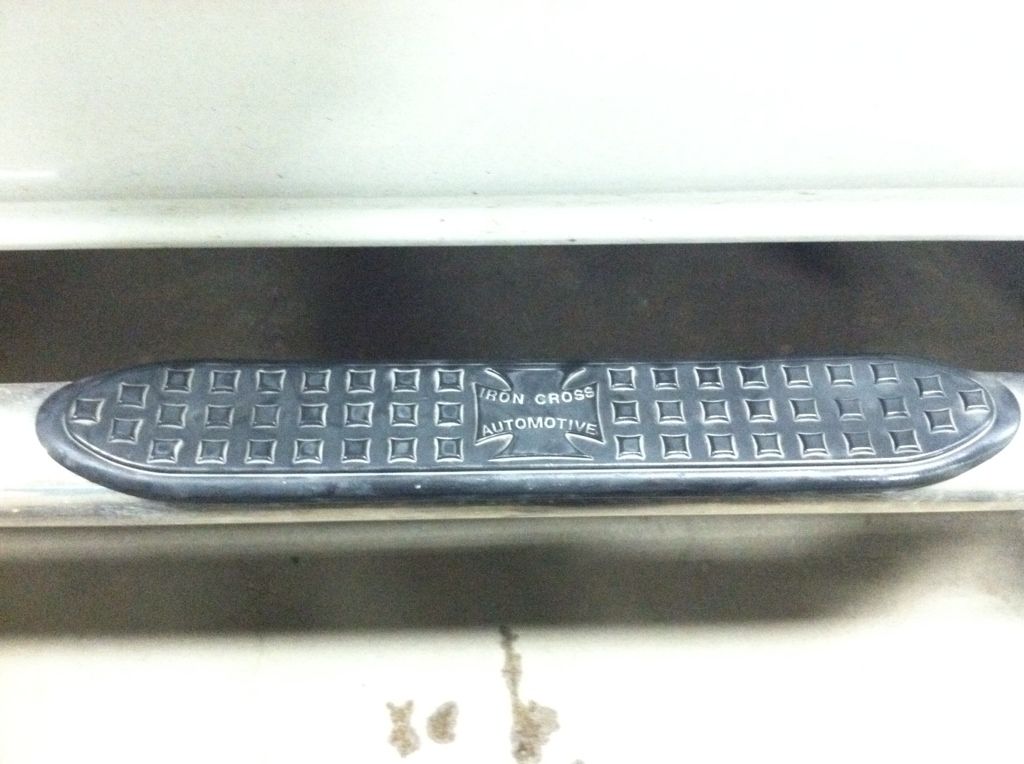
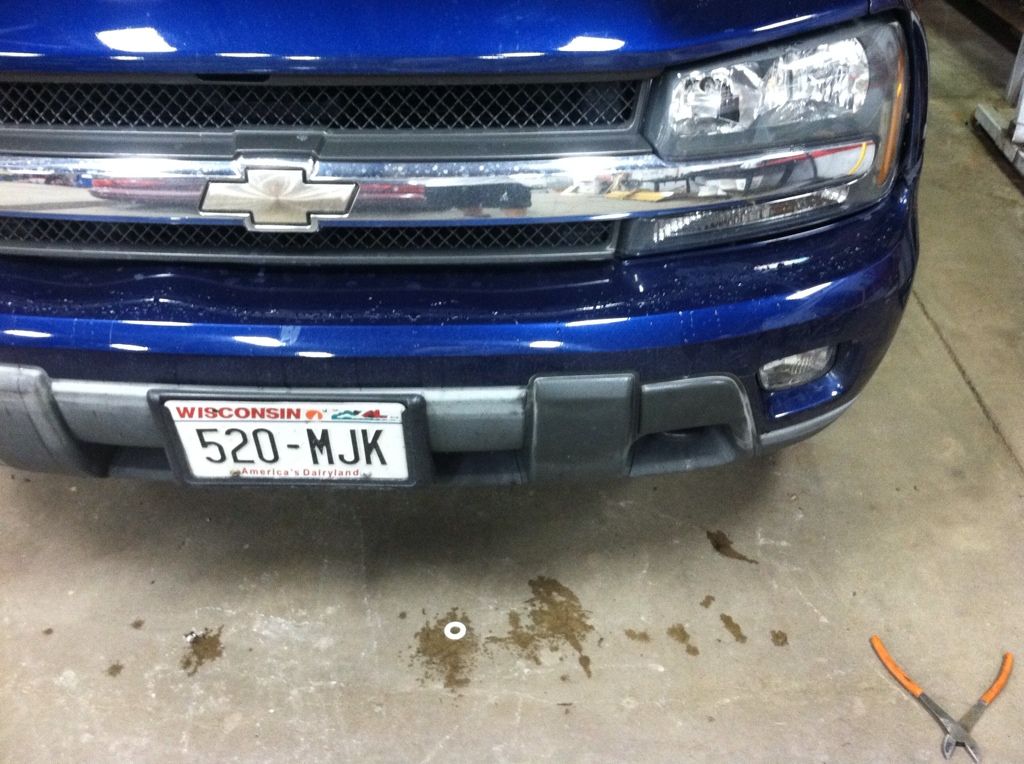
C) Enjoy your new looking rear bumper


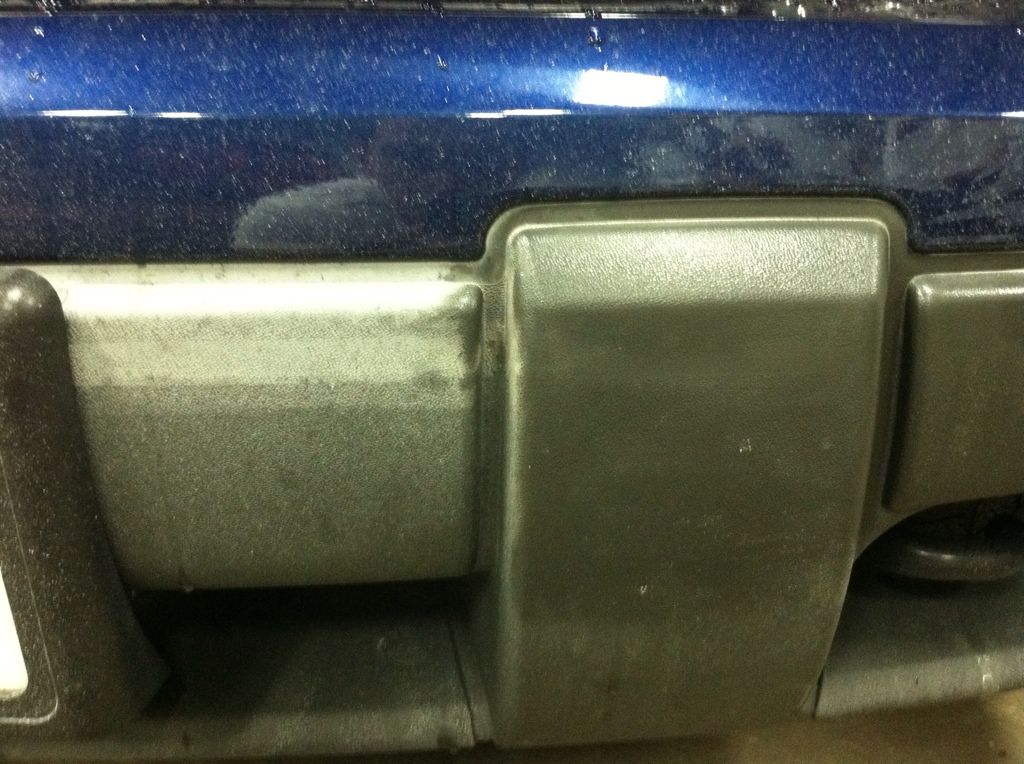
You will smell plastic melting. This is normal. You can even see it melting a bit. That's what you want! *Do not inhale fumes, Do not touch the hot part of the heat gun, Do not do anything else so blatantly ignorant as the first two things I typed* You do not want to touch the tip of the gun to the plastic, but you do want it very close. Do not focus on one spot for too long without moving the heat gun, and try to avoid heating up painted areas as much as possible.

This is a simple and free to make one of the ugliest parts of our cars SO much better looking. I hope this helped you. Enjoy.

 
Last edited by a moderator:
  • Like
Reactions: UsernameIsTaken

groundshock

Member
Dec 4, 2011
248
Very nice. Well done.

It's stuff like this that will have this place better than that 'other place' in no time.
 

ItsOnVoy

Member
Nov 21, 2011
2,401
Wow nice job on that!! I did not think the heat gun can do that! Thanks for sharing that :biggrin:
 

HARDTRAILZ

Moderator
Nov 18, 2011
49,665
Looks good. Wonder how long it stays looking that way?
 

moneypit

Member
Dec 7, 2011
214
Wow, Shabba you da man!!! got a cheap heat gun at Harbor Freight for $13.xx this morning to try this and it works flawlessly! Took like 10 minutes. It looks way better in person too! Now I gotta paint that rust...?
 

Attachments

  • bumper.jpg
    bumper.jpg
    79.5 KB · Views: 34

STLtrailbSS

Member
Dec 4, 2011
1,617
my bumber step is starting to turn nasty grey....To Harbor Freight I go!
 

Blckshdw

Moderator
Nov 20, 2011
10,665
Tampa Bay Area, FL
HARDTRAILZ said:
Looks good. Wonder how long it stays looking that way?

:undecided: Yeah, the OP will have to update us in a couple of months. I was thinking of pulling and painting mine, but if this is a long term solution, it will be SO much easier.
 

Shabba

Original poster
Member
Dec 1, 2011
43
I'll definitely update when and if it starts to fade. From everything I've been reading online, this is the most permanent way of doing it, but we shall see.

@moneypit if you pass it slowly back and forth over the cracks, it will fill them in as well, and you won't have those white "Corners".
 

Jakers

Member
Dec 4, 2011
19
Rockton, Il
i did this on a friends step plates on a bumper a couple years ago, still looks pretty good. I have also used the same method with a hair dryer or low setting on ATV plastics when you get the white stress lines
 

Blckshdw

Moderator
Nov 20, 2011
10,665
Tampa Bay Area, FL
Interesting. My pads below the brake lights have broken tabs, so they don't sit flush anymore. So some reshaping as well as blackening at the same time causes this to move further up the mod priority list. :yes:
 

Joe D 04

Member
Dec 5, 2011
26
I would pull them off and THEN do this. That way you can hit every little angle and not run the risk of damaging your rear bumper.

Mine aren't that right now bad though, maybe in time. I've seen some BAD ones out there though :no:
 

Shabba

Original poster
Member
Dec 1, 2011
43
Ideally, you would, but they are rivited on, and Appearantly are tough to put back on correctly if you do manage to get them off without tearing them up.

There's not much danger of hurting the paint, unless you go really overboard and get really careless. Evenness isn't a problem, as I was able to get every little bit of mine without needing any angles that I didn't have.

Whatever makes you feel comfortable though *shrug*
 

Blckshdw

Moderator
Nov 20, 2011
10,665
Tampa Bay Area, FL
Yeah, mine were already jacked up from the previous owner, and I had pulled them off at one point messing with my LED lightbar I've got back there. Maybe on my holiday vacation, I'll pull mine off and give this a shot :undecided:
 

gr82bCanadian

Member
Dec 8, 2011
74
:wootwoot: Thank you for the tip :yes:

I just said to hubby the other day....what would we ever need a Heat Gun for.....this was a question because he saw one in a flyer.....

Well guess what Santa's bringing this year :biggrin:
 

El1t3tb

Member
Dec 16, 2011
52
did this and worked amazing. pics arent the greatest and my iphone died before i finished it but you get the idea. also it worked on my dads step ups on his truck!

74c0b91a.jpg

4d565fc2.jpg

24fec95d.jpg

c8bd6831.jpg

ce45950a.jpg
 

Bailey4200

Member
Dec 9, 2011
5
love learning new tricks! thanks for sharing, this will help me in the detail biz. For you guys that want a quick fix that lasts a long time rub creamy peanut butter into the textured plastic then power wash it off and look at it shine :biggrin: Or most automotive paint supply stores sell plastic dye that you rub into it or spray on
 

04xuv

Member
Dec 3, 2011
94
thanks for the tip. did it the other day, and it looks great.
glad i don't have to wrestle it off and paint it.
 

Shabba

Original poster
Member
Dec 1, 2011
43
CdnGMan said:
I gotta admit that I'm still VERY skeptic regarding this, but I'm gonna give it a shot and see what happens... :undecided:

What part in particular are you skeptical about?

The only way I can see this not working is if you don't allow the heat gun to heat up all of the way, or possibly if you've used some product on it that makes it heat resistant (hi temp paint or something?).

The Video shows you how it works. That's completely unedited,with my retarded voice and lisp and all.
 

Badbart

Member
Nov 20, 2011
633
My son got wax on the running boards earlier this year and it's still white in the places he got it on. Will this take care of that or should I do something else? The bumper and running boards are not faded, as it stays under the carport most of the time, but where the wax got on it looks pretty bad. Any ideas?
 

fadyasha

Member
Dec 21, 2011
1,134
Sweet write up! This definetly on my to do list! Thanks for the brilliant idea! :thumbsup::wootwoot:
 

IAFF78

Member
Dec 29, 2011
205
Badbart said:
My son got wax on the running boards earlier this year and it's still white in the places he got it on. Will this take care of that or should I do something else? The bumper and running boards are not faded, as it stays under the carport most of the time, but where the wax got on it looks pretty bad. Any ideas?


If this trick with the heatgun doesnt take the white out then you might have to run to your local auto store and pick up the black dye for plastics trim pieces. I had a can but forgot the name. Just tell the store employee what your looking for and he will guide you in the right direction.


Kevin
 

papo020

Member
Dec 19, 2011
12
Great write up!!! I've been looking for something more permanent then constantly having to shine them up with each car wash! I might just remove them from the truck entirely so I don't have to worry about possibly messing up anything with the paint.
 

fadyasha

Member
Dec 21, 2011
1,134
papo020 said:
Great write up!!! I've been looking for something more permanent then constantly having to shine them up with each car wash! I might just remove them from the truck entirely so I don't have to worry about possibly messing up anything with the paint.

I used to shine them too but then noticed makes the slippery. So stopped doing so and had to deal with the ugly faded color! I think will be doing this mod over the weekend !
 

Rubberman

Member
Dec 14, 2011
117
I used the Plasti-kote black spray can. Taped it off and sprayed. It has the built in primer and made for plastic. The stuff holds up. I did all that plastic even the pieces on the doors.
 

Forum Statistics

Threads
23,273
Posts
637,488
Members
18,472
Latest member
MissCrutcher