Difficulty: Easy to Moderate
Working Time: 45 minutes (less if you don't drop screws and have to hunt for them)
Parts Numbers:
Tools Needed:
Step 1: Remove Door Panel (Borrowed from the Installing Mirror Turn Signals Article)
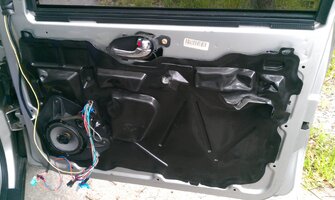
Step 2: Disconnect door handles from latch
Pull loose the rear half of the rain guard exposing the door lock hardware.
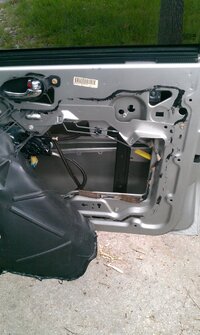
Locate and release, the door handle lock rods.
On the outside handle, the lock rod clip rotates away from the truck's body to release. If you're doing the driver's door, there will be 2 rods, with the additional one connecting to the key lock cylinder. (It was difficult to photograph due to low light, and the window glass being in the way)
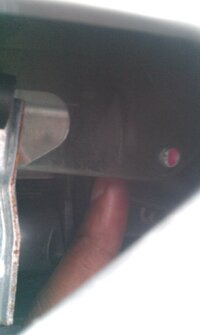
For the inside door handle, the lock rod clips rotate inwards towards the truck's body.
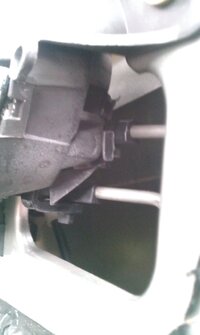
Step 3: Remove door latch assembly
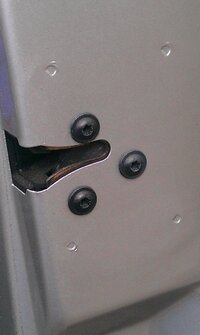
Remove the 3 T-27 torx head screws holding the latch to the door.
Lower the latch assembly into the lower section of the door. This will make it easier to take the outside door handle lock rod, and manuever it down along side the inside handle lock rods. Once that's done, you should be able to turn the latch assembly to access the 2 wire harnesses (lock/unlock signal, and anti theft circuit) to disconnect them.
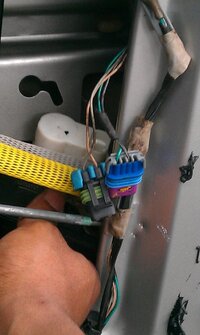
After the harnesses are disconnected, you should be able to work everything free.
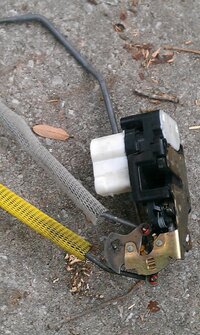
Step 4: Swap lock actuators
You can disconnect the inside handle lock rods from the latch to make handling things easier. Unscrew the 2 screws holding the lock actuator in the latch. My smallest torx bit was T-15 which was slightly too big, so I assume they are T-10. Fortunately I had a 5/64" Allen key that fit them perfectly.
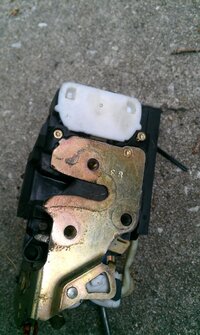
Lift the actuator slightly to disengage it from the latch's teeth, pop out the little rubber bumper near the bottom and you're free.
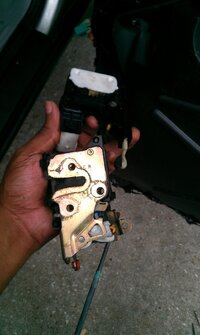
You can use the old actuator to mirror the teeth on the new one prior to installation in the latch.
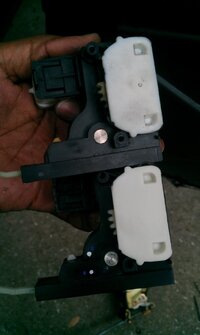
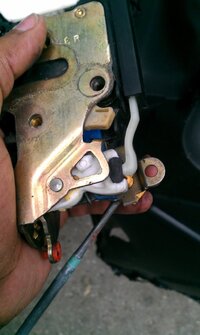
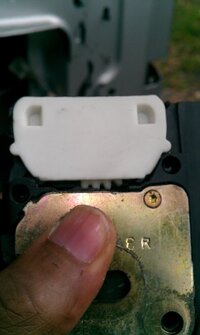
Insert the rubber bumper of the new actuator into the clip of the latch, and then slide the actuator down mating the teeth of each together.
Step 5: Reinstallation
Reverse your steps, and enjoy your properly locking door.
Working Time: 45 minutes (less if you don't drop screws and have to hunt for them)
Parts Numbers:
- ACDELCO Part# 11P5 (Passenger front and rear)
- ACDELCO Part# 11P4 (Driver front and rear)
Tools Needed:
- 10mm Socket, extension and ratchet
- Trim Panel tool, or some other flat bladed tool
- T-27 Torx Bit
- T-10 Torx Bit or 5/64" Allen key
- Pick tool (optional)
Step 1: Remove Door Panel (Borrowed from the Installing Mirror Turn Signals Article)
A) Using the small flat head screw driver, gently pry up on the power window/door lock plate enough to get your fingers under it to slowly lift it up the rest of the way. There are 2 clips holding it on.

B) Once the plate is lifted up, unplug the factory harness to the power window and door lock, then remove the plate.

C) After the plate is removed you will need to remove the inside handle trim piece. Locate the clips as shown in the pictures (4 clips on all inside handle trim pieces) and using the small flat head screw driver, gently press in on the clips releasing them from the handle assembly. Be sure to use your fingers to pull out on the trim while using the screw driver to depress the clips.


D) After the trim piece is removed, get your nut driver with the 10mm socket and remove the 2 bolts holding the panel in place. One is located where the power window/door lock plate was removed and the other is in the arm rest hand opening (I used the magnet to remove the one in the arm rest area)

E) After the 2 bolts are removed it is time to start working your way around the panel to release the factory push pins holding the panel on. I found it easiest to start up by the side view mirror of the panel (triangle piece) by pulling out gently and working my way all the way around the panel slowly until every clip was released. The only thing holding the panel on now is the channel at the top of the door panel. Carefully lift the panel off and set it aside.

Step 2: Disconnect door handles from latch
Pull loose the rear half of the rain guard exposing the door lock hardware.

Locate and release, the door handle lock rods.
On the outside handle, the lock rod clip rotates away from the truck's body to release. If you're doing the driver's door, there will be 2 rods, with the additional one connecting to the key lock cylinder. (It was difficult to photograph due to low light, and the window glass being in the way)

For the inside door handle, the lock rod clips rotate inwards towards the truck's body.

Step 3: Remove door latch assembly
Remove the 3 T-27 torx head screws holding the latch to the door.

Lower the latch assembly into the lower section of the door. This will make it easier to take the outside door handle lock rod, and manuever it down along side the inside handle lock rods. Once that's done, you should be able to turn the latch assembly to access the 2 wire harnesses (lock/unlock signal, and anti theft circuit) to disconnect them.

After the harnesses are disconnected, you should be able to work everything free.

Step 4: Swap lock actuators
You can disconnect the inside handle lock rods from the latch to make handling things easier. Unscrew the 2 screws holding the lock actuator in the latch. My smallest torx bit was T-15 which was slightly too big, so I assume they are T-10. Fortunately I had a 5/64" Allen key that fit them perfectly.

Lift the actuator slightly to disengage it from the latch's teeth, pop out the little rubber bumper near the bottom and you're free.

You can use the old actuator to mirror the teeth on the new one prior to installation in the latch.

Insert the rubber bumper of the new actuator into the clip of the latch, and then slide the actuator down mating the teeth of each together.


Step 5: Reinstallation
Reverse your steps, and enjoy your properly locking door.

