FUBAR'd Glove Box Handle...00-02 Silverados

mrrsm

Original poster
Lifetime VIP Donor
Supporting Donor
Member
Oct 22, 2015
7,639
Tampa Bay Area
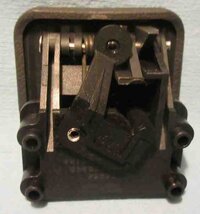
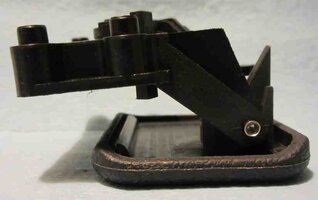
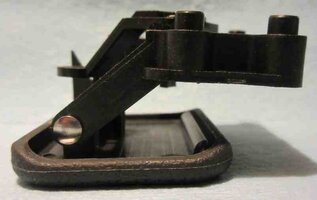
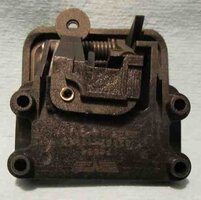
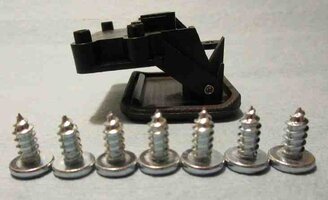
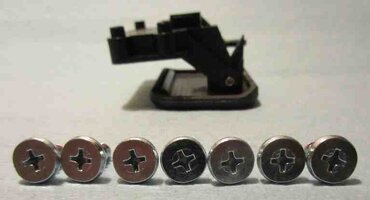
In the midst of performing other extensive R&R Work on my Y2K Truck… I hastily attempted to open the Glove Box yesterday and the Plastic Handle Under-Structure crumbled in my hand like an Oatmeal Cookie. This is a 20 Year Old Silverado that has been subjected to the daily exposure under the Florida Sunlight and High Heat that eventually gets the best of ANY and ALL Plastic Fixtures within the Cab. So I wasn’t really THAT troubled about this Damned FUBAR ...until I tried to get direct access to the Interior of the Glove Box and R&R the Handle using a Dorman After-Market Part #74363 Glove Box Repair Kit:

GLOVEBOXHANDLE1.jpgGLOVEBOXHANDLE2.jpgGLOVEBOXHANDLE3.jpgGLOVEBOXHANDLE4.jpgGLOVEBOXHANDLE5.jpgGLOVEBOXHANDLE6.jpgGLOVEBOXHANDLE10.jpgGLOVEBOXHANDLE11.jpg

But... the Real Problem here is that in order to even WORK on this thing… one must start by removing ALL of the Dashboard Fascia and Panel Retention Bolts in order to completely remove the Glove Box and attached hinged Dash Panel. After that... it appears that a whole series of 'border rivets' need drilling out to remove the 'inner skin' of the front Glove Box Fascia just to work on what's actually The Busted Parts hidden underneath.

You’ll probably LOL as much as I did at this Poor Dude who starts out kind of “Explaining How To Do ...something…“ and then he ends up performing this task completely Back-Asswards. Here he videotapes this ‘funny approach’ to getting at all of the ancillary stuff in his way removed enough ... JUST to Part Out his Silverado Glove Box:


...whereas THIS Dude takes a more conservative approach and actually show us how to “Break Into” a Glove Box ...that is already “Broken” and inaccessible afterwards without a Working Handle.


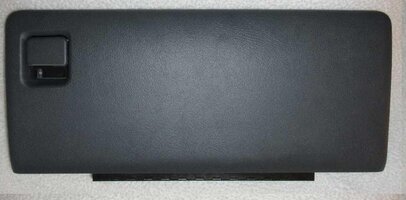
As per the attached images...I ordered BOTH the Dorman Kit previously mentioned AND also a Complete Used Dark Graphite Glove Box as well because I’d rather NOT have to crawl around inside the Cab and Phiddle-Ph*ck around with what SHOULD be THE Simplest GM Repair EVER to perform in History! I’m still waiting for the replacement Glove Box to arrive ...and then decide what I want to do next:
 
Last edited:

mrrsm

Original poster
Lifetime VIP Donor
Supporting Donor
Member
Oct 22, 2015
7,639
Tampa Bay Area
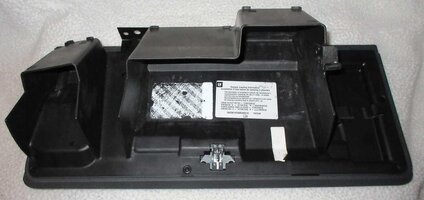
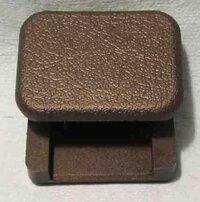
As per the promise made by the eBay Seller... The Complete Replacement Glove Box arrived after his Vacation was done. It looks like it is damned near Brand New. I'll install it soon after finishing some other more pressing maintenance and repair issues on my Truck:

SILVERADOGLOVEBOX1.jpgSILVERADOGLOVEBOX6.jpgSILVERADOGLOVEBOX4.jpgSILVERADOGLOVEBOX8.jpg
 

mrrsm

Original poster
Lifetime VIP Donor
Supporting Donor
Member
Oct 22, 2015
7,639
Tampa Bay Area
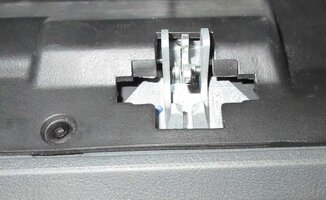
Short of making One Last Installment Post just to prove that I will finally manage to complete this "Simple Repair Job" before this year is out, I wanted to make mention here of another irritant lurking just inside of the upper rectangular opening to the Glove Box. THIS one will prove to Add Insult to Injury if you cannot complete this R&R from Start to Finish ...All in One Go.

With the Broken Latch preventing the normal closing of the Glove Box Door, if you're working on this project in Broad Daylight... it may escape your attention that without the usual pressure holding in that Spring-Loaded Light Switch Plunger it WILL stay on and Drain Down your Battery to Dangerously Low Levels overnight... and for as long as the vehicle sits idle.


Fortunately for me, I'd already had and solved another Battery Drain Down Issue while working on other areas of the truck. In response, I managed to resurrect the life of my Duralast Platinum AGM Battery using an Optima High End Battery Charger. I've been keeping a Battery Maintainer on "The Lazurus Battery" ever since it recovered and in this instance, the perpetual use of THAT handy device has paid off.

But getting back to this issue... I didn't realize that Glove Box Light was on until I had to crawl around on the passenger floorboard while trying to remove the (3) 7mm Machine Screws (and some Nuisance Rivets) holding the Lower, External Piano Glove-Box Hinge in place.

"Well...", I thought, "No Problemo... I'll just push ...or pull... or unscrew that Damned Little Bulb and leave it out until the job is done..." "HAH..." Jesus Wept! That GD Little Bulb was Hotter than the Surface of the Sun!

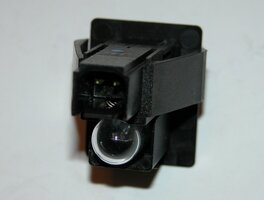
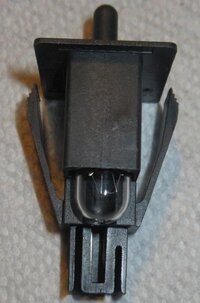
Next, I thought, "Well... I'll just Phiddle-PH**k around with the Two-Wire Plastic Connector and then disable it THAT way". Nope. I finally got so frustrated that I just dug my nails under the thin Outer Plastic Sheet that acts to Sandwich the front of that Switch in Place and worked away at ripping it off and breaking out the whole damned light unit, just so I could be done with it.

THAT Idea worked well enough for me to be able to poke the unit out of the Dash Frame and let the Plastic Switch to hang loose enough to use a screwdriver and get that Damned Thing un-plugged.

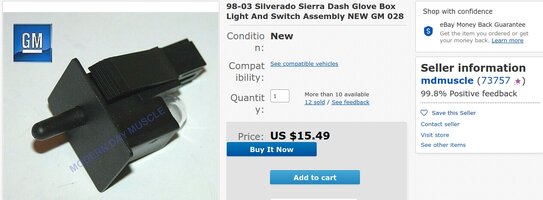
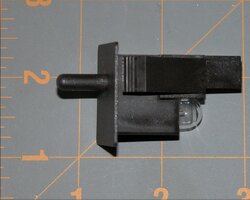
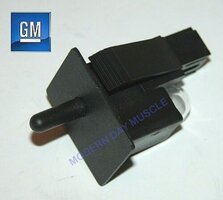
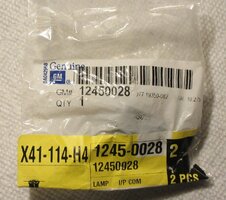
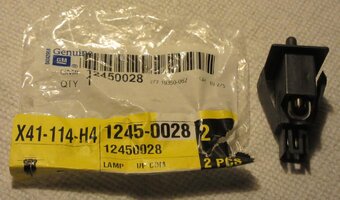
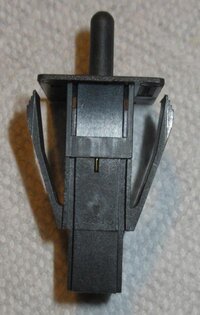
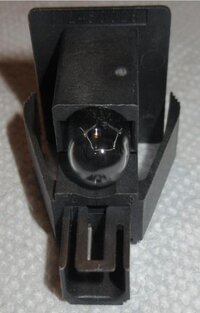
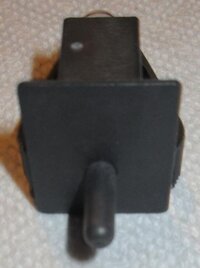
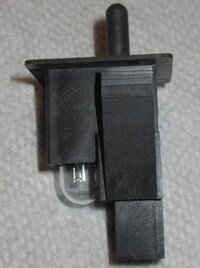
Well....HELL! "ACT in Haste... SUFFER at Leisure..." . So right afterwards, I went to eBay to search for an OEM Replacement to fix my FUBAR'd foible. I got lucky in this case, however and located & ordered THIS Replacement $15.50 Glove-Box Light Unit:

GMGLOVEBOXLIGHTSOCKET0.jpgGMGLOVEBOXLIGHTSOCKET3.jpgGMGLOVEBOXLIGHTSOCKET.jpgGMGLOVEBOXLIGHTSOCKET2.jpg

I'll make sure that the installation of this Friggin' PITA Light Unit is THE Very Last Part of this Project to be DONE!
 
Last edited:
mrrsm

Original poster
Lifetime VIP Donor
Supporting Donor
Member
Oct 22, 2015
7,639
Tampa Bay Area
Proof of this component being a 'Genuine GM Part':

GMGLOVEBOXLIGHTSWITCH1.jpgGMGLOVEBOXLIGHTSWITCH2.jpgGMGLOVEBOXLIGHTSWITCH3.jpgGMGLOVEBOXLIGHTSWITCH4.jpgGMGLOVEBOXLIGHTSWITCH5.jpgGMGLOVEBOXLIGHTSWITCH6.jpgGMGLOVEBOXLIGHTSWITCH7.jpg
 

TGstring

Member
Apr 11, 2020
19
Canada
I used a few four letter words changing that bulb to a super bright LED (along with the rest of the interior courtesy bulbs) ...another really fun bulb to change is the one hiding in the ashtray
 
  • Haha
Reactions: mrrsm

mrrsm

Original poster
Lifetime VIP Donor
Supporting Donor
Member
Oct 22, 2015
7,639
Tampa Bay Area
One of the VERY Few things about this Truck that I did NOT like was the fact that at some point in its long, well cared for life... somebody peeled off the RPO Sticker from inside of the Glove Box. Oddly enough, the replacement glove box I later obtained from eBay was missing that Aluminium Label as well. For anyone owning a 2018 or Later Model GM Truck... they will also NOT have any RPO Stickers in their Glove Boxes anymore, But... if you eyeball the lower inner area of the "B" Pillar of the Driver's Side of the Vehicle... THIS is what you'll find by using your Cell Phone to retrieve those Codes:


mrrsm

Original poster
Lifetime VIP Donor
Supporting Donor
Member
Oct 22, 2015
7,639
Tampa Bay Area
UPDATE on 08/17/2020:

This information comes late to the fray... but actually deserved to be shown as Post #1 in this Thread. I discovered this Odd Arrangement yesterday, when I was finally able to Drill out the Two Installed Rivets and finally completely extricate the Damaged Glove Box Door.

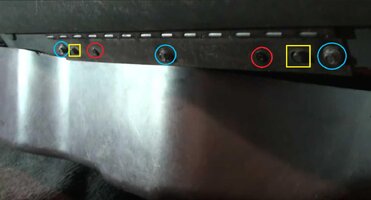
This information concerns the fact that the GM-GMC Truck Glove Boxes cannot simply be "Un-Bolted and Removed", but rather are all cobbled together in place along their Long Flange Lines like Custom Made Hob-Nail Leather Boots. This sandwiched arrangement consists of the following "layers" held together with an assortment of Alignment Studs, Rivets & Screws:

(1) The Main Dashboard Under-Framing.
(2) The Thin "Skin" Non-Removable Dashboard Fascia.
(3) The Outer Flange of the Glove Box to Dashboard Steel Piano Hinge.
(4) The Two Plastic Alignment Pegs - approximately 1/4" Long.
(5) The Two Black Painted Steel Pop-Rivets ***
(6) The Three Black Steel 5/32" Hex Head Screws.


The Attached Image highlights their distribution and locations along the Flange Line:

(1) Blue Circles = Blue Steel 5/32" Hex-Head Screw (3)
(2) Yellow Squares = Molded In Black Plastic 1/4" Alignment Pegs (2)
(3) Red Circles = GM Black Faced Steel Pop Rivets

SILVERADOGLOVEBOX.jpg

Now all of this might seem a bit "over-examined" until you realize that once You've removed the Glove Box Door and proceeded to "Drill Out" the Interior Panel Rivets... You will STILL require the GM OEM Replacement Rivets for Two reasons:

(1) If You do NOT have them... and overlook installing them after You "JUST Bolt The Damned Glove Box Door RIGHT BACK ON!" The resulting Reed-Like Vibrations in between those loose Dash Panel-to-Inner Dashboard Noises will DRIVE YOU INSANE!!!

Note: Be certain to install the Three Hex-Head Screws in the Piano Hinge Holes LOOSELY First and then, after inserting the Two, Low Profile Steel Rivets... Tighten up all Three Bolts before "Popping" the Two Rivets solidly in place.


(2) You will not be able to Re-Assemble the Plastic Cover Panel to the Inner Glove Box Door Framing AFTER you replace Dorman Part# 74364.

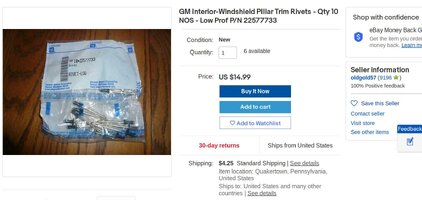
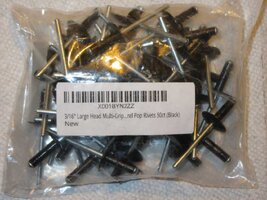
So if YOU are intent on doing this job and want to have EVERYTHING necessary available for the work (including a decent Rivet Installation Tool)...Stop by eBay and order THESE GM OEM Inner Window and Interior Low Profile Rivets Part # 22577733 to replace all of the ones you will need to Drill Out. With S&H, these will cost just under $20.00 for a Bag of (10). Other outlets may offer these for less money... Please Post what you find if those you find cost LESS...TIA :>)

GMTRIMRIVETS1.jpg
...AND... Speaking of Tools...

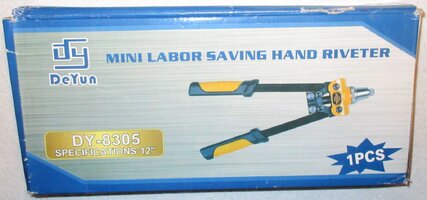
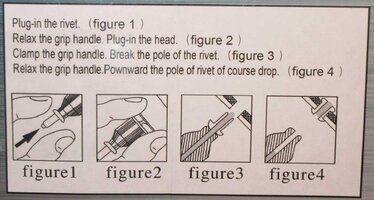
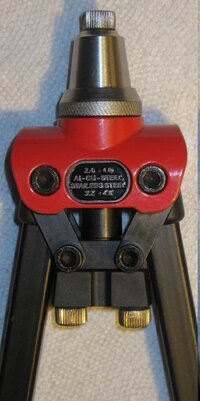
YES... You CAN get the Cheaper Rivet Tool Version with the Blah...Blahhh.blahh... This and That ...which WILL Work... BUT... As in Aircraft Riveting... If you Do NOT want to STILL have things loosening up and Rattling around on the Dash Panels because the Rivets LOOSED UP... Having a DECENT Rivet Tool to INSTALL Your Rivets Properly is NOT a Bad Idea!

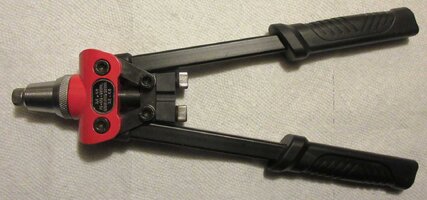
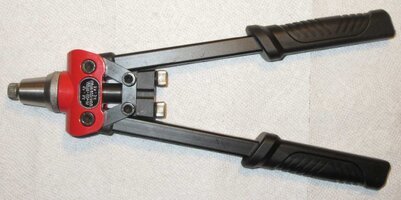
I like THIS One... Because:

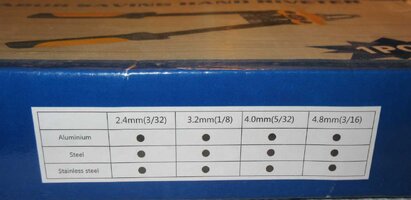
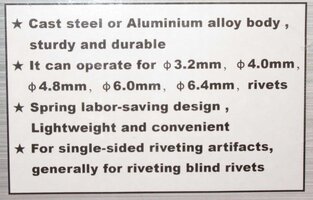
(1) It is VERY Well Made... With High Grade Steel(s) and is capable of handling all manner of Rivets in a way that will NOT JARRRrrr Your Teeth Loose when the Center Pins inside finally let GO with Loud SNAPs!!!

(2) For Fine, Close-In Work...the Cantilever Design lets you set the Blind, Low Profile GM Rivets in Place UNIFORMLY and neither Mar nor Damage the Work Pieces, like restoring the Glove Bax Panel after an OEM Quality Repair from Start to Finish.

(3) You may NEVER, EVER need One of These Tools... But IF You DO... Get one that will give you a Greater Sense of Control over the Work and won't Break Your Knuckles and Fingers when the Two Handles come together.

(4) I LIKE Tools... A LOT... Especially Tools like THIS One ...that will allow you to put any kind of Bent, Flat or Angled Sheet Metal Items *** together*** SEMI-Permanently and even Water-Proof the seams via the application of Sealant in between the Work Pieces and Hold them TIGHTLY Together... Whenever Screws, Nuts & Bolts OR WELDS are Impractical or IMPOSSIBLE to Use. :>)

SILVERADOGLOVEBOX.jpgGMTRIMRIVETS1.jpgPOPRIVETOOL1.jpgPOPRIVETOOL2.jpgPOPRIVETOOL3.jpgPOPRIVETOOL4.jpgPOPRIVETOOL5.jpgPOPRIVETOOL6.jpgPOPRIVETOOL7.jpgPOPRIVETOOL8.jpgPOPRIVETOOL9.jpgPOPRIVETOOL10.jpg
 
Last edited:
Forum Statistics

Threads
23,271
Posts
637,476
Members
18,472
Latest member
MissCrutcher

Members Online