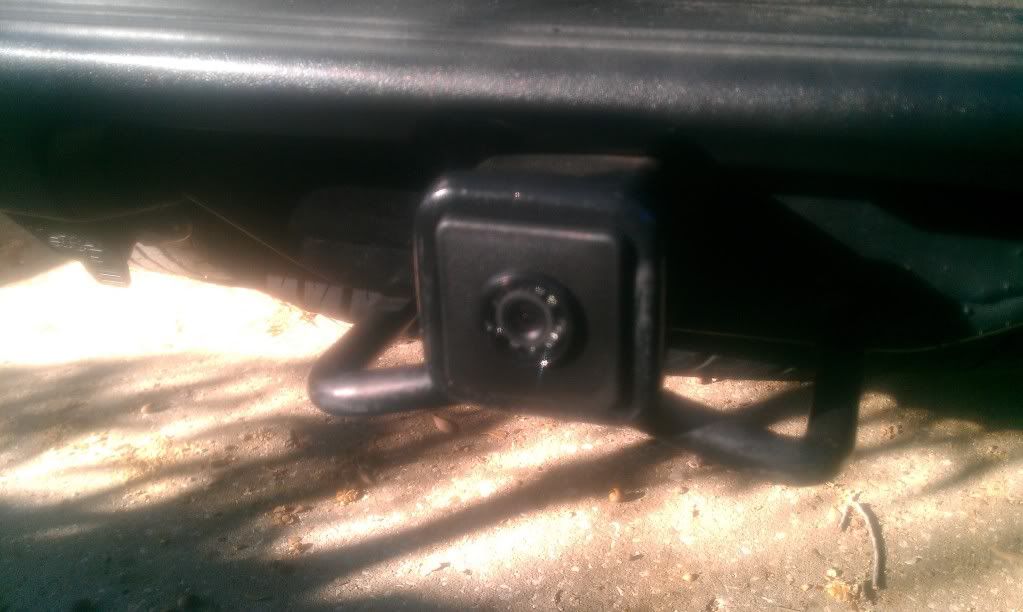
The install isn't rocket science, but I thought I would post with pics for anyone who is contemplating the install. I installed a camera that is very similar to the TaoTronics CC06, except this one has night vision and is both PAL and NTSC compatible. The camera was installed directly above the license plate and centered side-to-side since there was plenty of room.
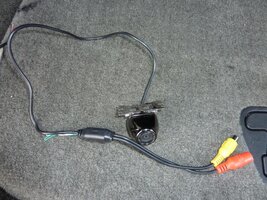
This is the camera.
View attachment 27251
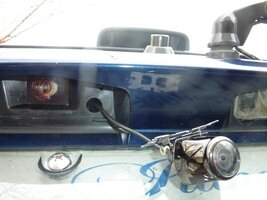
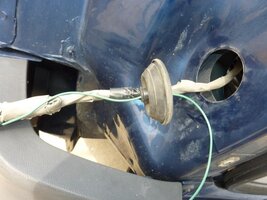
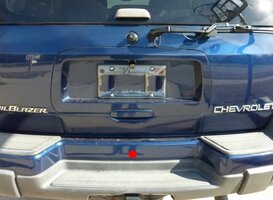
Due to the size of the connectors and ferrite housing, I had to drill a 1/2" hole next to the license plate socket to fit them into the tailgate.
View attachment 27252
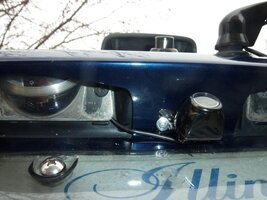
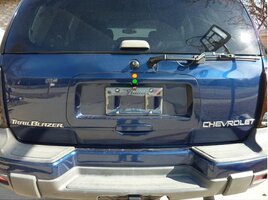
The camera mounted easily with the small self-tapping screws provided, although I did start with a tiny pilot hole to ensure their location. Below shows the camera mounted and license plate light cover back in position.
View attachment 27253
The next step is to route the wires for the camera through the tailgate and into the truck itself. I could not fit more wires through the grommet that connects the tailgate to the truck, so I ran wire wires outside of the grommet, but through the same access holes. I'll be honest, I need to go back and ensure I still get a good seal of the grommets to the truck.
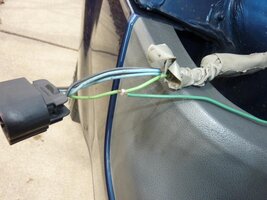
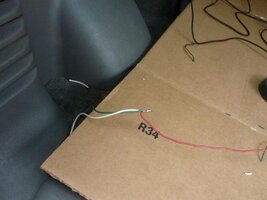
The next step is to find power for the camera, and to signal the Pioneer deck that the truck is in reverse. I tapped the drivers side reverse lamp (light green) off the harness, pulled it into the truck, and then connected 2 wires - one powering the camera, and one going to the receiver. You also have to ground the camera. I chose to ground it at the latch for the tailgate.
View attachment 27254
View attachment 27255
View attachment 27256
From here I simply ran the video and power signal wires around the floor of the truck, tucking them neatly under the sills, up under the drivers kick panel, and to the receiver. Connect the video / power wires to the receiver, configure the settings on the deck (use "Battery" polarity for camera), and re-install panels as needed.
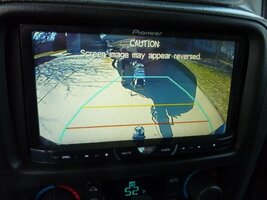
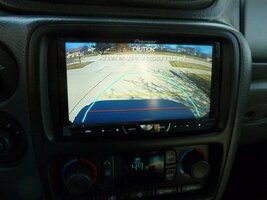
Here is the view (damn good for a $16 camera),
View attachment 27257
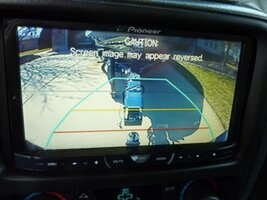
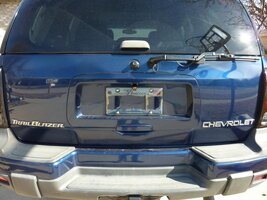
And here she is complete. What an awesome upgrade! I backed the truck up to my boat absolutely perfectly the first time. I mean perfectly.
View attachment 27258
This is the camera.
View attachment 27251
Due to the size of the connectors and ferrite housing, I had to drill a 1/2" hole next to the license plate socket to fit them into the tailgate.
View attachment 27252
The camera mounted easily with the small self-tapping screws provided, although I did start with a tiny pilot hole to ensure their location. Below shows the camera mounted and license plate light cover back in position.
View attachment 27253
The next step is to route the wires for the camera through the tailgate and into the truck itself. I could not fit more wires through the grommet that connects the tailgate to the truck, so I ran wire wires outside of the grommet, but through the same access holes. I'll be honest, I need to go back and ensure I still get a good seal of the grommets to the truck.
The next step is to find power for the camera, and to signal the Pioneer deck that the truck is in reverse. I tapped the drivers side reverse lamp (light green) off the harness, pulled it into the truck, and then connected 2 wires - one powering the camera, and one going to the receiver. You also have to ground the camera. I chose to ground it at the latch for the tailgate.
View attachment 27254
View attachment 27255
View attachment 27256
From here I simply ran the video and power signal wires around the floor of the truck, tucking them neatly under the sills, up under the drivers kick panel, and to the receiver. Connect the video / power wires to the receiver, configure the settings on the deck (use "Battery" polarity for camera), and re-install panels as needed.
Here is the view (damn good for a $16 camera),
View attachment 27257
And here she is complete. What an awesome upgrade! I backed the truck up to my boat absolutely perfectly the first time. I mean perfectly.
View attachment 27258


 Thanks for the reminder.

 I like the mounting point where it's out of the way.