Hi, Folks.
I've realized so much benefit from this forum (and its predecessor) over the years that I figured I would add my experience with removing and replacing my Kelsey Hayes 325 ABS module. If this information is already available, please feel free to ignore or delete.
The issue arose when my ABS pump continued to operate after the vehicle's engine was stopped. After briefly exploring a defective ignition (based upon the seemingly common history of ignition failures), I realized that a MOSFET in my ECBM had failed (with the same being used as a switch), and the result was a "run on" or "always on" ABS pump condition.
My first step (in order to "stop the bleeding") was to remove the 60A ABS fuse from the under-hood fuse box. I didn't take a photo of this step, but it should be easy to identify using the under-hood fuse schematic. It was yellow, and near the mega fuse. This obviously removed power from the ABS module, and prevented it from running.
It is probably a good idea to remove the negative battery terminal post - I did.
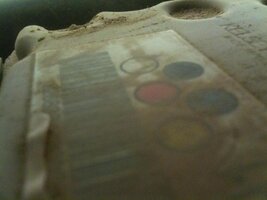
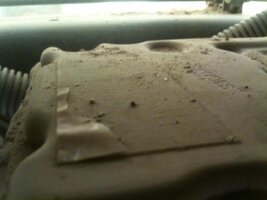
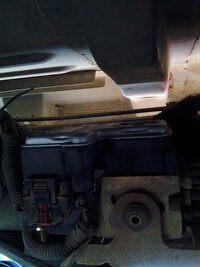
Next, I located the actual ABS module, which on my vehicle (2004 Buick Rainier) was located on the driver's side rail, approximately in the middle of the vehicle, on the inside of the rail. The module is quite easy to find - it is mounted adjacent to the fuel filter, and, if nothing else, you can follow brake lines to the pump. I live on a dirt road, and mine was quite dirty, as you will see from the picturesView attachment 21714
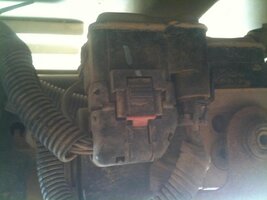
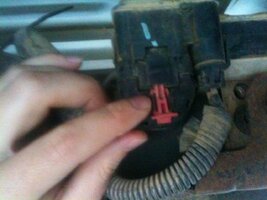
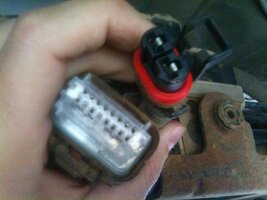
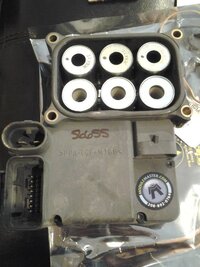
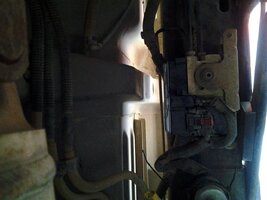
My particular module (it will vary depending upon your actual module model) is connected with three wire connections. The largest connection is secured using a red pull-tab type secure system. Pull the tab out, and press on the connector to remove it. View attachment 21717 It is a good idea to use a plastic baggie or something similar to protect these connections from dirt and debris. You may or may not have trouble with heat and plastic - I did not, but FYI.
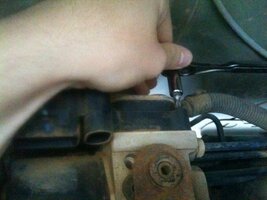
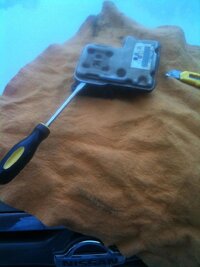
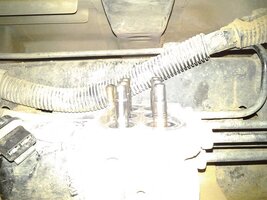
After the large electrical connector has been removed, you can use a Torx bit (I think it was a T-20) to remove the actual module. The module sits on top of the pump, and is fastened with four small bolts. Get ready for a fight, because it will not come out easily. The alloy used to make these bolts is either extremely soft from the factory, or it becomes soft over time . . . either way, it is extremely easy to strip the bolt heads. View attachment 21718 Use extreme care, go slowly, and allow the bolts to soak in penetrating oil prior to removal, if possible. If you do manage to strip a bolt head, there are no easy fixes - you don't want to move the pump much (or at all) because if you crimp one of the brake lines connected to it, things will get exponentially worse. For an absolutely immobile bolt on the far back end of the unit (that stripped for me), I used a hand held grinding bit to eat away at the bolt until I could get the module free. After that, the shaft of the bolt can be removed with pliers, because you have additional space. This is not a job to do with small children in ear's distance.
After removal, be sure to disconnect and protect the remaining wire connections. Or, do it before removal if you have super nimble fingers.
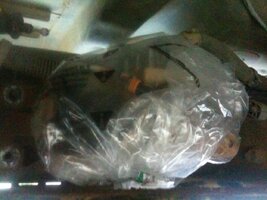
You will want to protect the (now exposed) top of the pump with somethingView attachment 21719.
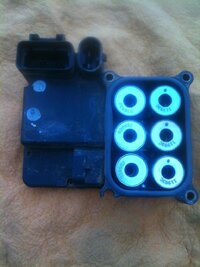
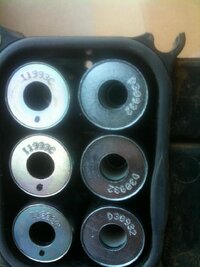
After the module is removed, you will have something that looks a bit like this, when looking at it from the solenoid / bottom view: View attachment 21720
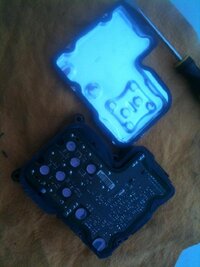
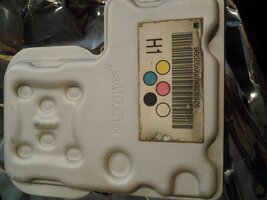
After looking at the Module Masters (they rebuild ABS modules) website, I originally believed that I had an "unrepairable" module, so I attempted to disassemble it and repair it myself. I used a razor blade to open the case: View attachment 21725.
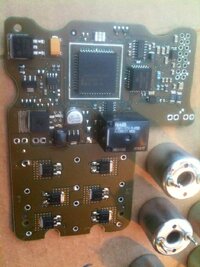
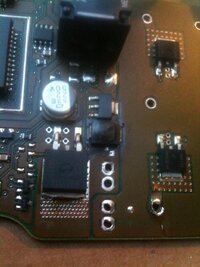
About the time that I had the thing apart, I got an email back from Module Masters (earlier, I sent them a picture of the device), and they advised me that the module was, in fact, a repairable model. After I saw the size of the solder points for the transistors on this thing, I decided that the best way to proceed was to mail it off . . . but, I had already taken it apart! I asked if I could still mail it in, and they said that they would look at it, fix it and it was the normal charge, no fix and it would only cost me shipping. So, I literally put the solenoids in one plastic bag, and the module in another, and mailed the thing off to Module Masters. A woman from the company called and said that they got it working, and they mailed it back. **I also asked them to include a replacement bolt set, which was about $5** It cost me around $140, and the part from the dealer was $450+.
About a week or so later (yesterday), I got the unit back. The invoice mentioned that they upgraded certain parts to be more robust / reliable. I'm not enough of an EE to know the veracity of that, but I don't have any reason to doubt it, either. Anyway, they cleaned it quite nicely for me: View attachment 21726. Still, I was uneasy at work that entire day, wondering if the thing was actually going to work, and if the wretched ABS light on my cluster was going to actually go away.
The re install was quite easier than the removal, not surprisingly. I used thread compound on the new bolts to prevent them from seizing (God forbid if I have to take the thing back out in the future). The new bolts are (or at least look like) stainless, and they have an allen head, so they should, hopefully, be more resistant to corrosion and disfigurement. The bottom of the returned module looked like: View attachment 21728
I used compressed air to clean the top of the pump (poor picture, but here it is): View attachment 21731
I reconnected the battery, re installed the 60 amp ABS fuse, and . . . no buzzing! I started the car, and the ever present ABS / Brake lights went out immediately. So, the problem appears to be resolved.
If you have access to high quality solder equipment, you can probably do the electrical work here yourself. Conceptually, it doesn't look all that difficult. My solder tips are too big (and, lets be honest - my hands are not steady enough) to work on leads that are as small as the transistor uses. But, for a total of around $150 bucks, including shipping, I felt like the rebuild place was money well spent. It will probably change the calculus somewhat if you are in a state that doesn't require annual auto inspection (like me).
I've realized so much benefit from this forum (and its predecessor) over the years that I figured I would add my experience with removing and replacing my Kelsey Hayes 325 ABS module. If this information is already available, please feel free to ignore or delete.
The issue arose when my ABS pump continued to operate after the vehicle's engine was stopped. After briefly exploring a defective ignition (based upon the seemingly common history of ignition failures), I realized that a MOSFET in my ECBM had failed (with the same being used as a switch), and the result was a "run on" or "always on" ABS pump condition.
My first step (in order to "stop the bleeding") was to remove the 60A ABS fuse from the under-hood fuse box. I didn't take a photo of this step, but it should be easy to identify using the under-hood fuse schematic. It was yellow, and near the mega fuse. This obviously removed power from the ABS module, and prevented it from running.
It is probably a good idea to remove the negative battery terminal post - I did.
Next, I located the actual ABS module, which on my vehicle (2004 Buick Rainier) was located on the driver's side rail, approximately in the middle of the vehicle, on the inside of the rail. The module is quite easy to find - it is mounted adjacent to the fuel filter, and, if nothing else, you can follow brake lines to the pump. I live on a dirt road, and mine was quite dirty, as you will see from the picturesView attachment 21714
My particular module (it will vary depending upon your actual module model) is connected with three wire connections. The largest connection is secured using a red pull-tab type secure system. Pull the tab out, and press on the connector to remove it. View attachment 21717 It is a good idea to use a plastic baggie or something similar to protect these connections from dirt and debris. You may or may not have trouble with heat and plastic - I did not, but FYI.
After the large electrical connector has been removed, you can use a Torx bit (I think it was a T-20) to remove the actual module. The module sits on top of the pump, and is fastened with four small bolts. Get ready for a fight, because it will not come out easily. The alloy used to make these bolts is either extremely soft from the factory, or it becomes soft over time . . . either way, it is extremely easy to strip the bolt heads. View attachment 21718 Use extreme care, go slowly, and allow the bolts to soak in penetrating oil prior to removal, if possible. If you do manage to strip a bolt head, there are no easy fixes - you don't want to move the pump much (or at all) because if you crimp one of the brake lines connected to it, things will get exponentially worse. For an absolutely immobile bolt on the far back end of the unit (that stripped for me), I used a hand held grinding bit to eat away at the bolt until I could get the module free. After that, the shaft of the bolt can be removed with pliers, because you have additional space. This is not a job to do with small children in ear's distance.
After removal, be sure to disconnect and protect the remaining wire connections. Or, do it before removal if you have super nimble fingers.
You will want to protect the (now exposed) top of the pump with somethingView attachment 21719.
After the module is removed, you will have something that looks a bit like this, when looking at it from the solenoid / bottom view: View attachment 21720
After looking at the Module Masters (they rebuild ABS modules) website, I originally believed that I had an "unrepairable" module, so I attempted to disassemble it and repair it myself. I used a razor blade to open the case: View attachment 21725.
About the time that I had the thing apart, I got an email back from Module Masters (earlier, I sent them a picture of the device), and they advised me that the module was, in fact, a repairable model. After I saw the size of the solder points for the transistors on this thing, I decided that the best way to proceed was to mail it off . . . but, I had already taken it apart! I asked if I could still mail it in, and they said that they would look at it, fix it and it was the normal charge, no fix and it would only cost me shipping. So, I literally put the solenoids in one plastic bag, and the module in another, and mailed the thing off to Module Masters. A woman from the company called and said that they got it working, and they mailed it back. **I also asked them to include a replacement bolt set, which was about $5** It cost me around $140, and the part from the dealer was $450+.
About a week or so later (yesterday), I got the unit back. The invoice mentioned that they upgraded certain parts to be more robust / reliable. I'm not enough of an EE to know the veracity of that, but I don't have any reason to doubt it, either. Anyway, they cleaned it quite nicely for me: View attachment 21726. Still, I was uneasy at work that entire day, wondering if the thing was actually going to work, and if the wretched ABS light on my cluster was going to actually go away.
The re install was quite easier than the removal, not surprisingly. I used thread compound on the new bolts to prevent them from seizing (God forbid if I have to take the thing back out in the future). The new bolts are (or at least look like) stainless, and they have an allen head, so they should, hopefully, be more resistant to corrosion and disfigurement. The bottom of the returned module looked like: View attachment 21728
I used compressed air to clean the top of the pump (poor picture, but here it is): View attachment 21731
I reconnected the battery, re installed the 60 amp ABS fuse, and . . . no buzzing! I started the car, and the ever present ABS / Brake lights went out immediately. So, the problem appears to be resolved.
If you have access to high quality solder equipment, you can probably do the electrical work here yourself. Conceptually, it doesn't look all that difficult. My solder tips are too big (and, lets be honest - my hands are not steady enough) to work on leads that are as small as the transistor uses. But, for a total of around $150 bucks, including shipping, I felt like the rebuild place was money well spent. It will probably change the calculus somewhat if you are in a state that doesn't require annual auto inspection (like me).
Attachments
-
 IMG_2017.jpg60 KB · Views: 19
 -
 IMG_2015.jpg63.5 KB · Views: 18
 -
 IMG_2016.jpg55.4 KB · Views: 19
 -
 IMG_2021.jpg97.4 KB · Views: 17
 -
 IMG_2022.jpg84.3 KB · Views: 17
 -
 IMG_2024.jpg89.3 KB · Views: 18
 -
 IMG_2027.jpg96.4 KB · Views: 19
 -
 IMG_2028.jpg75.9 KB · Views: 18
 -
 IMG_2029.jpg68.8 KB · Views: 18
 -
 IMG_2030.jpg71.1 KB · Views: 17
 -
 IMG_2032.jpg73.9 KB · Views: 20
 -
 IMG_2035.jpg92.6 KB · Views: 24
 -
 IMG_2034.jpg84.2 KB · Views: 25
 -
 module top clean.jpg43.4 KB · Views: 19
 -
 Bottom.jpg54.5 KB · Views: 18
 -
 IMG_2033.jpg73 KB · Views: 19
 -
 Pump top.jpg70.5 KB · Views: 18
 -
 Module Installed.jpg45.5 KB · Views: 18
 -
 installed - wide view.jpg80.7 KB · Views: 18