2000-2002 Silverado Rear Diff Partial Rebuild

mrrsm

Original poster
Lifetime VIP Donor
Supporting Donor
Member
Oct 22, 2015
8,272
Tampa Bay Area
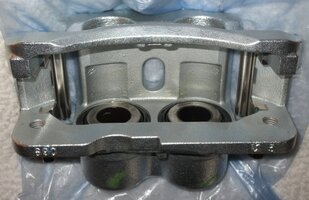
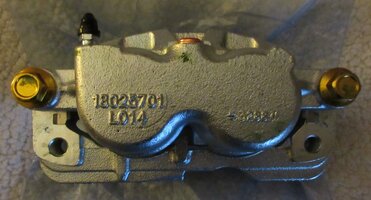
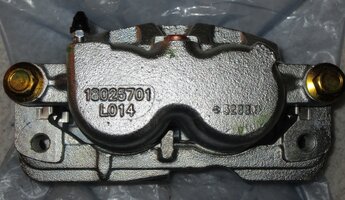
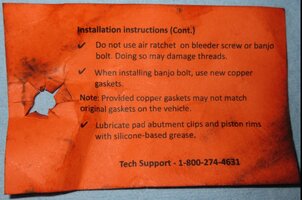
Concerning the arrival of one of the ACDelco 'Re-Manufactured for GM' Front Brake Calipers just this evening... while these images WILL have a separate Album on my "Flickr-Bucket"... I think it is very important to stress the reasons for my exclusive purchases of ACDelco OEM Equipment:

Why THIS Equipment instead of Using 'Generic Re-Mans' for the Front Brake Calipers?

(1) If you live in anywhere in the Rust Belt or in areas where Road Salt and Sand are lavished on your Driving Surfaces... having these Heavily Zinc Plated Cast Iron Front Calipers instantly eliminates the problem of developing "Rust Swollen Caliper-Body Brake Pad Glide Points" that will allow your Brake Pads the Freedom of Movement they deserve for their entire performance lives. Regular Cast Iron make the S/S Brackets swell INWARDS ... putting the SQUEEZE on the Brake Pad causing them to seize up or get stuck in direct contact with the Ordinary Cast Iron Brake Caliper Housings. For the additional cost of only $30.00... this seems to me to be a very worthwhile extra step to take when Re-Building the Front Brakes on ANY Full Size Truck:
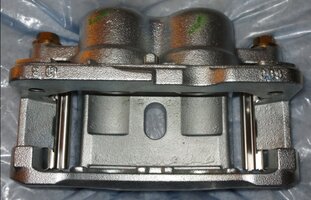
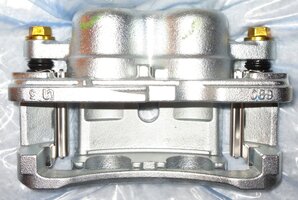
BRAKEJOBFRONTINSTALL6.jpgBRAKEJOBFRONTINSTALL7.jpgBRAKEJOBFRONTINSTALL8.jpgBRAKEJOBFRONTINSTALL9.jpgBRAKEJOBFRONTINSTALL10.jpgBRAKEJOBFRONTINSTALL12.jpg

(2) With the absence of the Rust Build Up.. these Brake Caliper Housing can be cleaned "Slick as a Whistle" right down to Bright Metal with common Brake Kleen Spray Solvent or even Soap and Water and a Hosing down with Fresh water afterwards. Ever notice how those Steel or Zinc-Plated Cast Iron Parking Brake Mounting Brackets that the Caliper Assemblies Fasten on with (2) 18mm Bolts...NEVER RUST...BUT... Everything esle around them DOES...? Yeah... THESE Zinc-Plated ACDelco OEM GM Brake Calipers ...are Like THAT. :>)

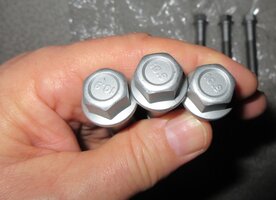
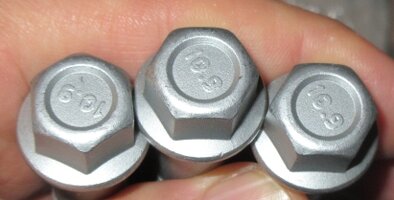
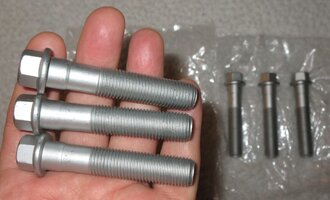
(3) If your GM OEM 10-9 Hard Fasteners used to secure the Front Wheel Bearing Hubs feel loose or look even slightly Sketchy during Hub Installation... the 10.9 Triple Bolt Sets offered by Dorman allows you to have Brand New Bolts of Astonishing Strength and that LACK ANY AMOUNT OF DAMAGE RUST OR CORROSION... for Under $14.00. Again... THIS is Money Well Spent:
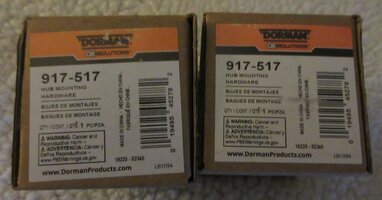
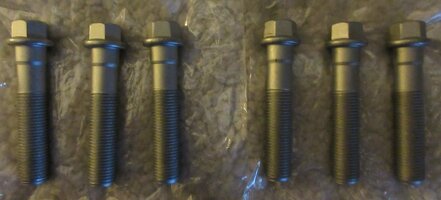
BRAKEJOBFRONTINSTALL1.jpgBRAKEJOBFRONTINSTALL2.jpgBRAKEJOBFRONTINSTALL3.jpgBRAKEJOBFRONTINSTALL4.jpgBRAKEJOBFRONTINSTALL5.jpg

The Last Caliper is due to arrive tomorrow and I'll "Turn To" on this work ASAP to move this Project to a decent closure.
 

mrrsm

Original poster
Lifetime VIP Donor
Supporting Donor
Member
Oct 22, 2015
8,272
Tampa Bay Area
The REAL value in going back over ALL of the images you've taken in the course of any Automotive Repairs is that invariably... SOMETHING that you overlooked ...will LEAP Right Out at You from the Computer Screen!

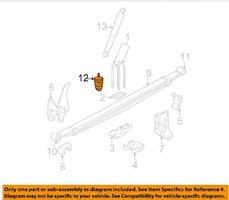
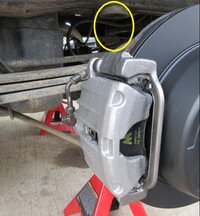
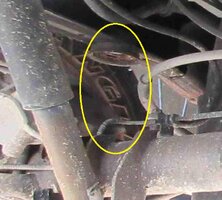
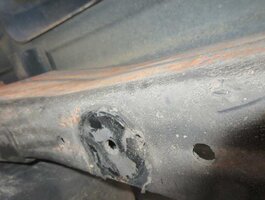
Such is the case with the "Lost Rear Axle Bumpers" from my Y2K Truck that now seems so very obvious in the two attached Images High-Lighted with Yellow Circles around the 'vacancies' of the Bumper Steel Pad Attachments.

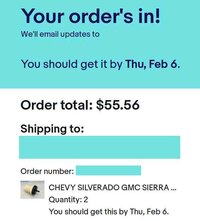
This problem is very common to MOST Older GM Vehicles and my oversight has since been corrected after ordering a Pair of GM OEM Rear Axle Bumper Replacements that I'll install by and by over the next week or so:

GMOEMREARAXLEBUMPERS1.jpgGMOEMREARAXLEBUMPERS2.jpgGMOEMREARAXLEBUMPERS3.jpgGMOEMREARAXLEBUMPERS5.jpgGMOEMREARAXLEBUMPERS4.jpg
 

mrrsm

Original poster
Lifetime VIP Donor
Supporting Donor
Member
Oct 22, 2015
8,272
Tampa Bay Area
Since I’m getting pretty close to the End of this Project… I just wanted to mention a few more idiosyncrasies regarding the Eaton MLocker Locking Rear Differential and make some clarifications about its capabilities AND a ‘potential weakness’ that can occur under certain driving conditions:

(1) The Eaton MLocker Locking Rear Differential WILL work equally well in providing BOTH Wheels with Traction in BOTH the Forward and Reverse Directions. Please pay particular attention to the Description of HOW the Cammed Locking Plate functions axially to understand HOW the Eaton MLocker is able to perform this Pretty Neat Trick:


(2) The potential “Weakness” I alluded to regarding possible causes for Failure in this “Governed” Centrifugal Force Induced Functionality has perhaps more to do with “Weakness” happening In Between The Ears of the Jackass shown in this Video becoming a “Self-Fulfilling Prophesy of Stupidity” while trying mightily to Destroy his Differential through Very Foolish Actions from behind the Steering Wheel.

Indeed, the Driver DOES manage to turn the GM Eaton MLocker underneath his Vehicle into a “GOV-BOMB” by using his Truck in a manner NOT intended for a Daily Driver. Abusing any Mechanical Mechanism to the Point of Self-Destruction ...and then getting MAD about the outcome lends much to the absurdity shown below:

Never Underestimate “The Power of the Stupid” in overcoming the Natural Limitations of otherwise Well-Designed Motor Vehicle Components...


Local Weather Conditions (and waiting for some Stuff to arrive) are keeping me away from the remaining repair work. I’ll try it on again tomorrow... Sunday, 01/21/2020.
 

mrrsm

Original poster
Lifetime VIP Donor
Supporting Donor
Member
Oct 22, 2015
8,272
Tampa Bay Area
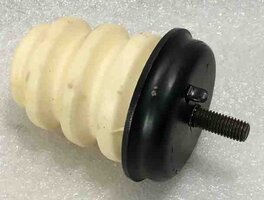
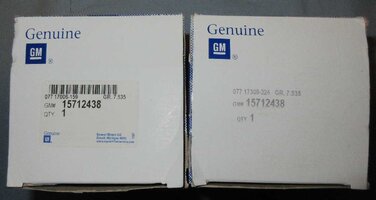
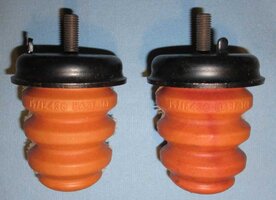
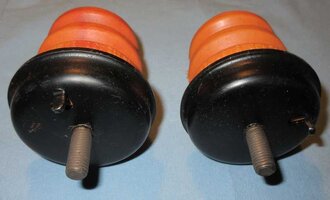
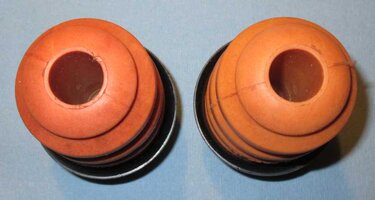
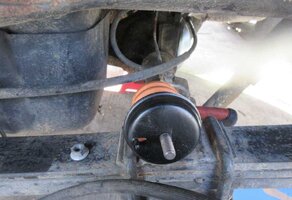
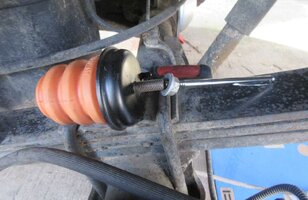
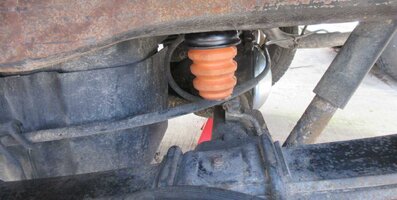
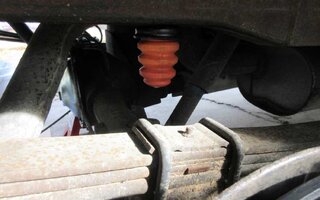
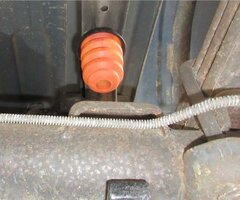
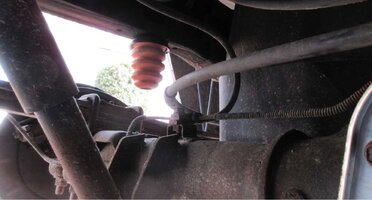
The Genuine ACDelco Rear Axle Bumpers came in this morning and appear to be a substantial Upgrade to the earlier versions made of Hardened White Plastic Foam. These two Orange "Snow Cone" Bumpers are now made of a Bouncy and Resilient "Gummy Bear" like Molded Gum Rubber. (Note that the GM Part# is made into the Mold that this stuff got poured inside of...)

These New ones look and feel much sturdier than the earlier Foam design that easily snapped off of their perches under the Mild Steel Pads once bolted to the underside of the aft frame rails. With the Truck still raised up on Jack Stands... Installation of them should be fairly EZ:


ACDELCOTRUCKBUMPERS1.jpgACDELCOTRUCKBUMPERS2.jpgACDELCOTRUCKBUMPERS3.jpgACDELCOTRUCKBUMPERS4.jpg

Try saying "Rubber Baby Buggy Bumpers..." 5 Xs in a Row... :>)
 

mrrsm

Original poster
Lifetime VIP Donor
Supporting Donor
Member
Oct 22, 2015
8,272
Tampa Bay Area
Just a Brief “How To...” about Installing Full Size Truck Rear Axle Rubber Bumpers as completed on 02-11-2020:

(1) Tools and Parts:

(a) 15mm 3/8” Drive Deep Socket
(b) 3/8” Drive Short-Handle Ratchet
(c) Pencil Magnet
(d) Small Stalk Mirror
(e) Shop Towels
(f) Canned Air
(g) See Post #45 for ACDelco Parts and GM Data

(2) The Old Gel Rubber Mounting Flange Bolts are fitted inside of “Rubic’s Cube” sized Welded Steel Frame sections that are difficult to access… even with your hands and fingers right over the top section of them, under the Frame Rails of the Rear Truck Bed.
(3) Feed the 15mm Deep Socket over the top of the Body Rail and push it down over the Bolt Shank.
(4) Slip the Fuel Tank Vent Tube & Electrical Harness loose from the Bracket to move them aside for more room to work.
(5) Attach the 3/8” Drive Ratchet and give it a good yank as it will have about 30 Ft Lbs of Resistance.
(6) Allow the 15mm Zinc Plated Flange Fastener to just drop down inside the bottom of the Cubby.
(7) Use the Pencil Magnet to Fish the Flange Fastener out of the bottom of the Frame Cubby.
(8) Remove the Old Flange plate...BUT LEAVE THE THICK UNDERCOATING ON THE FRAME.
(9) Put on Eye Protection and then use the Canned Air to Blow out all the accumulated Sand & Dirt.
(10) Use a Small Piece of Blue Shop towel tucked inside of the 15 Deep Socket to HOLD THE NUT.
(11) Use the Stalk Mirror to site the Two Mount Holes in the Under Frame. AVOID USING OTHERS!
(12) Fit the New Gel Rubber Bumper Mounting Plate Bolt & Alignment Peg into their positions.
(14) Feed the 15mm Socket over the Top of the Frame Rail and spin down the Fastener Hand Tight.
(15) Use the Ratchet to Apply 20 Ft Lbs of Torque on the Flange Fastener & secure the Mount Plate.
(16) Re-Insert the Fuel Tank Vent Hose & Electrical Harness back into their Support Brackets.
(17) Repeat these Steps...Less (3) and (16) ...on the Passenger Side Axle Bumper R&R.

Y2KSILVERADOAXLEBUMPERS1.jpgY2KSILVERADOAXLEBUMPERS2.jpgY2KSILVERADOAXLEBUMPERS3.jpgY2KSILVERADOAXLEBUMPERS4.jpgY2KSILVERADOAXLEBUMPERS5.jpgY2KSILVERADOAXLEBUMPERS6.jpgY2KSILVERADOAXLEBUMPERS7.jpg

Other Tasks Completed:

(A) I had to R&R the Left Rear Disk Brake and Caliper Assembly to make a Final Adjustment of the Parking Brake Shoes-to-Inner Drum Fitment to match that of the Passenger Side Rear Wheel Parking Brake Fitment.

(B) I R&Rd the Rear Differential Cover Plate External H-8 Filler Plug and finally Topped Off the Fluid Level with another Quart of Amsoil Severe Gear 75W-90 Full Synthetic Gear Oil.

All that remains now is to complete the Emergency Park Cables and Foot Pedal Hardware Installation ...to be covered in a Different Thread.
 
Last edited:

Zap.143

Member
Jul 8, 2020
3
New York
I’m looking to replace my chipped spider gears in my 06 Silverado with the gov lock. Did you have any issues using those Yukon gears? The description says for open diffs only? I only need the top and bottom the sides are ok. The only alternative is a used unit or 350$ gm spider gears. Thanks!
 

mrrsm

Original poster
Lifetime VIP Donor
Supporting Donor
Member
Oct 22, 2015
8,272
Tampa Bay Area
Welcome to GMT Nation...

Unfortunately... Without completely removing the Gear Cluster and inner M-Locker hardware as a Single Unit... the R&R of those Spider Gears will be impossible to do on the vehicle because it becomes necessary to remove the Gov-Locker Mechanism FIRST, piece by piece... and THAT requires performing this Re-Build ON THE BENCH.

If you decide to perform this repair... make Damned Sure that you associate any Washer-Spacers to their present positions and if they happen to emerge from inside of "The Pumpkin" as a series of multiples... Do NOT change their particular order after their removal and prep cleaning and lubing just before getting re-installed during Final Re-Insertion of the Re-Assembly.

The ONLY portions of that Yukon Kit I wound using were the Solid Center Pin and the Locking Grade 8 Fastener (and the Brand New Yukon "C" Clips) as those were the ONLY components that demanded replacement due to obvious damage.

Had the Spider Gear Sets not been so difficult to replace... I would have installed every piece of the Yukon Kit. The Gears in my Differential were in Good Shape as my 20 Year Old Truck only has around 72,500 Miles on the Odometer.

MAKE CERTAIN TO RESEARCH YOU OWN APPLICATION VERY CAREFULLY...as this particular Yukon Kit may NOT work on your 2006 Silverado.

Spend some time Browsing the Eaton M-Locker Repair Videos available on line, as there are some very good ones that will clue you in on many of the difficulties that must be overcome; both during the Removal Phase ...and during the On The Bench work.

If you are having to replace the gearing due to "Chipped Teeth" and this was the result of any attempts to Drag Race your Truck... consider switching to a more robustly built After-Market Differential set up, as this Non-Limited Slip, Centrifugal M-Locker Mechanism may be GREAT for ordinary use in gaining traction to both rear wheels... but as you can see in the last Video... it will BREAK from unnecessarily harsh treatment that it is NOT designed to endure.
 

Zap.143

Member
Jul 8, 2020
3
New York
Thanks for the reply and the advice. I may just go with a used/rebuilt carrier then. I will probably have to set backlash backlash again even though I’m using factory parts with my original gears? So I’ll have to buy a shim kit.
 

mrrsm

Original poster
Lifetime VIP Donor
Supporting Donor
Member
Oct 22, 2015
8,272
Tampa Bay Area
Yes. This is a VERY Heavy Handed Repair. And yet, it still requires a decent set of Delicate Mechanical Skills to achieve a satisfactory outcome. These Videos can give you a Bird’s Eye View and help you to bone up on what this task REALLY involves. ALL Rear Differentials are 'Intolerant ...of Poor Tolerance'.

Here are the Brutal Removal Procedures for a 'Grenaded' Eaton M-Locker G80 Differential:


Here are the Rebuilding and Set Up Procedures for a Ring and Pinion Gear Set in a GM 10 Bolt 8.6" 'Pumpkin':


While the VOP (Video Original Poster) is NOT working on an Eaton M-Locker set up, he does a VERY Good Job of explaining ALL of the necessary Rebuild Steps and How to achieve all of the proper Ring & Pinion Lash relationships required for ALL Silverado Differentials.

IIANM… @Mounce has some experience with this R&R. Hopefully, he can chime in with more ideas and advice, as he owns a 2003 Silverado and may have done this work as well.
 
Last edited:

Mounce

Member
Mar 29, 2014
13,667
Tuscaloosa, AL
IIANM… @Mounce has some experience with this R&R. Hopefully, he can chime in with more ideas and advice, as he owns a 2003 Silverado and may have done this work as well.
Negative sir :tiphat: Most I've done is fluid changes and pulled axles on one for a coworker one time. Luckily I haven't had to get intimate with mine yet. I'd probably prefer swapping the whole rear-end.
 
  • Like
Reactions: mrrsm

mrrsm

Original poster
Lifetime VIP Donor
Supporting Donor
Member
Oct 22, 2015
8,272
Tampa Bay Area
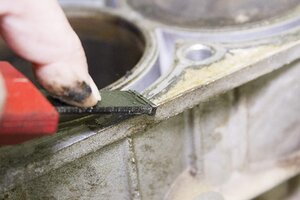
Here is a great compliment to Post #s 11-15 involving The "Pumpkin" Flange Prep and the Installation of the Dorman Chrome - Plated Differential Cover as per Eric "O" from his South Main Auto Youtube Channel. Catch this particular segment from his Full Size Truck and Van Rear Brakes R&R Video from around 12:45 onward.


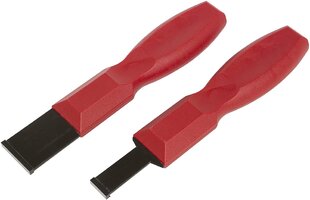
An Honorable Mention is in order back to @Mounce for introducing us a while ago to the Lisle Carbide Scraper Tool Set essential for this kind of Work:


Attachments

  • LISLECARBIDESCRAPERSET1.jpg
    LISLECARBIDESCRAPERSET1.jpg
    81.9 KB · Views: 0
  • LISLECARBIDESCRAPERSET2.jpg
    LISLECARBIDESCRAPERSET2.jpg
    171.6 KB · Views: 0
  • LISLECARBIDESCRAPERSET3.jpg
    LISLECARBIDESCRAPERSET3.jpg
    188.6 KB · Views: 0
  • Like
Reactions: TJBaker57

mrrsm

Original poster
Lifetime VIP Donor
Supporting Donor
Member
Oct 22, 2015
8,272
Tampa Bay Area
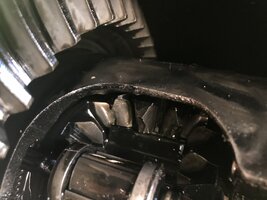
In keeping with the October "Halloween" Season ... Here is a 2001 Chevrolet Suburban sporting, "A Pumpkin... With Spiders that Goes 'BUMP' in The Night" (NON-Eaton NON-M-Locker Design):


Forum Statistics

Threads
23,726
Posts
642,687
Members
19,261
Latest member
Spanky73

Members Online