Quad Bi-xenon retrofit? woot woot!!!

Blckshdw

Moderator
Nov 20, 2011
10,691
Tampa Bay Area, FL
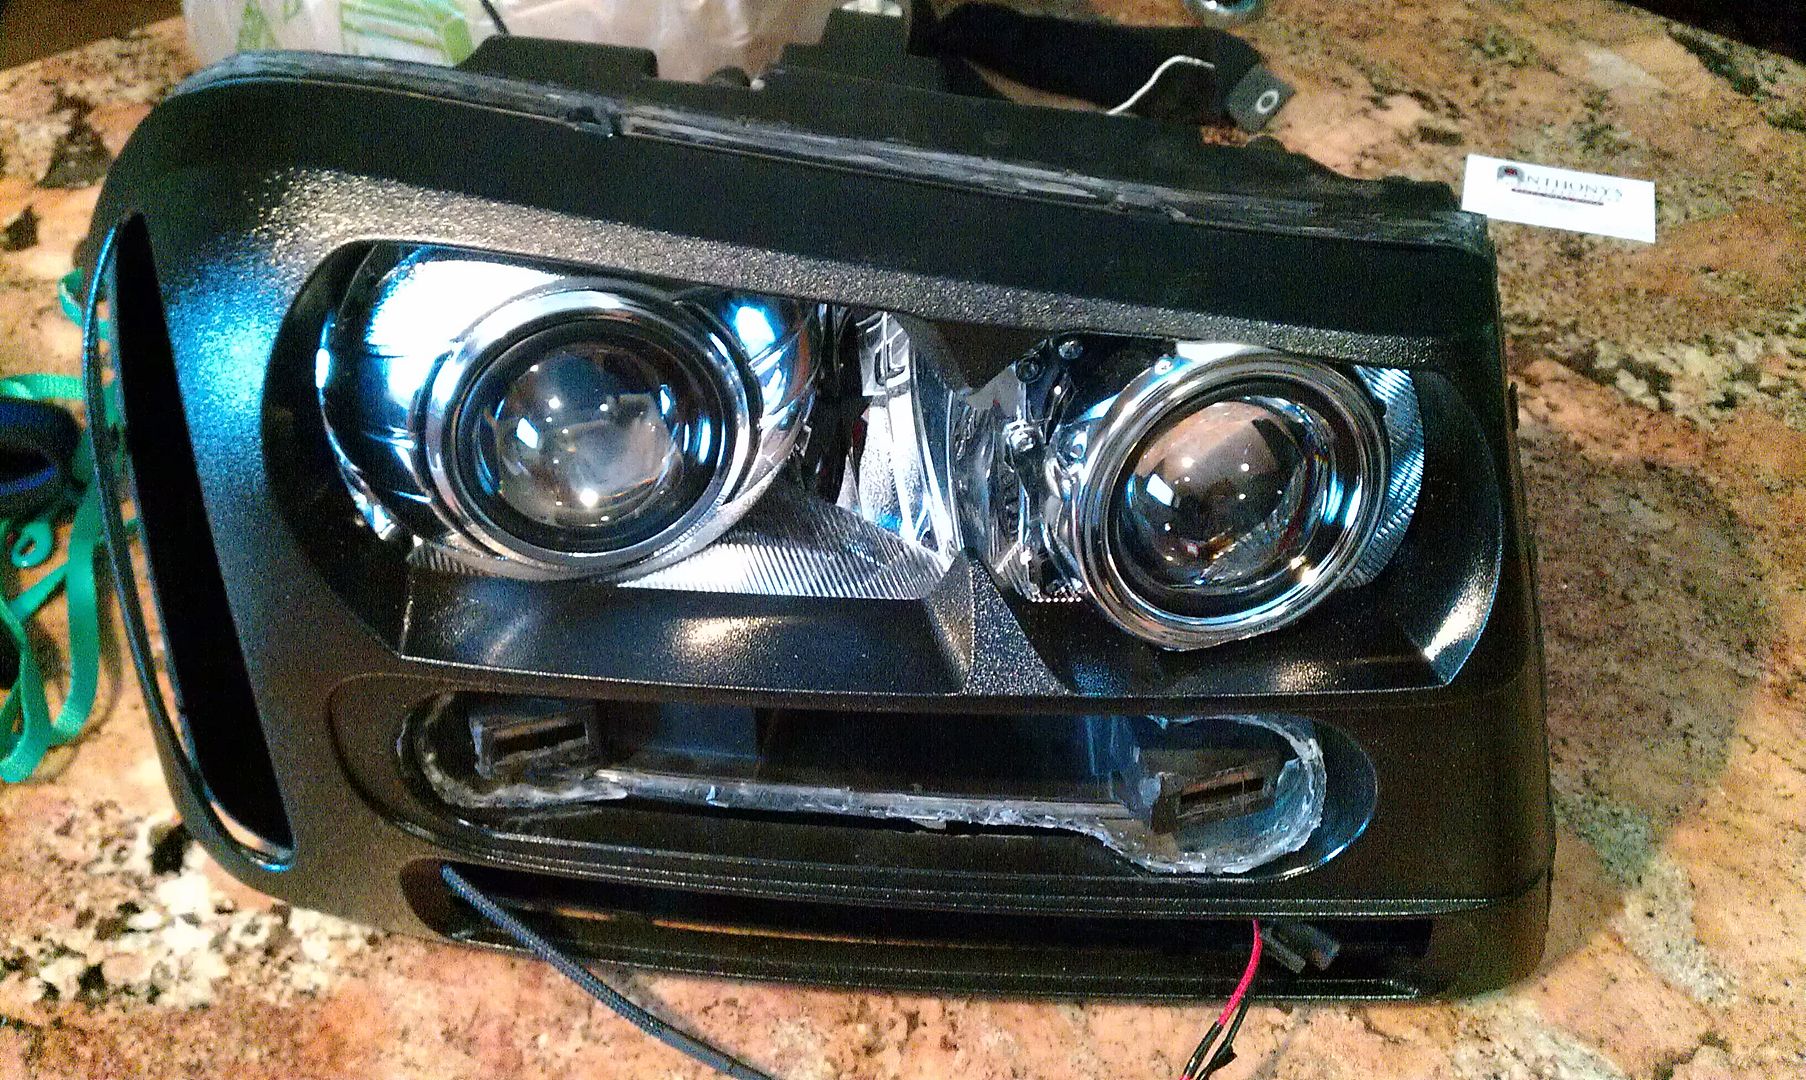
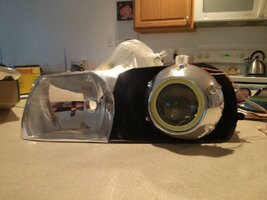
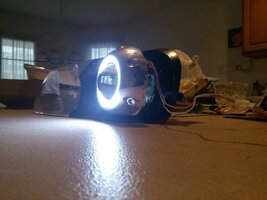
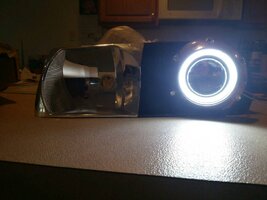
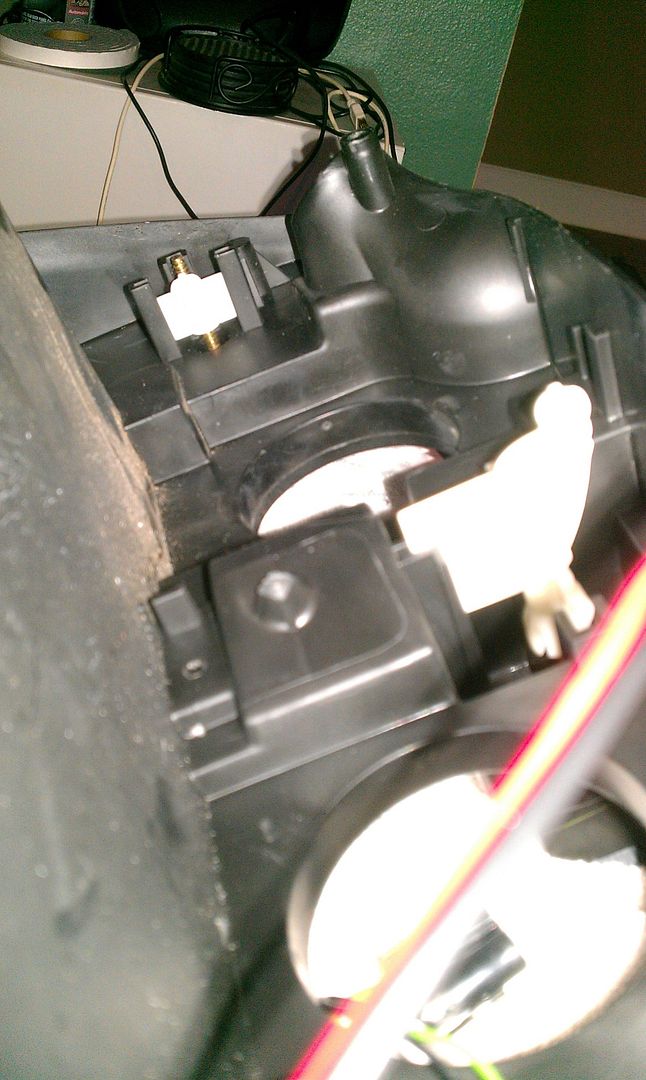
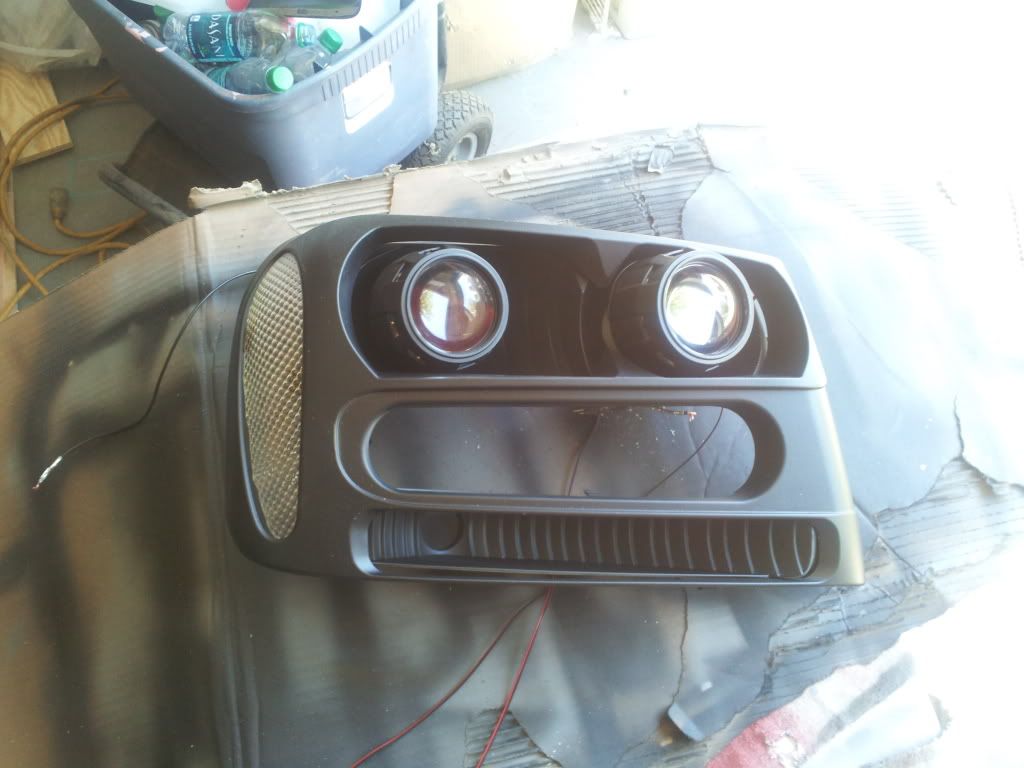
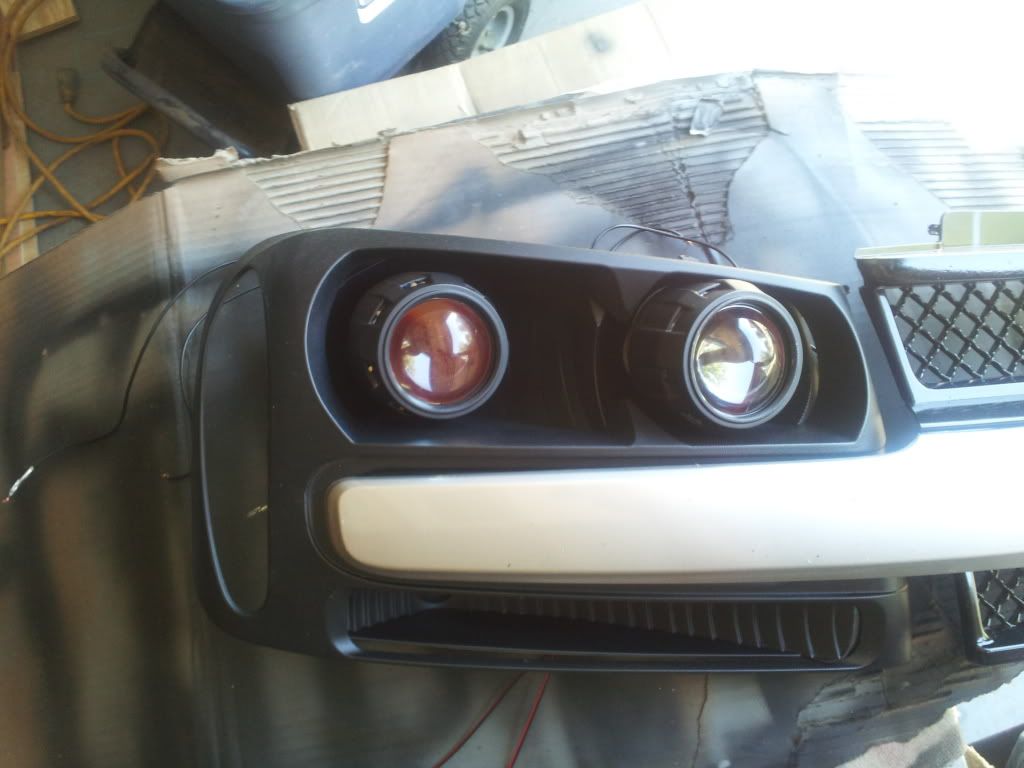
Well, I got things trimmed up so they fit and I can fit the bezels on, so that's done. Good thing I wasn't planning on just using these shrouds, you can see all behind the high beam ones from the sides :no:

IMAG0628_zps255f2ebe.jpg


IMAG0629_zpsde287e55.jpg


IMAG0627_zpsa83e810d.jpg


IMAG0626_zpsd6c45e4e.jpg


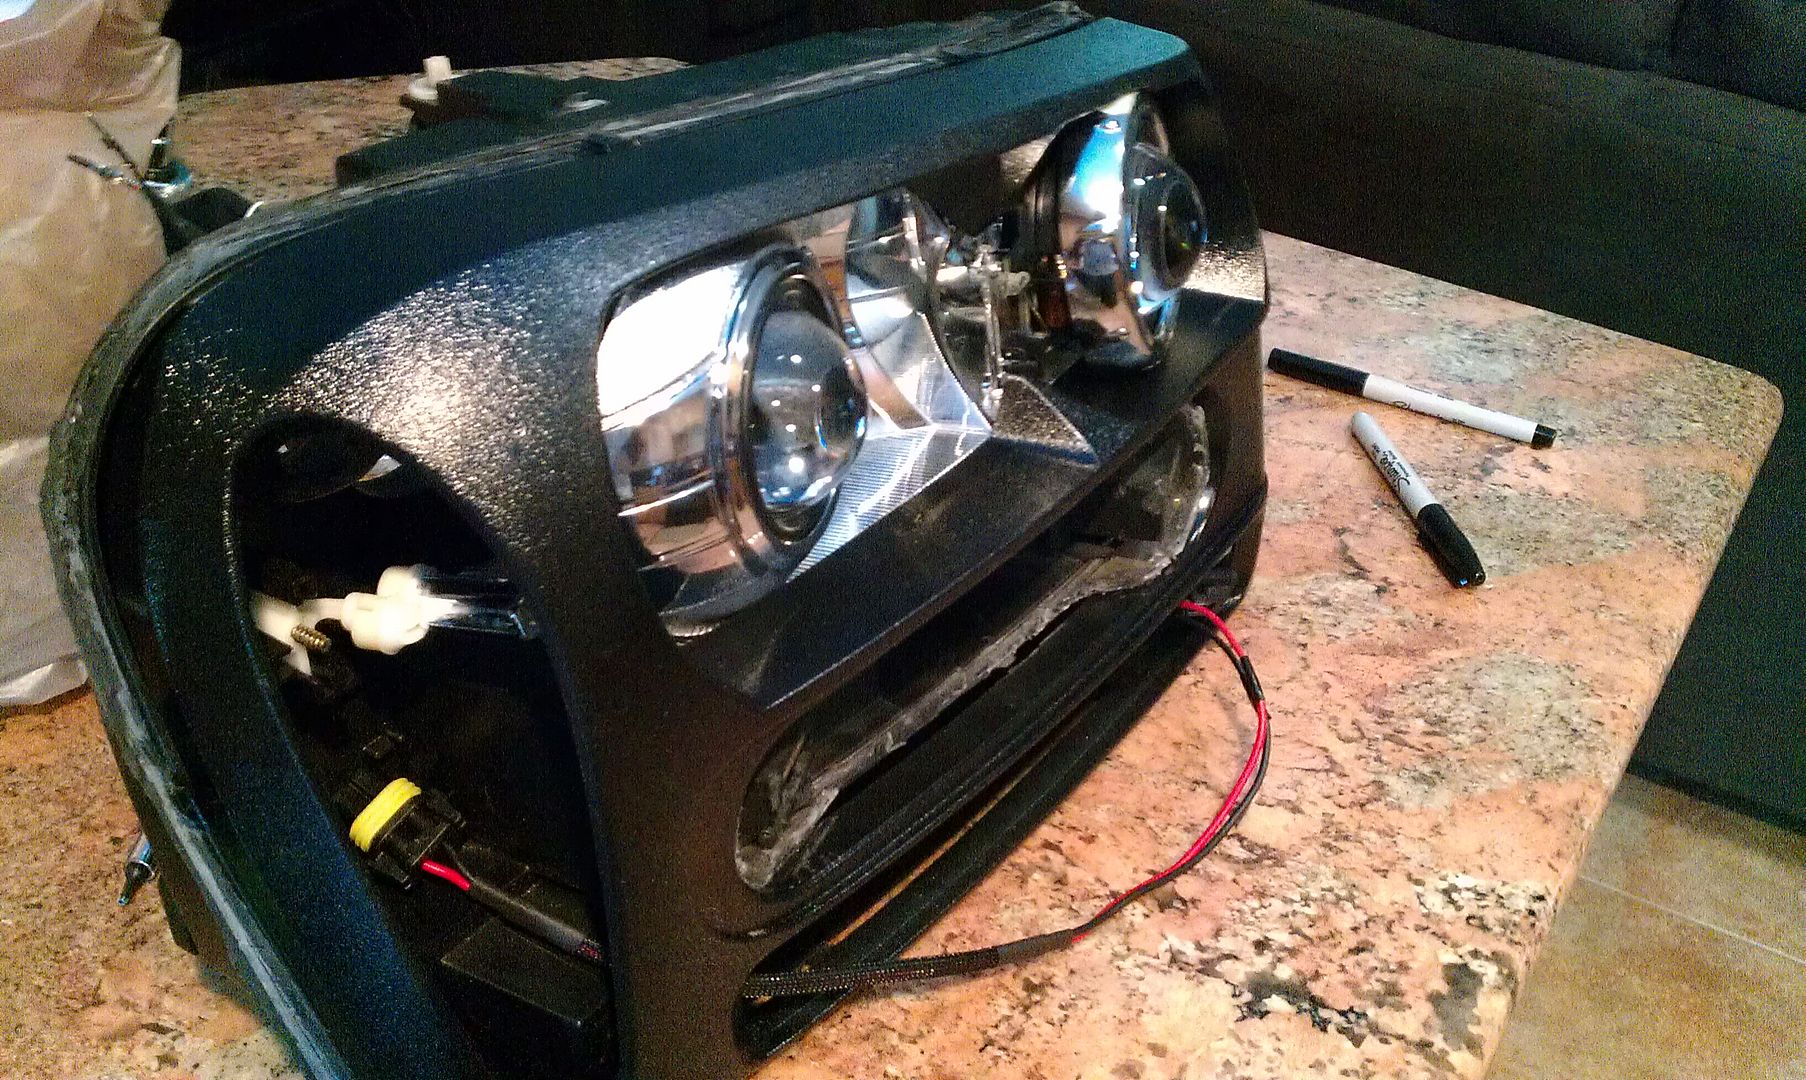
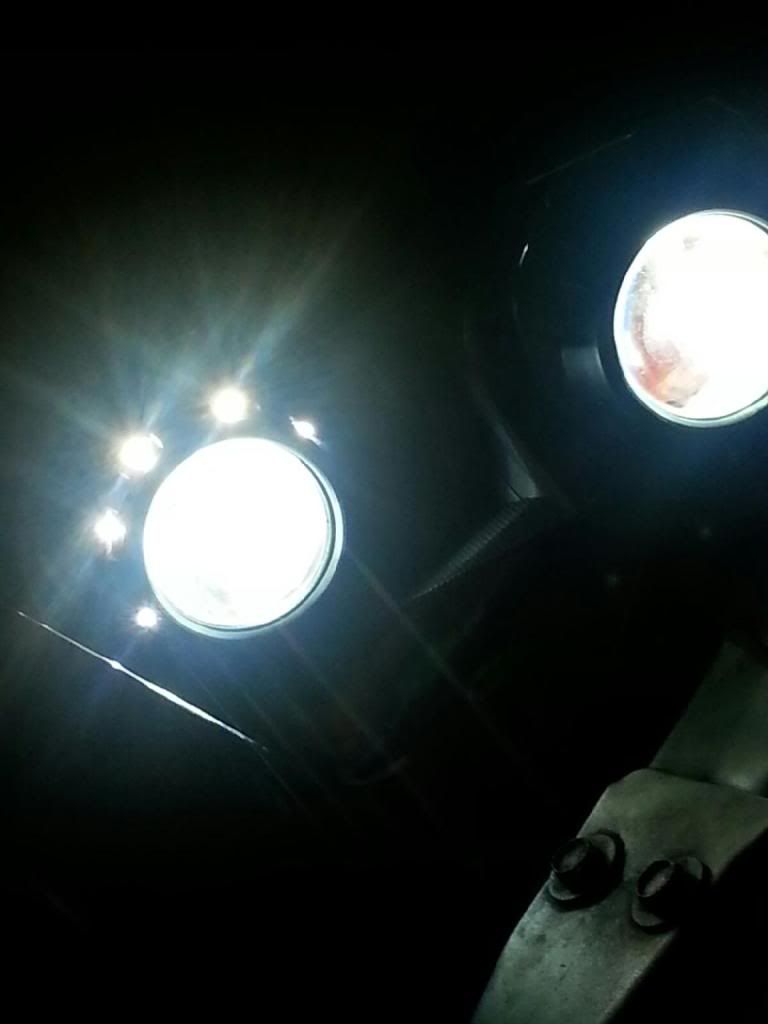
Wasn't able to get them aligned on the truck this morning. Slow getting outside, and there was too much ambient light (with the truck 25' back from the wall) to get a clear indication of the cutoff lines. I also had a tough time getting my sharpie in there to mark where the lock rings' tabs are to epoxy them later. After swapping headlights and dismantling my current HID system, and then putting it all back together, I think I might just align them in the reflectors and call it a day. I'm ready to move on to the vacuum table part now anyway :biggrin:
 

NinjuhhNutz

Original poster
Member
Oct 15, 2012
720
I had mine aligned, and almost had then installed, and then decided I wanted the custom halos and demon eyes...and 6 months later, here I am.


Eff this! I'm pulling an all nighter tomorrow when my parts come in if I have to...there's no way I'm letting you beat me on this install lol
:raspberry: :biggrin:
 

Blckshdw

Moderator
Nov 20, 2011
10,691
Tampa Bay Area, FL
I won't be installing anything anytime soon. I JB Welded that stationary reflector bowl mount, and when I went to put them on the truck I intended to just press it the top and side mounts, leaving the reflector just resting on that bottom stationary one. Well of course the one that's broken, decides it wants to snap in. :hopeless: 
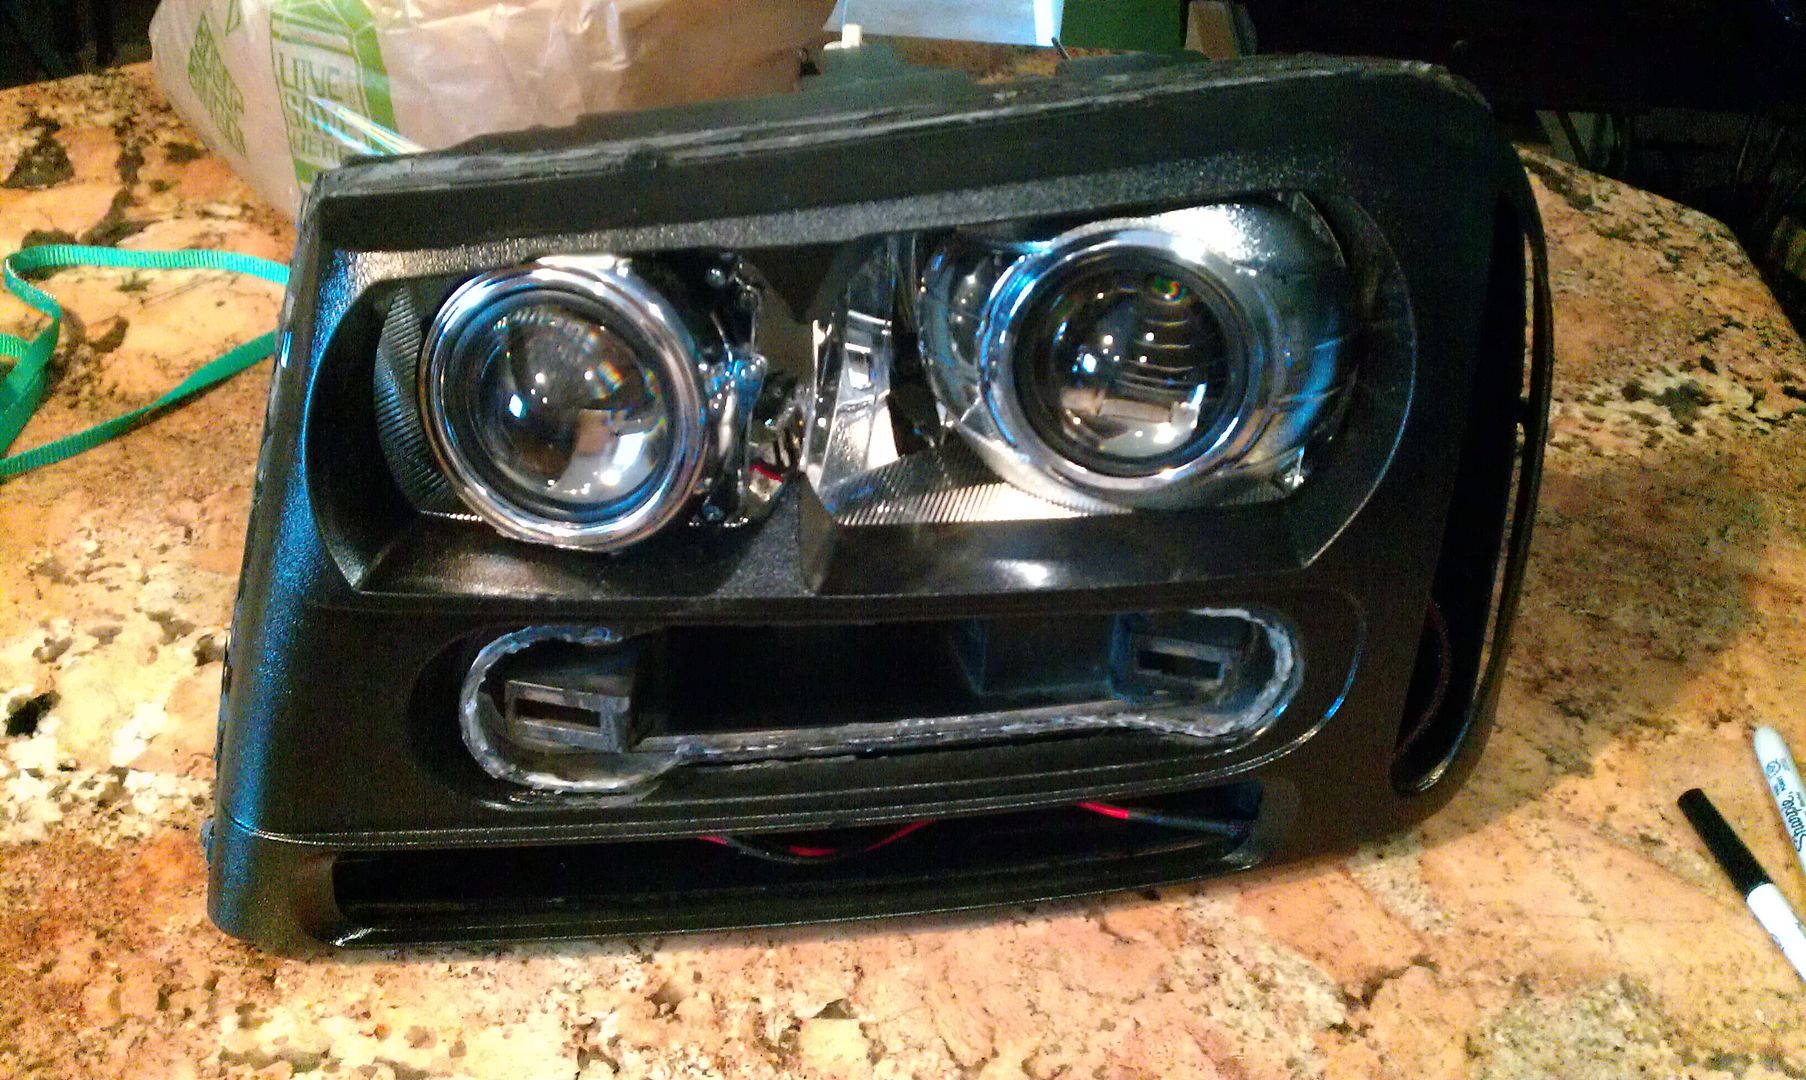
So when I had to remove it again, it broke the epoxy. FWIW it seemed to hold pretty strongly on the wiggle test beforehand. I got that ball joint pried out of the reflector again, but now I lost it. :hissyfit:

Something else I noticed, I aligned the lights in the reflectors, and JB Welded the back sides. Somehow, the driver's side low beam sagged slightly as it set. So the cutoff line is about 4-6" lower at 25' away. :mad: 
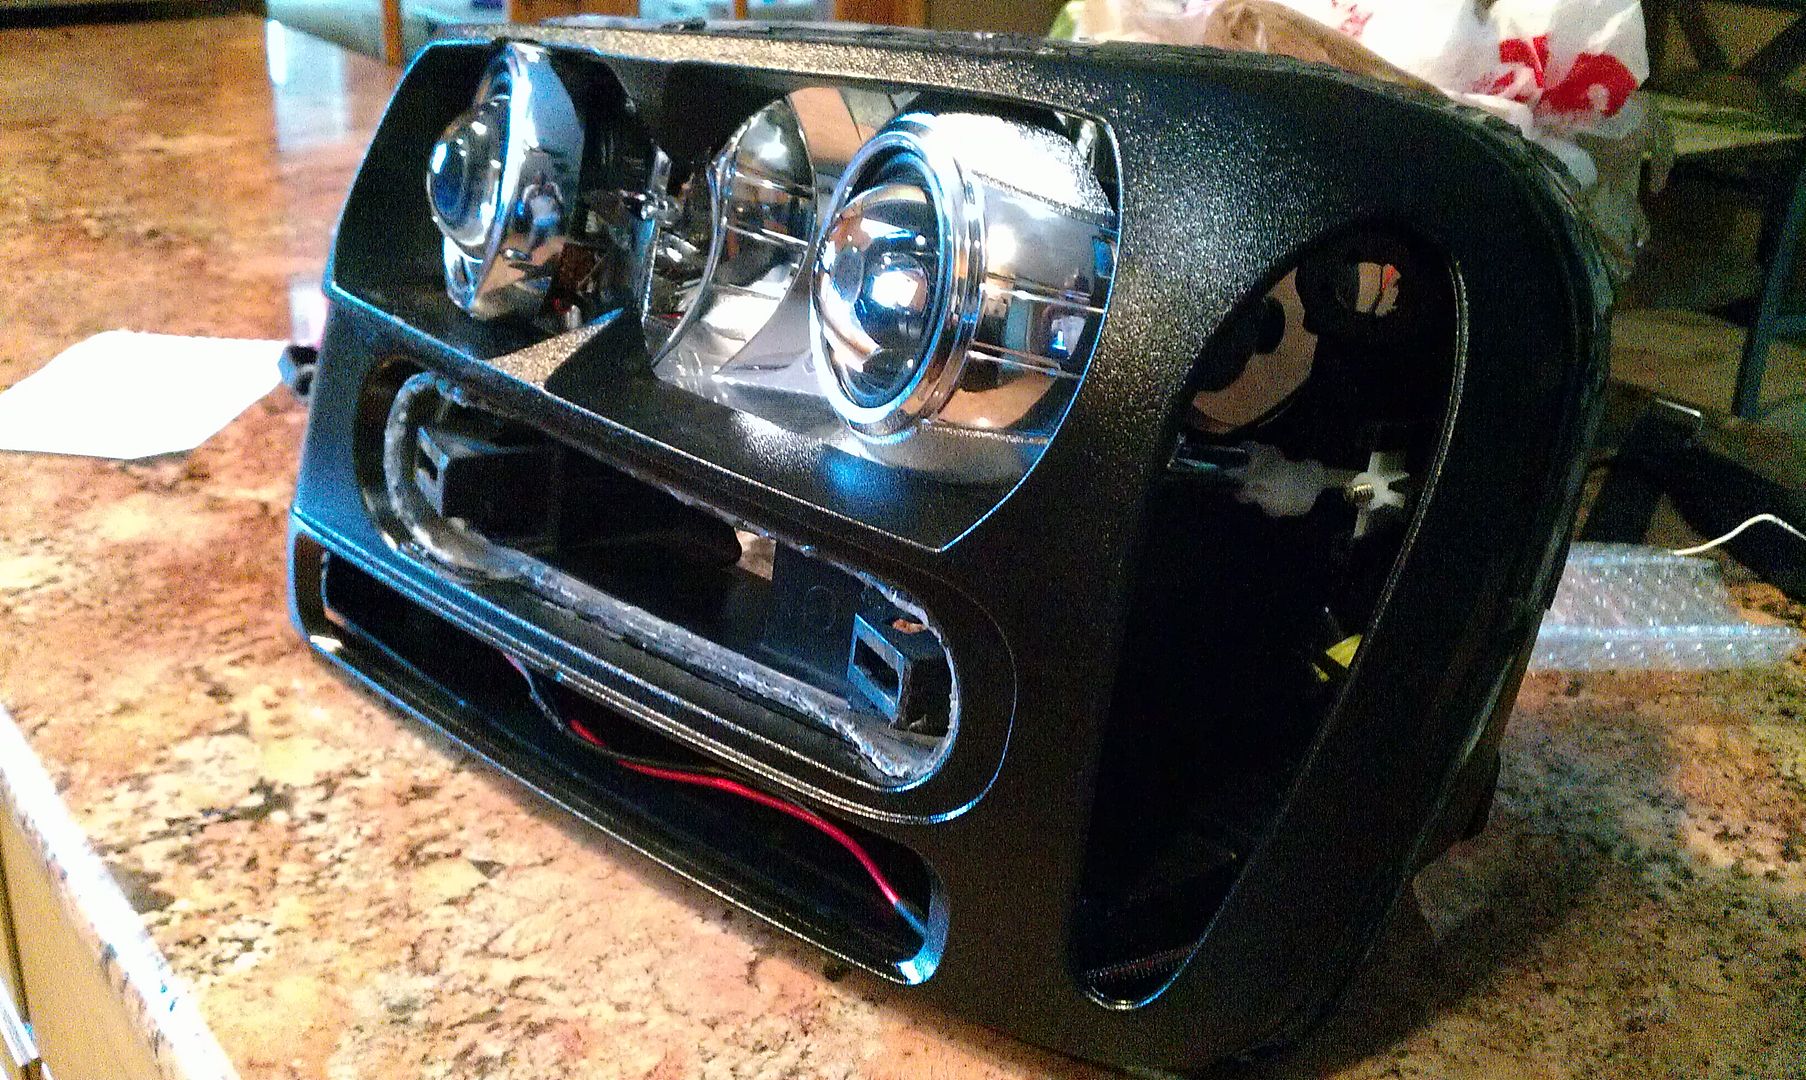
I can raise the projector up with a finger, so I might try to chip the JB weld off and redo it. Have to make sure it's propped up securely the entire time as it cures.
 

NinjuhhNutz

Original poster
Member
Oct 15, 2012
720
Damn, that sucks...I still have my extras parts if ya need any of it. You had it tightened with the locking nut and it still sagged? That concerns me a bit now, for when I do mine.
 

Blckshdw

Moderator
Nov 20, 2011
10,691
Tampa Bay Area, FL
Mine had a movement problem with the lock rings tightened down before. I think the problem was operator error though. I used the JB Weld putty so I could work it into all the small areas and stuff. It has a set time of 25 minutes, and a cure time of 3 hours. Wanted to get them in place that way first, and then go back with a 2 part epoxy to really lock them in place prior to install.

I did the driver's side first, and used the trimmed shroud to hold it up where I wanted it. I pulled it off after a half hour or so, and put it on the passenger side and did that one. Left to run errands while the passenger side sat there. Well, the passenger one is fine, so I guess it just took longer to set than expected. From the reflector mount breaking, I know that if I can get a pick under the surface, you can chip it off.

Not sure if there's an easy way to replace that mount with a surrogate, and have it stay there. Would need some type of plate, or a brace. The 2 part JB weld I initially tried snapped off easier than the plastik weld I tried this time. Unless the 2 part stuff was just too old and losing it's properties... I have this sinking feeling I might end up having to buy new headlights before this is over. :sadcry: From the one you bought, are the mounting points the same? (at least I'd be able to use the current reflector bowls in them) :undecided:
 

smitty5150

Member
Nov 18, 2011
1,069
I read these tales and I'm reminded of my first few retrofits. Sometimes you need to think simple to fix simple problems. The stationary mounts, for example....

Drill out the hole a little deeper and get a longer screw with a similar thread pitch. Use JB Weld and tighten down the new screw before it sets. That will have to be smashed with a hammer to break again.

Here's a set I'm finishing this weekend, just to show you I actually do this. MH1 projectors, gti-r shrouds, and xBALED rings in 70mm(look at the output on those suckers!):
 

Attachments

  • uploadfromtaptalk1368309714542.jpg
    uploadfromtaptalk1368309714542.jpg
    47.7 KB · Views: 19
  • uploadfromtaptalk1368309815497.jpg
    uploadfromtaptalk1368309815497.jpg
    41 KB · Views: 19
  • uploadfromtaptalk1368309872690.jpg
    uploadfromtaptalk1368309872690.jpg
    44.3 KB · Views: 20

Blckshdw

Moderator
Nov 20, 2011
10,691
Tampa Bay Area, FL
The stationary mount on mine (the bottom one) doesn't have a screw, it's just solid plastic, which broke right at the ball joint which the reflector grabs onto. No matter, I picked up a donor headlight at the junk yard this morning, so I'll be firing up the dremel tomorrow.

I got some of those LED halos too, and yes they are crazy bright. :cool:
 

smitty5150

Member
Nov 18, 2011
1,069
Wait, so is it the actual mount on the light assembly or the one on the reflector bowl? If it is the ball joint on the back of the light that broke off, you can run a small machine screw from the outside of the light to secure it. I've done that repair several times to lights damaged being shipped to me.
 

Blckshdw

Moderator
Nov 20, 2011
10,691
Tampa Bay Area, FL
Yep, it's the mount on the base that broke off. Took a while to pry the little ball fragment out of the reflector piece, I JB welded it with the 2 part kind, and the plastic weld putty, but it snapped right off with ease each time.

IMAG0591_zps4986594f.jpg


IMAG0590_zps6ab8f3ae.jpg


So when you used the machine screw, did you go through the base, and directly to the screw hole on the reflector? Bypassing that white piece that attaches to the ball joint? Or do something else?
 

smitty5150

Member
Nov 18, 2011
1,069
I've done it two ways. Once, I left it in the socket, lined it up, and drilled a pilot hole before running a machine screw into it. That went through the socket and was done with the light assembled. The other way, the joint was out of the socket. I epoxied it in place first, then drilled a pilot hole, ran a screw through from the outside, and cut the screw flush with a dremel so it would snap back in place. Only takes a few minutes and saves you the cost of a new light.
 

NinjuhhNutz

Original poster
Member
Oct 15, 2012
720
smitty5150 said:
I read these tales and I'm reminded of my first few retrofits. Sometimes you need to think simple to fix simple problems. The stationary mounts, for example....

Drill out the hole a little deeper and get a longer screw with a similar thread pitch. Use JB Weld and tighten down the new screw before it sets. That will have to be smashed with a hammer to break again.

Here's a set I'm finishing this weekend, just to show you I actually do this. MH1 projectors, gti-r shrouds, and xBALED rings in 70mm(look at the output on those suckers!):

that IS bright...but I think it's a bit too much for my taste :yes:
I could care less abt functional drl's...and that may be a bit overkill at night lol


Sidenote...I got my nut today :rotfl::rotfl::rotfl:
2013-05-13113410.jpg
 

infamouz

Member
Dec 3, 2011
89
smitty5150 said:
I read these tales and I'm reminded of my first few retrofits. Sometimes you need to think simple to fix simple problems. The stationary mounts, for example....

Drill out the hole a little deeper and get a longer screw with a similar thread pitch. Use JB Weld and tighten down the new screw before it sets. That will have to be smashed with a hammer to break again.

Here's a set I'm finishing this weekend, just to show you I actually do this. MH1 projectors, gti-r shrouds, and xBALED rings in 70mm(look at the output on those suckers!):

I wish I knew about those rings. I would've deffinetly got those instead.:yes:
 

NinjuhhNutz

Original poster
Member
Oct 15, 2012
720
Got a good bit of work done today :yes: 3 projectors together and in the bowl. One of my red smd's commited suicide on me, so I gotta order a couple more (can't just order one lol just not right) and my super secret squirrel squad homie hookup on my clear corner lenses to get here, and they'll be going in :yes:
gf took a few pics of the led's/projector combo
will upload in a few :biggrin:
 

NinjuhhNutz

Original poster
Member
Oct 15, 2012
720
They'll all look the same when I'm done wiring them up, but here are a few examples of the different modes :smile:
GF couldn't get a head on pic of it, because the halos were washing the camera out :wootwoot:

2013051395184350.jpg

20130513_203448.jpg

20130513_203529.jpg

2013051395203559.jpg

2013051395203603.jpg

2013051395203440.jpg
 

NinjuhhNutz

Original poster
Member
Oct 15, 2012
720
ConeKilrAutoX said:
thats going to be awesome. NICE WORK NinjuhhNutz :yes:

thank, bro. It's all FINALLY coming together! Seems like I've had to look at the projectors every day, and they just stare at me begging to be installed :crazy:
I have a lil secret that I'm not letting out of the bag until I'm finished...lol I think everyone will enjoy it haha
 

NinjuhhNutz

Original poster
Member
Oct 15, 2012
720
dmanns67 said:
I love the red glow coming from the projector! Is that from painting the cut-off shield red?

Thanks, it was kind of a pain to do tbh lol
No, painted the shield red gives a hint of red to it during the day. I actually wired a red smd led facing into each of the projectors for the red glow. I think I have a pic on here somewhere, if not, I'll see if I can find one. Idk what happened to one of them, just quit on me. So I'm gonna order a couple more wednesday...
 

dmanns67

Member
Apr 3, 2013
32,979
Ohio
Thats an awesome custom touch. Do you have the LED wired to come on with the parking lights? I am sure that will look sweet when the sun is going down!
 

NinjuhhNutz

Original poster
Member
Oct 15, 2012
720
Not yet, as they're aren't installed quite yet...still have a bit of tweaking to do, and 1 more trick up my sleeve lol
But that's the plan. Run them with my park lights, and independently to hidden switches.
Then cut the turn signals out of the parking lights in the front (if I can manage it) so only the red/white with be on
 

Blckshdw

Moderator
Nov 20, 2011
10,691
Tampa Bay Area, FL
:undecided: So what's wrong with the clear lenses you made? I can't see any problems, especially if you're gonna spray them to darken them a bit. :confused:
 

NinjuhhNutz

Original poster
Member
Oct 15, 2012
720
Blckshdw said:
:undecided: So what's wrong with the clear lenses you made? I can't see any problems, especially if you're gonna spray them to darken them a bit. :confused:

they have several spots on them where they're cracked, didn't fit right, melted etc
and I figured what's a couple sprays of vht to see if I liked it or not...
just tossed them on to see what it'd look like
in person you can see the inperfections much much better :frown:
 

Blckshdw

Moderator
Nov 20, 2011
10,691
Tampa Bay Area, FL
Looks good pieced together. I was gonna put mine to the side for a while and work on something else (meaning easier) but that will be harder after seeing this. I wonder how Jared's are coming along. :poke:

Side note: seeing your projectors from the bulb socket side, I can tell yours are much smaller. Now I know for next time, go with H1 instead of D2S to save headaches!! :mad:
 

NinjuhhNutz

Original poster
Member
Oct 15, 2012
720
Blckshdw said:
Looks good pieced together. I was gonna put mine to the side for a while and work on something else (meaning easier) but that will be harder after seeing this. I wonder how Jared's are coming along. :poke:

Side note: seeing your projectors from the bulb socket side, I can tell yours are much smaller. Now I know for next time, go with H1 instead of D2S to save headaches!! :mad:

I'm glad I started this project, though. I've learned more than I ever knew was out there :yes:
But damn if it didn't put my mod bug in hyperdrive!
well damn...who knows, your output may be better? hmph...AND you got snazzy bulb connectors hahaha
as usual with me, I ordered up everything before knowing EXACTLY what I wanted/needed. But, that's the learning process I guess

yea, I saw him down there a few minutes ago, too :shhh:
and HECK no...next time I'll be doing FX-R's if not better lol
the cutoff looks good in the mini's...but had I known then what I know now, I'd have went went the fx-r projectors.
TL Projectors
FX-R 3.0 Projectors
 

Blckshdw

Moderator
Nov 20, 2011
10,691
Tampa Bay Area, FL
When I first saw how wide the beam pattern on the Lexus LS430s (low beam) were, I wanted to go with those. But since I had no idea what to do, or how, there was no way (or so I thought) that I was gonna spend that much money on my first retrofit :weird:

Now that the LS460s (bi-xenon) are out, and cheaper than the LS430s :crazy:, that choice is simple. It would be a single pair, no way I could afford to do quads with those babies :nono:
 

ConeKilrAutoX

Member
Dec 8, 2011
1,179
NinjuhhNutz said:
The only way I would do single prjectors, would be with a custom bezel and shroud for the lights...i just dont like the look of projector and halogen together :no:


agreed. that is why I did the single bixenon projector and the upper slot is empty except for my halos. I couldnt even stand the clear corners with those ugly stock bulbs not hidden behind the amber with the look of the hids.
 

kjkim93

Member
Jan 1, 2012
696
NinjuhhNutz said:
ok, some better pics :tongue:
and you can see the effect of painting the shields red better in one of them
2013-05-14123950.jpg

2013-05-14124042.jpg

2013-05-14124325.jpg

2013-05-14125145.jpg

2013-05-14130239.jpg

2013-05-14130300.jpg
:eek::eek::eek: if I had the skill and money to do this I would. Great job man! :thumbsup:
 

NinjuhhNutz

Original poster
Member
Oct 15, 2012
720
ConeKilrAutoX;137903 said:
agreed. that is why I did the single bixenon projector and the upper slot is empty except for my halos. I couldnt even stand the clear corners with those ugly stock bulbs not hidden behind the amber with the look of the hids.

Mmm hmmmm... Exactly :yes:


kjkim93;137905 said:
:eek::eek::eek: if I had the skill and money to do this I would. Great job man! :thumbsup:

You can do it man...not.nearly as difficult as it looks....it's just the creative parts that make it harder lol
AND if you choose to only do the low beam slot, it bolts right in :yes:
 

Blckshdw

Moderator
Nov 20, 2011
10,691
Tampa Bay Area, FL
NinjuhhNutz said:
kjkim93 said:
:eek::eek::eek: if I had the skill and money to do this I would. Great job man! :thumbsup:

You can do it man...not.nearly as difficult as it looks....it's just the creative parts that make it harder lol
AND if you choose to only do the low beam slot, it bolts right in :yes:

:iagree: Just learn from our mistakes, and don't try to be fancy. If you do that, you'll have your retrofit done before we do! :rotfl:
 

ConeKilrAutoX

Member
Dec 8, 2011
1,179
Blckshdw said:
:iagree: Just learn from our mistakes, and don't try to be fancy. If you do that, you'll have your retrofit done before we do! :rotfl:

:iagree: same here its all about learning with every project almost. First time I had halos I left the original high beam bulb there and they melted the halo rings, then with my HID retro fit I learned I needed to physically retro fit the damn things in there :hissyfit: haha. but in the end its all worth it!

Between your project Blckshdw and NinjuhhNutz's it is awesome ! definitely very cool projects guys :thumbsup:
 

smitty5150

Member
Nov 18, 2011
1,069
I completely agree with everything said here. Your lights are turning out great, and it looks like you got some clear corners figured out before I had some ready to go...so kudos. I am gearing up for the quad retro on my new truck and it's actually going to be similar to yours...all the bells and whistles. Gonna keep it under lock and key until all the components are ordered.
 

Sparky

Member
Dec 4, 2011
12,927
Blckshdw said:
Looks good pieced together. I was gonna put mine to the side for a while and work on something else (meaning easier) but that will be harder after seeing this. I wonder how Jared's are coming along. :poke:

Side note: seeing your projectors from the bulb socket side, I can tell yours are much smaller. Now I know for next time, go with H1 instead of D2S to save headaches!! :mad:

Ouch! Stop poking me :poke:

I goofed reading the wiring diagrams and almost miswired some stuff, so I'm having to make some adjustments. Been playing with the circuit to make sure I have it right this time.
 

NinjuhhNutz

Original poster
Member
Oct 15, 2012
720
smitty5150;137927 said:
I completely agree with everything said here. Your lights are turning out great, and it looks like you got some clear corners figured out before I had some ready to go...so kudos. I am gearing up for the quad retro on my new truck and it's actually going to be similar to yours...all the bells and whistles. Gonna keep it under lock and key until all the components are ordered.

Smitty, since you've done a few...ever had V3 tritons for the turn signals? They suposedly wicked bright...and I need the brightest I can get for the matte black lol
 

smitty5150

Member
Nov 18, 2011
1,069
NinjuhhNutz said:
Smitty, since you've done a few...ever had V3 tritons for the turn signals? They suposedly wicked bright...and I need the brightest I can get for the matte black lol

I personally haven't, but I've heard good things. I did just hook up with a new couple new companies that deal with hids and leds, and I plan to use their components in my personal retrofit to wee how they perform. If they're decent, I'm bringing them to the table in a retail capacity.
 

Forum Statistics

Threads
23,386
Posts
638,646
Members
18,588
Latest member
Tcwest38

Members Online