xT's 06 LS TB I6 4.2 Dark Gray Metallic

xtitan1

Original poster
Member
Jun 5, 2013
467
Decided I would just make a thread all about myself and just continue to throw lots of questions out there. That way if people get tired of my questions they can just avoid this thread.

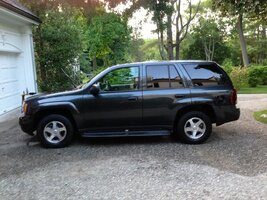
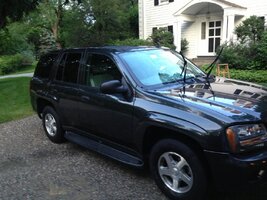
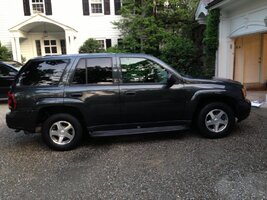
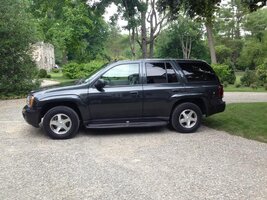
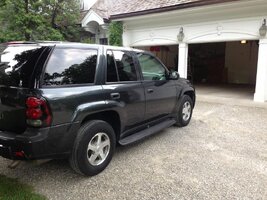
Well I just kind of became 'aware' when it comes to understanding and taking care of my vehicle. I'm probably going to have it a long time so I want to do as much preventative maintenance as I can. It's also cool to do some mods along the way.

I guess the first thing I did was remove the decal my dealer (who is now out of business btw) put on the back. I used a heat gun and my fingernail to get it off and then too gone for the sticky residue and then some quick detailing spray to get the too gone off and it all clean. I have video and pictures of that if anyone cares.

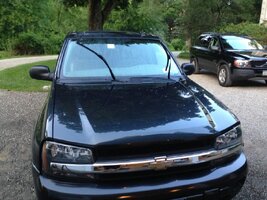
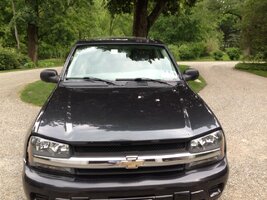
Right now I am polishing my windshield. I hadn't been good about keeping the windshield or the wipers clean and didn't replace them very often. Needless to say my windshield is full of small scratches in the path of the blades. I'm actually having success getting them out but it's slow going. Why bother? At night the light from brake lights or traffic lights gets refracted by all of the scratches so basically my whole windshield turns red and I can't see. I have pictures of that if anyone wants as well.

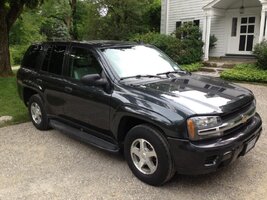
I'm planning only a wash polish and wax but I'm trying to decide if I want to take off the side molding or not because I if I am I would rather do that before washing and waxing. I was also contemplating the roof rack delete and the running boards delete.

Lastly, I need to get some tools ("noob buying some tools" thread for that conversation ) so I can repair the center console which is loose, squeaking, and whose lid is too far forward so it doesn't latch. May03lt gave me the rundown on how to do that.
 

xtitan1

Original poster
Member
Jun 5, 2013
467
About to remove dealer decal
pevysy6e.jpg


Micro scratches in windshield
eqavaneq.jpg


Trailer hitch is rusty
ypyjypuz.jpg
 

xtitan1

Original poster
Member
Jun 5, 2013
467
Well I bought a bunch of tools. I think I will delete the side moldings tonight and delete the roof rack. I've been researching how to cover the holes and the best method has something to do with Teflon tape but I can't find an explanation on that for what to do with the tape. If anyone could explain that would be cool. Or if they have a better idea let me know.

Still in the middle of detailing. Interior is done, windshield scratch correction done, currently restoring rubber and plastic trim. Will do the deletes before wash paint correction and wax.

Maybe I will go to an auto parts store for my first time and get some tb cleaner and some spark plugs and do that stuff as well.
 

dmanns67

Member
Apr 3, 2013
32,979
Ohio
xtitan1 said:
I think I will delete the side moldings tonight and delete the roof rack. I've been researching how to cover the holes and the best method has something to do with Teflon tape but I can't find an explanation on that for what to do with the tape. If anyone could explain that would be cool. Or if they have a better idea let me know.

Definitely be careful using the heat gun on your paint. Even at the lowest setting it can still damage the clear and base. I used the wife's hair dryer and that seemed to work well for me, until she seen what I was using her hair dryer for :crazy:.

I would recommend getting a 3M Eraser wheel (attaches to any drill) to remove the double sided tape left over from removing the badges and side molding. It will save you alot of time and your fingers will thank you. Also, Meguiar's Scratch X 2.0 will help remove the lines and blend the paint after you remove the side molding. When I removed my side molding I used the wife's hair dryer and 25lb test fishing line.

Once your remove your roof rack, you will have (5) bolt holes going down the passenger side and driver's side, (10) total. The bolts holes actually stick up about an 1/8" of an inch on the roof. You have different options to plug the holes. Some guys use automotive plastic clips and color match the top of the clip to their truck. Other's have used stainless steel set screws and painted the top of them. The teflon tape is used to wrap threads to make them water tight.

I personally used (10) M6x12 stainless steel set screws and wrapped the threads in teflon tape to seal the holes. Then I used RTV black on top of the set screws for a solid seal. I only used the RTV black to seal the holes because I have the smooth, colored matched side molding and used them to cover the bolt holes on the roof as I am not a fan of seeing the bolt holes sticking up. I stripped the old side molding tape and added new 3M automotive molding tape. Also, I cleaned up the paint where the roof rack once was and gave everything a good wipe down with alcohol prior to placing the side molding on the roof. I think this route is very clean and looks better than the bolt holes sticking up IMO and it is cheaper than going to a body shop to have them grind down the holes, fill them, and then repaint the roof. :twocents:

I got the idea from the OS, here is the link. Roof rack and side molding delete on the cheap - Chevy TrailBlazer, TrailBlazer SS and GMC Envoy Forum This thread has pics, but if you like I can take a pic of mine for reference.

For your trailer hitch recess being rusty, I used a rotary wire brush (also attaches to any drill) to clean up the rust then wiped down with alcohol and hit it with some Duplicolor black.
 

xtitan1

Original poster
Member
Jun 5, 2013
467
dmanns67 said:
Definitely be careful using the heat gun on your paint. Even at the lowest setting it can still damage the clear and base. I used the wife's hair dryer and that seemed to work well for me, until she seen what I was using her hair dryer for :crazy:.

I would recommend getting a 3M Eraser wheel (attaches to any drill) to remove the double sided tape left over from removing the badges and side molding. It will save you alot of time and your fingers will thank you. Also, Meguiar's Scratch X 2.0 will help remove the lines and blend the paint after you remove the side molding. When I removed my side molding I used the wife's hair dryer and 25lb test fishing line.

Once your remove your roof rack, you will have (5) bolt holes going down the passenger side and driver's side, (10) total. The bolts holes actually stick up about an 1/8" of an inch on the roof. You have different options to plug the holes. Some guys use automotive plastic clips and color match the top of the clip to their truck. Other's have used stainless steel set screws and painted the top of them. The teflon tape is used to wrap threads to make them water tight.

I personally used (10) M6x12 stainless steel set screws and wrapped the threads in teflon tape to seal the holes. Then I used RTV black on top of the set screws for a solid seal. I only used the RTV black to seal the holes because I have the smooth, colored matched side molding and used them to cover the bolt holes on the roof as I am not a fan of seeing the bolt holes sticking up. I stripped the old side molding tape and added new 3M automotive molding tape. Also, I cleaned up the paint where the roof rack once was and gave everything a good wipe down with alcohol prior to placing the side molding on the roof. I think this route is very clean and looks better than the bolt holes sticking up IMO and it is cheaper than going to a body shop to have them grind down the holes, fill them, and then repaint the roof. :twocents:

I got the idea from the OS, here is the link. Roof rack and side molding delete on the cheap - Chevy TrailBlazer, TrailBlazer SS and GMC Envoy Forum This thread has pics, but if you like I can take a pic of mine for reference.

For your trailer hitch recess being rusty, I used a rotary wire brush (also attaches to any drill) to clean up the rust then wiped down with alcohol and hit it with some Duplicolor black.

....um, you are the effing man!

I think the eraser wheel is definitely a good tip because taking the adhesive that was left on the body after removing the molding is extremely difficult. I couldn't finish tonight because it was so difficult.

I hear you on the heat gun advice. I tried to use as little heat as possible that still let me get the molding off. Luckily no damage as of yet (knock on wood).

Thanks for the link for the side molding technique for covering he roof rack holes. Once I've got the rack off I'm going to just sit the molding up there to see what it looks like and then do one of the fixes you mentioned. I think the raised bolt holes would bother me too.

I need to grab that rotary wire brush you were talking about as well for that trailer hitch. That's a great tip. Once I touch it up I think there is an insert for it so it won't get water inside it. It's nice to know I'm not alone in my OCD :smile:

I want to get these two things done (roof and side molding delete) so I can test out my new detailing stuff! I got a Flex 3401 and a bunch of blackfire wet diamond line. Although, I'm not sure I even need to use the compound except perhaps for the area where the side molding was. The rest of the paint is pretty swirl free.
 

dmanns67

Member
Apr 3, 2013
32,979
Ohio
xtitan1 said:
....um, you are the effing man!

I think the eraser wheel is definitely a good tip because taking the adhesive that was left on the body after removing the molding is extremely difficult. I couldn't finish tonight because it was so difficult.

I hear you on the heat gun advice. I tried to use as little heat as possible that still let me get the molding off. Luckily no damage as of yet (knock on wood).

Thanks for the link for the side molding technique for covering he roof rack holes. Once I've got the rack off I'm going to just sit the molding up there to see what it looks like and then do one of the fixes you mentioned. I think the raised bolt holes would bother me too.

I need to grab that rotary wire brush you were talking about as well for that trailer hitch. That's a great tip. Once I touch it up I think there is an insert for it so it won't get water inside it. It's nice to know I'm not alone in my OCD :smile:

I want to get these two things done (roof and side molding delete) so I can test out my new detailing stuff! I got a Flex 3401 and a bunch of blackfire wet diamond line. Although, I'm not sure I even need to use the compound except perhaps for the area where the side molding was. The rest of the paint is pretty swirl free.

The eraser wheel will run you about $35, but totally worth the money. Make sure when you are using the wheel on painted plastic parts, you do not use alot of speed or pressure or you will burn through the paint and the plastic. I found that out the hard way when I was removing the rear bowtie :hissyfit:. The eraser wheel will also help to remove the old tape from the under side of the side molding. If you have pin striping that you want to remove, it will take it off in no time.

No problem, thats what we are here for. I searched for a couple weeks before removing the side molding and roof rack to see what everyone else did, but the guy on the OS was the only one I seen to do it this way and I though it was ingenious. With my OCD kicking in, I wanted to make sure I had everything I needed to complete the job. It took me the weekend to complete.

The rotary wire brush should run about $8 from Lowes. It is definitely a quicker process than using a standard wire brush. Also, it is a great tool to use to clean up your rotors and calipers if you decide to paint them. :thumbsup:
 

xtitan1

Original poster
Member
Jun 5, 2013
467
dmanns67 said:
The eraser wheel will run you about $35, but totally worth the money. Make sure when you are using the wheel on painted plastic parts, you do not use alot of speed or pressure or you will burn through the paint and the plastic. I found that out the hard way when I was removing the rear bowtie :hissyfit:. The eraser wheel will also help to remove the old tape from the under side of the side molding. If you have pin striping that you want to remove, it will take it off in no time.

No problem, thats what we are here for. I searched for a couple weeks before removing the side molding and roof rack to see what everyone else did, but the guy on the OS was the only one I seen to do it this way and I though it was ingenious. With my OCD kicking in, I wanted to make sure I had everything I needed to complete the job. It took me the weekend to complete.

The rotary wire brush should run about $8 from Lowes. It is definitely a quicker process than using a standard wire brush. Also, it is a great tool to use to clean up your rotors and calipers if you decide to paint them. :thumbsup:

I had done some research I just had no idea that adhesive like this even existed. I thought some goo gone and a MF towel would do the job no problem. Boy was I wrong.

Some pics for you guys:

Finished windshield scratch correction (no more haze/light streaks coming from light sources in reflection).
eqajera6.jpg


Some of the tools I got today
9e2adeby.jpg

8asa5uza.jpg

4apa5y9y.jpg


Weatherstripping around license plate area trim is all messed up
eduganaq.jpg

qevuhuhy.jpg
 

dmanns67

Member
Apr 3, 2013
32,979
Ohio
xtitan1 said:
I had done some research I just had no idea that adhesive like this even existed. I thought some goo gone and a MF towel would do the job no problem. Boy was I wrong. Finished windshield scratch correction (no more haze/light streaks coming from light sources in reflection).

What did you use to clean up the windshield? Looks good.

You are definitely going all out on tools :thumbsup:
 

xtitan1

Original poster
Member
Jun 5, 2013
467
I used ceri glass with a flex 3401 polisher with carpro glass cutting pads. It's a little tricky but once u know the trick to its relatively easy so if you're interested in doing it give me a shout for more details.

Just picked up the 3m wheel, about to go to it!
 

xtitan1

Original poster
Member
Jun 5, 2013
467
MAY03LT said:
Awesome! Is that a dewalt impact? If so I AM MAXIMUM JELLY!!!!!:wootwoot:

Yeah well I do home repair stuff and needed a new drill anyway so I got it I just finished taking off my roof rack with it. It took less than 20 seconds and it was the first time I ever used one lol very cool

uga3u8y7.jpg


Also took off the side molding using a heat gun to loosen the piece and then a 3m stripe off wheel on a corded variable speed drill (they say putting it on low rpm makes it work better) to get the adhesive tape off be user there wasn't any other way that was coming off lol

sapa8uhu.jpg


I think the lines still visible will buff out with some compound. I guess I need to take off the running boards to complete the look
 

xtitan1

Original poster
Member
Jun 5, 2013
467
Tomorrow I think will be trying to take off those running boards and then dressing the trim and a full wash with some blackfire wet diamond that I've been wanting to try

Oh before that, finally putting this piece of weatherstripping back on that just randomly fell off the front of the driver side rear door
4ebuza8e.jpg

5y4yzu3a.jpg
 

Darkrider_LS

Member
Jan 25, 2013
9,332
Looks great so far man!
 

dmanns67

Member
Apr 3, 2013
32,979
Ohio
I would also use the 3M and hit the weather stripping on the driver's side and passenger side rear doors. It tends to sag down below the curved part of the doors when they are shut.
 

xtitan1

Original poster
Member
Jun 5, 2013
467
dmanns67 said:
I would also use the 3M and hit the weather stripping on the driver's side and passenger side rear doors. It tends to sag down below the curved part of the doors when they are shut.

Roger that. If mine is still attached firmly should I pull it off anyway or wait until it fails?
 

dmanns67

Member
Apr 3, 2013
32,979
Ohio
xtitan1 said:
Roger that. If mine is still attached firmly should I pull it off anyway or wait until it fails?

Mine was never attached with any adhesion, just slips on. The rubber is not as firm as it once was and thus started to sag. If you have not noticed it sagging then I would just leave it alone. As I am OCD, that bothered me too :rotfl:
 

Darkrider_LS

Member
Jan 25, 2013
9,332
dmanns67 said:
I would also use the 3M and hit the weather stripping on the driver's side and passenger side rear doors. It tends to sag down below the curved part of the doors when they are shut.

Kinda wondered if that was a chronic thing...damn near every SWB i have seen around here has it hanging out like that including mine.
 

DDonnie

Member
Mar 26, 2012
2,631
Mines still good :smile:

Looks good so far man
 

xtitan1

Original poster
Member
Jun 5, 2013
467
Darkrider_LS said:
Kinda wondered if that was a chronic thing...damn near every SWB i have seen around here has it hanging out like that including mine.

May03lt mde a video showing how to do it and said it was a pretty common issue. If they weren't even factory glued then I'm definitely going to hit 'em.
 

dmanns67

Member
Apr 3, 2013
32,979
Ohio
xtitan1 said:
May03lt mde a video showing how to do it and said it was a pretty common issue. If they weren't even factory glued then I'm definitely going to hit 'em.

May03lt is definitely the man and knows TBs well!
 

mikeinDE

Member
Jan 4, 2012
855
I love all the tools you have acquired!!!


Your ride is coming along GREAT!
 

Ryda55555

Member
Apr 11, 2013
1,111
xtitan1 said:
Well now I'm afraid to take them off because of that issue

Hahaha yea 1 of many reasons why i leave mine on
-stone chips
-makes it look lower
-gives short people a step
-you can rest your feet in it when your sitting with the door open
+ more i prolly cant think of
Btw i spray tire shine along the boards and they stay shiny and clean
 

xtitan1

Original poster
Member
Jun 5, 2013
467
Ryda55555 said:
Hahaha yea 1 of many reasons why i leave mine on
-stone chips
-makes it look lower
-gives short people a step
-you can rest your feet in it when your sitting with the door open
+ more i prolly cant think of
Btw i spray tire shine along the boards and they stay shiny and clean

Roger that. I'm going to have to do something about this in that case:

e7a2ane2.jpg
 

dmanns67

Member
Apr 3, 2013
32,979
Ohio
xtitan1 said:
Yeah I think that might be what's required for this. For now though its wash polish and was time

pu3azu4e.jpg

areranug.jpg

Looking very good! IMO option, I think GM should have never put side molding or roof racks on the TB as standard equipment. Maybe make it an option, but then you could buy the TBSS and not worry about it lol. Great work man :thumbsup:
 

xtitan1

Original poster
Member
Jun 5, 2013
467
dmanns67 said:
Looking very good! IMO option, I think GM should have never put side molding or roof racks on the TB as standard equipment. Maybe make it an option, but then you could buy the TBSS and not worry about it lol. Great work man :thumbsup:

Yeah I'm definitely a big fan of the SS look but at the time it wasn't out yet and now I think I'm sticking with this and making some SS inspired changes. Thanks for the encouragement sometimes my taste is weird so it's good to have people vetting my changes lol!
 

xtitan1

Original poster
Member
Jun 5, 2013
467
Okay did the wash and polish.

Black Wow on the trim, then Washed (BFWD Conditioning Shampoo with Nanoskin Medium Mitt and 2WB method)
View attachment 29170
View attachment 29171
View attachment 29172
View attachment 29173

Clayed (DP Clay and Lubcricant), Compounded some problem areas (BFWD SRC Compound on Flex 3401 and LC Hybrid 5" Orange Pads), polished (BFWD SRC Finishing Polish on Flex 3401 and LC Hybrid 5" White Pads), and sealed (BFWD All Finish Paint Protection on Flex 3401 and LC Hybrid 5" Gray Pads).
View attachment 29175
View attachment 29176
View attachment 29177
View attachment 29178
View attachment 29179
 

Attachments

  • 2013-06-22 20.20.59.jpg
    2013-06-22 20.20.59.jpg
    98 KB · Views: 15
  • 2013-06-22 20.21.20.jpg
    2013-06-22 20.21.20.jpg
    95.7 KB · Views: 15
  • 2013-06-22 20.21.34.jpg
    2013-06-22 20.21.34.jpg
    95.8 KB · Views: 15
  • 2013-06-22 20.21.45.jpg
    2013-06-22 20.21.45.jpg
    96.3 KB · Views: 15
  • 2013-06-25 16.30.19.jpg
    2013-06-25 16.30.19.jpg
    98.5 KB · Views: 15
  • 2013-06-25 16.30.35.jpg
    2013-06-25 16.30.35.jpg
    96.4 KB · Views: 15
  • 2013-06-25 16.30.42.jpg
    2013-06-25 16.30.42.jpg
    96.8 KB · Views: 16
  • 2013-06-25 16.30.51.jpg
    2013-06-25 16.30.51.jpg
    97.4 KB · Views: 16
  • 2013-06-25 16.31.02.jpg
    2013-06-25 16.31.02.jpg
    97.1 KB · Views: 16

xtitan1

Original poster
Member
Jun 5, 2013
467
Then I drove back to Philly and I noticed that my right turn signal indicator light on my dash would come on when I pressed the brake, except about half as bright and solid instead of blinking. When I put the left turn signal on, it would stop, and when I put the right turn signal on, it would blink twice as fast. Today it still intermittently turned on a little bit. I haven't tested yet to see what is actually going on with the actual turn signal light on the back of the car. Anyone heard of this?
 

xtitan1

Original poster
Member
Jun 5, 2013
467
This is stuff back from July 4th weekend:

Took care of my aunt's dog for the day, loved the AC! She accompanied me to Home Depot to get some set screws for my roof rack delete, but of course they were totally disorganized and I could only find 2 and they were plain steel (worried me about corrosion since they weren't SS or zinc coated), so I just ended up ordering them online.

Annie trying to find my aunt in her car (she's very attached lol) but couldn't find her
View attachment 29444
Annie enjoying the AC
View attachment 29445
[video=youtube_share;xfd_V_icsEU]http://youtu.be/xfd_V_icsEU[/video]

I also tried to make a video of me putting the screws in, but then dropped one of them inside the space where the sunroof goes when you open it. I then tried to make a video of me getting the screw out using a magnet, but I dropped the phone lol. I will put them here for comedic value and not in any way informative value.
[video=youtube_share;ff0JM3lpmn8]http://youtu.be/ff0JM3lpmn8[/video]
[video=youtube_share;LifkZlTGgXI]http://youtu.be/LifkZlTGgXI[/video]

I took a video of my engine at idle. I think I hear a weird noise, but considering I don't know what I'm talking about, it could be nothing.
[video=youtube_share;yxqWPEMWXJ8]http://youtu.be/yxqWPEMWXJ8[/video]

My brother-in-law used to be a mechanic, so we looked at the weird light issue I explained above. It seems that both my tailights have a huge amount of water in them, and that the actual harness for the right tail has a short (determined by switching around known good batteries).
[video=youtube_share;kmYn50nm8nI]http://youtu.be/kmYn50nm8nI[/video]

I decided to just order a new harness for the right tail, as well as new bulbs for both tails, and new housings for both tails (TYC brand, like $32 or something each). I could have tried to fix them myself with silicone or something, but since the left was already messed up from me backing into something, I just decided to start fresh.

I re-attached the weatherstripping that had fallen off of the front side of my rear driver's side door, as well as the drooping door seals on the rear door wheel wells that MAY03LT shows in his video.
[video=youtube_share;pLet3rI1Wls]http://youtu.be/pLet3rI1Wls[/video]

Oh, and I checked my oil for the first time in my life.


P.S. I almost forgot. While I was in the car taking that picture of annie in the HD parking lot, some woman loading her kid into the back of her minivan took her hands off of her shopping cart and it went across two or three spaces directly at my door. I heard it coming and put down the window in time and stuck my hand out and caught it before it hit the car. She just looked at me then looked back and got in her car and drove away. WTF? Well at least I was there to catch it.
 

Attachments

  • 2013-07-06 12.11.03.jpg
    2013-07-06 12.11.03.jpg
    98.2 KB · Views: 12
  • 2013-07-06 15.31.59.jpg
    2013-07-06 15.31.59.jpg
    69 KB · Views: 11

Playsinsnow

Member
Nov 17, 2012
9,727
Did you ever retrieve the screw that went MIA? Could you hear it rattling around? I would suggest cracking the roof up and braking hard to a stop down a hill. Should get it?! Sorry if I missed that you got it out. About to watch the videos...


Edit: I don't know why but those videos were hilarious. Awesome soundtrack on the 2nd and 3rd video!
 

xtitan1

Original poster
Member
Jun 5, 2013
467
Playsinsnow said:
Did you ever retrieve the screw that went MIA? Could you hear it rattling around? I would suggest cracking the roof up and braking hard to a stop down a hill. Should get it?! Sorry if I missed that you got it out. About to watch the videos...

Hahahaha that's actually a good idea I'm going to try that. I never got it out but I can't hear anything rolling around or rattling up there. At the end of the magnet video I dropped my phone and got frustrated and just gave up lol
 

Forum Statistics

Threads
23,319
Posts
637,896
Members
18,519
Latest member
chirobo1

Members Online