Transgo/Sonnax/Corvette Servo Kit & Boost Valve questions?

Scott89TTA

Original poster
Member
Jul 30, 2013
11
My 03 Trailblazer has 120K on it and definitely has something going on with the trans. I did a AIRAID CAI and PCMforless tune a couple years ago with 50% torque management removed and stage II trans mod basically for towing but was also looking for performance and a little MPG improvement if possible. Just prior to tune I had both the trans and transfer case flushed, fluids and filter changed. Trans has a slight almost slip/clunk pulling away on light acceleration and sometimes on the 1-2 shift plus sometimes in reverse. Lightly letting on and off the accelerator it does the same and lock up may be acting up a little. When the trans guy did the flush, filter and fluid change he said everything looked fine but he did not remove the valve body so these failing parts everyone is speaking of is quite possible especially at 120K. Shifts are not what I would call firm at all or what I expected after reading posts from others with the PCMforless tune w/Stage II trans upgrade...I'm hoping this is a result of a failing separator plate, accumulator pistons, etc.?

I am looking at this kit 4L60E 4L65E 1996 2006 1870 P1870 Code Buster Combo Kit Corvette Servo Kit Book | eBay as recommended and am also wondering if replacing the stock "Boost Valve" with a new upgraded performance boost valve .490 or .500 (I believe stock is .470?) HIGH-PERFORMANCE PRODUCTS 700R4 4L60E 700 4L65E 4L60 AOD 200 items in CT POWERTRAIN PRODUCTS store on eBay! is recommended as well?. Has anyone done this too, what are your thoughts on this kit and upgrading the boost valve?

Sorry for a duplicate post in another section...I'll try an remove it or request it be removed as my post should have been here instead.

Thanks,
Scott
 

Scott89TTA

Original poster
Member
Jul 30, 2013
11
v7guy said:
I just finished this the other day. Maybe this will help ya out a bit.

offroadTB.com - View topic - Shift kit install


the shift kit contains upgraded springs for the stock valve and seems to up the pressure a good lil bit.

yeah saw that post...excellent write up. I'm not worried about the install part as I have done several shift kits over the years. I'm more interested in whether or not I should upgrade/replace the the stock boost valve while I'm in there?
 

gmcman

Member
Dec 12, 2011
4,673
I would change the separator plate, this needs to be done if you want to preserve the life of the tranny. While you are in there, change out the accumulator pistons, install the TCC PWM eliminator, and maybe hold off on the boost valve for now and see if it firms back up with the fresh plate.

Also add the vette servo and the Sonnax super hold 4th servo. There's also a process that involves reaming the plate for the 4th apply piston and changing the spring to the opposite side of the piston either in conjunction to or separate from the Super hold servo...I'm changing out the super hold servo but if I was going into the trans again I would ream the plate as well...choice is yours.

With the new plate, vette servo, my shifts are just right, not too harsh but quick and somewhat crisp...can't really feel them over the weight of the truck which is nice.
 

Scott89TTA

Original poster
Member
Jul 30, 2013
11
gmcman said:
I would change the separator plate, this needs to be done if you want to preserve the life of the tranny. While you are in there, change out the accumulator pistons, install the TCC PWM eliminator, and maybe hold off on the boost valve for now and see if it firms back up with the fresh plate.

Also add the vette servo and the Sonnax super hold 4th servo. There's also a process that involves reaming the plate for the 4th apply piston and changing the spring to the opposite side of the piston either in conjunction to or separate from the Super hold servo...I'm changing out the super hold servo but if I was going into the trans again I would ream the plate as well...choice is yours.

With the new plate, vette servo, my shifts are just right, not too harsh but quick and somewhat crisp...can't really feel them over the weight of the truck which is nice.

I saw this post by you in another thread:

This is what I would do if I were you.....

Replace the separator plate
Replace the 1-2 & 3-4 accumulator pistons
Install a vette servo
Replace both shift solenoids
Swap the PWM TCC valve with a Trans-go PWM eliminator kit which removes the soft, subtle converter lockup into a positive off/on style lock up, feels like another gear and is a great mod for towing.

I did all this, less than $200 and it made my trans shift and work better than new.

Are all these included in this kit? 4L60E 4L65E 1996 2006 1870 P1870 Code Buster Combo Kit Corvette Servo Kit Book | eBay If not what isn't and where can I get them?

Thanks,
 

gmcman

Member
Dec 12, 2011
4,673
I dont think that kit has the Sonnax super hold servo, prob the most expensive part @ $80 ish.

I would call Pro Built @ 909-795-1876 , Dana will set you up.
 

v7guy

Member
Dec 4, 2011
298
I'm unsure if I would want the transmission to shift harder than it does now to be honest. It's fairly docile (but noticeably firmer than stock) at mid range rpms but at full WOT it'll squeal the belt for a smidge on the 1-2 and it's pretty firm on the 3-4. I'm sure the sonnax pistons are better for an application that could use them, but i'm unsure that it would be all that great for a big ole SUV.
 

DocBrown

Member
Dec 8, 2011
501
gmcman said:
I would change the separator plate, this needs to be done if you want to preserve the life of the tranny. While you are in there, change out the accumulator pistons, install the TCC PWM eliminator, and maybe hold off on the boost valve for now and see if it firms back up with the fresh plate.

I'll second these recommendations. I put in the replacement TransGo separator plate and accumulator pistons (the stock pistons are plastic! And while mine were like new, many members that have done this said theirs were cracked or broken). The TransGo separator plate is drilled differently than the factory plate. Their documentation has additional recommendations for increasing the size of specific holes, but says "you will be pleased" with their choices. I put the plate in as delivered and wow, what a difference. I am pleased. With the basic shift kit and new separator plate it shifts fast and smooth and drops into convertor lockup beautifully even without the PWM eliminator kit.
 

Scott89TTA

Original poster
Member
Jul 30, 2013
11
gmcman said:
I dont think that kit has the Sonnax super hold servo, prob the most expensive part @ $80 ish.

I would call Pro Built @ 909-795-1876 , Dana will set you up.

Talked to Dana at Pro Built today...thanks for the recommendation very knowledgeable guy. He is working me up a kit to meet my needs.

Also turned out he knows a bunch of the trans guys I know on the turbo Buick and Trans Am forums...had a long chat with him about GM, Turbo Buick's (Grand National, GNX, Turbo TA), Syclone, Typhoon, Pontiac and Corvette politics :smile:

Will post back when all is installed.

-Scott
 

kawaholic

Member
Sep 9, 2013
106
gmcman said:
I dont think that kit has the Sonnax super hold servo, prob the most expensive part @ $80 ish.

I would call Pro Built @ 909-795-1876 , Dana will set you up.

Just got done rebuilding my tranny. What a job, NEVER did anything like that before. Anyway, I went with the heavy duty kit from Dana. I was VERY impressed with the kit he sent me.

I'm trying to decide what to do about my pcm. I had pcm of nc do their level 2 upgrade to "firm up" the shift points a while back. I'm trying to decide if I should go back to the stock setting in the pcm, now that I've done all the upgrades to the tranny. My 2-3 shift is a little clunky under light throttle and I'm concerned I might be doing damage to the rest of the drive train. Other than that I'm very happy with the build. Just curious where you're at as far as tuned pcm for the tranny.

Also, I have the stock pcm that I could put back in to test how the shift points would feel, I'm just a little concerned about doing it because I had them do the e-fan patch in the new pcm. I know it'll throw a code for the fan but I don't know if having that code in the system would affect any performance while I was testing.

Sorry to the OP, not trying to hijack your thread, it just seemed like a good place to ask these questions.

Keep a lookout for my diy tranny rebuild thread coming in the near future... :biggrin:
 

gmcman

Member
Dec 12, 2011
4,673
ConeKilrAutoX said:
i will be also man just like you told me before! just havent had the money

No worrries...as long as yours is still rolling you are good. Just watch for slippage in 4th under boost.
 

gmcman

Member
Dec 12, 2011
4,673
kawaholic said:
Other than that I'm very happy with the build. Just curious where you're at as far as tuned pcm for the tranny.

Was that directed to me or the OP? For me I don't have a tune......yet. I would imagine your shifts are firm as mine are slightly firmer than stock but positive and I don't have any programming. don't know if it will damage anything, I know the sunshell is a weak link so it's a tough call. I like mine the way they are...not too harsh but quick.
 

gmcman

Member
Dec 12, 2011
4,673
ConeKilrAutoX said:
it happens....big time =/

Definitely either add the Super hold servo or ask Dana about the procedure to boost pressure on the 4th clutch.
 

kawaholic

Member
Sep 9, 2013
106
gmcman said:
Was that directed to me or the OP? For me I don't have a tune......yet. I would imagine your shifts are firm as mine are slightly firmer than stock but positive and I don't have any programming. don't know if it will damage anything, I know the sunshell is a weak link so it's a tough call. I like mine the way they are...not too harsh but quick.

You...my shifts are definitely firm...lol...hard on the gas puts you back in the seat with each shift. I don't mind it when I'm trying to get somewhere but it might be a little harsh just cruising around. I'll probably put the stock pcm back in and see how I like that.

This is what was in the kit...

Seal retainer
Late design seal
13-vane rotor with vanes, slide, rotor guide & pin assembly
Trans-Go steel rings & priming spring (under 5,500 rpm WOT)
New replacement stator support with extra wide bushings installed

"Clutches, Steels And Pressure Plates"
4 Borg-Warner reverse/input clutches .078
4 Reverse/input "low drag" Turbulator steels .078
1 Reverse waved steel (eliminates the belleville spring that tears up the inside of the drum)
5 Borg-Warner forward clutches .070
5 Forward steels .090
2 Borg-Warner overrun clutches .078
2 Overrun steels .091
5 Borg-Warner low/reverse clutches .087
5 Low/reverse "low drag" Turbulator steels .068

8 Borg-Warner Hi-Energy 3-4 clutches .080
3 3-4 steels .060
5 3-4 Steels .076
1 3-4 top pressure plate .128
1 3-4 bottom apply pressure plate .225
1 3-4 snap ring .062

Borg Warner dual cage 29 element sprag.
GM "heat treated" sunshell
Borg-Warner low/reverse roller assembly (late design)
Trans-Go (Hi-Rev) replacement forward springs & 3-4 springs
Transtech paper & rubber (gasket) kit
Transmission filter (OEM)
Bushing kit with 3 teflon
Thrust washer kit
Sealing ring kit
HD Bearing kit
Borg-Warner Hi-Energy 2-4 band
Corvette servo
Trans-Go Heavy Duty Shift kit, with .500 boost valve & w/accumulation for nice part throttle shifts
Vamac 3 lip rear seal
New steel molded rubber pistons for overrun, forward & 3-4
New aluminum 4th & forward accumulator pistons
New aluminum "modified" 2nd accumulator piston for smoother part throttle shifts
New oem 4th accumulator pin
New 2nd & Forward "hardened" (RC52) accumulator pins
New TransGo PWM eliminator valve
 

Scott89TTA

Original poster
Member
Jul 30, 2013
11
No worries, post away guys...lots of good info, that's what this stuff is for :thumbsup:

I have the PCMforless tune, 50% torque management removed, stage II trans, and AirAid CAI...I did tell Dana that up front. He was more concerned about about me running taller 32" tires than the tune since it changes the final drive gear ratio and taking away a little power. Told him I wasn't interested in changing gears and the power loss wasn't enough for me to be concerned about. I told him I just wanted the sloppy shifts corrected (have 120K on TB) and firmed up to some nice crisp shifts. So we will see how it all works together.
 

Scott89TTA

Original poster
Member
Jul 30, 2013
11
gmcman said:
Need some pics of the Turbo Trans Am... is this the pace car?.............:salivate:

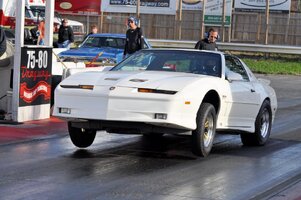
Yes...1989 20th Anniversary Trans Am / Indy Pace Car # 1376 of 1555, 55K miles, 3.8L Turbo V6 basically same engine as Buick Grand National with different heads and GNX inter cooler.
 

Attachments

  • Traans Am Wheels Up no tag.jpg
    Traans Am Wheels Up no tag.jpg
    96.5 KB · Views: 6

kawaholic

Member
Sep 9, 2013
106
Scott89TTA said:
No worries, post away guys...lots of good info, that's what this stuff is for :thumbsup:

I have the PCMforless tune, 50% torque management removed, stage II trans, and AirAid CAI...I did tell Dana that up front. He was more concerned about about me running taller 32" tires than the tune since it changes the final drive gear ratio and taking away a little power. Told him I wasn't interested in changing gears and the power loss wasn't enough for me to be concerned about. I told him I just wanted the sloppy shifts corrected (have 120K on TB) and firmed up to some nice crisp shifts. So we will see how it all works together.

I THINK I have the same tune + the e-fan patch. It's been a while, so I can't remember exactly. He was concerned about my tire size too and I only went from 245/65/17 to 245/70/17. He recommended not going any taller without changing gearing.

When I was trying to explain to him about "firming up" the shift points with the tune I got, he wasn't sure how they were doing it and I had no answers for him because I didn't know either.

I'm sure you'll be happy with what he puts together for you.

I guess I just need to put my old pcm back in and see which shift points I like better. I've talked to pcm of nc and they said they'd return my trans tune to stock setting for free, if I wanted to do it. All I'd have to pay is shipping. That's pretty awesome service being that I got the tune about 2.5 years ago. :cool:
 

tmm217

Member
Oct 18, 2012
44
Has anyone had the servo cover crack the casing something like this:
images


What would cause this? Found this about 500 miles after I did shift kit with corvette servo. I lost 4th and this is where I started also found 4th piston nylon seal folded over and servo pin was tight in casing.
 

kawaholic

Member
Sep 9, 2013
106
:eek: THAT'S not good...Just speculating here, MAYBE the pin was holding the band too tight on the drum (that band needs to be fairly loose on the drum and it's adjusted by the length of the pin), which put lateral pressure on the pin, bending the pin and cracking the case like that? IDK... Were you able to get the pin out?

Sorry man, that SUCKS!!!
 

Sparky

Member
Dec 4, 2011
12,927
Holy crap I've never seen that happen.
 

tmm217

Member
Oct 18, 2012
44
kawaholic said:
:eek: THAT'S not good...Just speculating here, MAYBE the pin was holding the band too tight on the drum (that band needs to be fairly loose on the drum and it's adjusted by the length of the pin), which put lateral pressure on the pin, bending the pin and cracking the case like that? IDK... Were you able to get the pin out?

Sorry man, that SUCKS!!!

The pin was not to tight when I originally installed it and didnt use the gold spacer. If anything it was too lose. I did get the pin out and now its back in with gold spacer. Pin was n ot bent by the looks of it. I'm just wondering if the 4th piston leaking put this much pressure on cover to crack it..
 

kawaholic

Member
Sep 9, 2013
106
tmm217 said:
I'm just wondering if the 4th piston leaking put this much pressure on cover to crack it..

This crossed my mind too. I wouldn't think so but I've really got no idea... Just looked at the instructions that came with mine. Did you put the tall knob of the piston towards the cover?

Not sure if this would have anything to do with it or not. My kit had me grind four oil exit notches on the steel cover for the second piston, did you do this too?

You should post this up on Dana's forum and see what he thinks happened.

700r4l60e.com - Index page

It might take a day or two if you aren't already registered over there. First your registration has to be approved, then your post needs to be approved before it'll show up on the board. At least that's how it worked for me. After a few posts I'm now able to post to the board without having to wait.

I guess I could just post it over there for you to get a quicker response. I'd really like to know what could've caused this.
 

kawaholic

Member
Sep 9, 2013
106
Dana's response,

In most cases this is caused from the snap ring not being fully seated in the snap ring groove. The groove must be perfectly clean when installing the snap ring. The snap ring itself must be in good shape (not bent anywhere) and no high spots on the snap ring. In very rare instances the case will have a void in the aluminum casting that will show up when the pressure goes up from installing larger boost valves and or installing a larger apply servo such as the Corvette, Sonnax or Superior.
 

tmm217

Member
Oct 18, 2012
44
Thanks I saw that. I wonder why the directions dont put any emphasis on this snap ring install. Im wondering if it is too much pressure with the corvette servo but if I go with factory servo Im not sure if Ill need to replace the transgo sep. plate since I drilled for the corvette servo which was # 993 i believe and my fact. servo is #553. Two different size holes for plate. Im scared to drive now with the corvette servo but im also wondering if ring wasnt fully seated in groove. If it cracks anymore Im in for some deep s*** with this trans.
 

Sparky

Member
Dec 4, 2011
12,927
Mine has the corvette servo in it and no cracks. I wouldn't think the servo would be the culprit.
 

Sparky

Member
Dec 4, 2011
12,927
I don't remember. That was nearly 3 years ago now.
 

tmm217

Member
Oct 18, 2012
44
Well im wondering now if open ends should be in groove or should they be in the opening of the cracked off piece now. I have driven a few miles now with ring engs in opening but not sure which way they should be. Im hoping I can get away with what little piece has broken off.
 

kawaholic

Member
Sep 9, 2013
106
tmm217 said:
Thanks I saw that. I wonder why the directions dont put any emphasis on this snap ring install. Im wondering if it is too much pressure with the corvette servo but if I go with factory servo Im not sure if Ill need to replace the transgo sep. plate since I drilled for the corvette servo which was # 993 i believe and my fact. servo is #553. Two different size holes for plate. Im scared to drive now with the corvette servo but im also wondering if ring wasnt fully seated in groove. If it cracks anymore Im in for some deep s*** with this trans.

I hear ya. I'd be scared to drive it too!!! LOL I thought you were already in some deep s***. I was surprised you were able to get it back together and it's working without leaking.

IDK what to tell you about the drilled out plate. I'd offer you my old one but some of the holes are hammered from the check balls.

I can't see where the orientation of the snap ring would matter as long as it's fully seated. I remember the first time I put mine in, I THOUGHT it was fully seated but it wasn't (had it in and out two or three times while I was checking the band clearance). I was impressed with the fight that thing was giving me. I did mine while the trans was removed, I can't even imagine trying to do it under the truck, not a whole lot of room there.
IIRC, the two ends on mine were around 7 or 8 o'clock with the trans on its back, so 1 or 2 o'clock with it right side up.
 

kawaholic

Member
Sep 9, 2013
106
tmm217 said:
Well im wondering now if open ends should be in groove or should they be in the opening of the cracked off piece now. I have driven a few miles now with ring engs in opening but not sure which way they should be. Im hoping I can get away with what little piece has broken off.

So, yours isn't as bad as the one in the pic you posted? It sounds like you're just missing a chunk of the housing somewhere. I still don't think it matters but I guess I could go along with the notion that it MIGHT be less stress on the housing if the ring was spanning the missing piece.
 

tmm217

Member
Oct 18, 2012
44
I just read today on "s10forum" that the ends should be placed in the 1030 position and stay away from the 3 and 6 position with the ends. So yeah I would say that would be right kawaholic.
 

tmm217

Member
Oct 18, 2012
44
Kawaholic could you do me a huge favor and ask Dana what I should do with the ring with the case being partially broke off. I think its the part between the 2 original cut outs so as it is now theres just one opening in the full circle, if that makes sense to you.
 

kawaholic

Member
Sep 9, 2013
106
Will do. Can you post up a pic of yours for me to include with my post? I think that would help out a lot here...
 

tmm217

Member
Oct 18, 2012
44
will do. I wont be able to get a pic until later tonight when I get home. Itll be some time after a 11 if thats ok. I really appreciate all your help in my problem.
 

Forum Statistics

Threads
23,821
Posts
643,804
Members
19,589
Latest member
sc repair

Members Online