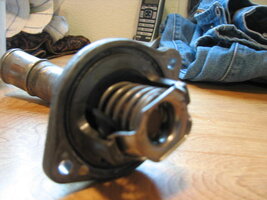
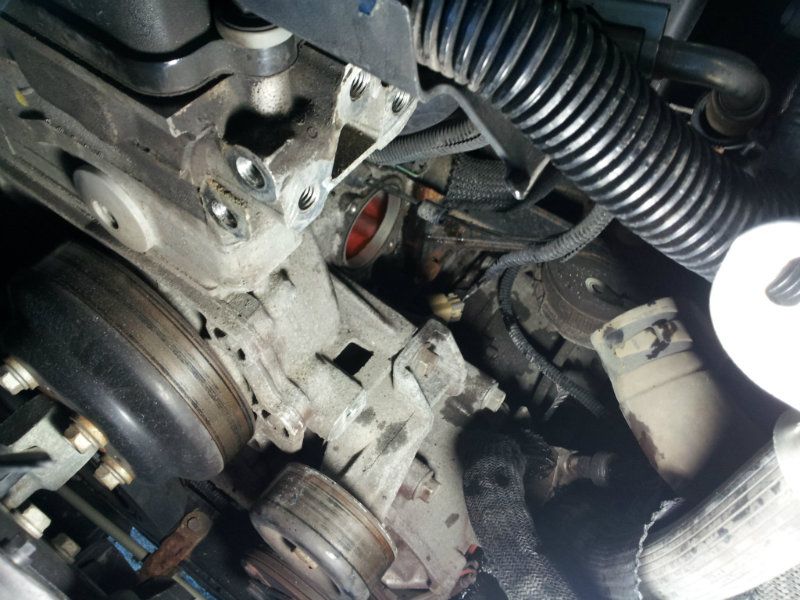
If the How To for replacing the thermostat is on here, I didn't find it. Got the pictures off another site. Those that replace the thermostat by only going thru the inner fender, more power to you! I removed the battery, battery tray(removed the horns so I could get to front side bolts), alternator and bracket above it. I also loosened the fan clutch and backed it off a few threads to get more room for my big hands. I am seriously considering leaving the top bar holding the battery in place off next time I remove it. Started at 2pm and finished at 8:30pm. Only one trip to the parts store. Bought a 18mm deep well socket and slotted the side to make a tool to R&R the coolant temperature sensor. Found the thermostat with a common problem of the rubber gasket up into the spring. Dropped one of the 10mm bolts behind the A/C compressor. Took about an hour to get it. Easy job, just a lot of crap to remove to get enough room and access to the parts to replace.
New thermostat was running just shy of 210. Will see how it does in the next few days. No puddle on the floor this morning so I am calling it good.
New thermostat was running just shy of 210. Will see how it does in the next few days. No puddle on the floor this morning so I am calling it good.


 The last one I did was 45min start to finish, and I only used air on 1 bolt (the burried one on the lift bracket). I tried the 1/4 inch by 3 foot extension in the wheel well and found my big claws won't fit in that opening. So I don't put em there. Also I have found the same method works on the 4's and 5's also. So after doing about 50 of them it easy to do.
