- Nov 21, 2011
- 2,405
How to repair sunroof.
Vehicle used for documentary: 2003 Chevy Trailblazer LT (other vehicles may have slight difference's)
Symptoms:
loud snap or bang while opening or closing sunroof
unable to close or open sun roof
How to prevent:
clean and grease track regularly, grease that came with repair kit looked like axle grease
Parts needed:
ordered repair kit from The Sunroof Doctor at time of writing cost is $119.00 (no part number must search by vehicle)

copyright stock image from www.sunroofdoctor.com of said repair kit
Tools needed:
Socket set
Torx set
Pliers
Flat head screwdriver
Rivet Gun
Towels
A friend is recommended for some parts
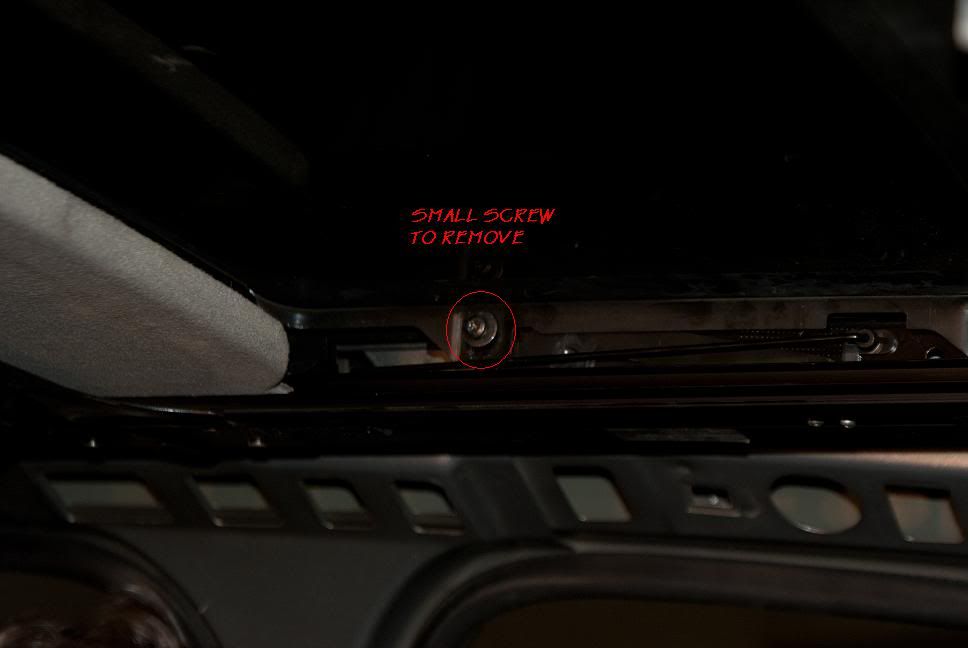
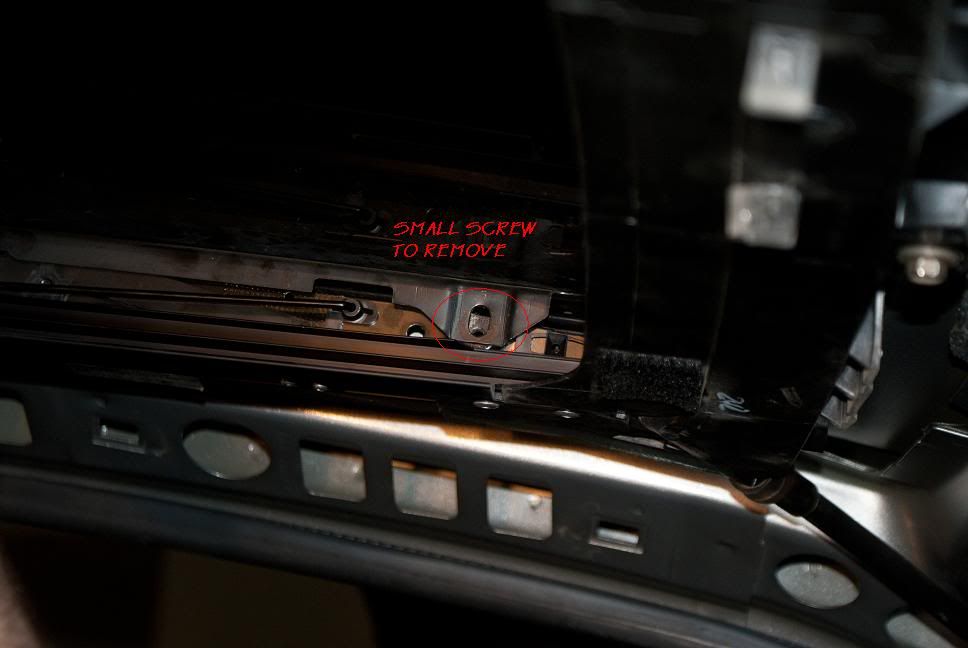
OPTIONAL STEPStep 0: Remove glass
I found it easier to take the assembly in and out with the glass removed.
To remove glass: 2 small torx screws on each side of sun roof opening from inside of vehicle. Picture is of driver side screws.
Step 1: Drop head liner processes vary vehicle to vehicle
To drop the head liner, following items need to be removed:
A pillar
B pillar
c & D pillar
Coat hanger hooks in trunk roof
Trunk light cover
2 plastic pull clip next to trunk light
4 over door grab handles and light covers
2 sun visors (was a huge pain for me)
Center roof console
After all that is removed the head liner can come down. It is attached to roof with velcro in some areas. the head liner MUST come straight down and sit on top of the seats. There are electrical wires hot glued to the roof liner with no disconnects. So pulling the head liner out all together would require alot more work.
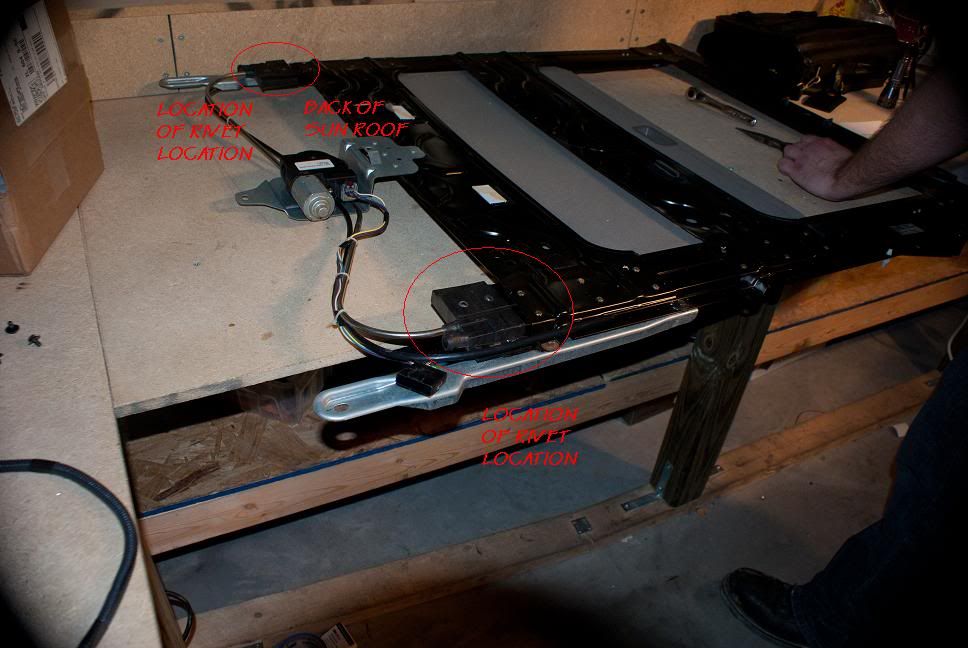
Step 2: Removing Sun roof assembly
This is when the extra hands come into play. As its a bulky item trying to carry out over the head liner. From front to back in the photos.
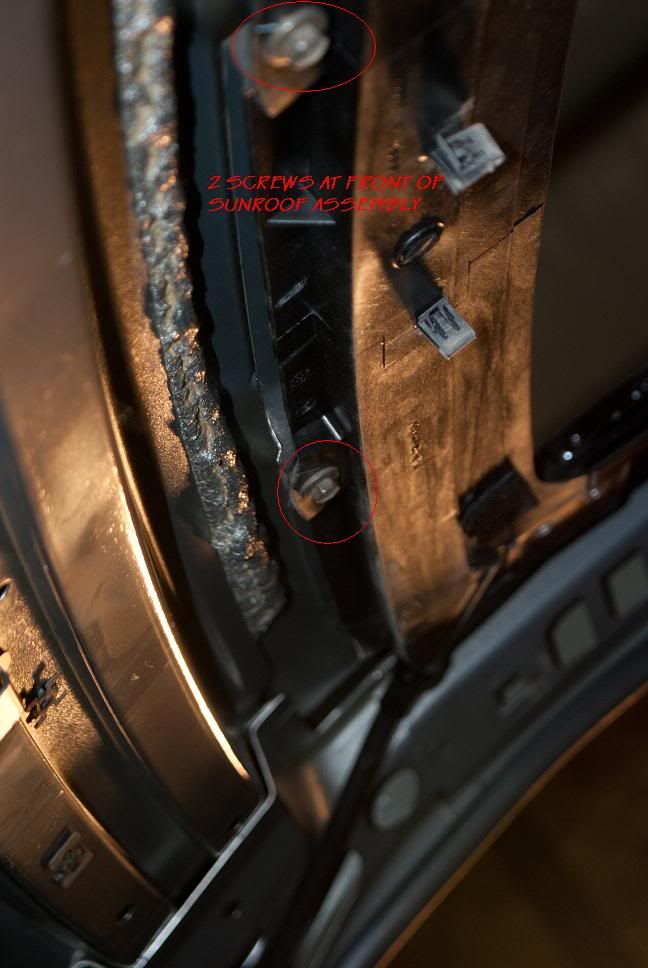
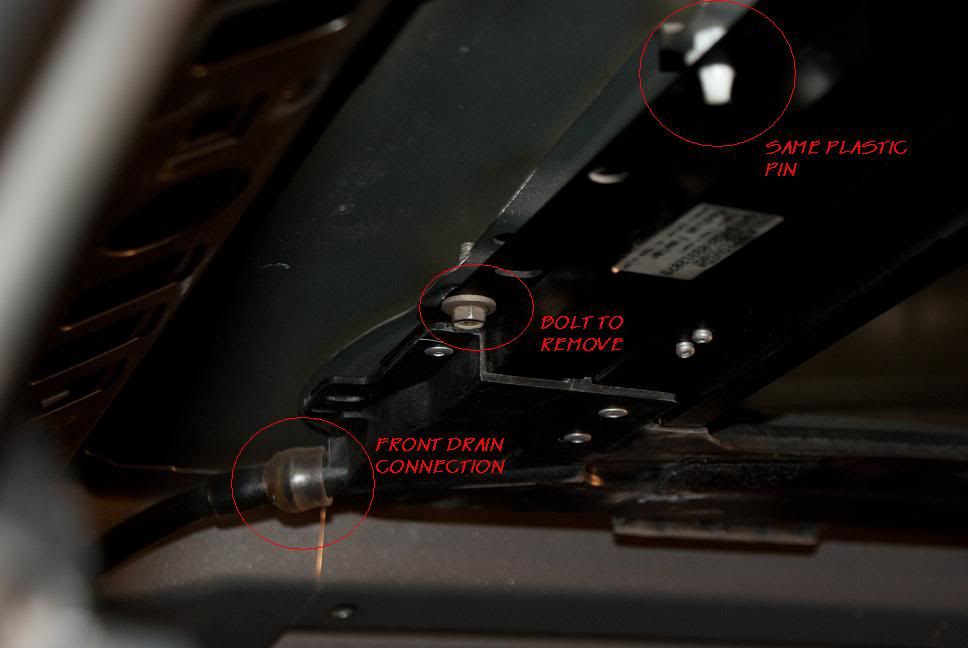
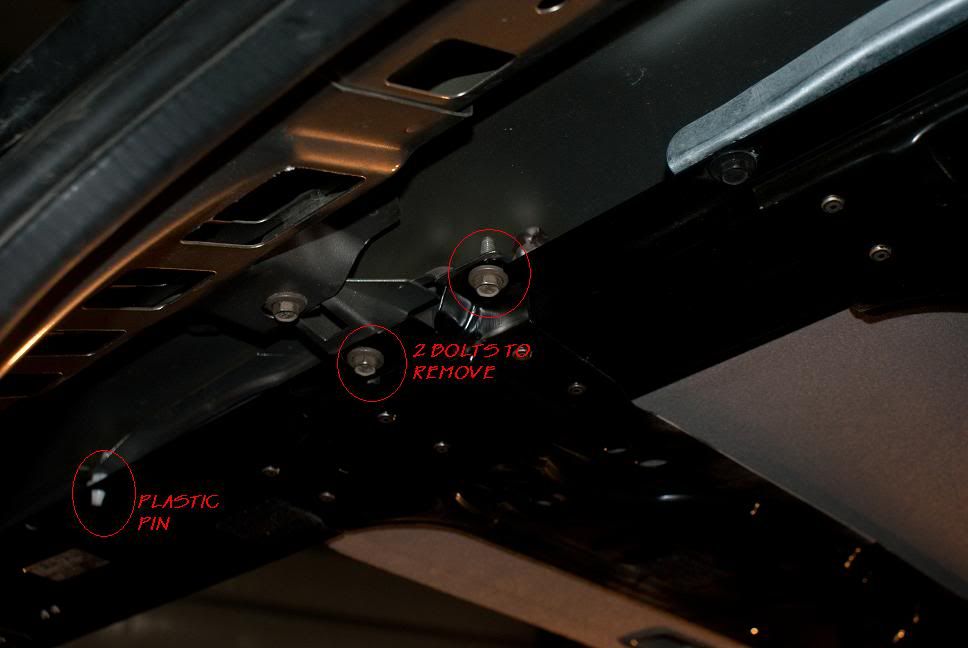
2 small bolts at front of sun roof near winshield
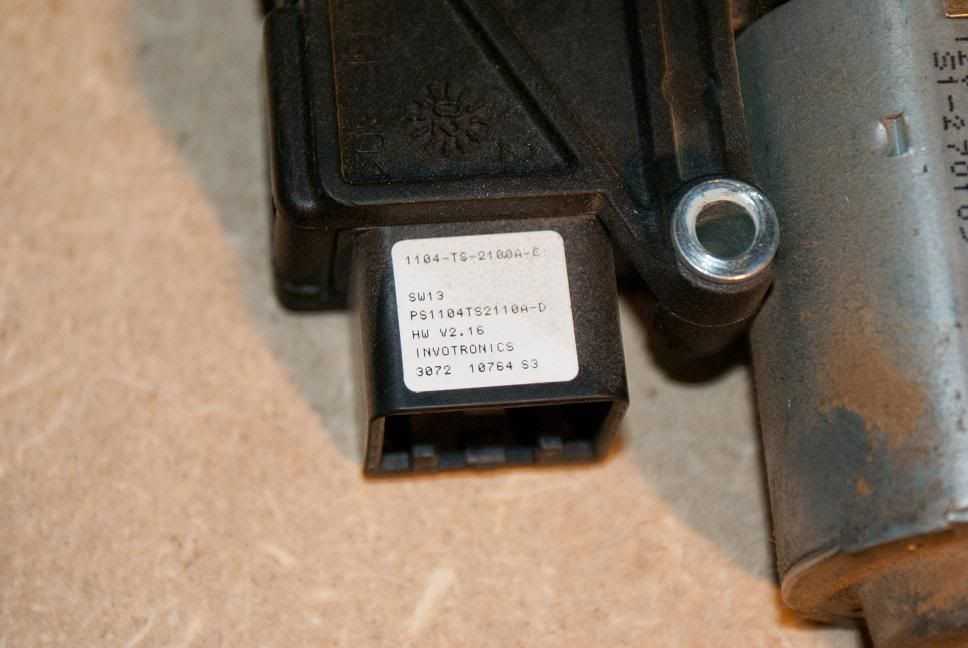
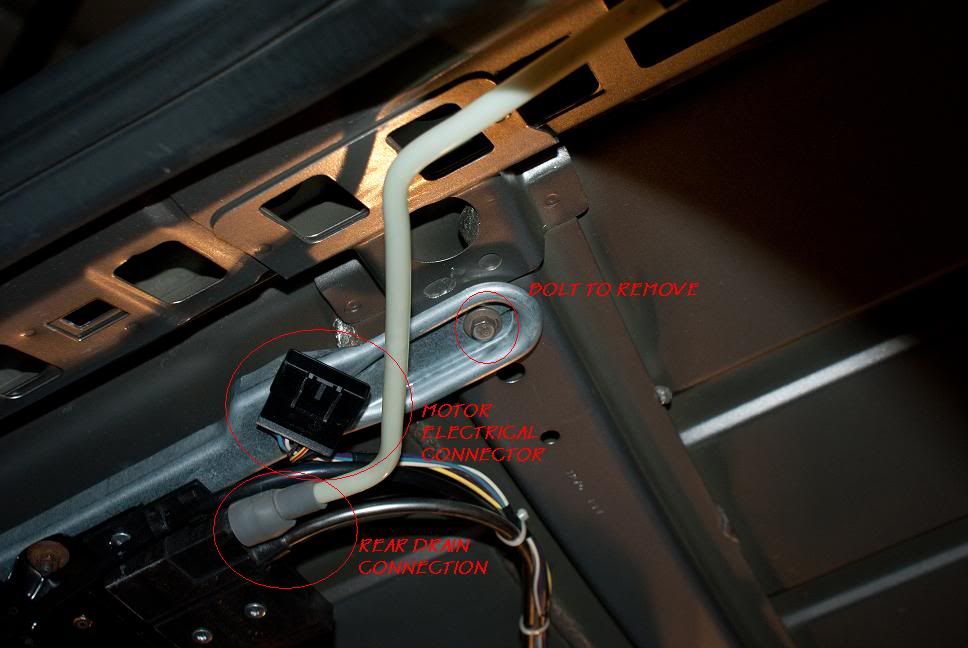
Disconnect plug to electrical motor as shown in 3rd picture below. It is located at the rear of the assembly.
There are 2 drains per side to disconnect. 1 in front and 1 in back, they just pull off, no mechanical fasteners.
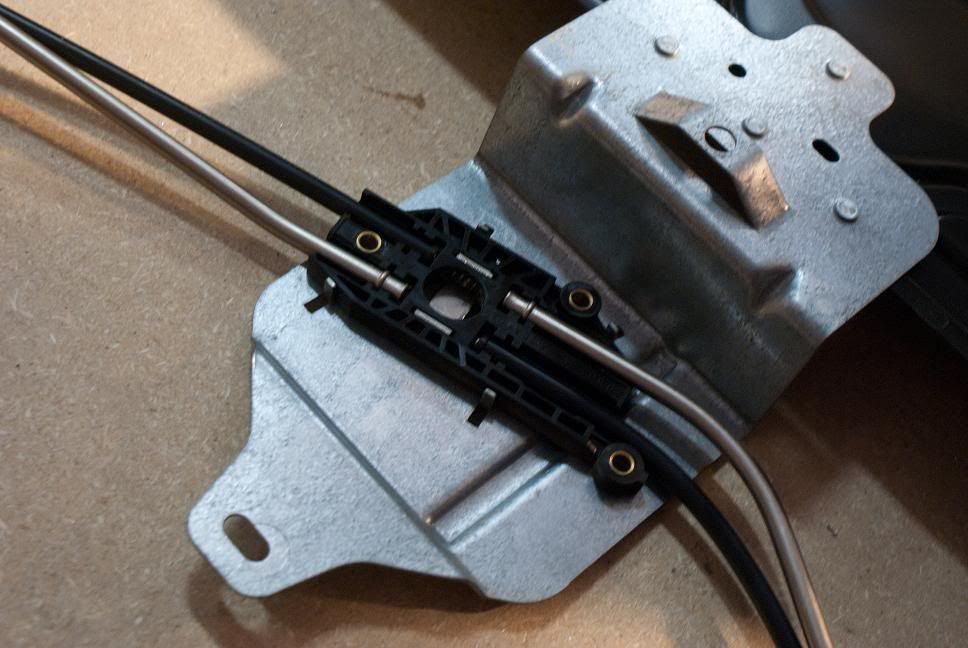
Remember how the plastic pin is positioned, as i found this helpful for re-aligning the frame when ready to install back in.
There are 4 bolts on each side as circled below that need to be removed.
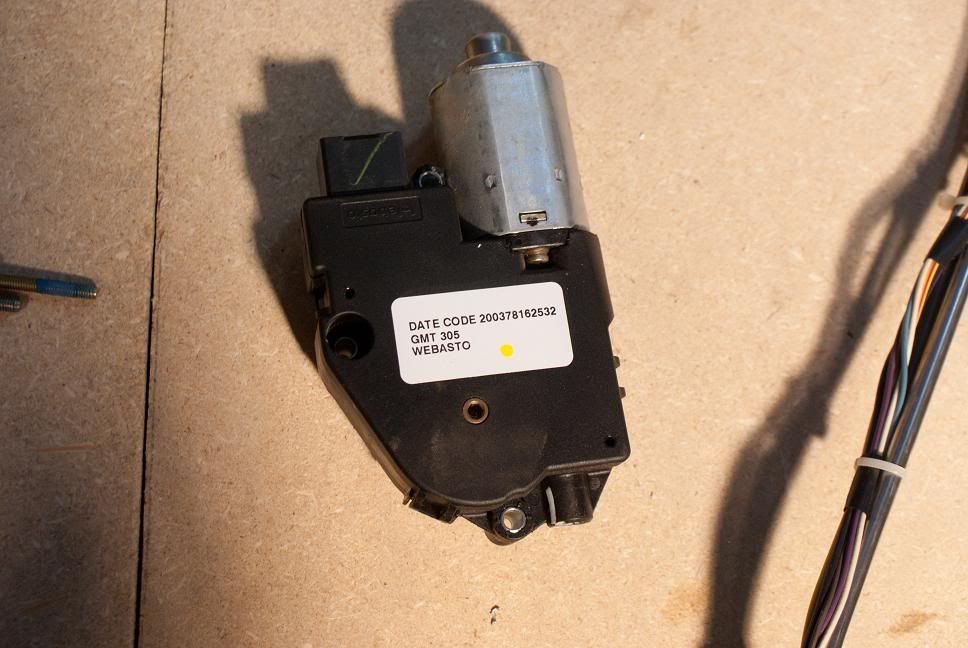
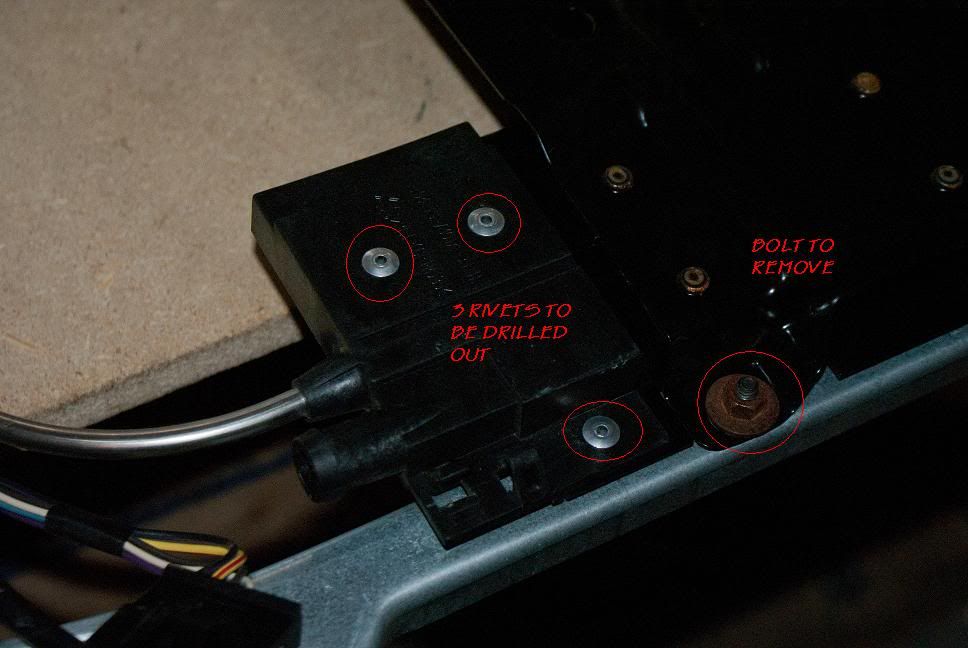
Step 3: Dis-assembly of motor
The motor needs to be removed in order to complete repair.
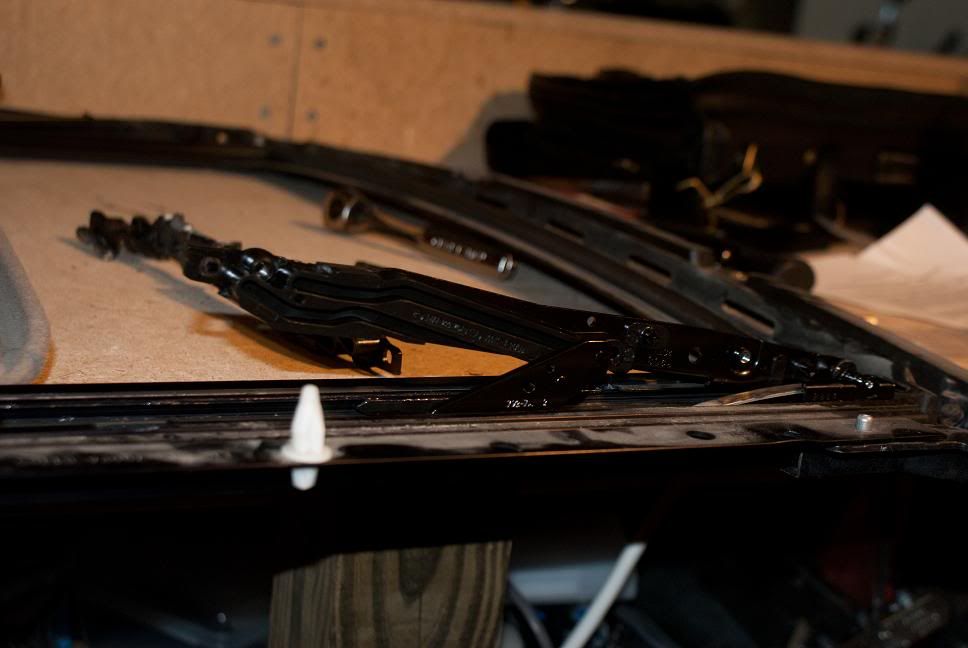
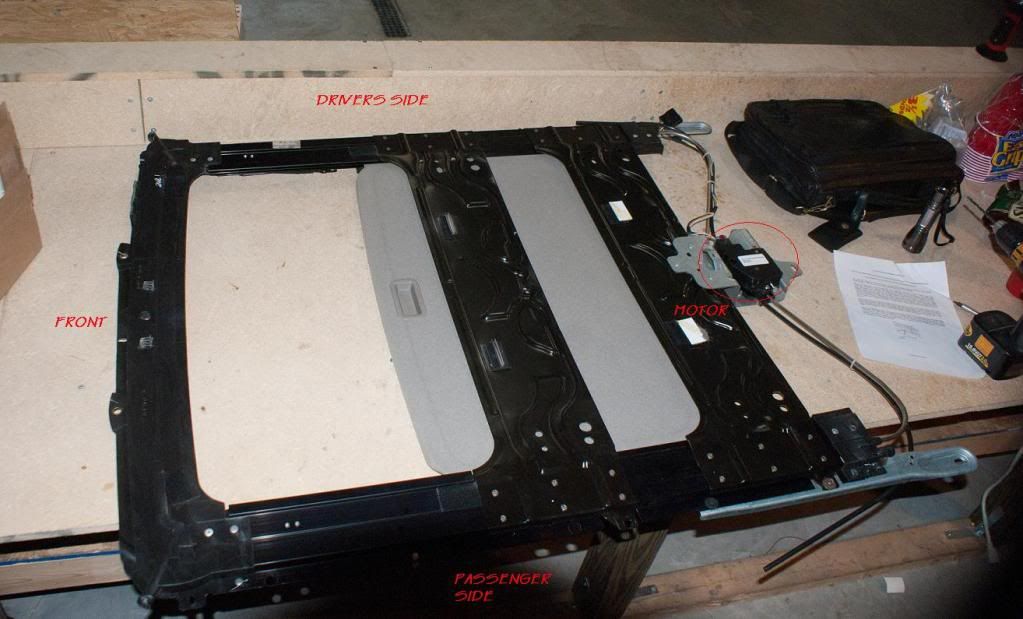
Assembly on table. Unit is upside in picture.
As with any project, do one side at a time.
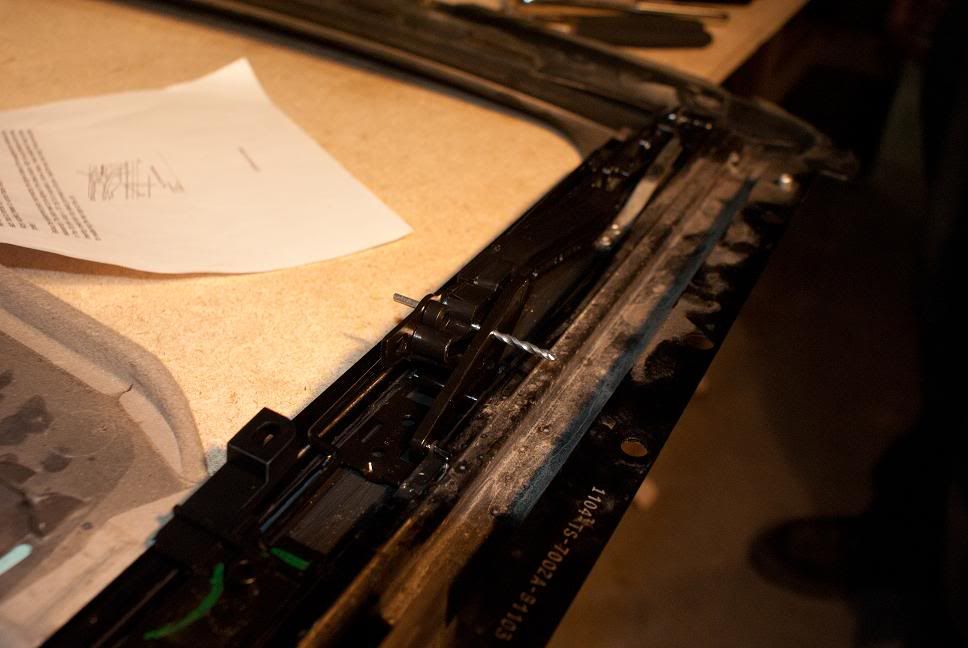
First part is to remove the bolt circled near the rivets. With that bolt removed the galvanized channel can swing out of your way.
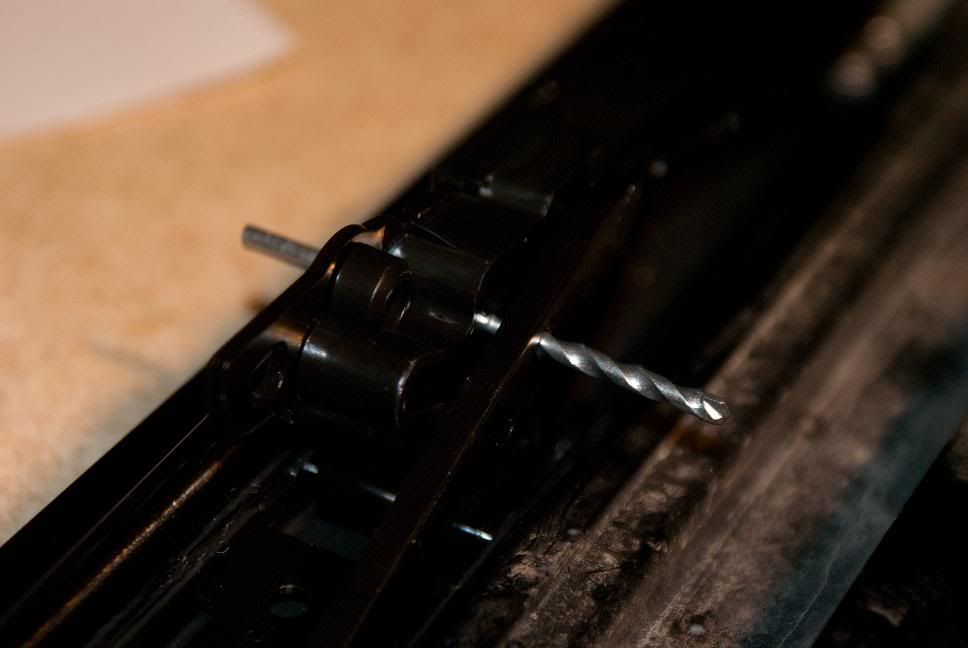
Second Part is to remove 3 rivets located at rear of assembly. They need to be drilled out. Drill size is specified in directions that come with repair kit.
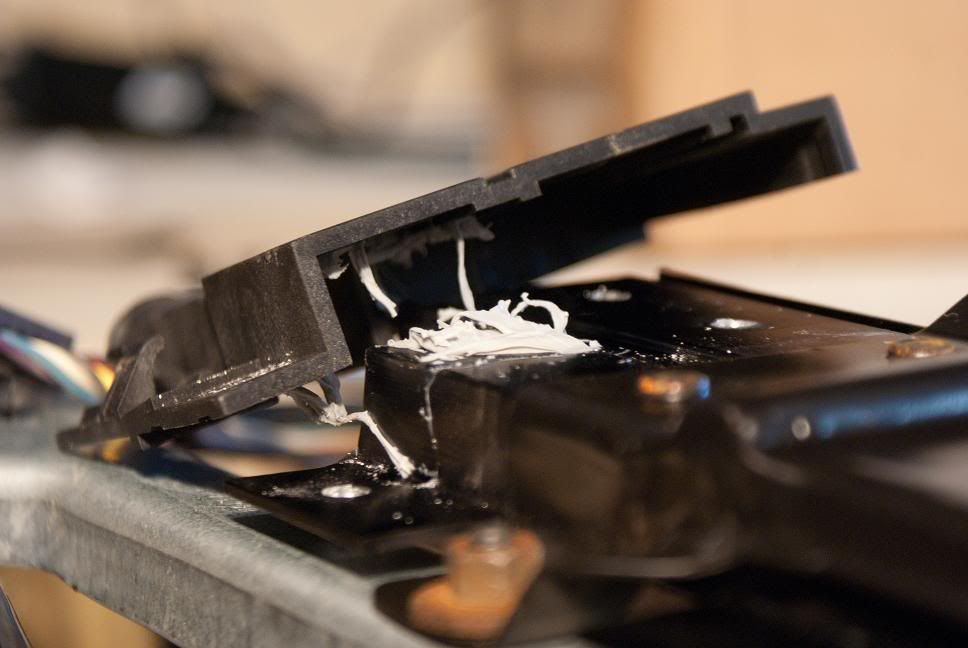
With rivets removed, carefully release the plastic cover that was attached with the rivets. There is some caulk? material holding it down. Again be careful as to not damage this part.
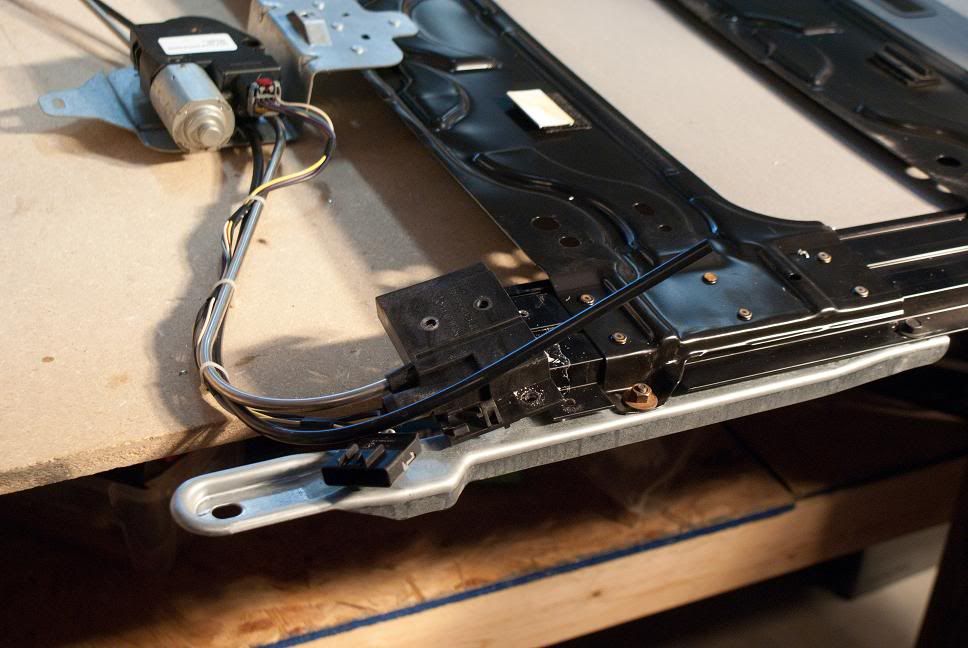
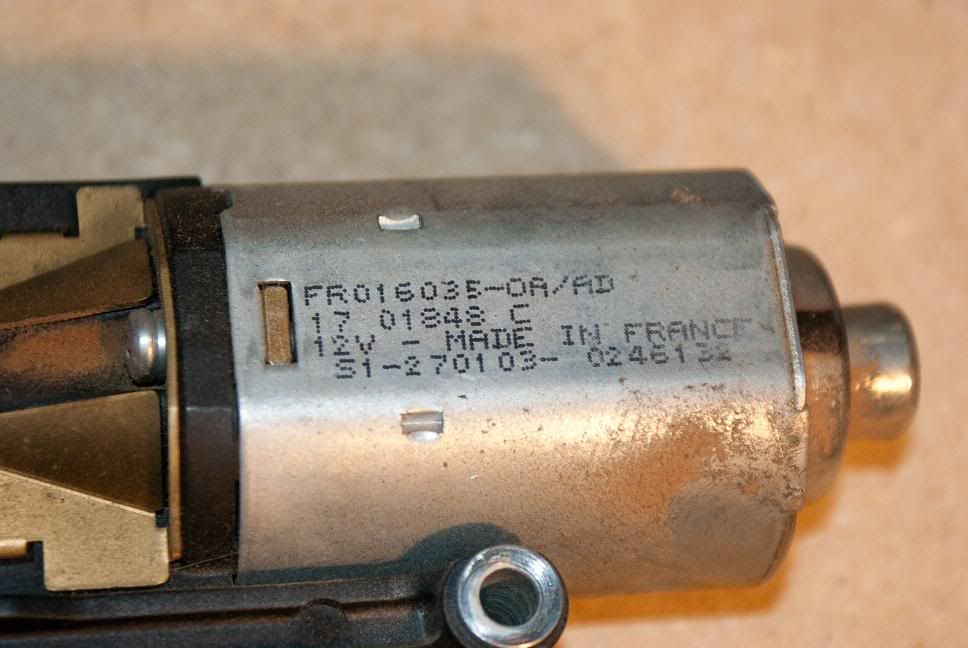
Third part is to remove the motor. 3 torx screws hold it on.

With motor removed.
Step 4: Removing damaged parts
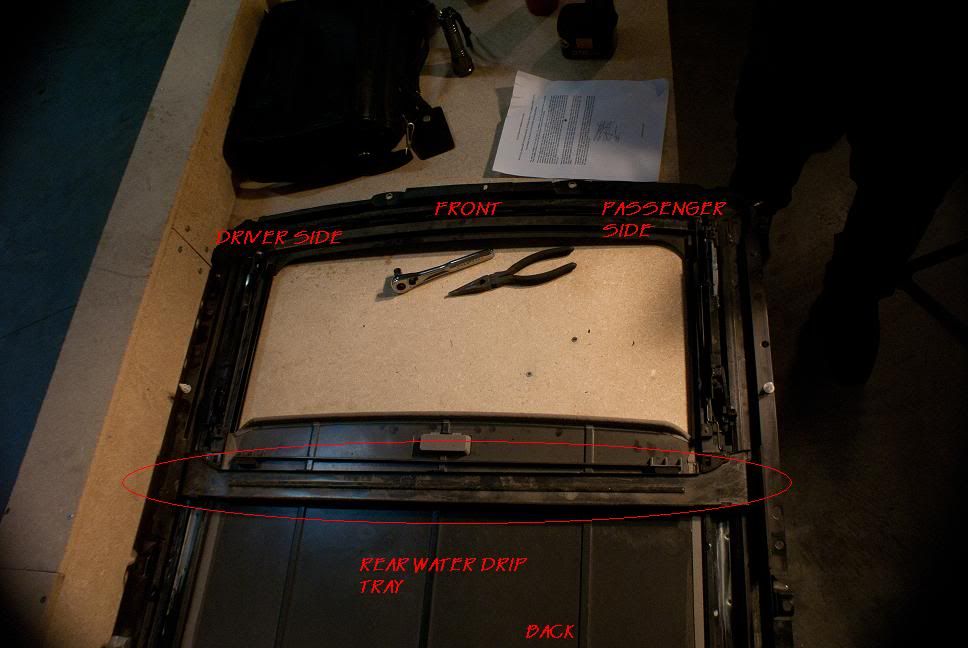
The unit will need to be flipped over. Now the rear drip tray needs to be removed. I believe there is 1 screw on each side to remove it.
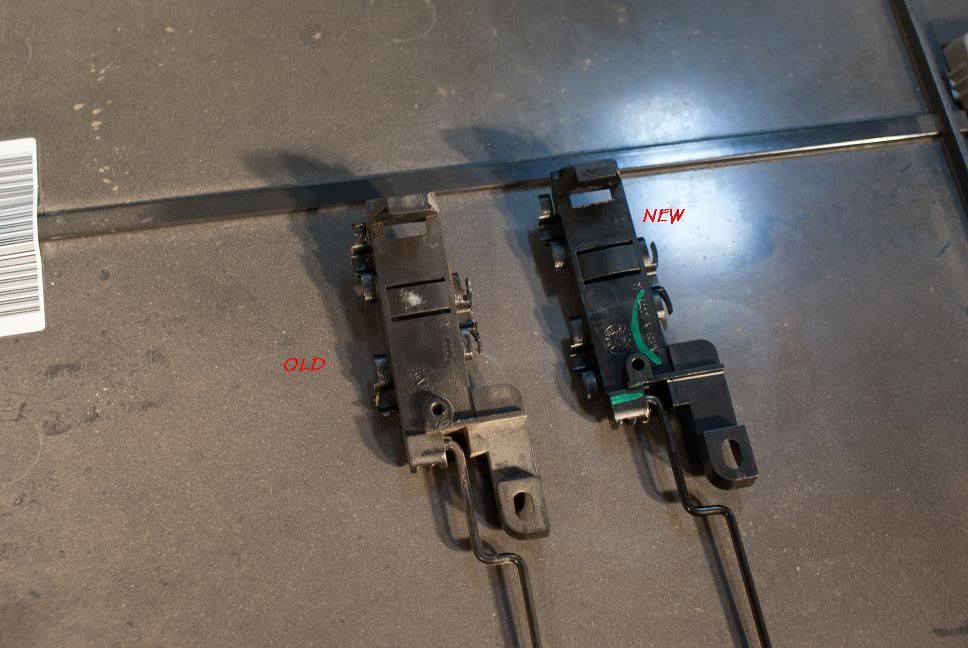
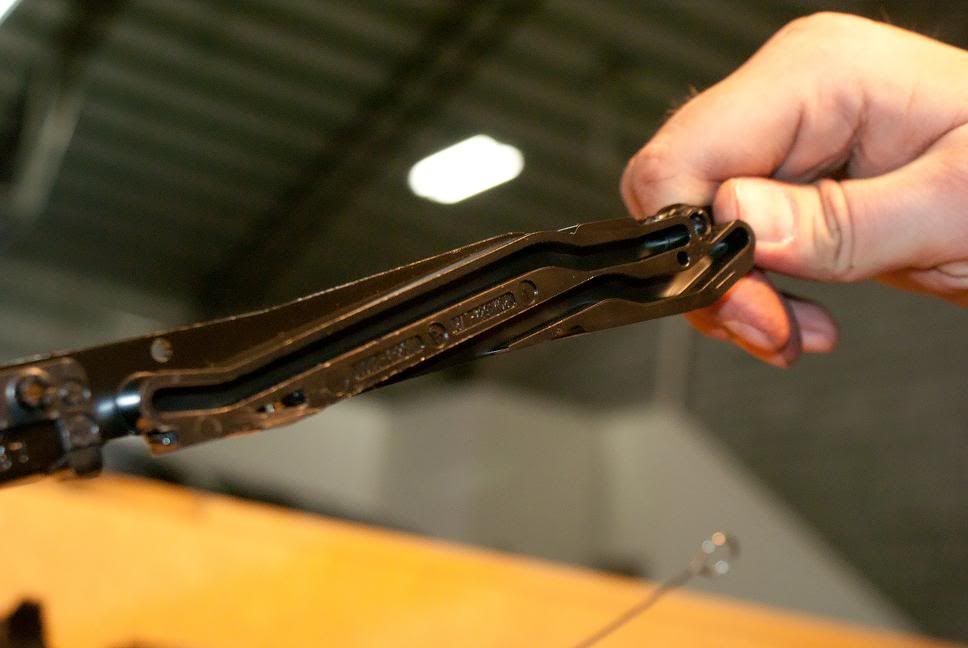
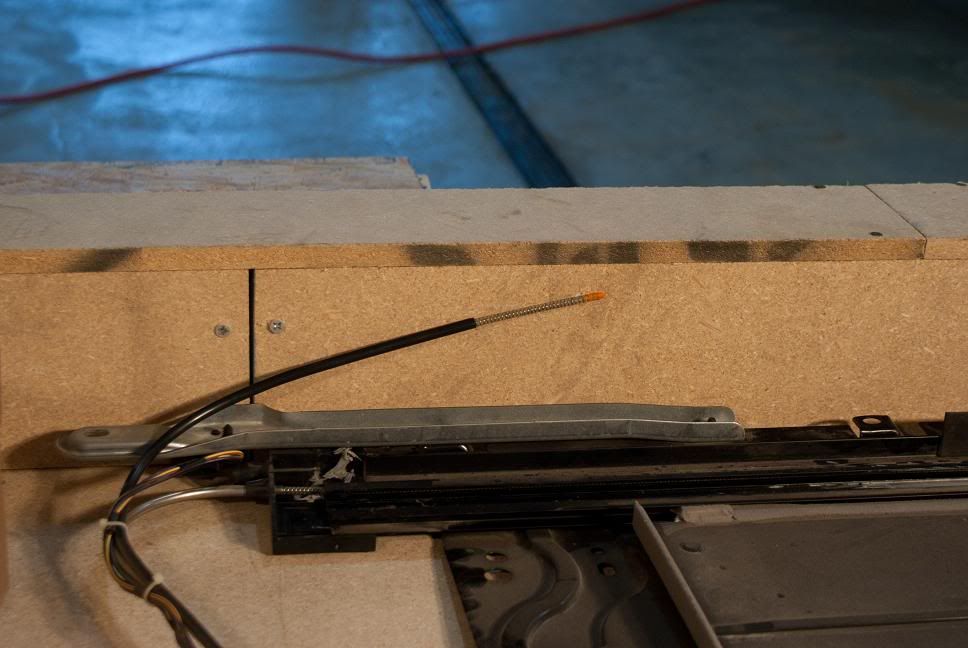
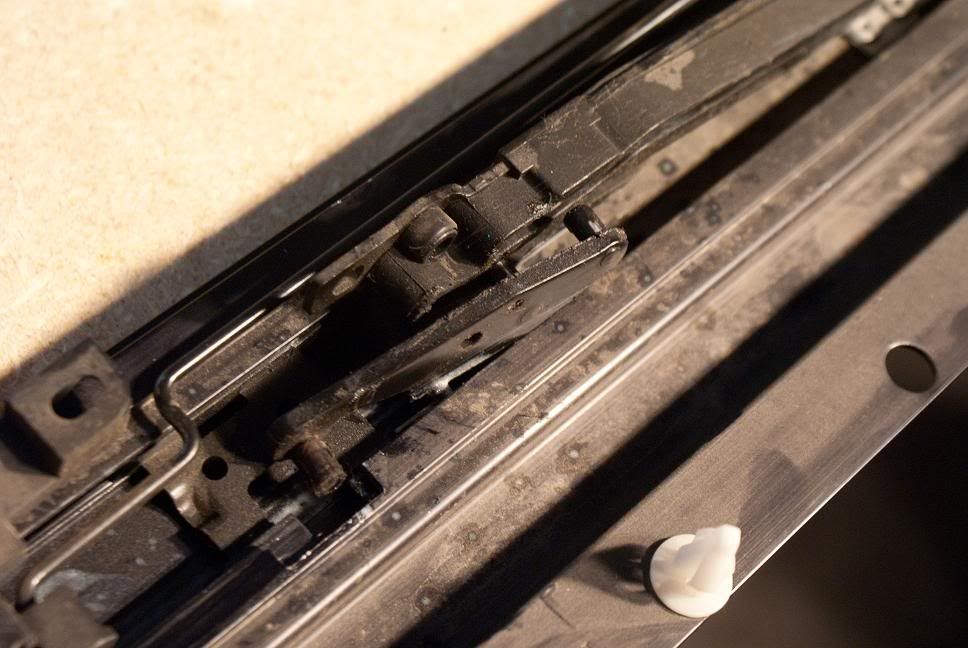
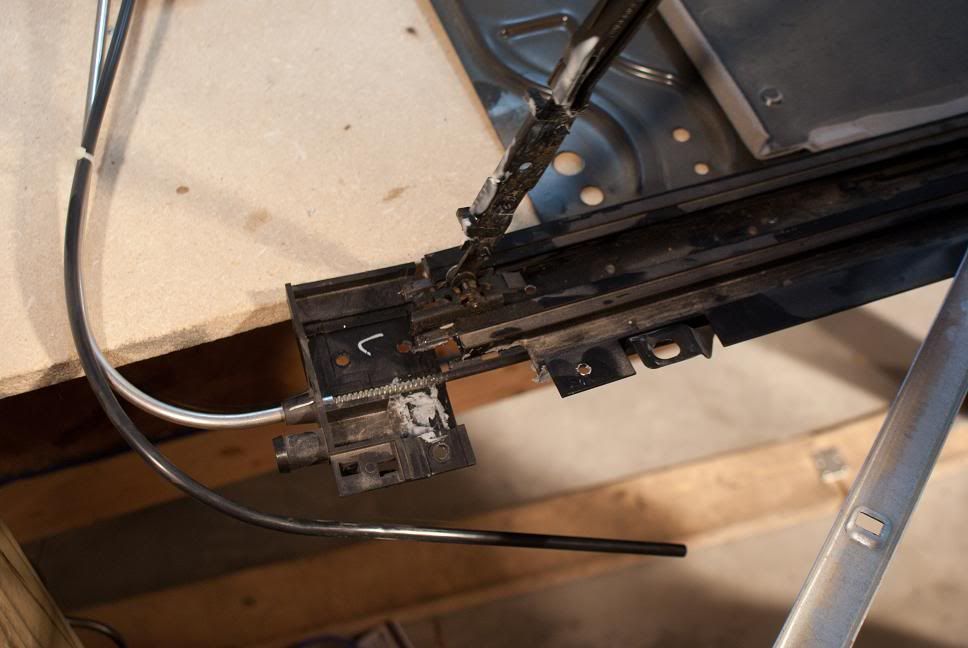
Next part is to remove the traveler (pictured below). It will be easier to remove with the motor no long attached.
As you pull the traveler out you will see this coming out of a black tube on the other side. Do not be alarmed, it is just the extra cable from the traveler.
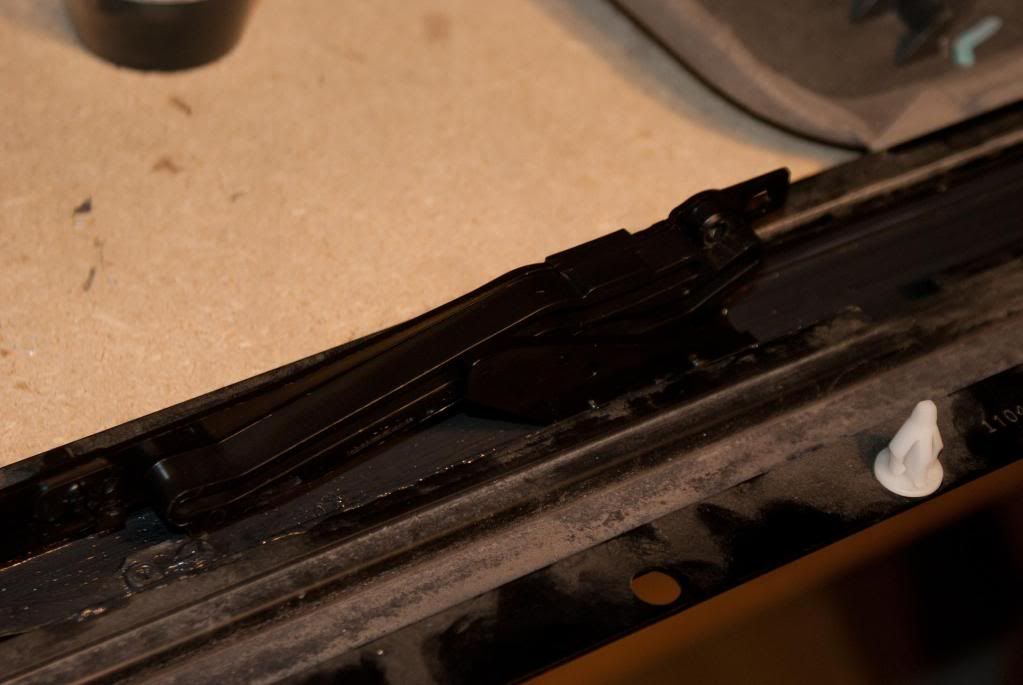
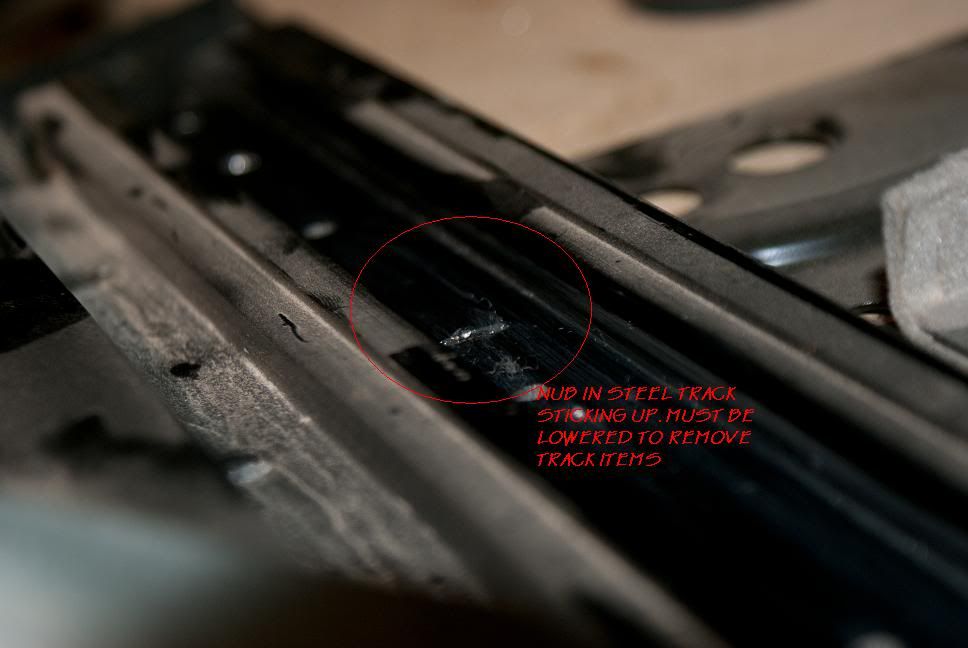
In order to get that parts off you will need to push down a little nub in the track designed to stop the parts. I used a hammer and a screw driver to push it down enough to slide the parts over. YOU MIGHT NEED TO DO THIS STEP BEFORE PULLING OUT THE TRAVELER I dont remember
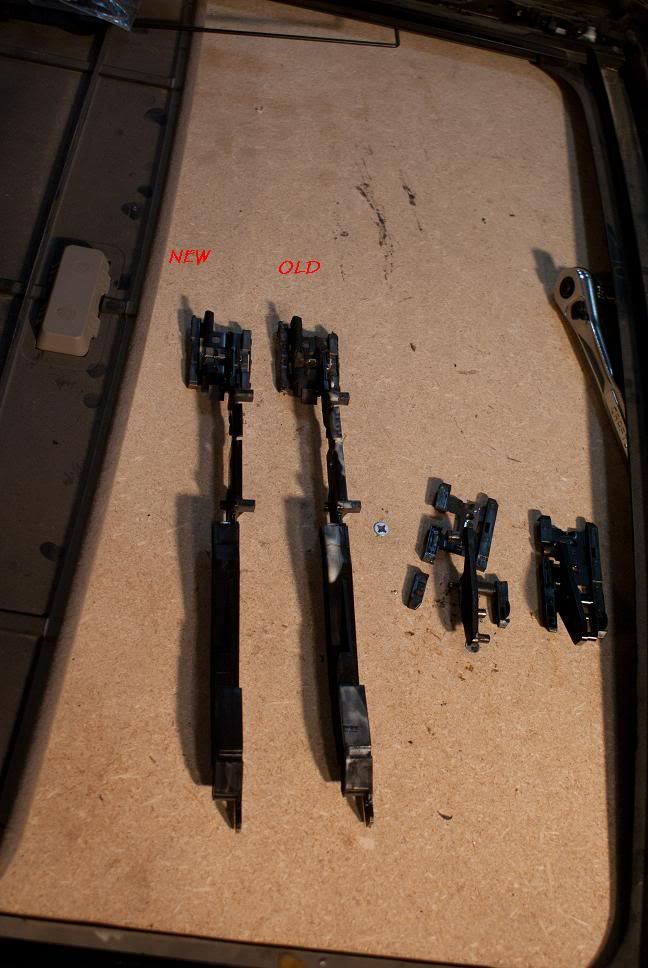
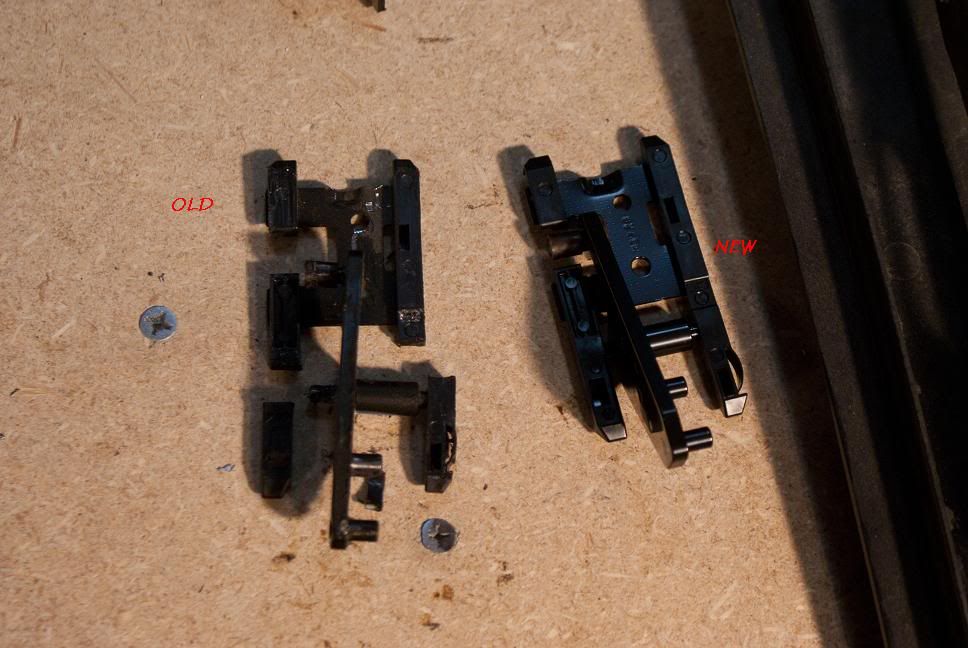
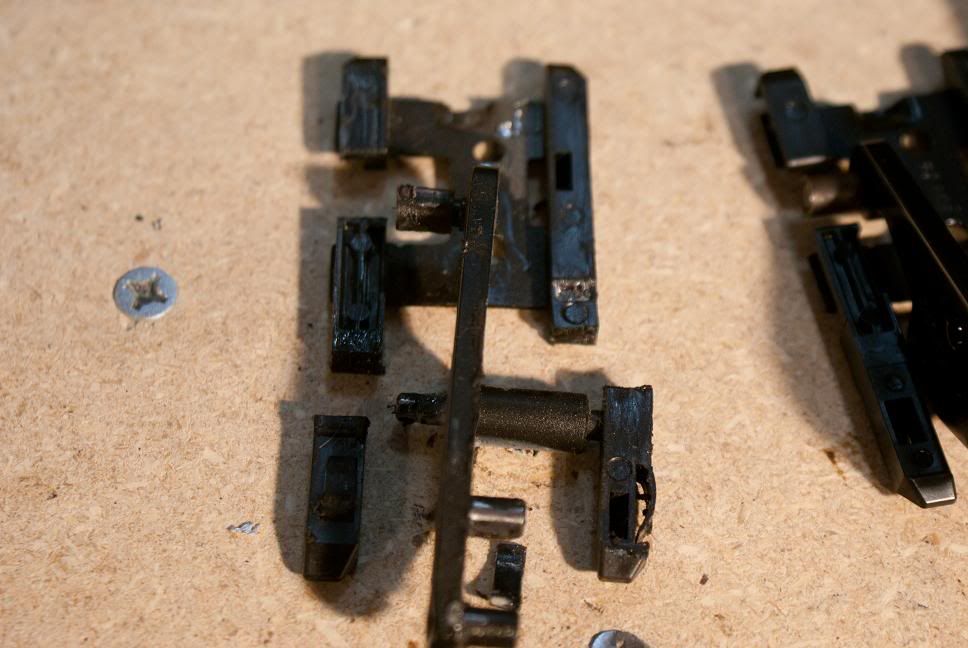
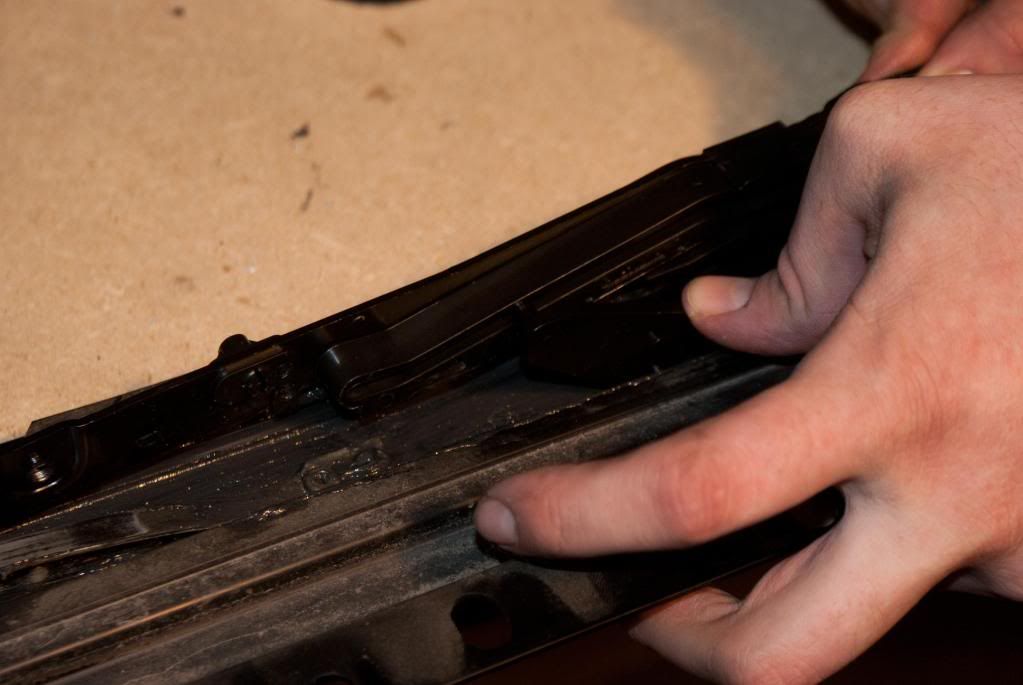
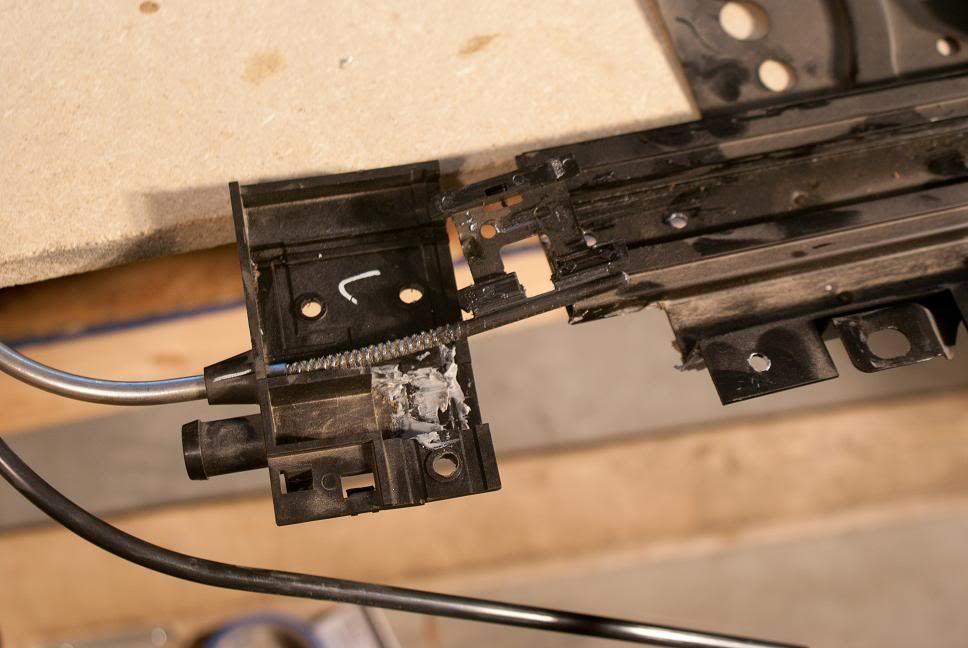
Now for the damaged parts. BEFORE OR AS YOU PULL THEM OUT REMEMBER HOW IT GOES AND MATCH IT TO THE NEW PART TO INSURE IT GOES BACK TOGETHER RIGHT The pictures here cant show you perfectly how it goes.
But here is what i saw on my passenger side. Clearly damaged.
Slide the parts off once your sure of how it goes together.
Vehicle used for documentary: 2003 Chevy Trailblazer LT (other vehicles may have slight difference's)
Symptoms:
loud snap or bang while opening or closing sunroof
unable to close or open sun roof
How to prevent:
clean and grease track regularly, grease that came with repair kit looked like axle grease
Parts needed:
ordered repair kit from The Sunroof Doctor at time of writing cost is $119.00 (no part number must search by vehicle)
copyright stock image from www.sunroofdoctor.com of said repair kit
Tools needed:
Socket set
Torx set
Pliers
Flat head screwdriver
Rivet Gun
Towels
A friend is recommended for some parts
OPTIONAL STEPStep 0: Remove glass
I found it easier to take the assembly in and out with the glass removed.
To remove glass: 2 small torx screws on each side of sun roof opening from inside of vehicle. Picture is of driver side screws.
Step 1: Drop head liner processes vary vehicle to vehicle
To drop the head liner, following items need to be removed:
A pillar
B pillar
c & D pillar
Coat hanger hooks in trunk roof
Trunk light cover
2 plastic pull clip next to trunk light
4 over door grab handles and light covers
2 sun visors (was a huge pain for me)
Center roof console
After all that is removed the head liner can come down. It is attached to roof with velcro in some areas. the head liner MUST come straight down and sit on top of the seats. There are electrical wires hot glued to the roof liner with no disconnects. So pulling the head liner out all together would require alot more work.
Step 2: Removing Sun roof assembly
This is when the extra hands come into play. As its a bulky item trying to carry out over the head liner. From front to back in the photos.
2 small bolts at front of sun roof near winshield
Disconnect plug to electrical motor as shown in 3rd picture below. It is located at the rear of the assembly.
There are 2 drains per side to disconnect. 1 in front and 1 in back, they just pull off, no mechanical fasteners.
Remember how the plastic pin is positioned, as i found this helpful for re-aligning the frame when ready to install back in.
There are 4 bolts on each side as circled below that need to be removed.
Step 3: Dis-assembly of motor
The motor needs to be removed in order to complete repair.
Assembly on table. Unit is upside in picture.
As with any project, do one side at a time.
First part is to remove the bolt circled near the rivets. With that bolt removed the galvanized channel can swing out of your way.
Second Part is to remove 3 rivets located at rear of assembly. They need to be drilled out. Drill size is specified in directions that come with repair kit.
With rivets removed, carefully release the plastic cover that was attached with the rivets. There is some caulk? material holding it down. Again be careful as to not damage this part.
Third part is to remove the motor. 3 torx screws hold it on.
With motor removed.
Step 4: Removing damaged parts
The unit will need to be flipped over. Now the rear drip tray needs to be removed. I believe there is 1 screw on each side to remove it.
Next part is to remove the traveler (pictured below). It will be easier to remove with the motor no long attached.
As you pull the traveler out you will see this coming out of a black tube on the other side. Do not be alarmed, it is just the extra cable from the traveler.
In order to get that parts off you will need to push down a little nub in the track designed to stop the parts. I used a hammer and a screw driver to push it down enough to slide the parts over. YOU MIGHT NEED TO DO THIS STEP BEFORE PULLING OUT THE TRAVELER I dont remember
Now for the damaged parts. BEFORE OR AS YOU PULL THEM OUT REMEMBER HOW IT GOES AND MATCH IT TO THE NEW PART TO INSURE IT GOES BACK TOGETHER RIGHT The pictures here cant show you perfectly how it goes.
But here is what i saw on my passenger side. Clearly damaged.
Slide the parts off once your sure of how it goes together.