You are using an out of date browser. It may not display this or other websites correctly.
You should upgrade or use an alternative browser.
You should upgrade or use an alternative browser.
Hobby's S-15 Mini
- Thread starter Hobby
- Start date
Hobby
Member
- Joined
- Dec 11, 2011
- Posts
- 72
million-miles said:1. how much did you bring up the floor?
2. how big is the guy in the drivers seat?
3. Enjoy it while your young cause once you start getting older your body is not going to like the truck anymore
Well it was already dropped when I bought it. Im just trying to resurect it and bring it back to life. Plus add an insane stereo system

Was told it was a 4" drop, havent measured it but It looks about right. Mayo is about 6'2 ish I would have to guess. And I have shaved off all the seat hardware to get it as low as possible. Still more work being done to the seat when I get it upholstered.
To late for the young thing. Im 47 and cant wait to get in and rattle the shit out of my old fart body.

million-miles
Member
- Joined
- Jan 10, 2012
- Posts
- 189
Hobby
Member
- Joined
- Dec 11, 2011
- Posts
- 72
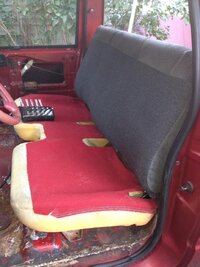
Found a deal on a 2nd gen S10 bench seat today. Couldnt beat the 50.00 price tag for an almost brand new looking bench. A little modification to the rear feet on the sliders and I think it will be good to go. It sits a little higher in the back so I need to drop it down a bit. This bench sits back further so its a little more comfortable. And it has a bitchin cup holder built in
View attachment 18240
View attachment 18240
Attachments

Hobby
Member
- Joined
- Dec 11, 2011
- Posts
- 72
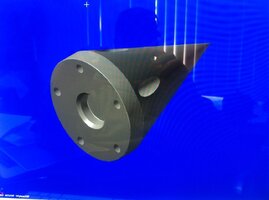
A small custom part im getting made for my truck. These are the first renderings and have been slightly modified since. I did a hand drawing of the part and Robbie at DC Power and Engineering took that info and threw it into Solidworks. Then it will be imported into their CNC mill and machined in house.
Pretty freakin cool getting a one off part custom machined for my truck. Cant wait to get the new setup installed in the truck. Also cant wait for some building weather.
View attachment 18781
Pretty freakin cool getting a one off part custom machined for my truck. Cant wait to get the new setup installed in the truck. Also cant wait for some building weather.
View attachment 18781
Attachments


killallblue
Member
- Joined
- Dec 14, 2011
- Posts
- 82
Hobby said:Pretty freakin cool getting a one off part custom machined for my truck. Cant wait to get the new setup installed in the truck. Also cant wait for some building weather.
Yeah that is BOSS. I'm also looking forward to some warmer temps.

Hobby
Member
- Joined
- Dec 11, 2011
- Posts
- 72
Hobby
Member
- Joined
- Dec 11, 2011
- Posts
- 72
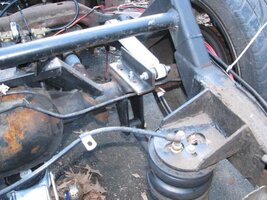
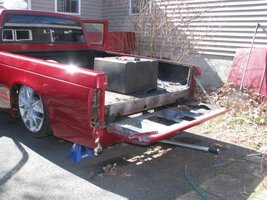
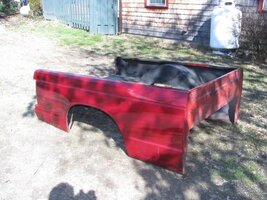
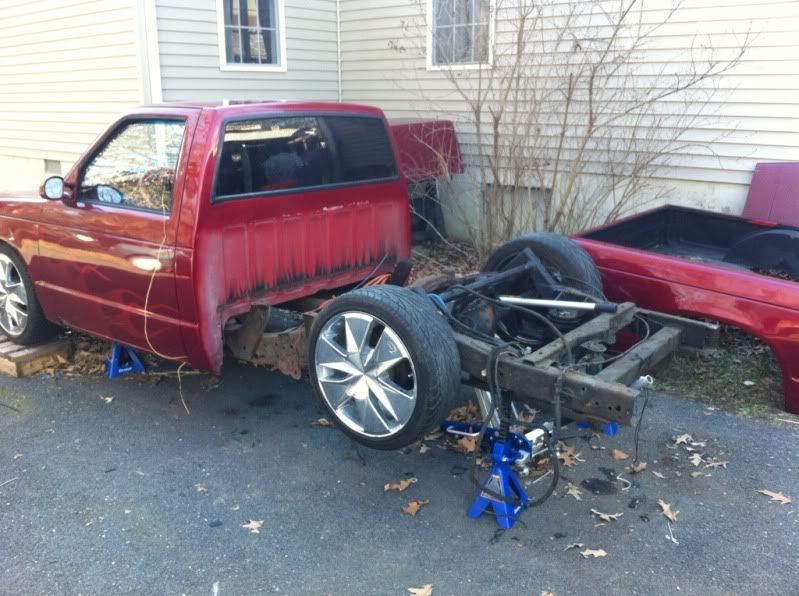
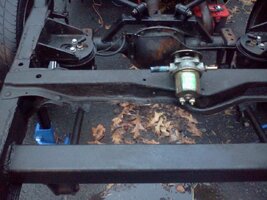
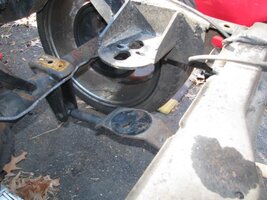
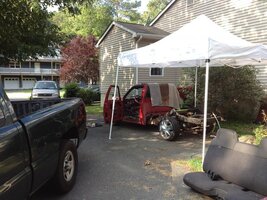
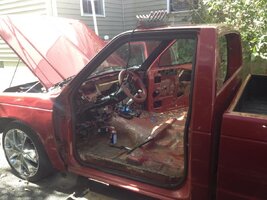
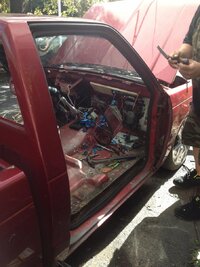
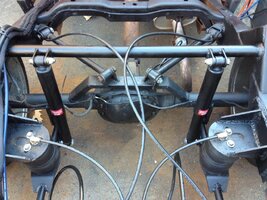
I was very busy today. Finally decided to bite the bullet and take the bed off. Everything in the bed had to come out anyways as its getting replaced. Only extra work was removing the tailgate, removing the tail lights and taking off 5 bolts. After getting it all off and stripping the old wires, fuel lines and air valves I saw a lot of hidden things that need my attention. Also opens things up so I can do some needed modifications to the suspension setup.
I also measured it out for new rear bags. Probably going with the Slam Specialty SS7's. That will give me the same dropped height and 5 more inches of lift. The setup will easily adjust to the new height.
Big thanks to Mr Cherry for lending a hand and keeping me company.
View attachment 19041
I also measured it out for new rear bags. Probably going with the Slam Specialty SS7's. That will give me the same dropped height and 5 more inches of lift. The setup will easily adjust to the new height.
Big thanks to Mr Cherry for lending a hand and keeping me company.
View attachment 19041
Attachments


Hobby said:I saw a lot of hidden things that need my attention.
Was there a butt connector crimped onto another butt connector?
Hobby
Member
- Joined
- Dec 11, 2011
- Posts
- 72
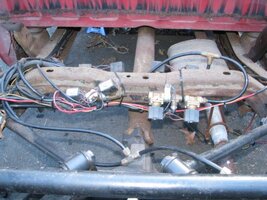
We will have a long discussion as soon as you see it. Wiring? Thats all gone 
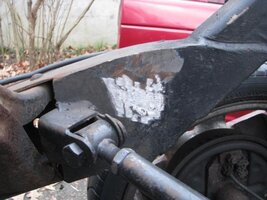
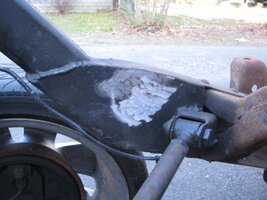
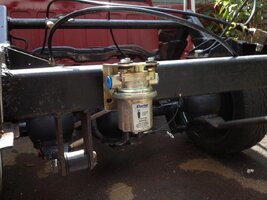
Well everything but the tail light factory harness. Striped the shock setup off. I couldnt get the doors to operate though. Took the relay off the bed and couldnt get it to work again. So the door is back on the manually operated wire on the handle action. The fuel pump bracket was the only thing I couldnt get off. It was welded on the frame member. Didnt want to sawzall with gas leaking out the pump or did I.
Picts from the phone.
View attachment 19054
Well everything but the tail light factory harness. Striped the shock setup off. I couldnt get the doors to operate though. Took the relay off the bed and couldnt get it to work again. So the door is back on the manually operated wire on the handle action. The fuel pump bracket was the only thing I couldnt get off. It was welded on the frame member. Didnt want to sawzall with gas leaking out the pump
or did I.Picts from the phone.
View attachment 19054
Attachments


Hobby said:We will have a long discussion as soon as you see it.
Something tells me I'm in for something good!
Hobby said:Took the relay off the bed and couldnt get it to work again.
To be honest I'm happy to see it go!:wootwoot:
Hobby said:Didnt want to sawzall with gas leaking out the pump
I gots the fix..use a Wendys spoon in yer sawzall...guaranteed no sparks!

killallblue
Member
- Joined
- Dec 14, 2011
- Posts
- 82
Hobby
Member
- Joined
- Dec 11, 2011
- Posts
- 72
Attachments
Hobby
Member
- Joined
- Dec 11, 2011
- Posts
- 72
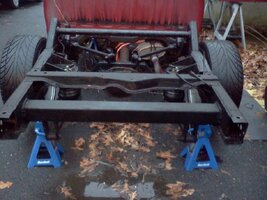
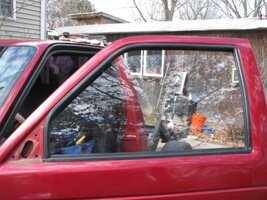
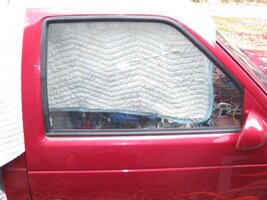
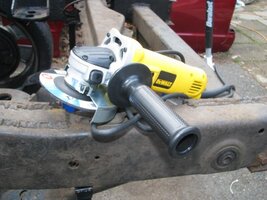
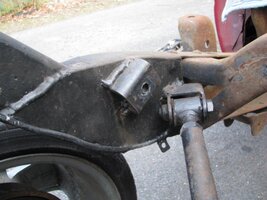
First I started unbolting stuff then bought a grinder, a couple cutting wheels and started cutting stuff off.
Replaced the window trim/gaskets and bolted the window motors to the doors.
Only drew blood 3 times doing the windows
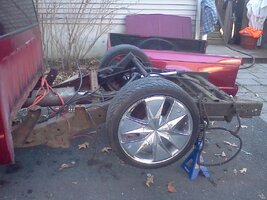
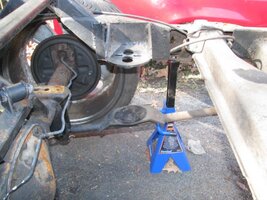
The old bags came off first. Found out that I could drop the wheels on the ground without a problem. If I can find the right bags im all set. Then I did the window repairs and finished the day cutting and grinding the upper shock mounts from the frame.
View attachment 19118
Replaced the window trim/gaskets and bolted the window motors to the doors.
Only drew blood 3 times doing the windows
The old bags came off first. Found out that I could drop the wheels on the ground without a problem. If I can find the right bags im all set. Then I did the window repairs and finished the day cutting and grinding the upper shock mounts from the frame.
View attachment 19118
Attachments
-
 IMG_1884.jpg43.2 KB · Views: 8
 -
 IMG_1885.jpg42.1 KB · Views: 8
 -
 IMG_1850.jpg53 KB · Views: 10
 -
 IMG_1858.jpg47.8 KB · Views: 8
 -
 IMG_1859.jpg52.8 KB · Views: 9
 -
 IMG_1863.jpg66.9 KB · Views: 8
 -
 IMG_1864.jpg60.8 KB · Views: 8
 -
 IMG_1865.jpg62.8 KB · Views: 8
 -
 IMG_1869.jpg54.9 KB · Views: 9
 -
 IMG_1877.jpg40 KB · Views: 10
 -
 IMG_1878.jpg43 KB · Views: 8
 -
 IMG_1880.jpg41.2 KB · Views: 8
 -
 IMG_1881.jpg47.3 KB · Views: 8
Hobby
Member
- Joined
- Dec 11, 2011
- Posts
- 72
I ordered all the new bags, front and back. Also picked up 2 1/2" water separators, a couple of tees and reducers. That should be almost all the parts for the air setup that I need.
Im just going to do a little cleaning up on some of the welds. Only thing new I need to add are the shock tabs and shocks. Still debating in my head if I want to redo the cross member on the axle for the forward links. Desperately need to replace the end link bushings too.
Will hopefully have some parts and pictures sometime next week.
Hobby
Member
- Joined
- Dec 11, 2011
- Posts
- 72
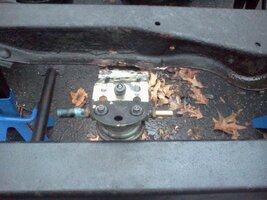
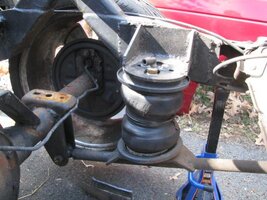
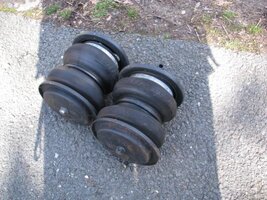
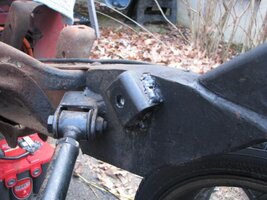
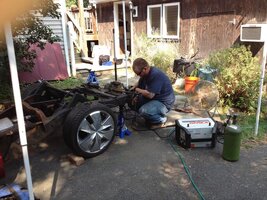
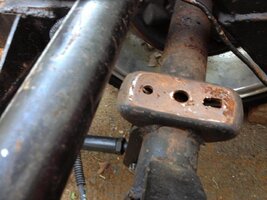
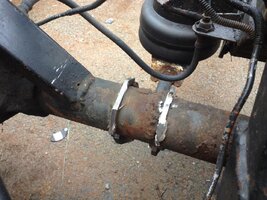
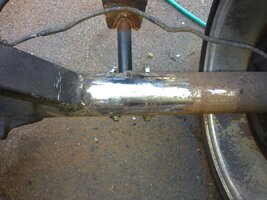
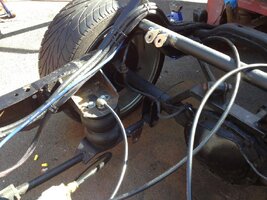
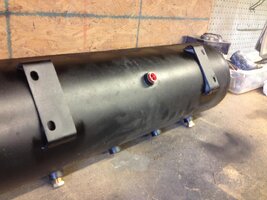
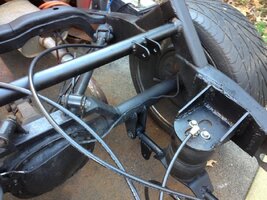
Slow moving update. A little bit to share so I figured I would post some picts up. Mayo got a great start on the wiring for the new fuse panel setup and have room now for the bank of relays to come next. Did some welding on the rear end that fixed a few problem areas. Bought and installed the new bags and front cup mount as well. SlamSpecialty SS6's in the front and SS7's in the rear. The new bags have much improved lift from the old worn out Airride bags. Still undecided whether to run the 7's in the back or the pair of SS5.5's that I also have. Still need to get a few things and a new pair of shocks so I can get the new tabs welded in place. My man John did reweld a bad spot on my notch, flipped the bag mount on one or the lower links and rewelded the top portion of the rear crossmember. That was after grinding off 1/2" of old ugly nastyness. Removed the unneeded factory crossmember from the rear while we were at it. Also trying to resolve a problem with the new alt. The new case is opposite of the OEM mount. Cant install it the way its manufactured.
View attachment 22259
View attachment 22253
View attachment 22254
View attachment 22255
View attachment 22256
View attachment 22257
View attachment 22258
View attachment 22259
View attachment 22253
View attachment 22254
View attachment 22255
View attachment 22256
View attachment 22257
View attachment 22258
Attachments
-
 new SS7 bags.jpg98.4 KB · Views: 20
 -
 bag cups and new shock tabs mounts.jpg91.7 KB · Views: 20
 -
 flipping the bag mount.jpg98.7 KB · Views: 19
 -
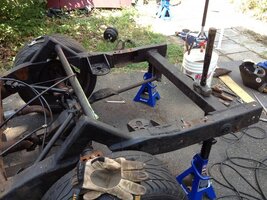 factory crossmember gone.jpg98.3 KB · Views: 17
 -
 new welds on the rear crossmember.jpg99 KB · Views: 18
 -
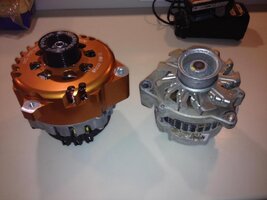 backwards ass alternator case.jpg60.6 KB · Views: 21
 -
 preping the work area.jpg96.7 KB · Views: 22
Hobby
Member
- Joined
- Dec 11, 2011
- Posts
- 72
Short vid of my son taking a ride on the back end. I know the setup is slow and airs up uneven. That is one 1/4" line running 90 pounds from my shop compressor. Dont have any control of the individual bags either. They all fill and all dump from one manual valve.
[video=facebook;3952733429607]http://www.facebook.com/video/video.php?v=3952733429607[/video]
[video=facebook;3952733429607]http://www.facebook.com/video/video.php?v=3952733429607[/video]
Hobby
Member
- Joined
- Dec 11, 2011
- Posts
- 72
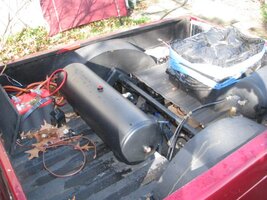
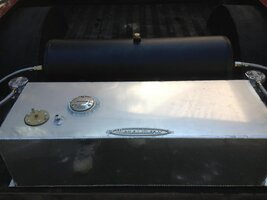
Another update. Trying hard to get the bed back on so I can put the fuel cell in place and the air compressors, air tank and batteries. Had some of the stray parts I needed delivered to the house.
The next round its door pins and pass thru grommets. Weld in the shock tabs and install the rear shocks. Weld in a seat belt bracket so I can attach the new setup. Finish upholstering the shaved seat. Having a shop up the road do the new stitch across the top. Then its time to wire up all that stuff and get it operating. Also need to get that alternator situation fixed as well as my air cleaner assembly.
View attachment 23183
View attachment 23184
View attachment 23185
View attachment 23186
View attachment 23187
View attachment 23188
View attachment 23189
View attachment 23190
View attachment 23193
View attachment 23194
Attachments
-
 IMG_0194.jpg83.2 KB · Views: 19
 -
 IMG_0202.jpg89.1 KB · Views: 20
 -
 IMG_0201.jpg96.7 KB · Views: 19
 -
 IMG_0209.jpg94.3 KB · Views: 19
 -
 IMG_0210.jpg95.2 KB · Views: 19
 -
 IMG_0244.jpg89.1 KB · Views: 19
 -
 IMG_0245.jpg99.3 KB · Views: 20
 -
 IMG_0256.jpg78.8 KB · Views: 21
 -
 IMG_0270.jpg73.8 KB · Views: 22
 -
 IMG_0248.jpg93.4 KB · Views: 23
killallblue
Member
- Joined
- Dec 14, 2011
- Posts
- 82
Hobby
Member
- Joined
- Dec 11, 2011
- Posts
- 72
You were there Saturday fool. You know whats up lol
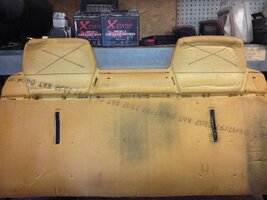
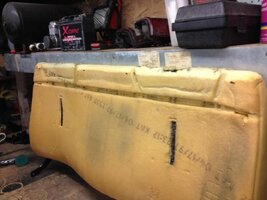
The seat back is sewn and back on the seat. Turned out nice for a total fudge job.
We replaced the door pins and made some door gap adjustments with the floor jack.
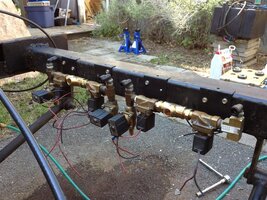
I have all the valves installed, wired and plumbed. Its nice being able to use the switch box again.
Added a rubber firewall boot in the engine bay and re ran all the wiring into the cab thru the boot.
Will try and add a couple of picts if I get a chance tonight.
The seat back is sewn and back on the seat. Turned out nice for a total fudge job.
We replaced the door pins and made some door gap adjustments with the floor jack.
I have all the valves installed, wired and plumbed. Its nice being able to use the switch box again.
Added a rubber firewall boot in the engine bay and re ran all the wiring into the cab thru the boot.
Will try and add a couple of picts if I get a chance tonight.
Hobby
Member
- Joined
- Dec 11, 2011
- Posts
- 72
Heres a few picts from the past couple of weeks.
Seat back cover sewn up and put back on. A preview of the finished setup too. Need some cutting and welding done on the lower section before it gets recovered.
View attachment 23462
View attachment 23463
Put the bed on and layed the air and fuel setup in the bed to see how its going to look.
View attachment 23464
View attachment 23465
The first time it was aired up in many months using the switchbox. Its getting fun again.
View attachment 23466
This was last weekend. Doors off, getting ready to replace the door pins and bushings.
View attachment 23468
View attachment 23469
Attachments


Hobby
Member
- Joined
- Dec 11, 2011
- Posts
- 72
This is just after we got the switches working again. My boy in the truck playing around with them. The setup is still slow because its only running off the shop compressor. 90psi and a 25' long 1/4" air line.
[video=youtube;Mji4j5mAfdU]http://www.youtube.com/watch?v=Mji4j5mAfdU&feature=plcp[/video]
[video=youtube;Mji4j5mAfdU]http://www.youtube.com/watch?v=Mji4j5mAfdU&feature=plcp[/video]
Hobby
Member
- Joined
- Dec 11, 2011
- Posts
- 72
Received 2 packages this week.
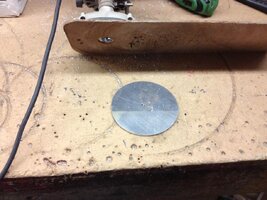
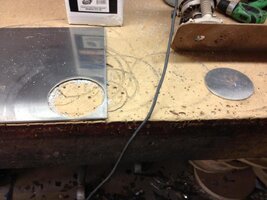
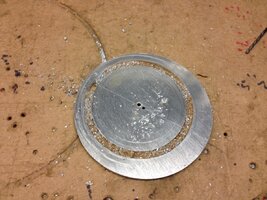
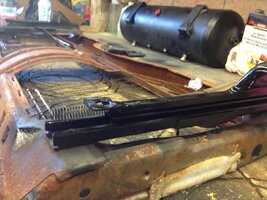
First is a sheet of 3/16" aluminum. 16" x 36"
Using this to make a new bottom plate for the air cleaner assembly. Also using it for a nice mounting plate for all the custom wiring Mayo is gonna add under the dash. Need something strong to hold up to the pounding bass.
View attachment 23488
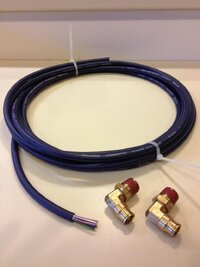
Also picked up a piece of 9 conductor Install Bay quick wire. And 2 - 1/2" PTC 90's. Replacing the old burnt switchbox wire and needed the 90's to connect to the air tank and feed the air valve setups.
View attachment 23489
First is a sheet of 3/16" aluminum. 16" x 36"
Using this to make a new bottom plate for the air cleaner assembly. Also using it for a nice mounting plate for all the custom wiring Mayo is gonna add under the dash. Need something strong to hold up to the pounding bass.
View attachment 23488
Also picked up a piece of 9 conductor Install Bay quick wire. And 2 - 1/2" PTC 90's. Replacing the old burnt switchbox wire and needed the 90's to connect to the air tank and feed the air valve setups.
View attachment 23489
Attachments

Hobby
Member
- Joined
- Dec 11, 2011
- Posts
- 72
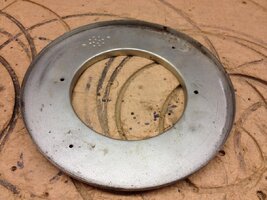
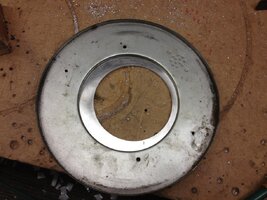
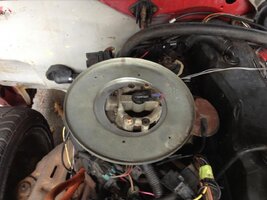
Spent some time getting my air cleaner assembly to fit on the carburetor correctly. Before the fix the area that I am filling in was open allowing air to bypass the filter and directly enter the carb. Still have some holes to fill and some work to do so it can be properly secured but the hard part is done.
I also replaced the cable to my switchbox this evening. Original cable was to short and a few of the wires were pretty burnt. Just need to re run the new wire and re connect to the valves.
View attachment 23524
View attachment 23525
View attachment 23526
View attachment 23527
View attachment 23528
View attachment 23529
View attachment 23530
View attachment 23531
View attachment 23532
Attachments


Hobby
Member
- Joined
- Dec 11, 2011
- Posts
- 72
Made a little more progress. Had a buddy come over and do some of the welding that needed to be finished before mounting the bed. Burned on a set of shock tabs so I could mount the new shocks. He also took 1.5 inches off of the air tank legs so it can sit lower. Also cut about 1" of height from the rear seat mounts. Trying to get all he read room I can get in the mini.
Mayo also stopped over to do some rewiring after I reran a lot of the wiring thru the new firewall boot. Things are slowly coming together. Just received the last of the air fittings I need and picked up a pair of hog ring pliers so I can reupholster the bottom bench seat cushion.
View attachment 24143
View attachment 24144
View attachment 24145
View attachment 24146
View attachment 24147
View attachment 24148
[video=youtube;L2pBmQESY-4]http://www.youtube.com/watch?v=L2pBmQESY-4&feature=plcp[/video]
Attachments

Hobby
Member
- Joined
- Dec 11, 2011
- Posts
- 72
Im really not sure what you would call it, I was guessing a triangulated 4 link but since the lower links are set to the rear you description would work just as well. The add on Craigslist where I found it said it was a cantilever setup which is def wrong. Its an old build done 12 years or so ago that Im restoring and repairing. The old shock setup was horrible and really didnt do to much at all. Maybe had 1.5 in of travel in the shocks from full bags to deflated.
Hobby
Member
- Joined
- Dec 11, 2011
- Posts
- 72
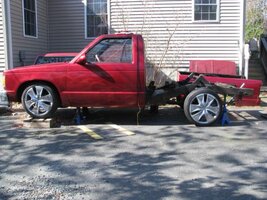
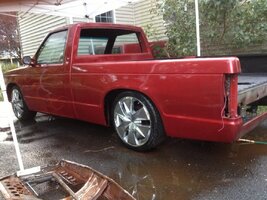
Wow havent been here in a while. Will have a shit ton of picts to post after I get them all sorted. As of now its getting close to being completed. Mayo and myself took a maiden voyage it the mini last year and the f-ing front wheel fell off and tore the quarter panel to hell. It has been repaired and the truck repainted. I will leave one pict for everyone to enjoy till I get time for a mega post.

