headlight mod help, please

03TB93

Original poster
Member
Mar 25, 2012
341
hey guys, so im thinkin about tomorrow doing my headlight corner reflectors (nite-shading them).

My question is how do it get the headlight apart? i saw the tread for painting the headlight howsing but i just wanted to hopefully get some backup info or suggestions.

Do the 3 or 4 plastic clips on top just pry up? or do i have to somehow get the glue apart that somehow holds the headlight cover(clear plastic) or will the clips just let that pop off? thanks guy, help/info/suggestions, anything is much appreciated :thumbsup:

Oh and 1 other peice of info.. im not taking the reflector out, im just gonna tape off around it and paint it.
Thanks again!!
-Dan
 

Blckshdw

Moderator
Nov 20, 2011
10,754
Tampa Bay Area, FL
:confused: If you're going to open your headlights, the inside gray plastic piece pops off, then the reflector will come out by unscrewing a couple of philips head screws.

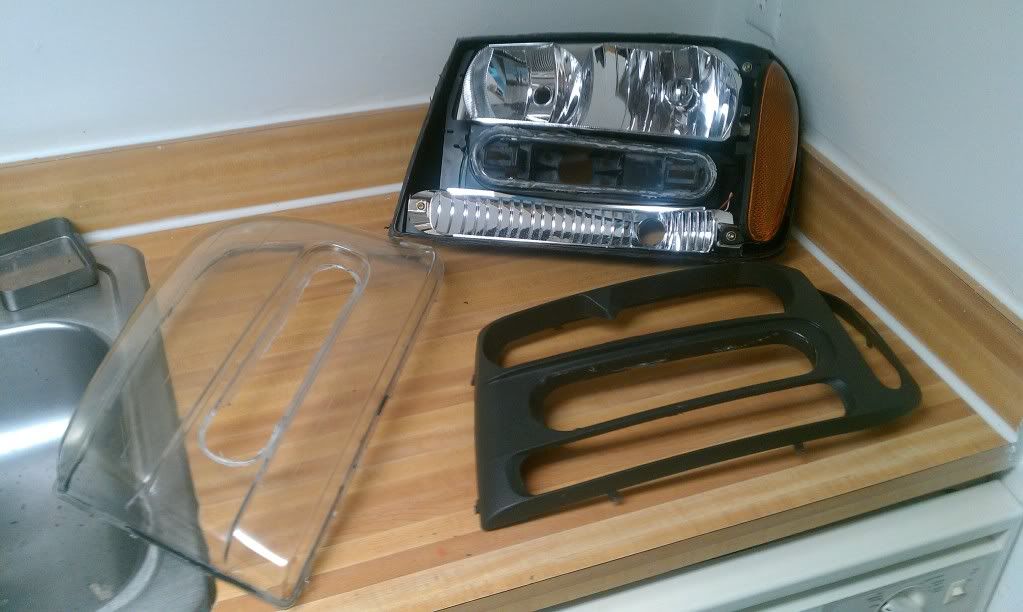
Those clips you see were just for holding the assembly together while the factory adhesive set and dried. You're gonna have to either break out your Dremel and do some cutting, or try the easy bake oven method. Good luck man.
 

03TB93

Original poster
Member
Mar 25, 2012
341
i have to open the headlight to get to the reflector though right? baisically i need to know how to get to the reflector.

Sorry man im sure im confusing the hell outta you lol.
 

Blckshdw

Moderator
Nov 20, 2011
10,754
Tampa Bay Area, FL
03TB93 said:
i have to open the headlight to get to the reflector though right? baisically i need to know how to get to the reflector.

Sorry man im sure im confusing the hell outta you lol.

It's all good man, that's what we're here for. I am assuming you saw my article that's doing this mod right? You have to cut the lip around the outside of the light, and inside where the crossbar goes to get the clear piece off. Then you can pop the gray piece out (good opportunity to color match it, or paint it black here) the reflector will be below that, held into the base of the headlight with some screws. You should be good to go from there. :thumbsup:
 

03TB93

Original poster
Member
Mar 25, 2012
341
ya!! it must have been your thread i was reading about it. Did u just gut the peices aprt the a razor in between the 2 plastics? and did you just glue it back together?
 

Blckshdw

Moderator
Nov 20, 2011
10,754
Tampa Bay Area, FL
You'll need a rotary tool, or a power drill with a cutoff wheel to cut through the plastic, then something thin/sharp to get through any adhesive the power tool didn't cut and to clean the joining parts so you can get a good seal when you're done. Pry the pieces apart, do your work, then use some RTV silicone to glue them back together.
 

03TB93

Original poster
Member
Mar 25, 2012
341
cool man. I didnt know it involved all that, so thanks a bunch for the info. im prob gonna try it tomorrow and ill for sure let you know how it goes. thanks alot for the help.
 

ConeKilrAutoX

Member
Dec 8, 2011
1,179
hope it goes good! dremel works great (as stated by Blckshdw) haha I've cut mine open about 5 times now lol

p.s.
when you seal them back up try to avoid extreme temp changes from the temp they are sealed in to when you put them back on or you might get condensation inside the lens (I ran into this issue when I did it a few times) It was fixed with a hair dryer and a few days of getting acclimated to the temperature changes and your good to go!) :wootwoot:
 

03TB93

Original poster
Member
Mar 25, 2012
341
cool man thanks alot for that bit of info, thats why i wanted to start a specific thread for this just to be sure. im probly gonna do this mod tonight, thanks fellas :thumbsup:
 

03TB93

Original poster
Member
Mar 25, 2012
341
alright guys so im out there doing this now.. i cant figure out for the life of me wtf to do lol so do you cut the black plastic border with the clips off?? (the border i am talking about is like half an inch wide) or can i heat the glue up and try to get it apart that way??
 

03TB93

Original poster
Member
Mar 25, 2012
341
right, i got that. i looked carefully. so do i use the dremel and cut the black plastic around the outside of the lens?
 

Blckshdw

Moderator
Nov 20, 2011
10,754
Tampa Bay Area, FL
03TB93 said:
right, i got that. i looked carefully. so do i use the dremel and cut the black plastic around the outside of the lens?

:yes:
 

03TB93

Original poster
Member
Mar 25, 2012
341
allrrrightttttt. lol now let me go see if i can make this happen. thanks alot for the help man, ill be back on in like 30 to let u know haw bad i f*ck it up :raspberry:
 

03TB93

Original poster
Member
Mar 25, 2012
341
alright guys so ive got the glue completly sperated from the light.. now its the middle peice for the crome bar to attach to thats holding me up..

Edit: did you just cut the shit outta that plastic around the center?
 

Blckshdw

Moderator
Nov 20, 2011
10,754
Tampa Bay Area, FL
All you have to do is make a cut in the clear plastic, around that rim, that's inside the area that's covered by the crossbar. Once you do that, it should lift right off, then you can pop out the gray insert piece, and be home free.

Edit: In this pic, you can kinda see the route I took cutting the inside part

IMAG0189.jpg
 

03TB93

Original poster
Member
Mar 25, 2012
341
alright man, thanks again for all the help. :cool:

Ill post a pic when its done
 

Blckshdw

Moderator
Nov 20, 2011
10,754
Tampa Bay Area, FL
:biggrin: I accept, cash, paypal, and cool things with LEDs in em, btw :wink:
 

ItsOnVoy

Member
Nov 21, 2011
2,401
Blckshdw said:
:biggrin: I accept, cash, paypal, and cool things with LEDs in em, btw :wink:

LIke these?

[video=youtube;E1uxzy0WIwA]http://www.youtube.com/watch?v=E1uxzy0WIwA[/video]
[video=youtube;Pks9k1DZTM0]http://www.youtube.com/watch?v=Pks9k1DZTM0[/video]
[video=youtube;HKEBlnVVw1k]http://www.youtube.com/watch?v=HKEBlnVVw1k[/video]
:biggrin:
[video=youtube;TjNZKNe2cvE]http://www.youtube.com/watch?v=TjNZKNe2cvE[/video]
 

Blckshdw

Moderator
Nov 20, 2011
10,754
Tampa Bay Area, FL
ItsOnVoy said:
LIke these?

If I was still a big gamer, I would be all over the PS3 controller. :thumbsup:

But right now, I use it mainly to stream Netflix :bonk:
 

ItsOnVoy

Member
Nov 21, 2011
2,401
Blckshdw said:
If I was still a big gamer, I would be all over the PS3 controller. :thumbsup:

But right now, I use it mainly to stream Netflix :bonk:

Yeah the ps3 controller did look bad ass!! Hey stream netflix in style :cool::biggrin:
 

03TB93

Original poster
Member
Mar 25, 2012
341
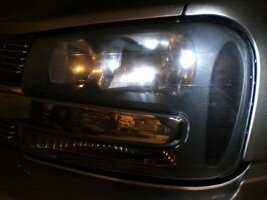
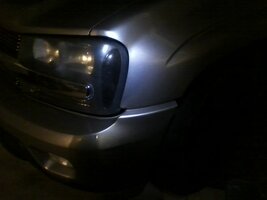
And 8 hours later here they are. now that its all said and done it was deff worth it. if you asked me that 5 hours ago, i would told you the compete oposite.
Thanks for the help tho guys. blckshdw, your the man!! :thumbsup:
 

Attachments

  • 0515122342.jpg
    0515122342.jpg
    55.2 KB · Views: 72
  • 0515122342a.jpg
    0515122342a.jpg
    34.2 KB · Views: 71

Blckshdw

Moderator
Nov 20, 2011
10,754
Tampa Bay Area, FL
Glad you got it all finished up. Job well done! :wootwoot:
 

03TB93

Original poster
Member
Mar 25, 2012
341
Thnaks a bunch :hail:
 

03TB93

Original poster
Member
Mar 25, 2012
341
fletch09 said:
looks good :thumbsup:
IMHO, i would have color matched (whistler mod), while they were apart.

thanks man. and i was seriously considering it :undecided: i still might do that,, its just held together with some glue and JB weld. i was seeing how the 2 tone would look. ill let u know if i change it :thumbsup:
 

mikeinDE

Member
Jan 4, 2012
855
They look sharp Dan!!
 

03TB93

Original poster
Member
Mar 25, 2012
341
mikeinDE said:
They look sharp Dan!!

Thanks buddy, i have an idea in mind for your truck when i was doing it. ill explain to you on sunday :thumbsup:
 

mikeinDE

Member
Jan 4, 2012
855
03TB93 said:
Thanks buddy, i have an idea in mind for your truck when i was doing it. ill explain to you on sunday :thumbsup:

sweet, can't wait to hear it!!
 

Forum Statistics

Threads
23,705
Posts
642,339
Members
19,204
Latest member
jozene

Members Online