Front Control Arm Bushing Upgrade - Advice / Opinions?

Sqrly

Original poster
Member
Apr 2, 2024
77
Livingston CA
Hi people,

Next up for me is the bushings in the front end. Step one will be the 5 control arm bushings on each side.

I found this poly kit for the arms https://www.suspension.com/7242. I've always gone with poly in the past and it's nearly the same price as the rubber MOOG ones.

That kit doesn't include the MOOG K200270 for the bottom of the strut so I'll get those seperate.

These days I have access to a press and Autozone sells a PowerBuilt Bushing Driver Set for only $36! In the past I've used a home made tool consisting of a stick of all thread, a super heavy duty thrust bearing, peices of pipe, large sockets, and lots of washers.

Has anyone put the poly bushings in?

Putting the bushings in with a press is pretty simple, I'm not so sure about getting them out. I may have to use my home made tool for that. I don't think I've done any as big as those lower front ones though.
 

6716

Member
Jul 24, 2012
830
I've seen people post they use a torch to burn/melt the bushings out. I've only done the whole control arm/bracket though, since I don't have access to a press.
 

Sqrly

Original poster
Member
Apr 2, 2024
77
Livingston CA
I've seen people post they use a torch to burn/melt the bushings out. I've only done the whole control arm/bracket though, since I don't have access to a press.

Sometimes the rubber is between the solid metal and your hammer and absorbs enough energy that you can't get the bushing sleeve to budge. I've burned them out before myself.

I've considered replacing the controls arms as units but the cheap ones I see on the Rock Auto website look questionable to me.

I have years of experience in certified welding, both manual and robotic and those welds look very minimal and where done by hand which greatly increases the chances for them to be outside of acceptable specifications.
 

Sqrly

Original poster
Member
Apr 2, 2024
77
Livingston CA
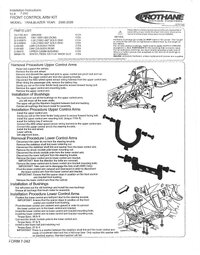
FYI I bought the polyurethane bushing kit Iinked in my first post. To install it you must burn out the upper bushings and reuse the outer sleeves. That will actually be easier then pressing those out.

The lower bushings aren't actually in the A-frames so that will make them much easier to press out.

FrBushings.jpg
 
Last edited:
Feb 18, 2017
108
Shreveport, LA
Sometimes the rubber is between the solid metal and your hammer and absorbs enough energy that you can't get the bushing sleeve to budge. I've burned them out before myself.

I've considered replacing the controls arms as units but the cheap ones I see on the Rock Auto website look questionable to me.

I have years of experience in certified welding, both manual and robotic and those welds look very minimal and where done by hand which greatly increases the chances for them to be outside of acceptable specifications.

I replaced the control arm brackets on my 05 Trailblazer. Got them from Rock Auto. I saw no issues with the ones I bought but I don't remember which ones it was right off hand. It wasn't a difficult job once I got a set of 4 prybars in different lengths.

Pryed the old ones out and hammered the new ones home, IIRC. I thought it needed entire control arms like my 2001 Blazer does but that isn't the case. The bushings are in a separate bracket that you replace by itself. Makes things MUCH easier.

Also, I could have sworn that at least one of the bushings in the bracket was poly instead of rubber. Thats what I concluded from what I saw/felt. I did mine on the floor of my garage and it took me maybe an hour for each side. Easy peasy.

Jack it up.
Put on a jackstand.
Pull the wheel.
Remove the sway bar bolt.
Remove the bolts holding the bracket and pry it out.
Hammer the new one in,
put the bolts back in,
attach the sway bar,
and put the wheel back on.

It's really that simple.
 
Last edited:

Sqrly

Original poster
Member
Apr 2, 2024
77
Livingston CA
I already bought the poly bushing kit.

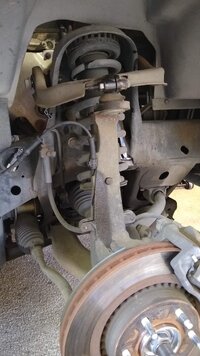
I just did one of the upper sets and it was so easy. It took about 15 minutes from the time I pulled it into the garage to having the upper A-Frame out. Burning out the old bushings was time consuming and tedious but not difficult. I used a map torch and a drywall saw with the blade installed upside down for a scraper and finished it up with a barrel sander on a die grinder. I also have a gearwrench set that goes up to 1" + 24mm. Those pay for themselves every time I use one.

@midnightbluS10

I believe you just answered a question I haven't asked yet. Can the lower bushings be changed without removing the A-Frame?


I would take the axle nut off too, to keep the other end from getting popped out of the case and probably disconnect the tie rod end, just so I don't have to fight it.

I'm not doing ball joints, they are fine, and not popping that bottom ball joint loose would save a lot of time and a tool rental.

One thing I love about CA, minimal corrosion!

(After applying WD-40 to threads)
FRSusp.jpg
 

Forum Statistics

Threads
23,447
Posts
639,505
Members
18,668
Latest member
Zee0719

Members Online