- Aug 26, 2012
- 69
The following procedure is to replace the midgate window regulator on a 2004 Envoy XUV and can be done by one person without dismounting the midgate.
Tools / Parts needed:
1. Replacement Midgate – Dorman 741-072
2. J-B Weld KwikWeld or equivalent
3. Philips #2 screwdriver
4. Trim removal tools
5. 3/8 Ratchet drive
6. 13mm Deep well socket and 10mm socket
Proceedure:
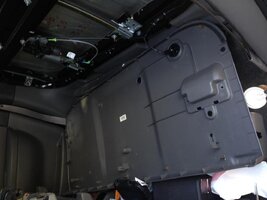
1. Remove the center screw on the midgate cover and the two screws securing the pull handle.
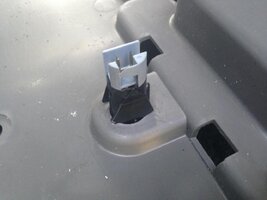
2. Starting at the bottom left side pull out to loosen the cover snaps and work around then disconnect the release button and allow the cover to lay on the floor.
View attachment 34228
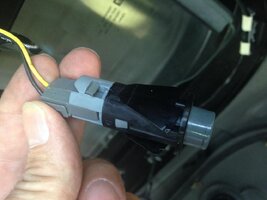
3. Remove the release button from the cover and plug back into the midgate connector
View attachment 34229
View attachment 34230
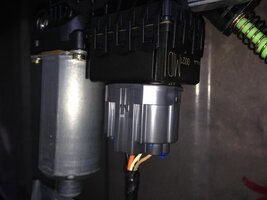
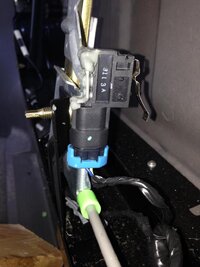
4. Remove the connector from the regulator motor and from the window position switch
View attachment 34231
View attachment 34232
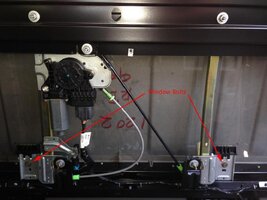
5. Remove the bolts that hold the window glass to the regulator
View attachment 34233
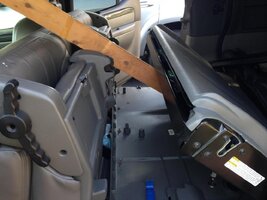
6. Position a 4' 2x4 from the bottom of the midgate to the back of the folded up rear seats.
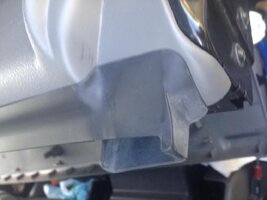
7. Release the midgate and allow it to rest on the 2x4
View attachment 34234
View attachment 34235
8. Remove the rubber from the window opening
9. Slide the window glass up and remove from the midgate - note that the curved surface faces inwards
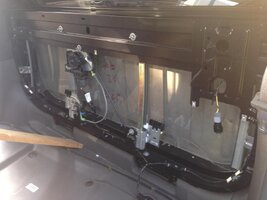
10. Push the midgate back into the closed position
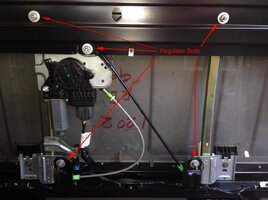
11. Remove the old regulator by unbolting the 5 bolts.
View attachment 34236
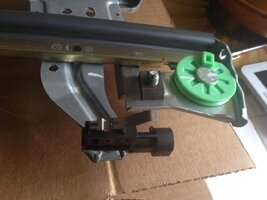
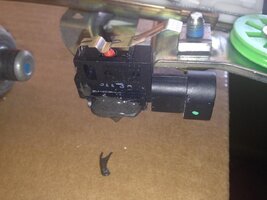
12. Remove window position switch from old regulator (mine was glued on and I used a razor knife to cut it free)
View attachment 34237
13. Glue the window position switch to the new regulator using J-B weld or other suitable glue and allow to cure (I used the Kwikweld / 20 minutes)
View attachment 34238
14. Install the new regulator into the mid-gate and reconnect the motor and switch connectors.
15. Release the midgate by pressing the release button while holding the glass position switch closed and lean midgate against the 2x4.
16. Slide the glass back in being careful to feed the glass into the side window channels with the curve facing the front ensuring that the mounting tabs align correctly with the regulator
17. Push the midgate back into the closed position.
View attachment 34239
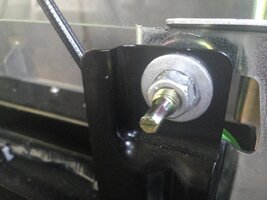
18. Adjust the slider(s) forward to back position if necessary
View attachment 34240
19. Secure the glass to the regulator by reinstalling the bolts
20. Ensure that the window switch is closed when the window is down (mine wasn't and I had to remove the cover to correct it after I had already reinstalled the cover)
21. Test the operation of the window regulator leaving the window in the down position
22. Disconnect the midgate release button from the connector and reinstall into the midgate panel
23. Holding the midgate panel in position reconnect the release button connector and reinstall the panel by aligning the top edge and snapping in the clips.
24. Test the release button to ensure that the midgate will open
25. Reinstall the three screws and pull handle
26. Reinstall the rubber by releasing the midgate to rest on the 2/4 again. (I reinstalled the rubber before the panel and had to fuss with getting the rubber to lay on top of the panel so this sequence should work better)
Sit back and admire your work!
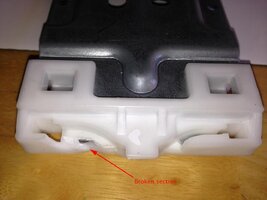
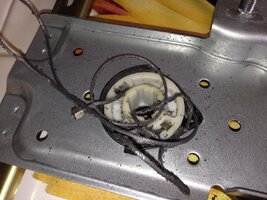
I believe that the regulator was replaced once before on this Envoy so I am not sure if the factory window position switch was originally glued to the regulator. The old regulator looked exactly like the new Dorman regulator. The failure mode was that one of the slides broke where the cable end was held in place allowing the cable pull loose which at that point when the previous owner activated the open / close switch the excess cable length tried to roll up into the motor / cable reel and made a real mess of the cable. The old one probably could have been fixed by replacing the cable and gluing the cable back into the slide. I guess if your midgate window drops down on its own do not activate the window switch. (I guess the same is probably true for any power window regulator).
View attachment 34241
View attachment 34242
Attachments
-
 IMG_7411.jpg56 KB · Views: 211
 -
 IMG_7437.jpg52 KB · Views: 186
 -
 IMG_7435.jpg60.6 KB · Views: 186
 -
 IMG_7414.jpg53 KB · Views: 185
 -
 IMG_7416.jpg69.8 KB · Views: 194
 -
 window bolts copy.jpg77 KB · Views: 196
 -
 IMG_7412.jpg70 KB · Views: 188
 -
 IMG_7431.jpg52.9 KB · Views: 175
 -
 regulator bolts.jpg79 KB · Views: 190
 -
 IMG_7423.jpg75.4 KB · Views: 184
 -
 IMG_7424.jpg66.5 KB · Views: 173
 -
 IMG_7428.jpg65 KB · Views: 189
 -
 IMG_7438.jpg74.3 KB · Views: 163
 -
 broken slide.jpg59 KB · Views: 172
 -
 IMG_7419.jpg96.6 KB · Views: 162

