- Jan 14, 2014
- 172
I am going to detail, step-by-step, the installation of a new True Flow CAI system on my 03 TB 4.2. I'll include pictures of every step, plus a couple of short video clips of the sound my TB makes once the kit is installed.
Note that my 03 has a PCM for Less Tune: 87 octane, shift point 3, torque management eliminated (may still be 5%), and spec'd for resonator eliminate and drop in K&N air filter in a hogged out air-box. I am planning on sending the PCM out for a re-tune with the CAI system and new tires in place. I also have a .490 boost valve in the transmission (soon to be a Vette servo also), and am running 255-70-16 Cooper ATR w/3.73 gears.
Here goes:
Package as it arrived:
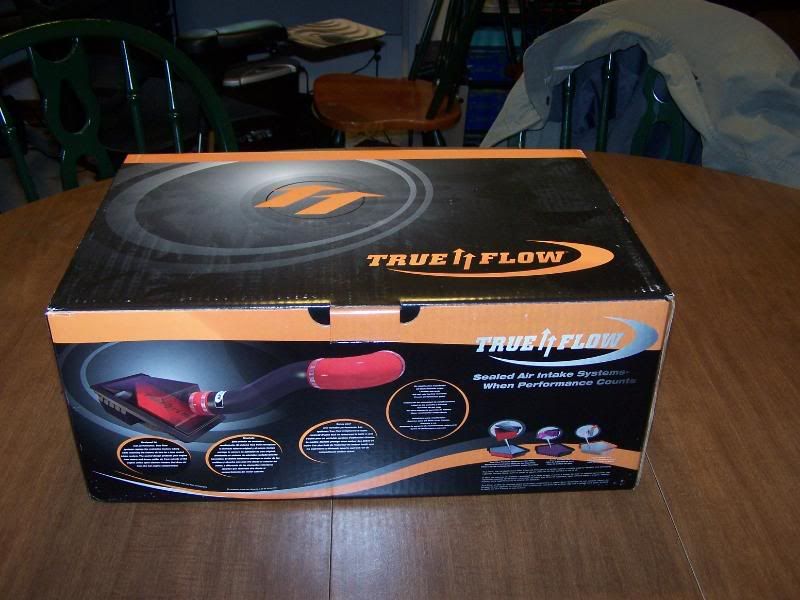
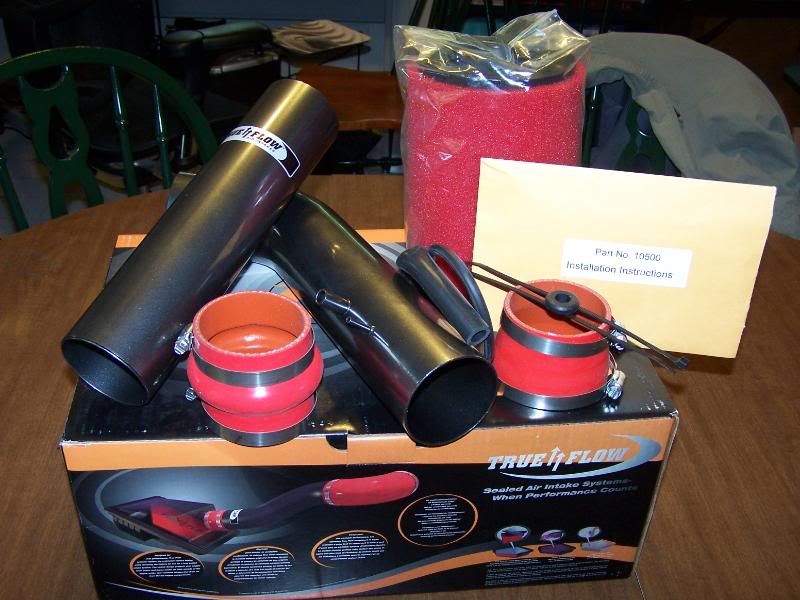
Open it up and this is what is inside: Two metal (powder-coated) air tubes, 2 silicon sleeves, 4 worm-drive clamps, 2 pieces of rubber tubing for vacuum connections, the air filter, instructions and stickers (ARB compliance for inspections, "don't throw away the filter" and a manufacturer's sticker)
Here is the unwitting donor vehicle. Yes, it is dirty. I drive it!

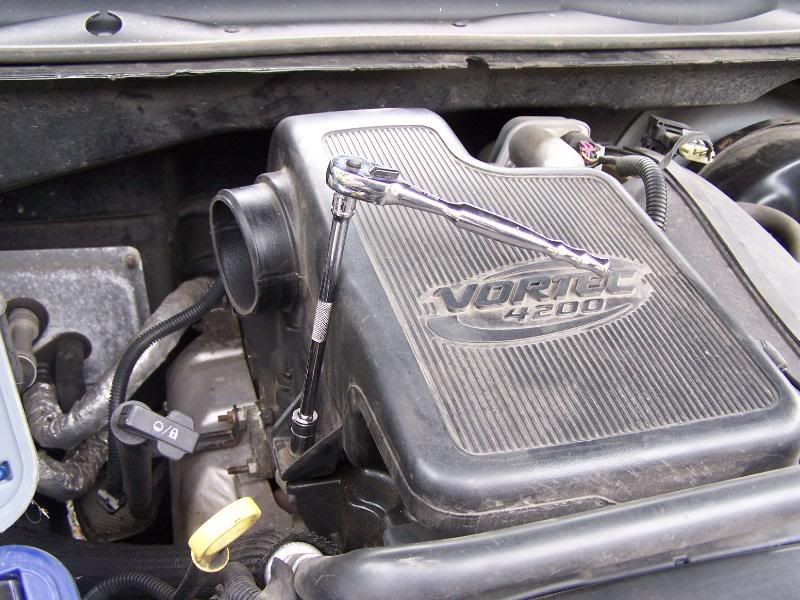
The air box is the place to start. It has 3 screws. You can use either a flat-head screwdriver with about a 1/4" wide blade or a Phillips. I've found that the flat blade works better, as the screw does not have deep grooves.
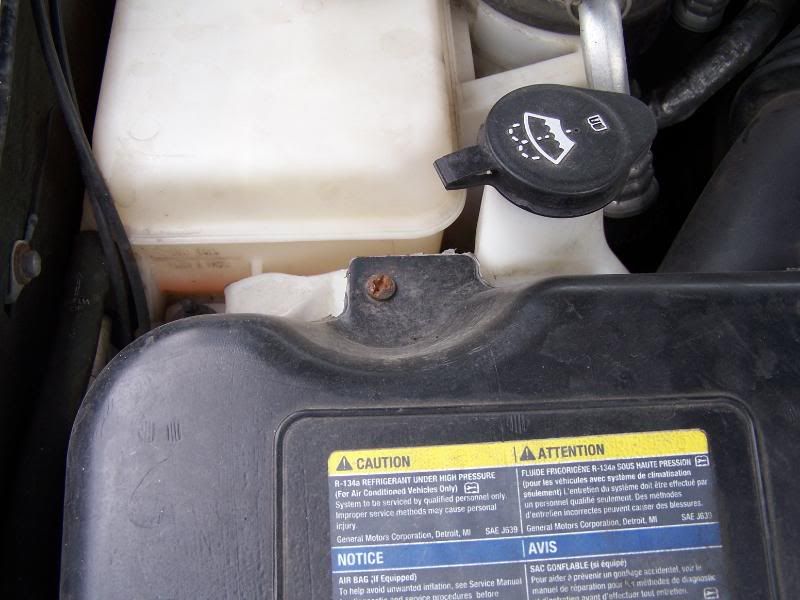
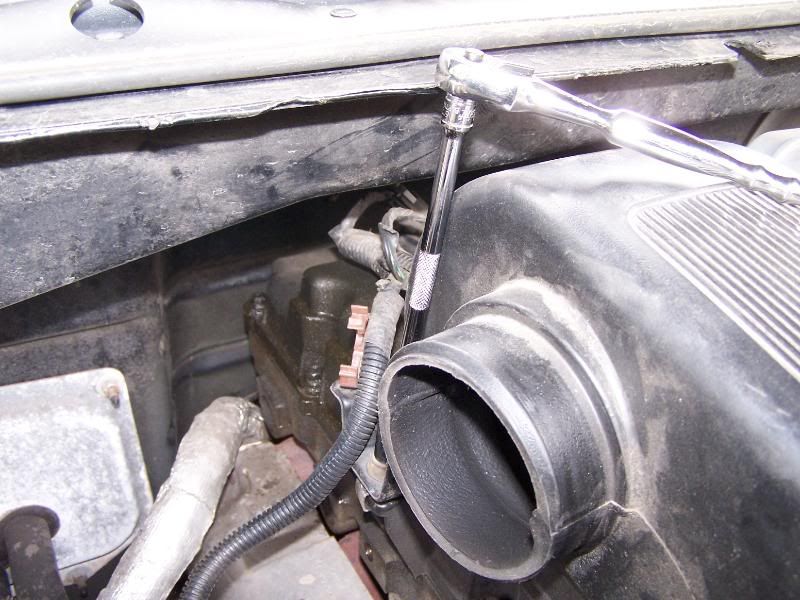
Screw 1 is sort of hidden. You may need to shine a light down the hole to find it:
Screw 2:
Screw 3:
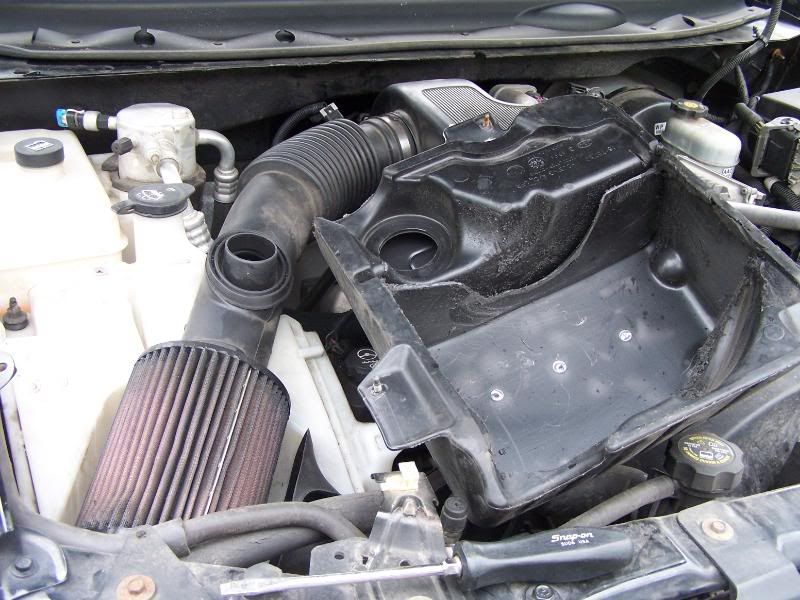
Air box lid lifts off. You sort of have to wiggle it some, as it can hang up on some of the hoses around the front. It will come out of its hole without removing anything else, just have patience and press the hoses out of the way a bit for clearance.
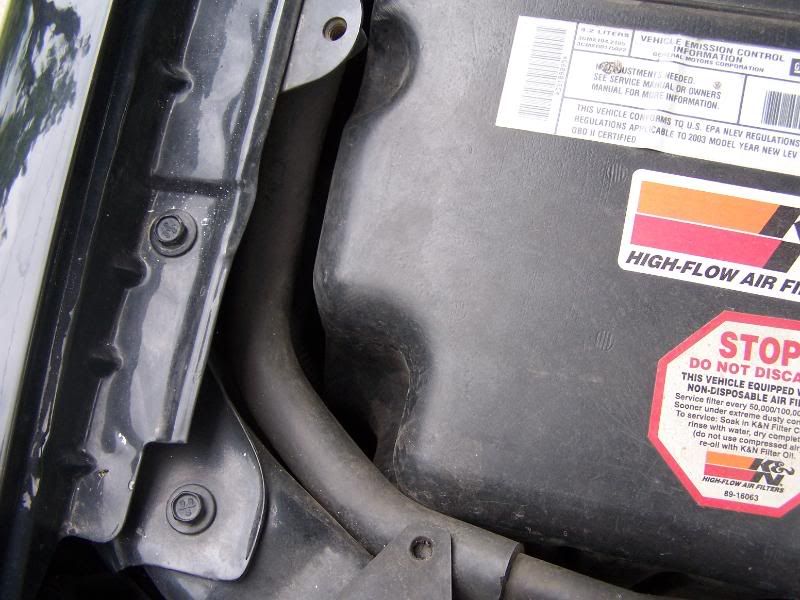
Note the K&N drop in filter. It did a good job, but I was wanting to move to a CAI system to replace the entire factory setup. The K&N is for sale. Let me know. It has been cleaned once and has around 30K miles. Due for another cleaning!
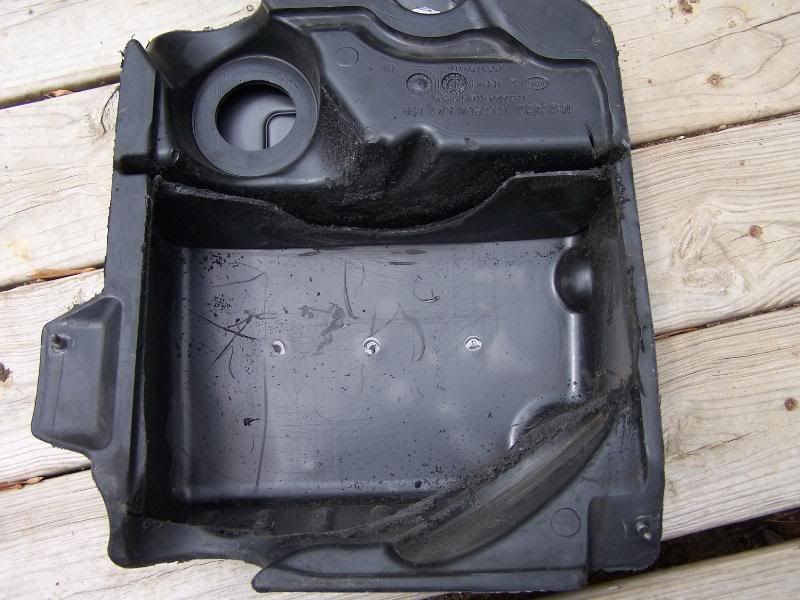
Some of you may have noticed the hogged out air box in the prior picture. Here is a better look at it. I just took a cut-off wheel to it. Leaves a bit more room around the filter.
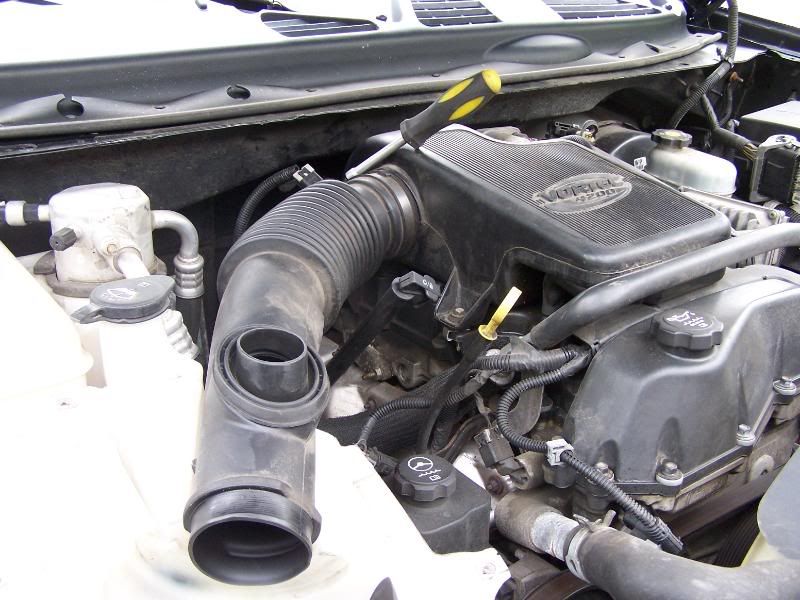
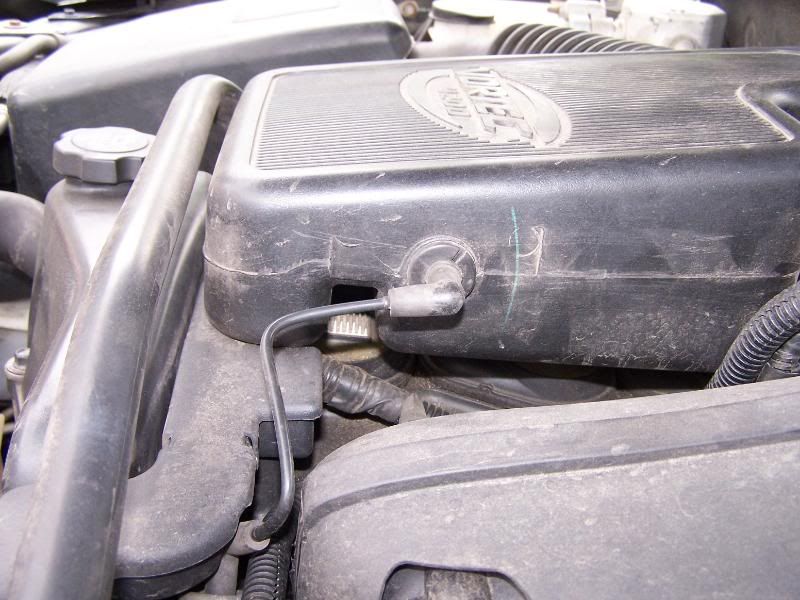
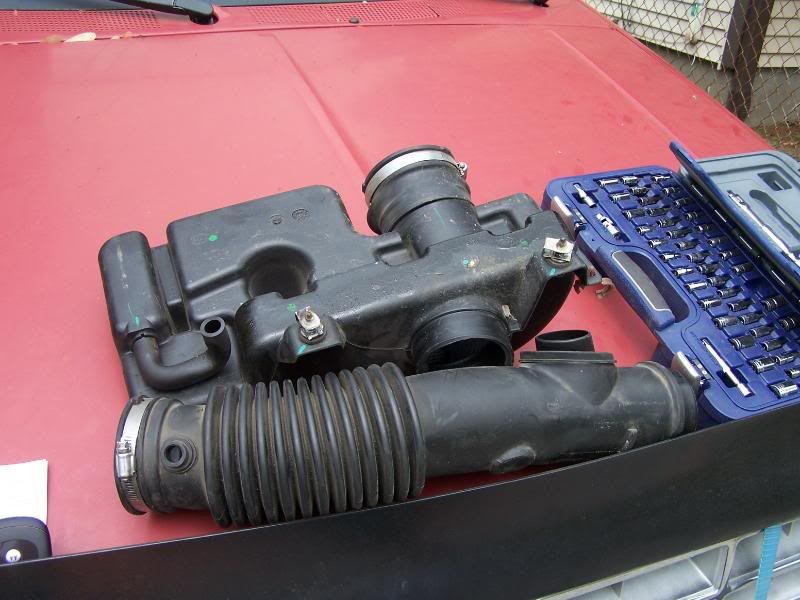
Here is the factory intake tube. Note the famous resonator hole that has so many people mystified. It is there JUST to help quiet the air flow. Only God and some factory engineer know just how much time was spent to figure out that design -- at the cost of usable horsepower -- to make the air intake silent so that we enthusiasts could dump it in the scrap heap for something that made our TB sound like a man's vehicle!
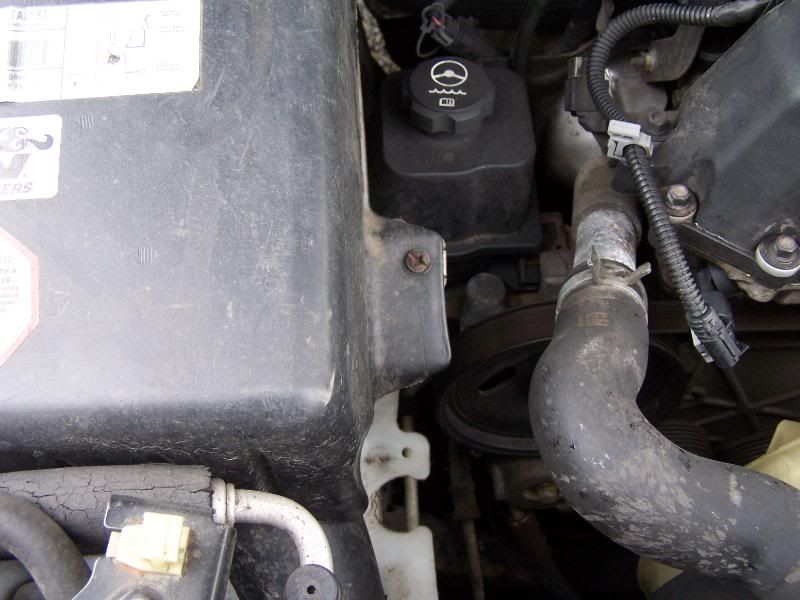
And next, is the air temperature sensor. This helps the PCM adjust to air temps hitting the intake manifold. It pops right out of the rubber grommet and will later be placed into the new CAI.
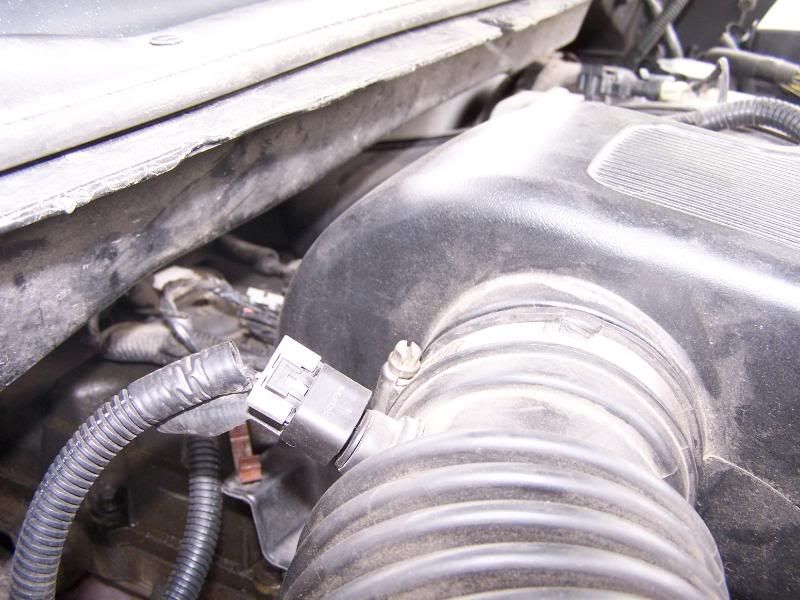
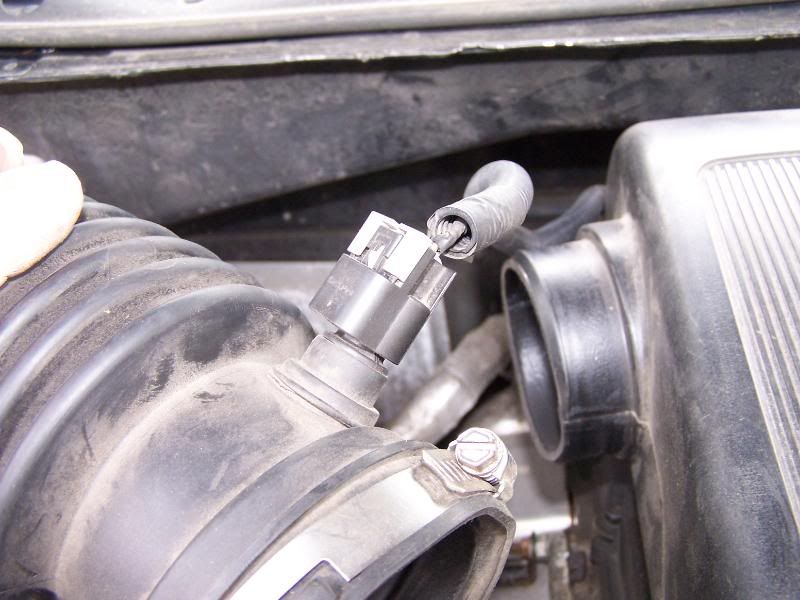
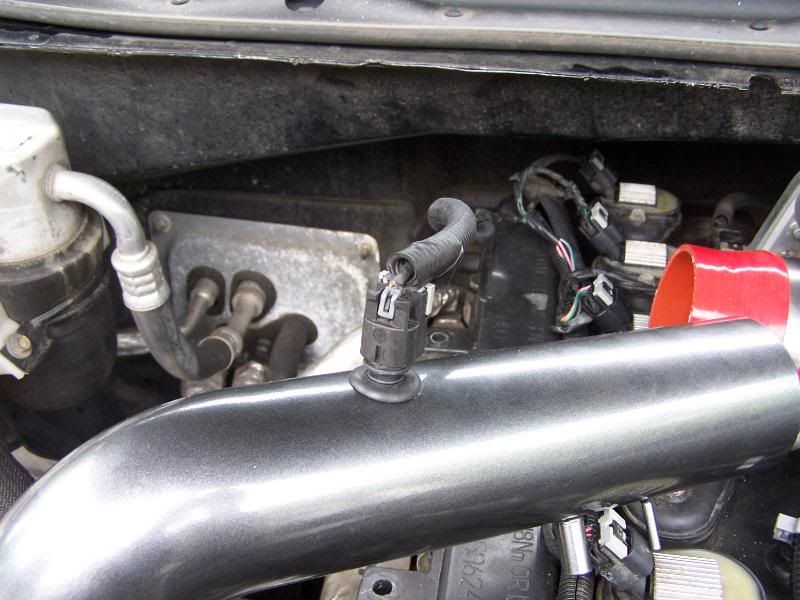
Traveling up the factory intake, here is the throttle body and connection.
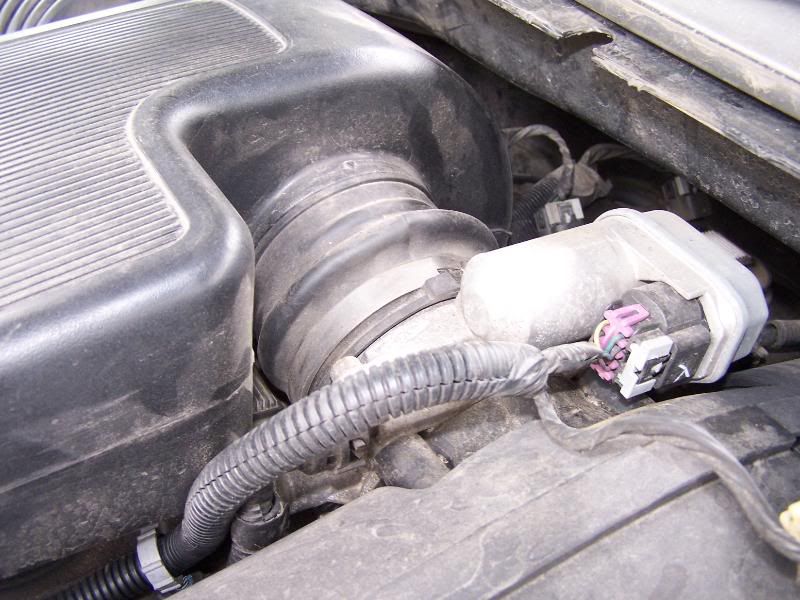
And, here is the fuel pressure regulator vacuum line. This will later connect to the new CAI also.
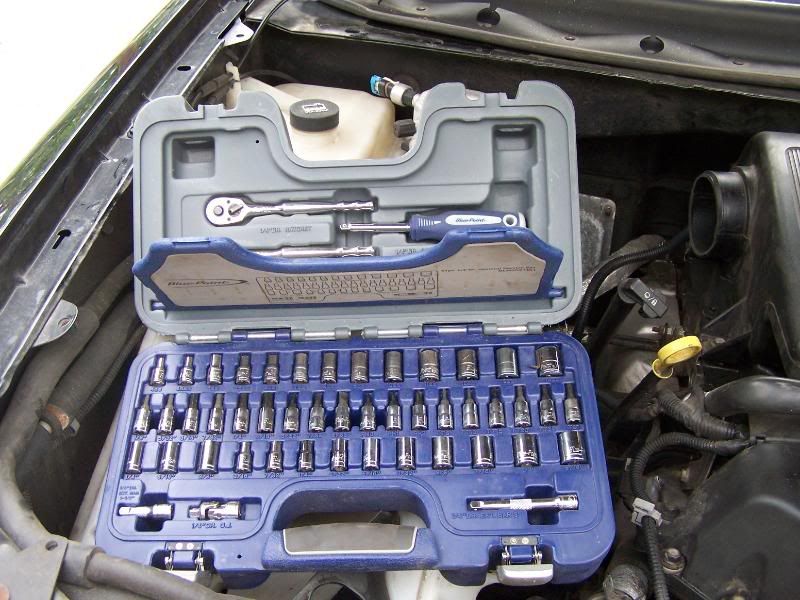
And, now a word from our sponsor... I used this handy Blue Point 1/4" socket set for the two bolts that had to be removed from the factory resonator. You could use a simple 10mm wrench. Snap On has these kits available in a number of formats and they are nice tools for a reasonable price.
All tools needed for this job include: 1/4" wide flat screwdriver, 10mm wrench or socket, cleaning supplies. I also used a nut driver for the hose clamps, but you could use an 8mm socket or the flat screwdriver as well.
Let's get the rest of the factory system off. Pull the intake from the resonator by loosening the worm-drive hose clamp:
Pull screw #1 on the resonator housing:
Pull screw #2 on the resonator housing (and note, I chose to not retain the resonator housing on my install -- some guys like to cut it out and reinstall it. Your choice. I figure that it is nothing more than a heat trap for the top of the engine, so I plan on running without it. I'll save it for trade-in someday. If you run without it, you may also want to remove the clip nuts on the top of the engine and retain them with the resonator for future use.
Here is the throttle body clamp removed. Same as the other side, then the resonator box can be lifted from the engine bay.
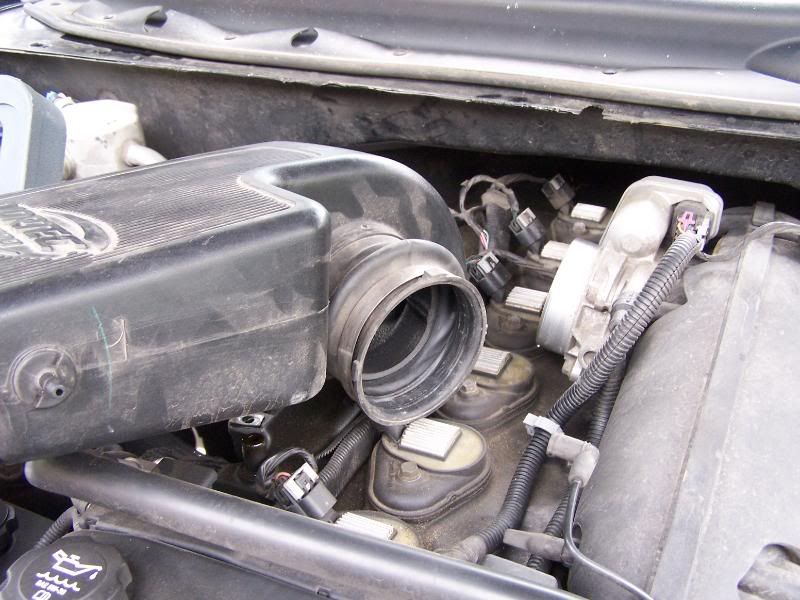
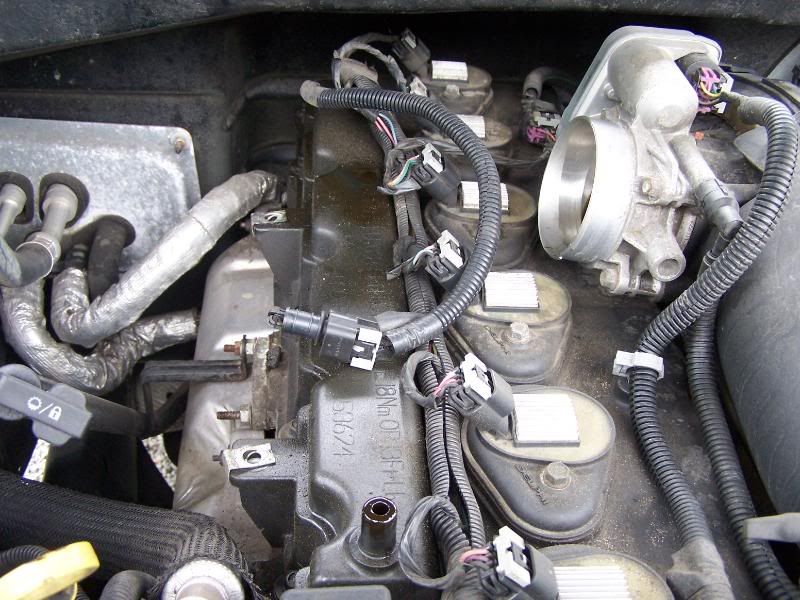
Here is what you see once everything is removed. The silver thing at the rear of the photo is the throttle body. Inspect it and clean it if necessary. Now is the time! It comes off the intake with 4 bolts, and as long as you have the socket set out already...
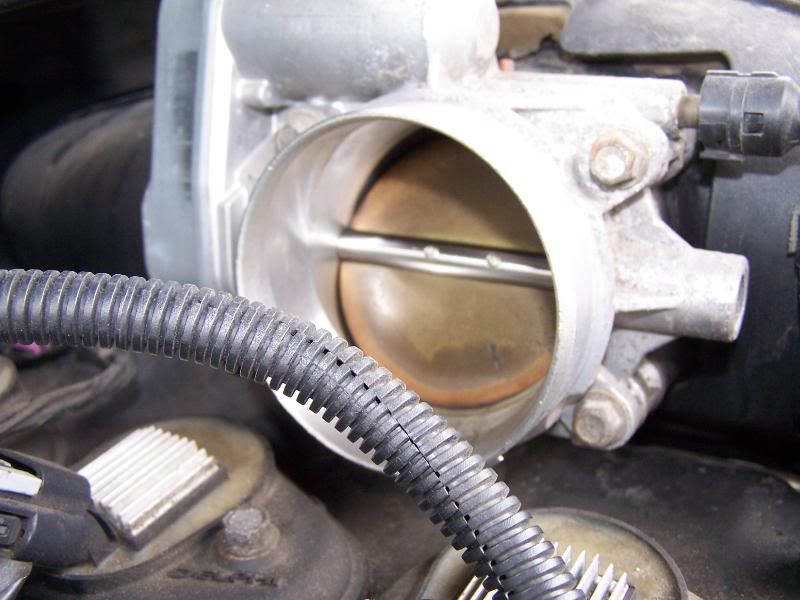
Here is my throttle body before cleaning. Not too bad figuring it has 88,000 miles and hasn't been cleaned since I installed the K&N drop in. guess the K&N was doing a fair job of filtering. I'll not detail the cleaning procedure here as others have done so in other threads, but in my case it only took a couple of minutes.
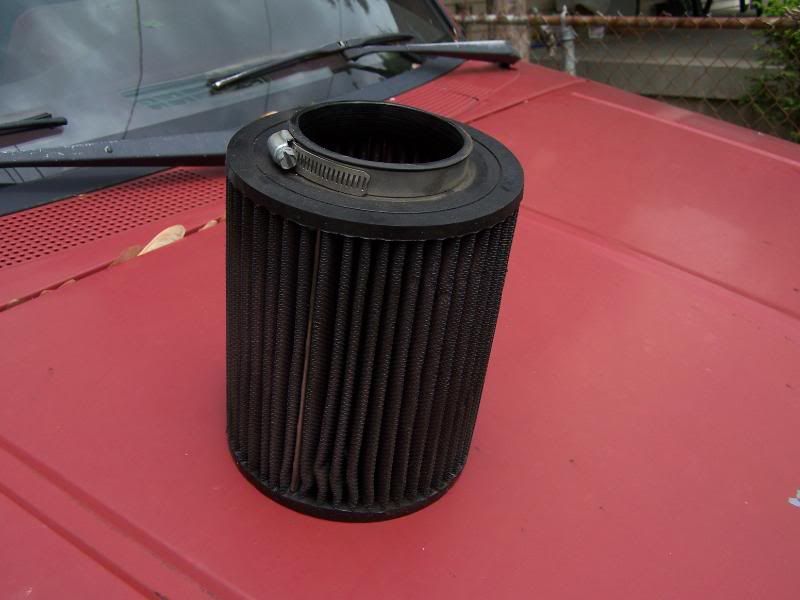
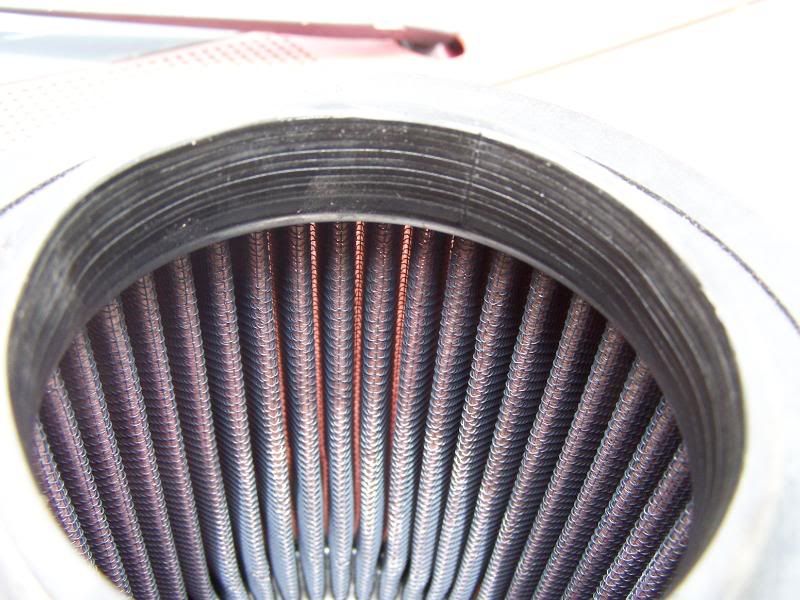
Speaking of the K&N, here is mine as it came out. Due for washing and re-oiling! The inside, as seen in the next shot, isn't nearly as bad looking, however. Dirt SHOULD be on the outside and not the inside.
As I mentioned above, the filter and cleaning kit is for sale...
Here is the pile of old parts removed. I recommend saving them for trade-in time!
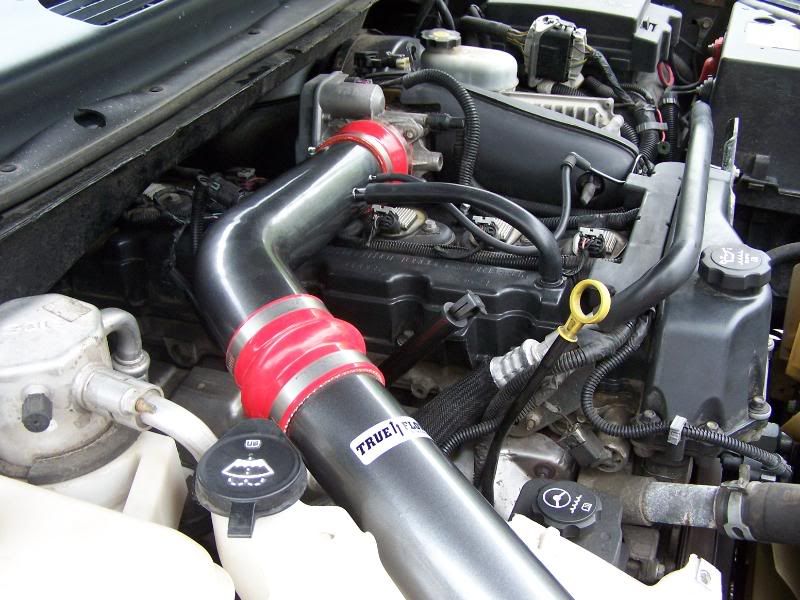
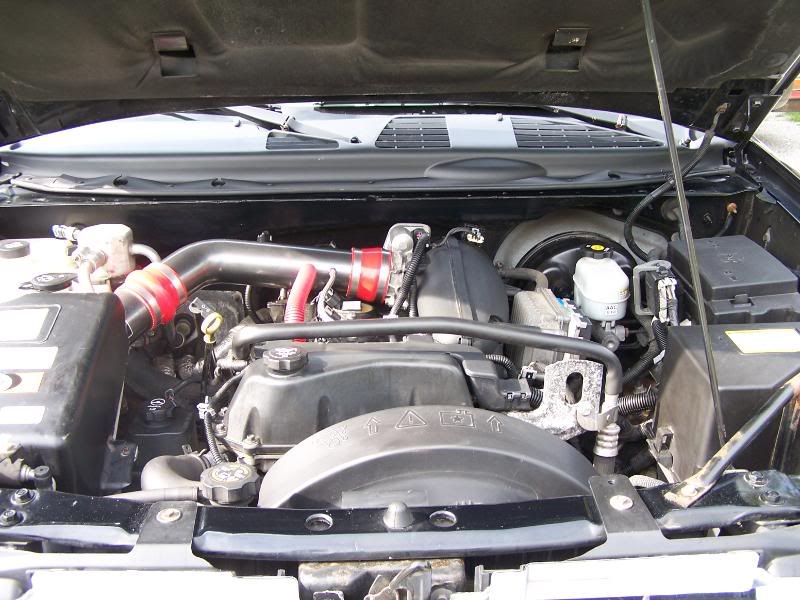
Let's get the new intake in place. The new system replaces ALL the factory parts except the air box itself. True Flow says that the advantages of the factory air box are that it runs cooler than sucking up hot under-hood air, and that it protects the filter element. They have dyno tests to back up their beliefs, and in this instance the dyno says that they gain about 6 hp over stock with their setup.
In this shot, you can see the two fittings for vacuum duty. The larger one will connect to the top of the head (the bent tube under the factory resonator box). This draws out oil vapors from the engine blow-by and re-burns them. Note: It is this blow-by that makes the throttle body get dirty (unless you have a horrid or no air filter). Without a "wet" intake track, there is no way to clean the throttle body, which is why we must disassemble it for cleaning periodically as part of the regular tune-up procedure).
The smaller vacuum line will hook to the fuel pressure regulator, and will help to regulate -- fuel pressure (doh!) based on engine needs as signaled by engine vacuum.
On full throttle, the engine vacuum drops to zero, which will give full fuel pressure boost. At idle or part throttle, engine vacuum will run somewhere between 14-16 Hg., which will cut back on fuel pressure. Best economy is found when the engine vacuum is held as high as possible for any or all driving circumstances. Driving with an add-on vacuum gauge will really show some things about driving habits and can help you to be more efficient. Lifting the pedal just a little bit can drastically change vacuum readings, and likewise improve economy.
Note that my 03 has a PCM for Less Tune: 87 octane, shift point 3, torque management eliminated (may still be 5%), and spec'd for resonator eliminate and drop in K&N air filter in a hogged out air-box. I am planning on sending the PCM out for a re-tune with the CAI system and new tires in place. I also have a .490 boost valve in the transmission (soon to be a Vette servo also), and am running 255-70-16 Cooper ATR w/3.73 gears.
Here goes:
Package as it arrived:
Open it up and this is what is inside: Two metal (powder-coated) air tubes, 2 silicon sleeves, 4 worm-drive clamps, 2 pieces of rubber tubing for vacuum connections, the air filter, instructions and stickers (ARB compliance for inspections, "don't throw away the filter" and a manufacturer's sticker)
Here is the unwitting donor vehicle. Yes, it is dirty. I drive it!
The air box is the place to start. It has 3 screws. You can use either a flat-head screwdriver with about a 1/4" wide blade or a Phillips. I've found that the flat blade works better, as the screw does not have deep grooves.
Screw 1 is sort of hidden. You may need to shine a light down the hole to find it:
Screw 2:
Screw 3:
Air box lid lifts off. You sort of have to wiggle it some, as it can hang up on some of the hoses around the front. It will come out of its hole without removing anything else, just have patience and press the hoses out of the way a bit for clearance.
Note the K&N drop in filter. It did a good job, but I was wanting to move to a CAI system to replace the entire factory setup. The K&N is for sale. Let me know. It has been cleaned once and has around 30K miles. Due for another cleaning!
Some of you may have noticed the hogged out air box in the prior picture. Here is a better look at it. I just took a cut-off wheel to it. Leaves a bit more room around the filter.
Here is the factory intake tube. Note the famous resonator hole that has so many people mystified. It is there JUST to help quiet the air flow. Only God and some factory engineer know just how much time was spent to figure out that design -- at the cost of usable horsepower -- to make the air intake silent so that we enthusiasts could dump it in the scrap heap for something that made our TB sound like a man's vehicle!
And next, is the air temperature sensor. This helps the PCM adjust to air temps hitting the intake manifold. It pops right out of the rubber grommet and will later be placed into the new CAI.
Traveling up the factory intake, here is the throttle body and connection.
And, here is the fuel pressure regulator vacuum line. This will later connect to the new CAI also.
And, now a word from our sponsor... I used this handy Blue Point 1/4" socket set for the two bolts that had to be removed from the factory resonator. You could use a simple 10mm wrench. Snap On has these kits available in a number of formats and they are nice tools for a reasonable price.
All tools needed for this job include: 1/4" wide flat screwdriver, 10mm wrench or socket, cleaning supplies. I also used a nut driver for the hose clamps, but you could use an 8mm socket or the flat screwdriver as well.
Let's get the rest of the factory system off. Pull the intake from the resonator by loosening the worm-drive hose clamp:
Pull screw #1 on the resonator housing:
Pull screw #2 on the resonator housing (and note, I chose to not retain the resonator housing on my install -- some guys like to cut it out and reinstall it. Your choice. I figure that it is nothing more than a heat trap for the top of the engine, so I plan on running without it. I'll save it for trade-in someday. If you run without it, you may also want to remove the clip nuts on the top of the engine and retain them with the resonator for future use.
Here is the throttle body clamp removed. Same as the other side, then the resonator box can be lifted from the engine bay.
Here is what you see once everything is removed. The silver thing at the rear of the photo is the throttle body. Inspect it and clean it if necessary. Now is the time! It comes off the intake with 4 bolts, and as long as you have the socket set out already...
Here is my throttle body before cleaning. Not too bad figuring it has 88,000 miles and hasn't been cleaned since I installed the K&N drop in. guess the K&N was doing a fair job of filtering. I'll not detail the cleaning procedure here as others have done so in other threads, but in my case it only took a couple of minutes.
Speaking of the K&N, here is mine as it came out. Due for washing and re-oiling! The inside, as seen in the next shot, isn't nearly as bad looking, however. Dirt SHOULD be on the outside and not the inside.
As I mentioned above, the filter and cleaning kit is for sale...
Here is the pile of old parts removed. I recommend saving them for trade-in time!
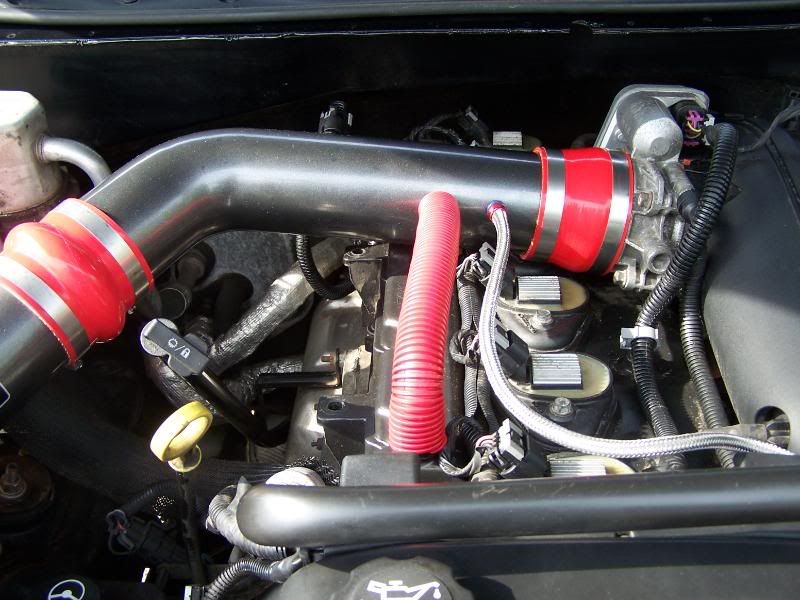
Let's get the new intake in place. The new system replaces ALL the factory parts except the air box itself. True Flow says that the advantages of the factory air box are that it runs cooler than sucking up hot under-hood air, and that it protects the filter element. They have dyno tests to back up their beliefs, and in this instance the dyno says that they gain about 6 hp over stock with their setup.
In this shot, you can see the two fittings for vacuum duty. The larger one will connect to the top of the head (the bent tube under the factory resonator box). This draws out oil vapors from the engine blow-by and re-burns them. Note: It is this blow-by that makes the throttle body get dirty (unless you have a horrid or no air filter). Without a "wet" intake track, there is no way to clean the throttle body, which is why we must disassemble it for cleaning periodically as part of the regular tune-up procedure).
The smaller vacuum line will hook to the fuel pressure regulator, and will help to regulate -- fuel pressure (doh!) based on engine needs as signaled by engine vacuum.
On full throttle, the engine vacuum drops to zero, which will give full fuel pressure boost. At idle or part throttle, engine vacuum will run somewhere between 14-16 Hg., which will cut back on fuel pressure. Best economy is found when the engine vacuum is held as high as possible for any or all driving circumstances. Driving with an add-on vacuum gauge will really show some things about driving habits and can help you to be more efficient. Lifting the pedal just a little bit can drastically change vacuum readings, and likewise improve economy.

 . Also good call on keeping the stock parts. I gutted all of my stuff so it required a trip to the salvage yard to pick up the parts.