Difficulty: Moderate
Estimated Time: Varies
Part Numbers: None
Cost: $50-75
Tools Needed:
Optional:
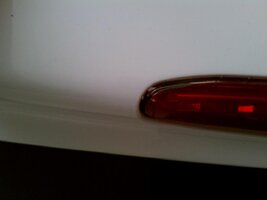
The Avalanche LED 3rd brake light can be found on Ebay for upwards of $50. There are a number of vendors that carry slightly different styles as far as color and number of LEDs, but fitment-wise, there is no difference and model year does not matter. The one I used was the least expensive, and it had the most LEDs available.

Step 1: Remove the stock 3rd brake light.
First, open your lift gate and locate the small rubber plug where the brake light wiring enters the truck, and pop it out.

You'll have a couple inches of wire to feed from the opening, until you reach the square shaped wiring harness. It's a tight fit, but with a bit of wiggling, it will come free.

Now close the lift gate, and open the lift gate glass. You'll see where the brake light wire feeds down next to the lift gate glass hinge. Pull the wiring up through the opening.

Once that's out, remove the 2 screws on either end of the brake light, and you're clear.

Step 2: Modifying the Avalanche brake light wiring
You'll notice 2 differences between the Avalanche light and the stock GMT360/370/305 brake light. The connector is a different shape, and the wiring is way too short. To fix this, we'll use our quick disconnects or butt connectors.
Cut off the Avalanche connector as close to the connector as possible. Measure out the approximate length of the Avalanche wiring on the stock wiring and make your cut there. Using your connectors, connect the yellow wire on the stock segment (positive) to the white wire on the Avalanche light. Connect the 2 black wires to each other.

If you have a battery pack, spare computer power supply, or test bench of some kind, you can test your connections to make sure they work.

If you are happy with the results, you can reverse step 1 and install your new 3rd brake light. If you want to paint the reflector inside, continue to the next step.

Step 3: Cutting open your Avalanche brake light
There are a few different ways to try opening up a sealed light housing. I tried using a heat gun, and the bake method, with poor results and ended up with slightly deformed mounting points. I found that using some plastic-specific Dremel cutting wheels performed the best.

Align the wheel horizontally with the light, and cut around the edges. You'll be cutting through the outer plastic lens, a layer of adhesive, another layer of the plastic lens, and another layer of adhesive before getting down to the base itself. Don't worry about scratching the base, it won't be visible once installed.

Once you have the lens off, you can clean out the bit of lens that's left around the bottom of the base using a screwdriver or pick tool. Then it's time to get the lights removed. The reflector is attached to the base by several dabs of silicone in the mounting channels. Here are some closeups of the ends and center channels.


You can pull the reflector up gently so you can wedge your fingers underneath. From that point, pull a bit harder and the silicone will give way.

The LED board is held to the reflector by small screws, so remove those and set them aside. The rubber grommet for the wires can be pinched on the "outside" and fed through the hole.

Step 4: Painting the reflector and base
The reflector does not take up all of the visible space behind the lens. Small sections of the sides and bottom lip of the base can be seen, so those need to be painted as well. If you have a touch up paint kit, it may come in handy here since it's such a small area.

Moving on to the reflector, apply the necessary coats to get the desired coverage.


Once everything is dry, reassemble by putting the brake light in a clamp, and running a bead of silicone sealant around the edge where you cut.

Let that set and cure, then you're ready to install and enjoy.

Estimated Time: Varies
Part Numbers: None
Cost: $50-75
Tools Needed:
- Wire cutter or scissors
- Wire strippers
- Quick disconnects and electrical tape or butt connectors
- Crimping tool
Optional:
- Dremel with plastic cutoff wheel
- Small flat head screwdriver or pick tool
- Paint supplies
- Clamp or vice
- Silicone sealant
The Avalanche LED 3rd brake light can be found on Ebay for upwards of $50. There are a number of vendors that carry slightly different styles as far as color and number of LEDs, but fitment-wise, there is no difference and model year does not matter. The one I used was the least expensive, and it had the most LEDs available.
Step 1: Remove the stock 3rd brake light.
First, open your lift gate and locate the small rubber plug where the brake light wiring enters the truck, and pop it out.
You'll have a couple inches of wire to feed from the opening, until you reach the square shaped wiring harness. It's a tight fit, but with a bit of wiggling, it will come free.
Now close the lift gate, and open the lift gate glass. You'll see where the brake light wire feeds down next to the lift gate glass hinge. Pull the wiring up through the opening.
Once that's out, remove the 2 screws on either end of the brake light, and you're clear.
Step 2: Modifying the Avalanche brake light wiring
You'll notice 2 differences between the Avalanche light and the stock GMT360/370/305 brake light. The connector is a different shape, and the wiring is way too short. To fix this, we'll use our quick disconnects or butt connectors.
Cut off the Avalanche connector as close to the connector as possible. Measure out the approximate length of the Avalanche wiring on the stock wiring and make your cut there. Using your connectors, connect the yellow wire on the stock segment (positive) to the white wire on the Avalanche light. Connect the 2 black wires to each other.
If you have a battery pack, spare computer power supply, or test bench of some kind, you can test your connections to make sure they work.
If you are happy with the results, you can reverse step 1 and install your new 3rd brake light. If you want to paint the reflector inside, continue to the next step.
Step 3: Cutting open your Avalanche brake light
There are a few different ways to try opening up a sealed light housing. I tried using a heat gun, and the bake method, with poor results and ended up with slightly deformed mounting points. I found that using some plastic-specific Dremel cutting wheels performed the best.
Align the wheel horizontally with the light, and cut around the edges. You'll be cutting through the outer plastic lens, a layer of adhesive, another layer of the plastic lens, and another layer of adhesive before getting down to the base itself. Don't worry about scratching the base, it won't be visible once installed.
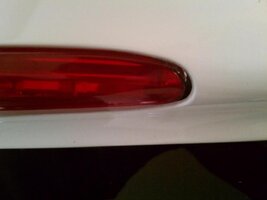
Once you have the lens off, you can clean out the bit of lens that's left around the bottom of the base using a screwdriver or pick tool. Then it's time to get the lights removed. The reflector is attached to the base by several dabs of silicone in the mounting channels. Here are some closeups of the ends and center channels.
You can pull the reflector up gently so you can wedge your fingers underneath. From that point, pull a bit harder and the silicone will give way.
The LED board is held to the reflector by small screws, so remove those and set them aside. The rubber grommet for the wires can be pinched on the "outside" and fed through the hole.
Step 4: Painting the reflector and base
The reflector does not take up all of the visible space behind the lens. Small sections of the sides and bottom lip of the base can be seen, so those need to be painted as well. If you have a touch up paint kit, it may come in handy here since it's such a small area.
Moving on to the reflector, apply the necessary coats to get the desired coverage.
Once everything is dry, reassemble by putting the brake light in a clamp, and running a bead of silicone sealant around the edge where you cut.
Let that set and cure, then you're ready to install and enjoy.

 Sounds like a good excuse for the mod bug to take a stroll through Ebay to me!!
 I wouldn't know where to begin to look.. all the horror stories I read through the years.. and hell some of them bulbs costs more then the 3rd brake light mod lol..


 Got pics? Only gap I had, was between the lens and the base due to cutting mine open. Some silicone should fill in any gaps you've got, and keep water out.