I have seen the inside of this engine waaaaaaaaay too many times.
Because of a P1345 code and poor fuel economy, I am forced to replace the cam phaser again. This time, I will be using a Dorman as per this thread:
Dorman now has VVT cam phaser
This time, I documented the install for anybody that wants to replace theirs.
Difficulty (out of 5): 3.5
Tools required: Assortment of wrenches, ratchets, extensions, screw drivers. Socket sizes: 7mm, 10mm, 15mm, Allen socket, Kent-Moore chain holding tools J 44217
Time required (removal and install): 4 to 6 hours
1. Remove intake manifold and valve cover
2. Remove the spark plugs (this will make it easier to turn the engine)
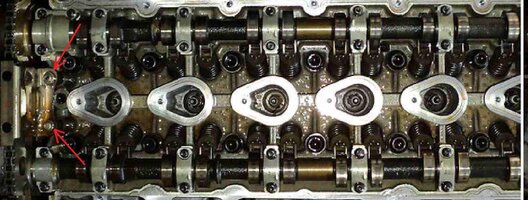
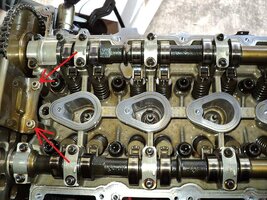
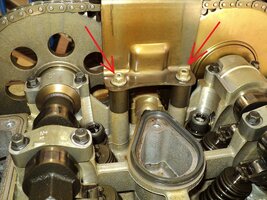
3. Remove the top chain guide (two bolts)
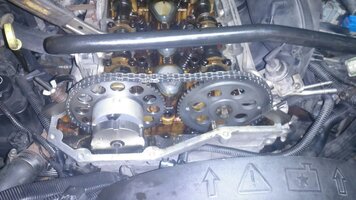
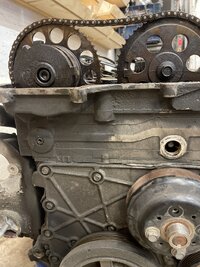
4. Turn the engine until both marks on the gears line up with the dark links on the chain and the word "Delphi" is parallel with the cylinder head.
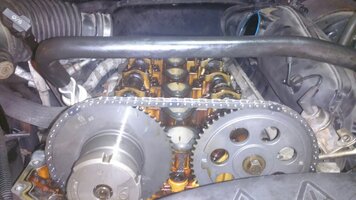
5. Using either a wrench (maybe 1") or an adjustable wrench (like me), hold the camshaft at the hex part while you loosen the camshaft phaser bolt. Only Loosen.
6. Install the Spent-Moore J-44217 chain holding tools. The tools look like this:
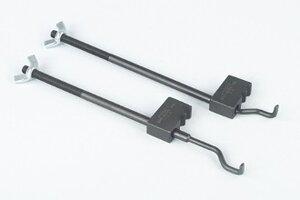
They go like this:
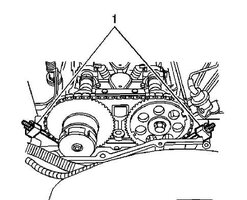
Make sure they are hooked to the chain link as close to the shoes as possible, secure and moderately tight. Don't go crazy. The important thing is that they are securely holding the chain on each side. If they come off while the gear is off, you're in for a world of extra work when the chain tensioner extends fully and locks.
7. Remove and discard the cam phaser bolt.
8. Wiggle the cam phaser forward to disengage it from the camshaft and remove it from the chain.
9. Install the new phaser, aligning the mark on the gear with the dark link. It should slide right on the camshaft. If not, the old phaser may have been a little loose and the camshaft may be out of alignment. Turn the camshaft ever so slightly back and forth using the wrench while pushing on the phaser, it should eventually slide in. I had to do this as my old one was loose and allowed movement internally.
10. Install the new bolt snug.
11. Remove the chain holding tools.
12. While holding the wrench on the camshaft, torque the bolt to 18 ft-lbs. Then, while still holding the camshaft, turn the bolt another 135 degrees (I just guesstimated it).
13. The rest is the reverse of removal.
A few notes:
- Since the battery was disconnected, you will have to clean the throttle body before reinstalling it.
- Now is a good time if you need new plugs. (ACDelco 41-103)
- If your CPAS is old, it wouldn't be a bad idea to replace it or at the very least, clean it if there is no oil in the plug.
- You should change your oil before starting this job just so the new phaser doesn't have to deal with dirty oil while breaking in.
Because of a P1345 code and poor fuel economy, I am forced to replace the cam phaser again. This time, I will be using a Dorman as per this thread:
Dorman now has VVT cam phaser
This time, I documented the install for anybody that wants to replace theirs.
Difficulty (out of 5): 3.5
Tools required: Assortment of wrenches, ratchets, extensions, screw drivers. Socket sizes: 7mm, 10mm, 15mm, Allen socket, Kent-Moore chain holding tools J 44217
Time required (removal and install): 4 to 6 hours
1. Remove intake manifold and valve cover
2. Remove the spark plugs (this will make it easier to turn the engine)
3. Remove the top chain guide (two bolts)
4. Turn the engine until both marks on the gears line up with the dark links on the chain and the word "Delphi" is parallel with the cylinder head.

5. Using either a wrench (maybe 1") or an adjustable wrench (like me), hold the camshaft at the hex part while you loosen the camshaft phaser bolt. Only Loosen.
6. Install the Spent-Moore J-44217 chain holding tools. The tools look like this:

They go like this:

Make sure they are hooked to the chain link as close to the shoes as possible, secure and moderately tight. Don't go crazy. The important thing is that they are securely holding the chain on each side. If they come off while the gear is off, you're in for a world of extra work when the chain tensioner extends fully and locks.
7. Remove and discard the cam phaser bolt.
8. Wiggle the cam phaser forward to disengage it from the camshaft and remove it from the chain.
9. Install the new phaser, aligning the mark on the gear with the dark link. It should slide right on the camshaft. If not, the old phaser may have been a little loose and the camshaft may be out of alignment. Turn the camshaft ever so slightly back and forth using the wrench while pushing on the phaser, it should eventually slide in. I had to do this as my old one was loose and allowed movement internally.
10. Install the new bolt snug.
11. Remove the chain holding tools.
12. While holding the wrench on the camshaft, torque the bolt to 18 ft-lbs. Then, while still holding the camshaft, turn the bolt another 135 degrees (I just guesstimated it).
13. The rest is the reverse of removal.
A few notes:
- Since the battery was disconnected, you will have to clean the throttle body before reinstalling it.
- Now is a good time if you need new plugs. (ACDelco 41-103)
- If your CPAS is old, it wouldn't be a bad idea to replace it or at the very least, clean it if there is no oil in the plug.
- You should change your oil before starting this job just so the new phaser doesn't have to deal with dirty oil while breaking in.

