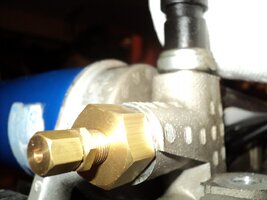
Just around the time that Drew was posing this question of not having to use any Special Tools to take Direct Readings of Oil Pressure "At The Galley" ... I was trying to dope out something semi-permanent to mount directly to my Donor Motor while it was still mounted on an Engine Stand and be useful as soon as my Pre-Oiler Build was completed and work off of ANY available Oil Galley. The reason this would work is because in Fluid Dynamics... Say you have a length of pipe that is 5 Miles long and when filled completely with a column of ANY type liquid or fluid... If you push inwards on one end of that fluid and it moves 1".... 5 Miles away... the Ass End of the Fluid Column will also simultaneously move exactly 1", too. So it really does not matter where in the Pressurized Oil System that you plug in to take your readings... as long as the line it is being connected up to is being pressurized by the Oil Pump with absolutely NO AIR BUBBLES IN BETWEEN:
This applies to STATIC fluid only. When the fluid is flowing, like the oil in your engine, there are losses (pressure drops) that are dependent on temperature (viscosity), flow rate, passage length and diameter, the presence of bends (bend radius and turning angle), roughness of the passage, other obstructions, protuberances or transitions, etc. These losses add up as you get further downstream.
Granted, any galley plug is
likely going to be a relatively short distance from the pump with large passages in between but you
will have some losses along the way. Are these negligible? Maybe, maybe not. You could be off less than the error of the pressure gauge itself, it could be a couple of PSI, it could be 10+ psi. The only way to know for sure is to measure both at the pump (actually post filter) and your location simultaneously. If you're just looking to monitor trends to keep track of wear, filter condition, oil temp status, etc. this is less critical. But if you're looking for an absolute measure then the location of the pressure tap definitely matters.
A couple of additional notes:
The length and size of the line between the pressure tap and your gauge doesn't matter (within reason) for the reason you stated before because in this case the fluid is not
flowing through the tube to the gauge. it is effectively static and only changes pressure.
The presence of air in this line also doesn't particularly matter (assuming it is normally sized). The oil will press on the air and compress it until its pressure is the same as the oil. Which will continue to press on the oil or gauge downstream of it so everything in the line up to the gauge will be the same pressure. If you put a block of foam on a bathroom scale then stand on it, it will read the same as if you stood directly on it, no? The compressibility (springiness) of the air will have a dampening effect on the pressure read by the gauge but this can actually be advantageous (less needle bounce) and is often done intentionally with gauge "snubbers" to protect them pressure transients that could damage them.