Sludge vs Oil Pressure (non-gauge related low pressure)

W4UWC

Original poster
Member
Nov 11, 2019
46
Nicholasville, KY
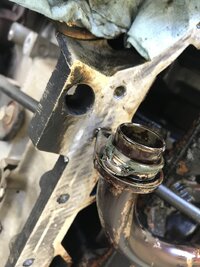
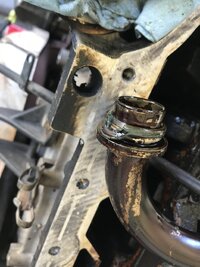
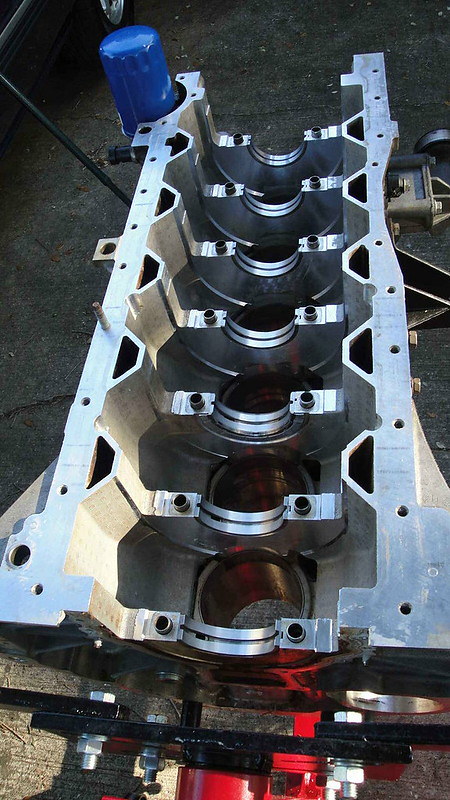
In another thread, Mooseman commented on a post I made about severe sludge I had in my 4.2. I broke most of it up and cleaned/vacuumed it plus cleaned the oil pan and pickup. The pickup wasn't severely clogged but could use cleaning.

Put it back together with a mechanical gauge (uses tube, not sender) and oil pressure will dip to 0 when it's hot. Instrument cluster gauge agrees ("stop engine"). So this is not a gauge problem as most threads end up covering.

I'm testing this engine hoping to use it in another Envoy but won't put forth the effort until I am confident in it.

What is mysterious is it can idle for an hour at 20 psi but if I drive it then it will start dropping the oil pressure. Shift to N and restart it and immediately back to 20+ psi. If it were purely mechanical issue causing the low oil pressure (such as worn bearings) then seems it should remain low oil pressure.

I swapped a VVT solenoid into it hoping it may be a factor but same result. I can rev the engine and that doesn't always increase oil pressure. No weird noises however I don't let it run for but a few seconds at 0 psi. Restarting fixes low oil pressure.

Question: Do you think random sludge particles are clogging the system and stopping oil flow and restarting frees them and restores oil pressure since it seems vehicle movement is needed to initiate the problem?

I'm looking for ideas on anything to try. Engine wear and sludge are both in play here and both would be fatal (not worth fixing). One thing I did not do was replace the o-ring on the oil pickup or touch the oil pump when I took the timing cover off. MSSRM commented those are factors so I'm deciding if it's worth diving back in to change those. Labor is free so I'm not afraid of the work but I'm not interested throwing more than $100 at it vs using that towards a new engine.

Thanks!
 

littleblazer

Member
Jul 6, 2014
9,265
I would almost think a gummed up oil bypass valve... Don't they have those built into the block? It would be similar to what happens on the LS oil pumps where the plunger can stick.
 

W4UWC

Original poster
Member
Nov 11, 2019
46
Nicholasville, KY
I've seen it mentioned. On the 4.2 the manual shows it is above the oil filter. Assumed to be a press fit as Rockauto says "PART HAS A 16.10MM MAX OD & FITS A 15.84 HOLE IN BLOCK ". It's cheap so worth a shot if anyone else agrees. I just wish I would have pastigaged the crank when I had the oil pan off and put on a new o-ring on the tube going into the oil pump.
 

W4UWC

Original poster
Member
Nov 11, 2019
46
Nicholasville, KY
I went back and looked again and Mooseman mentioned the bypass valve in a previous message but I didn't write it down and thus it got mixed in with everything else I've been reading! Too much information sometimes. Like I said it was hard to sort out all the posts that immediately referenced the factory oil pressure gauge being just a switch and then "clean your throttle body" to those who said the engine RPM was dipping down causing oil pressure loss.

The manual makes it look easy. No special tools. Yes or no?
 

Attachments

  • IMG_E9961[1].JPG
    IMG_E9961[1].JPG
    849.8 KB · Views: 31

littleblazer

Member
Jul 6, 2014
9,265
I've never replaced one. However I think there are two. One bypasses the filter. The other bypasses the flow. I don't remember if a pf61 has an internal bypass.
 

Mooseman

Moderator
Dec 4, 2011
25,343
Ottawa, ON
I was thinking more the pressure regulator in the oil pump that's gummed up. All the oil filter bypass does, whether it's in the oil filter or in the block, is let oil through unfiltered if the filter is plugged up.

For the oil pressure to drop to 0, it's either the pressure regulator or the oil pickup tube seal. The LS engines had this for a while which required replacement of the oil pump. Hasn't happened a whole lot to the 4.2 but it's possible. Even a badly worn engine would still have some pressure.
 
  • Like
Reactions: mrrsm

mrrsm

Lifetime VIP Donor
Supporting Donor
Member
Oct 22, 2015
7,727
Tampa Bay Area

littleblazer

Member
Jul 6, 2014
9,265
I was thinking more the pressure regulator in the oil pump that's gummed up. All the oil filter bypass does, whether it's in the oil filter or in the block, is let oil through unfiltered if the filter is plugged up.

For the oil pressure to drop to 0, it's either the pressure regulator or the oil pickup tube seal. The LS engines had this for a while which required replacement of the oil pump. Hasn't happened a whole lot to the 4.2 but it's possible. Even a badly worn engine would still have some pressure.
I thought that was in the block on these. Still learn something new. :tiphat:
 

Mooseman

Moderator
Dec 4, 2011
25,343
Ottawa, ON
timing-cover-oil-pump-seal-jpg.60976


In this pic, it's to the left of the pump and vertical. It's held inside with a hex plug at the bottom.

Which reminds me, it could also be the seal from the pump to the block, circled in red.
 
  • Like
Reactions: littleblazer

W4UWC

Original poster
Member
Nov 11, 2019
46
Nicholasville, KY
timing-cover-oil-pump-seal-jpg.60976


In this pic, it's to the left of the pump and vertical. It's held inside with a hex plug at the bottom.

Which reminds me, it could also be the seal from the pump to the block, circled in red.
I did not change that seal. I don't see any alternative but to open her up again. On the bright side I finally found a good harmonic balancer removal and installer. I'd like to get to the bottom of this and decide if oil pressure will be the doomsday of this engine or if it should live on to go into my 2005. The 2005 has the manifold off and I'd prefer not to take it down any further to avoid having 2 engines apart at once!
 

mrrsm

Lifetime VIP Donor
Supporting Donor
Member
Oct 22, 2015
7,727
Tampa Bay Area
If you decide that the Gerotor Pump Gearing is suspect (including the Pump-To-Engine Block Rubber Grommet pointed out by @Mooseman) the Sealed Power Gerotor Pump Kit Part# 224-53582 that includes a New Gerotor Double Gear Set (fits into Old Timing Cover Cavity in place of the complete Old Gear Set) with an Updated Oil Pump Cover. The set of (7) New Torx Fasteners require Hi-Temp Thread-Locker applied to their Threads along with 105 Inch Pounds of Torque in a Star Pattern.

The Sealed Power Kit works directly with the New Design of the Melling Oil Pick Up Tube and the Orange-Metal Grommet. Please know that the Piston-Plunger inside of the Oil Pressure Relief Valve in the Oil Pump Body is NON Removable due to the way it was factory assembled. So if you cannot extract and replace that Plunger along with a New Spring ...ONLY GM has the Complete Front Cover with Gerotor Oil Pump pre-installed as GM Part# 1262-8565.

42494505385_96b2751a6a_c.jpg43350770092_ee64ddf644_c.jpg43350770532_d84660def6_c.jpg42494506245_a26b4d10da_c.jpg42494505745_234ac7eabe_c.jpg42494505865_f069e40fc8_c.jpg42494505965_d4f791ba11_c.jpg43350770632_56bd86ecbc_c.jpg43350770822_f24af5ce29_c.jpg
 
Last edited:
  • Like
Reactions: Mooseman

W4UWC

Original poster
Member
Nov 11, 2019
46
Nicholasville, KY
I’m back. I got the “nice” engine installed (discussed in another thread) so I’m now back to playing with this sludge engine with intermittent 0 psi oil pressure when hot

I found the blue/greenish oring in the pickup tube was not seated. This very likely was the cause of the low oil pressure. I know MrRSM has covered this in detail so thanks for that info. I did find more sludge particles on the pick up screen as well as in the pan. Recall at the beginning of this thread I thoroughly cleaned those out when I assembled it last time.

I think the only way to get the sludge out is to do chemical cleaning and frequent oil changes. However... This engine has no future for a road vehicle so I’m just playing with it and will spend almost no money on it.

My next step will be to source a new oil pickup o-ring. I think I need 12557752 but there is still confusion so I’ll need to keep researching MRRSM posts before pulling the trigger on a new oring.

I compared the timing cover to one from a 2005 and it has the later style seal. See the pic. I thought about using it since that engine probably is dead.
 

Attachments

  • C1443E7C-AF29-43A8-B406-C5BD34AF899D.jpeg
    C1443E7C-AF29-43A8-B406-C5BD34AF899D.jpeg
    380.4 KB · Views: 30
  • CB04DE1F-872C-4AA8-97CA-83D6EB90B8F7.jpeg
    CB04DE1F-872C-4AA8-97CA-83D6EB90B8F7.jpeg
    374.3 KB · Views: 33
  • 02A94E34-DFDA-4779-A7D9-718990828B68.jpeg
    02A94E34-DFDA-4779-A7D9-718990828B68.jpeg
    418.9 KB · Views: 30

W4UWC

Original poster
Member
Nov 11, 2019
46
Nicholasville, KY
I’m back. I got the “nice” engine installed (discussed in another thread) so I’m now back to playing with this sludge engine with intermittent 0 psi oil pressure when hot

I found the blue/greenish oring in the pickup tube was not seated. This very likely was the cause of the low oil pressure. I know MrRSM has covered this in detail so thanks for that info. I did find more sludge particles on the pick up screen as well as in the pan. Recall at the beginning of this thread I thoroughly cleaned those out when I assembled it last time.

I think the only way to get the sludge out is to do chemical cleaning and frequent oil changes. However... This engine has no future for a road vehicle so I’m just playing with it and will spend almost no money on it.

My next step will be to source a new oil pickup o-ring. I think I need 12557752 but there is still confusion so I’ll need to keep researching MRRSM posts before pulling the trigger on a new oring.

I compared the timing cover to one from a 2005 and it has the later style seal. See the pic. I thought about using it since that engine probably is dead.
 

Attachments

  • 8EA3F6F0-5141-4E19-B649-F589BA113129.jpeg
    8EA3F6F0-5141-4E19-B649-F589BA113129.jpeg
    547.6 KB · Views: 35

mrrsm

Lifetime VIP Donor
Supporting Donor
Member
Oct 22, 2015
7,727
Tampa Bay Area
These images show the Before & After Effects of using ACDelco Top Engine Cleaner along with Scott "Blue" Shop Towels to De-Glaze the Donor 2004 GM Atlas 4.2L LL8 Engine Block of Gas Gum, Fuel Vapor Varnish and Carbon Buildup after 160,000 Miles of Wear & Tear:


I used a proper Chemical-Proof Breathing Mask, deWalt Sealed Eye Protection Glasses and Nitrile Gloves while carefully Foaming and then Wiping Down the Aluminum Engine Block in segments. This work MUST be done Out Of Doors and well away from living quarters, family members or passers-by as these Heavy Fumes are quite overwhelming and VERY Toxic.

In hindsight... this job would have been MUCH easier had I used Berryman's Chem-Dip via (2) One Gallon Cans and a Mechanics Parts Brush as THAT Chemical can achieve the Very Same Results ...with MUCH less VOCs (Volatile Organic Compounds) vaporizing around and getting into the local breathable atmosphere.

Berryman's Chem-Dip courtesy Amazon:


BERRYMANSCHEMDIP.jpg

Please expect Long Delays in Delivery as Amazon is Prioritizing our Needs for Critical Consumer Goods during the COVID-19 Crisis.

NOTE:

If you submerge those two Front Timing Covers in a shallow Rectangular Plastic Pan under the Berryman's Chem-Dip... they will passively clean right down to Bare Metal in around Four Hours. The Chem-Dip is VERY Re-Useable...just pour it back into the (2) Gallon Cans and be ready for the Next Cleaning Job.
 
Last edited:

W4UWC

Original poster
Member
Nov 11, 2019
46
Nicholasville, KY
Submerge the oil pump and everything? I have a gallon of the Berrymans but I do not plan to totally disassemble the engine like in your pictures. I'd like to as my labor is free but I don't want to buy news seals and various other components considering this engine will probably never leave my driveway. I'm just playing around as it's a learning experience.

Question: is FelPro 72401 a substitute for the oil pickup O-ring 12557752? The ads keeps popping up for the FelPro O-ring during my searches and it seems to be universally available vs a GM part which will take time to acquire.
 

mrrsm

Lifetime VIP Donor
Supporting Donor
Member
Oct 22, 2015
7,727
Tampa Bay Area
Yes... Drown them... and Walk Away. Unlike using Harsh Sodium Hydroxide Oven Cleaner... Extended Soaks of ALL Metals getting the "Serious Dunk" in Berryman's Chem-Dip will NOT harm them even if left in the Pan for longer than a few hours of soaking. Not even Aluminum Parts will suffer as they will NOT leech out Aluminum Oxides into the solvent if they are also submerged for very long periods of time.

And so components like Fully Assembled, Used Pistons with Old Rings still installed and while still fastened onto the Connecting Rods after being just yanked from any tired Engine Block can be left in this stuff and clean up much sooner than you would think. The most intractable Hard Baked-On Carbon Deposits on them WILL yield to the Chem-Dip and leave them all amazingly clean.

Afterwards... You can use Plain VERY Hot Water in the Kitchen Sink to thoroughly rinse off such Aluminum Parts and then liberally spray them all down along with any other Ferrous Metal sub-parts like Re-Usable 10.9 Fasteners and Roller-Needle Bearings, etc., with Water Displacing WD-40 and Bag them up to be ready for the next re-assembly with New Seals ...or whatever.

Re: Substituting the FelPro Part #72401 vs. the GM ACDelco Part # 12557752 :

I think that besides using the GM, ACDelco or Delphi Gaskets & "O"Rings... FelPro Gasket Sets and TTY Fastener Sets are "The Gold Standard" for any Engine Re-Build Project... You can safely choose their alternative to the familiar Blue Viton "O" Ring for the 2002-2004 OEM GM Gerotor Oil Pump Pick Up Tube. Don't forget to wet the "O"Ring down with Fresh Engine Oil before sliding it over the Short Pipe on the Oil Pump Pick Up Tube prior to inserting it into the Base of the Gerotor Oil Pump.
 
Last edited:

W4UWC

Original poster
Member
Nov 11, 2019
46
Nicholasville, KY
Thanks MRRSM. I'm debating whether to disassemble everything. I don't want to spend the money if I take the head off and then put $ into new TTY bolts and head gasket since this engine has no future. But I'd like the experience to get it spic-n-span to know that all the old sludge is gone. What are your opinions on using basic degreasers and pressure washing an assembled engine, inside and out? I'd take off the timing chain but leave the rotating assembly and head. My fear is I couldn't get into the oil passages with basic tools like brushes and pipe cleaners. Or just push the sludge around. I know this engine has good compression and runs well so fixing the loss of oil pressure when hot is the goal... not necessarily a good looking bare aluminum interior. There is no way I could hit it with hot water so it'd be hard to get it all dry and then lube it with WD40 before corrosion starts.

I bought the GM part for the pickup oil seal. I always lube the seal first so I'll be careful not to pinch it. I'm OK to screw things like that up since the penalty is labor plus some Permatex to seal it back up if I have to go back into the oil pan or timing cover again.
 

mrrsm

Lifetime VIP Donor
Supporting Donor
Member
Oct 22, 2015
7,727
Tampa Bay Area
Engine Dregreaser? YES:

A Half Dozen Cans of THIS Stuff Sprayed all over that "MOTS" (Motor On The Stand) would probably do a great job at dissolving that Brown Build-Up. Its not as effective as the more powerful solvent like Berryman's B12 or ACDelco Top Engine Cleaner in concentration... but with multiple wetting applications... it will dissolve the Bulk of the Gas Gum Varnish:

GUNKEMGINEDEGREASER.jpg

There are other means for Driving Oil and Cleaning Solutions through the critical Oil Feed Galleries and Journals that can Dissolve the Old Oil and Detritus hiding within as suggested by @Mooseman and @m.mcmillen. Quite a few years back they discussed using some Oversized, Thick PVC Pipes with End Caps fitted with an NPT to M16 X 1.50 Threaded Adapter on the inlet side and using Compressed Air on the other side to Drive the Oil or Cleaning Fluid Stream through the Lower Front of the Engine Block on the Passenger Side after removing the Oil gallery Plug first. You can see @MAY03LT using this adapter in this Video as he investigates whether or not the Trailblazer & Envoy Oil Pressure Gauge is "Honest":


If you have looked over my "$85,000.00 Engine Rebuild..." Thread or my "2002-2004 Engine Swap Thread", then you've seen that I designed and built a complete, functioning Engine Pre-Oiling Machine. I coined this "Frankenstein" Device with the name, "The Franken-Oiler Machine" expressly to be able to do this very job.

I would not suggest going to all of the Time, Effort and Expense I went through to achieve this end effect... but THAT Machine WORKS at being able to Pump nearly One Gallon of various kinds of fluid into the Engine Block; either to Pre-Lube the Motor or to Dissolve away the in-dwelling Built Up Gunk. You would NOT have to introduce any High Pressure Stream of Hot, Soapy Water into the Oil Galleries and Risk getting the Crankshaft Journals and Connecting Rods and Journals in contact with anything that would expose them to RUSTING. This effort would have to be done BEFORE replacing the Front and Rear Crankshaft Oil Seals to prevent these Cleaning Chemical from either softening or dissolving the PTFE Materials those Seals are made of.

@Mooseman and @m.mcmillen 's ideas are much easier to do and much more practical to achieve this desired result. I see no reason why you could not pressurize the Oil Galleries with Berryman's Chem-Dip as well... as long as you eventually follow up with using either Kerosene or Organic Motor Oil mixed with Transmission Fluid to flush the cleaning solution Into, Through and then Out of the Galleries.

My only over-arching concern is that you avoid exceeding 60-75 PSI getting into the PVC Pipe, lest it risk an Explosion from an Over-Pressure event and cause you either Injury or Death if it lets go near you like a Grenade.
 
Last edited:

littleblazer

Member
Jul 6, 2014
9,265
A guy on corvette forum had a relatively sludged up engine when he bought the car. He did a long term experiment with just oilchanges with mobil 1 and ill be damned that after a year it cleaned most of it back out. There is still varnish but it looks normal now. There is enough detergent normally that it'll eventually get clean.
 

mrrsm

Lifetime VIP Donor
Supporting Donor
Member
Oct 22, 2015
7,727
Tampa Bay Area
IIANM... THIS is the YouTube Video referenced way back when by @Mooseman and @m.mcmillen as a "How to Build an LS Engine Pre-Oiler" with mostly Common Parts. Again... NOT Pneumatically Over-Charging the Large PVC Pipe Container holding the Donor Oil will prevent any Catastrophe of turning this device into an Oil Filled "Grenade":

 
Last edited:

W4UWC

Original poster
Member
Nov 11, 2019
46
Nicholasville, KY
I put a new o-ring on the 2004 Envoy 4.2. I got both a Felpro and GM (I listed the P/Ns previously). Here is a comparison. The red Felpro looks like it would work (thicker) but I put in the GM. The one on previously was torn and the engine had intermittent no oil pressure at hot idle.

Oil pressure was 80+ at cold idle and 20 at hot idle. I never saw it flinch when hot so I think the low/no oil pressure problem is solved or until the sludge particles clog it up. I strained the oil when I drained it because I could hear chunks coming out of the pan so here's a pic. The pickup wasn't too badly contaminated although it had run for maybe an hour after it was last cleaned. I learned that using Permatex sealant out of a tube and caulk gun is SOOO much better than a small tube and squeezing it with your hand.
 

Attachments

  • 20200416_142131.jpg
    20200416_142131.jpg
    182.4 KB · Views: 13
  • 20200416_141909.jpg
    20200416_141909.jpg
    183.4 KB · Views: 10
  • Like
Reactions: mrrsm and Mooseman

mrrsm

Lifetime VIP Donor
Supporting Donor
Member
Oct 22, 2015
7,727
Tampa Bay Area
@littleblazer 's suggestion in Post# 19 is a very good idea to follow up with. But instead of using the Expensive Mobil1 Oil & Filters every 3,000 Miles over the period of One Year... You can accelerate this process by following this 'Recipe and Timeline' to Flush Out the remaining Crap from inside the Motor with a series of "HOT Motor Oil/ATF Hot Engine Flushings" using:

(1) Six Quarts of Cheap Organic Motor Oil
(2) One Quart of Transmission Fluid
(3) One Cheap Oil Filter

(4) Start the Engine (at a Bone Idle of 600 RPM) and allow the motor to warm up for no longer than 10 Minutes. Do NOT press on the Accelerator Pedal. Have the Analog Oil Pressure Gauge installed and Observe the Oil Pressure from Ice Cold to Heated Engine. Record the Readings.

(5) Then Drain the Crankcase and R&R the Cheap Oil Filter with a Mobil1 or K&N Long Body Oil Filter. Discard the Oil ...but KEEP The Cheap Oil Filter. Refill the Engine with Seven Quarts of Mobil1 Motor Oil. Note the Mileage. Perform an Oil Filter Autopsy as mentioned below in #7.

(6) Drive the Vehicle for 500 Miles (or in your case... Run the Engine via your Test Bed SUV at 2,000 RPM for 15-30 Minutes Daily for One Month). Then Drain the Mobil1 Engine Oil into a Sanitary Container and SAVE IT FOR RE-USE.

(7) Remove the Used Mobil1 Oil Filter and Perform an Autopsy on it using this ***Tool and a 1/2 Gallon of Kerosene in a [5] Gallon Bucket to wash out the Corrugated Paper Filter and Cut Off Can of all Debris. Then Drain off and save the Kerosene into a Clean Container for later Re-Use. Finally, Collect-Save in a Zip Lock whatever Debris is left in the bottom of the [5] Gallon Bucket:

***Tool for Oil Filter Autopsy:


(8) Repeat all of these procedures 3 or 4 times and observe whether after each successive HOT Motor Oil/ATF Hot Engine Flushings you are able to collect MORE or less amounts of Caked On Engine Carbon Debris as apparent in your Screen Collection of Debris. If the amount drops off substantially after 3 or 4 such Clean-Outs... BUT your Oil Pressure remains Nominal during EACH Procedure at between 12 PSI @ 1,200 RPM to 65 PSI @ 3,500 RPM... That should do it.
 
Last edited:

W4UWC

Original poster
Member
Nov 11, 2019
46
Nicholasville, KY
Great advice however this engine is for test only. It will probably never leave the neighborhood so it's life will be measured in "idle hours" instead of miles. it has no roof or doors so it's not going anywhere. I don't plan to tackle the sludge problem unless I have to tear the engine down again then I may try to run some ATF in in before draining the oil. It's served its purpose which was to educate me on the 4.2 and how to install/remove it.
 
  • Like
Reactions: TJBaker57 and mrrsm

Forum Statistics

Threads
23,328
Posts
637,956
Members
18,531
Latest member
jvest

Members Online