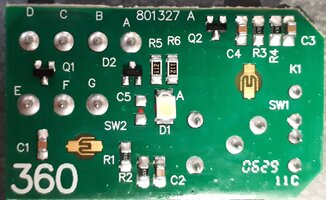
Yes, I have burnt out bulbs. What's new. I saw this article on "how-to-replace-burnt-out-window-switch-lights-on-02-05-envoy" (https://gmtnation.com/forums/thread...witch-lights-on-02-05-envoy.9503/#post-587210), but the bayonet type lamp shown there is different to the ones in the rear audio/hvac control unit.
These have contacts in the bayonet base that go through the PCB and contact on the opposite side, so those other ones shown with simply a wire bent over the base won't work.
.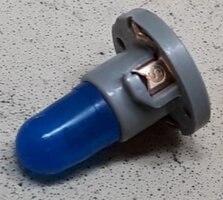
I am going to try and get the contacts out and fit "grain of wheat" type bulbs into the bases, but if the contacts break by bending out and back I will need the whole base/bulb units. Anyone come across these? The bulb itself is 4mm diameter while the base is 10.5mm diameter. 12v of course.
Also, how about supplies of the headlamp switch bulbs? 3mm diameter with bi-pin base.
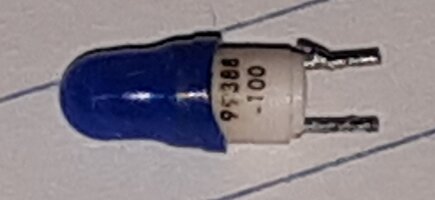
EDIT: I found a Hummer site that seems to use these rear audio bulbs:
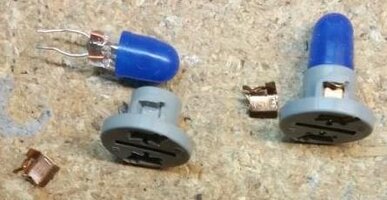 You can see the contacts bent and removed here, as I have now done. It risks breaking the contact when bending back into place though. These bulbs are sold here: http://rover.ebay.com/rover/1/711-5...0001&campid=5338077216&icep_item=273903488481 , but do not ship to Canada plus they would work out quite expensive.
Also, the Toyota #90010-09017 looks the same part except no blue cover filter. Surely these are available in Canada for a reasonable price?
These have contacts in the bayonet base that go through the PCB and contact on the opposite side, so those other ones shown with simply a wire bent over the base won't work.
.

I am going to try and get the contacts out and fit "grain of wheat" type bulbs into the bases, but if the contacts break by bending out and back I will need the whole base/bulb units. Anyone come across these? The bulb itself is 4mm diameter while the base is 10.5mm diameter. 12v of course.
Also, how about supplies of the headlamp switch bulbs? 3mm diameter with bi-pin base.

EDIT: I found a Hummer site that seems to use these rear audio bulbs:
 You can see the contacts bent and removed here, as I have now done. It risks breaking the contact when bending back into place though. These bulbs are sold here: http://rover.ebay.com/rover/1/711-5...0001&campid=5338077216&icep_item=273903488481 , but do not ship to Canada plus they would work out quite expensive.
Also, the Toyota #90010-09017 looks the same part except no blue cover filter. Surely these are available in Canada for a reasonable price?
Last edited:

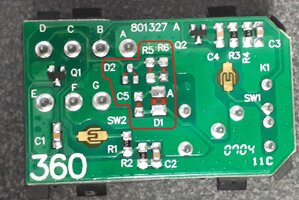

 I can see an A on the board for the LED anode but I don't know what values/types D2, R2, R3 and C5 are. Oh well, I guess I don't see the rear window switches normally.