Redneck rust removal project

Sparky

Original poster
Member
Dec 4, 2011
12,927
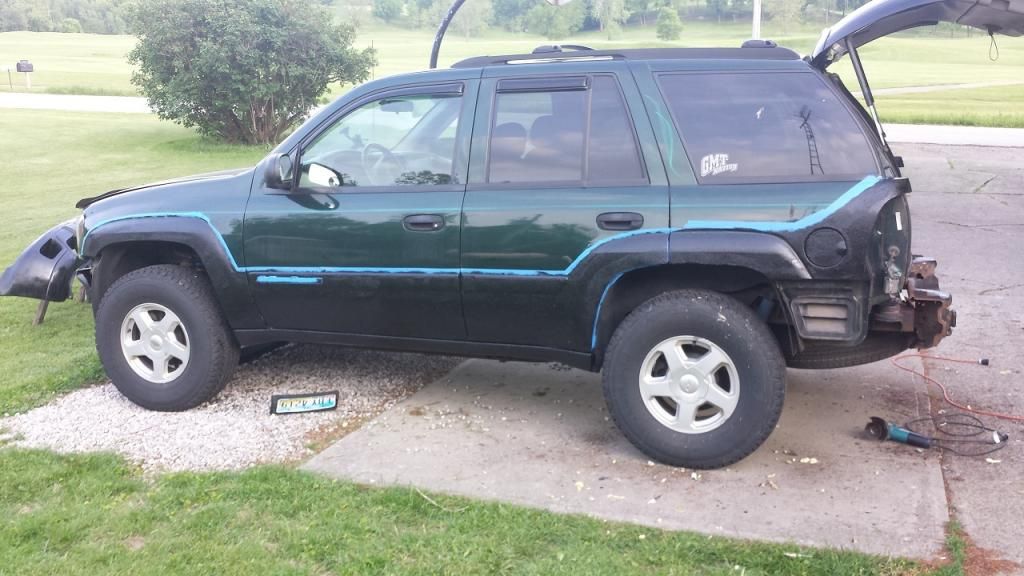
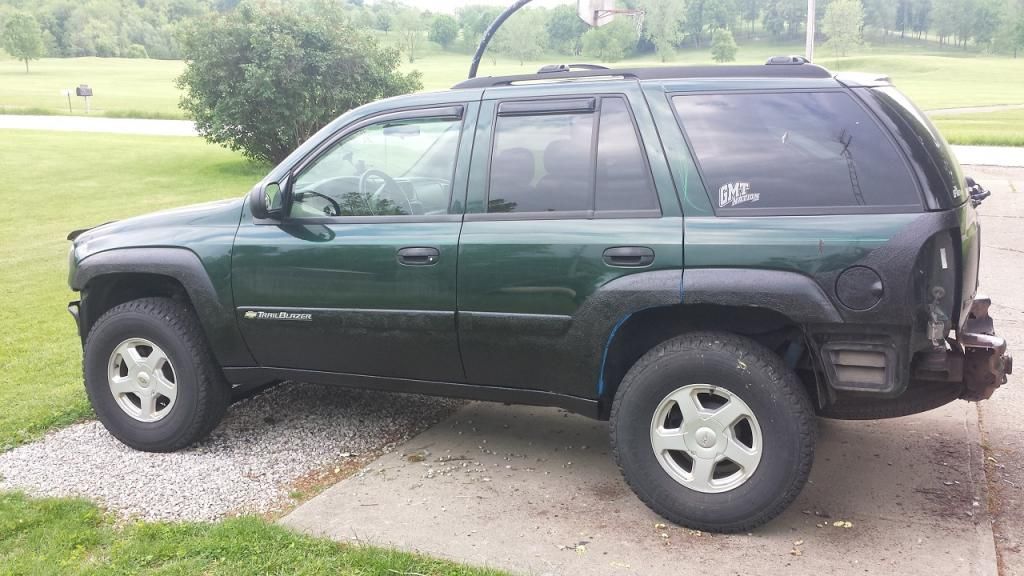
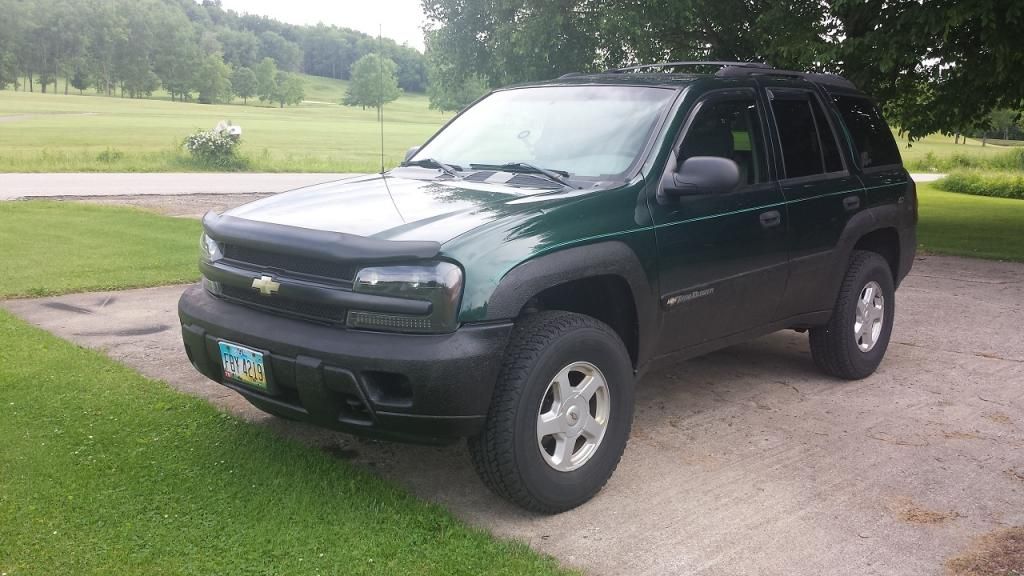
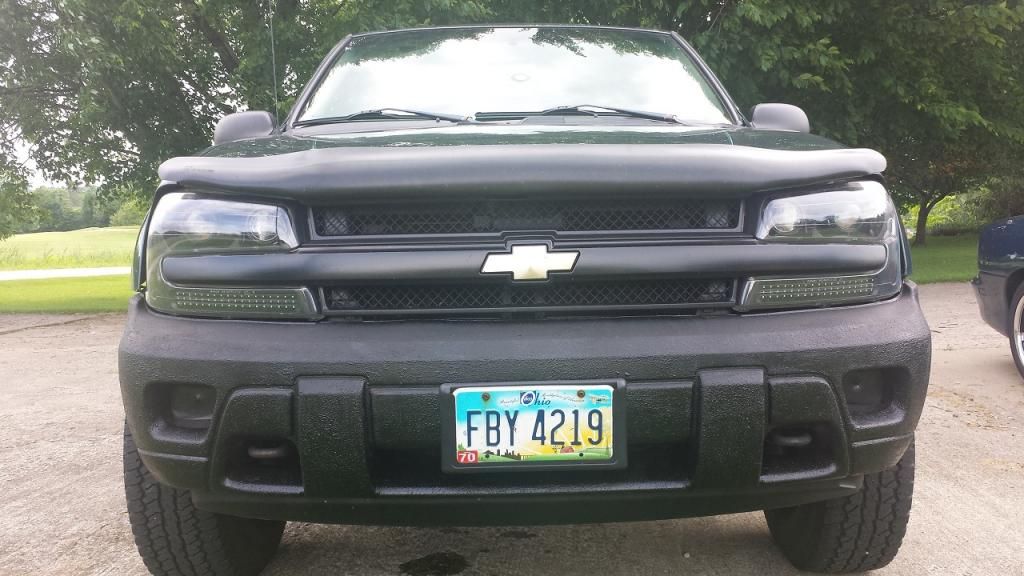
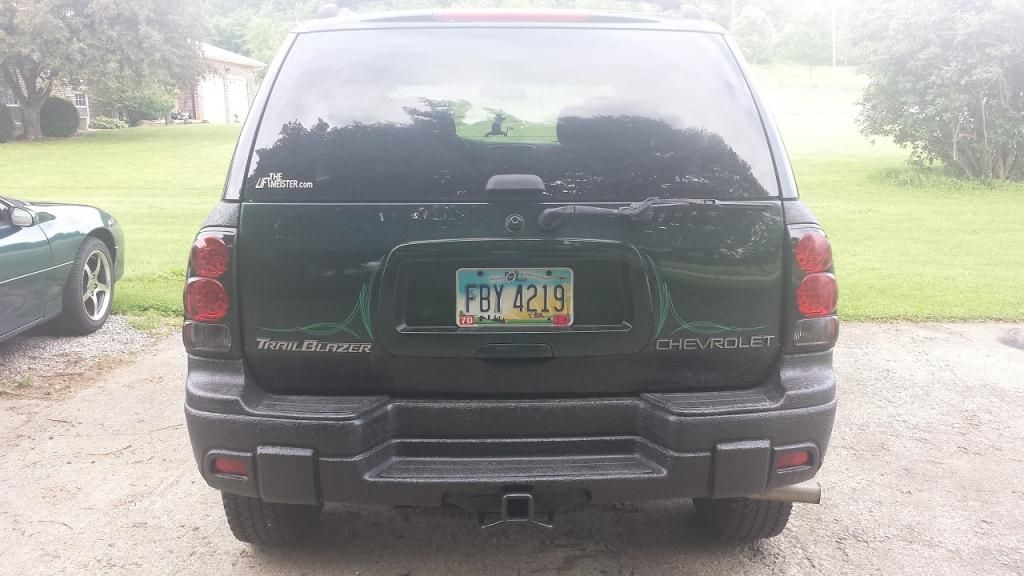
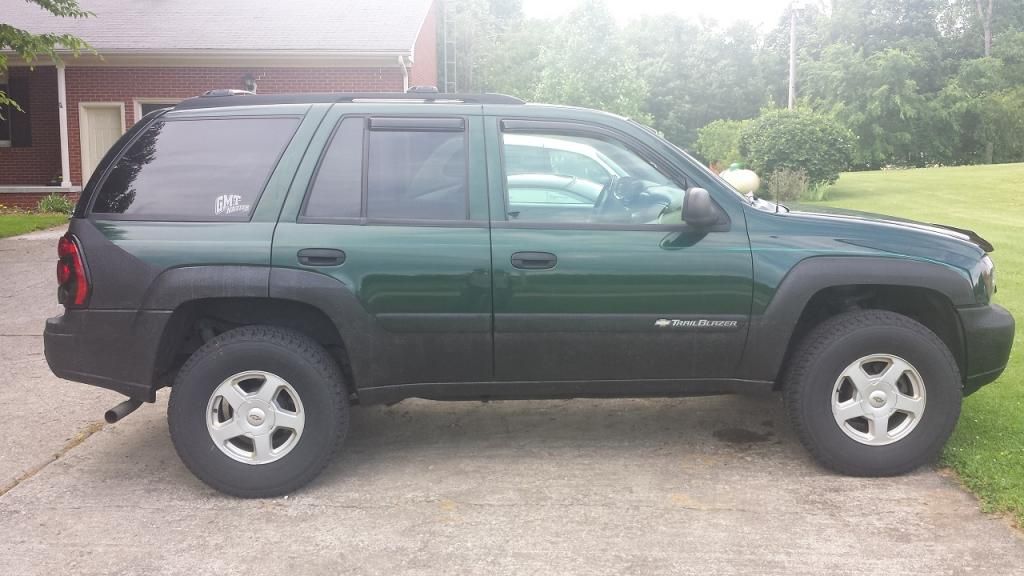
My truck is effectively the crowned king of rust on this site I'm pretty sure. It is a 2002 with 200k miles on it. Wanting to buy it some time without spending tons of money on it I came up with the idea of using Great Stuff foam as a "backing" as it will fill any voids from cutting/grinding out bad metal, is waterproof, rigid, sandable, and paintable. Then I'll coat the repair areas (lower half of the truck) with Herculiner since it is relatively cheap, doesn't need the same kind of application care as paint, and durable.

Sound redneck enough yet? :biggrin:

This thread will document my progress and the end result, for anyone who is interested.

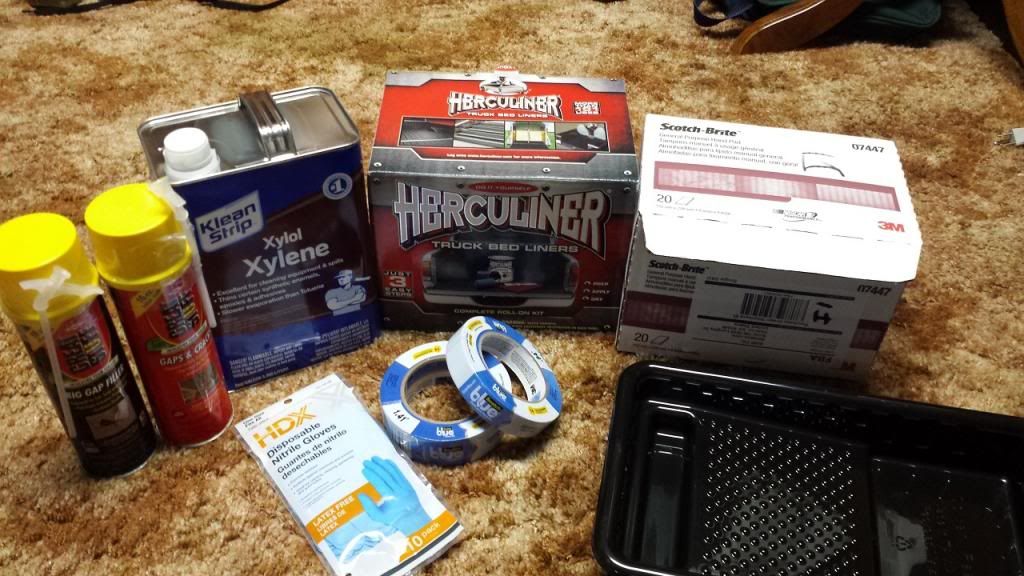
A shot of some of my supplies :biggrin:

20140512_192203_zpsc0282396.jpg


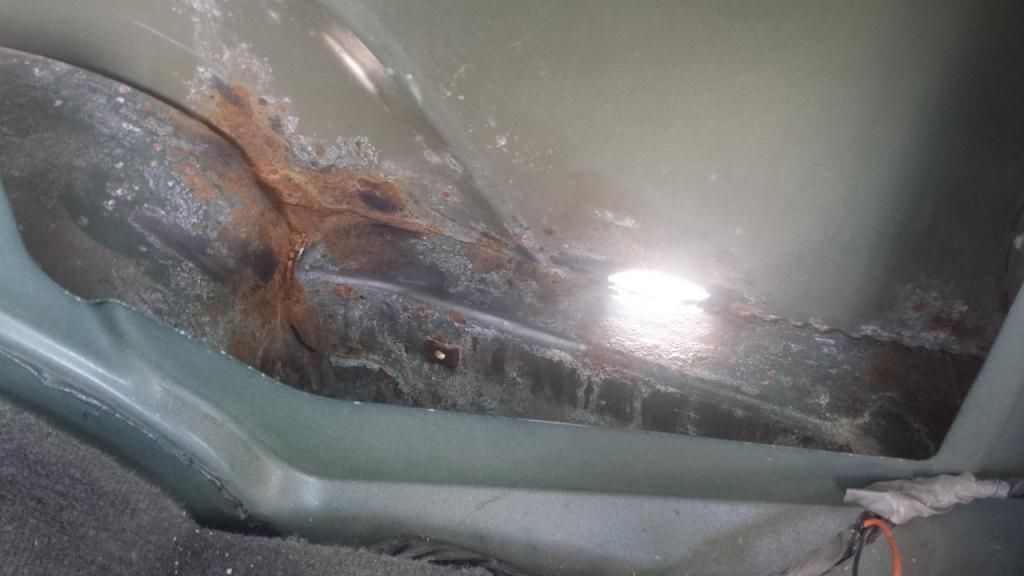
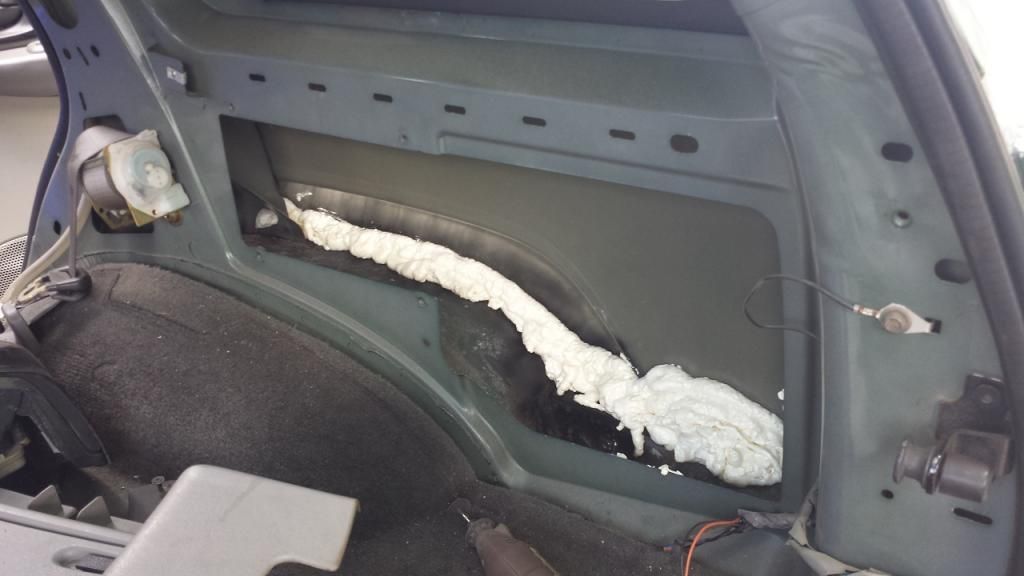
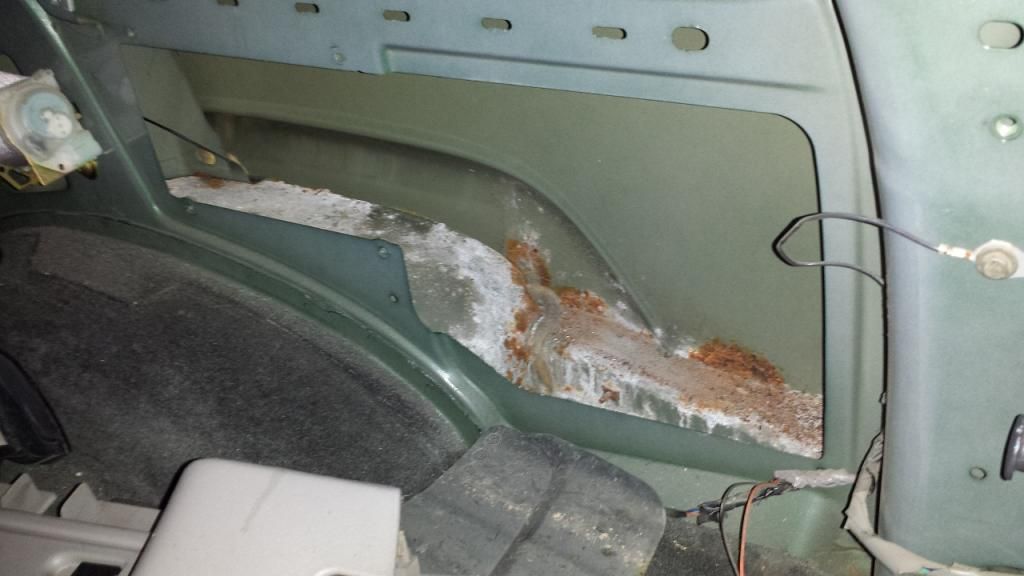
I took off the interior panels to gain access to inside the quarters. I did not expect to find loads of what looks like road salt inside like this :eek: I don't know how that much got in there.

20140523_210331_zpsb7df9f28.jpg


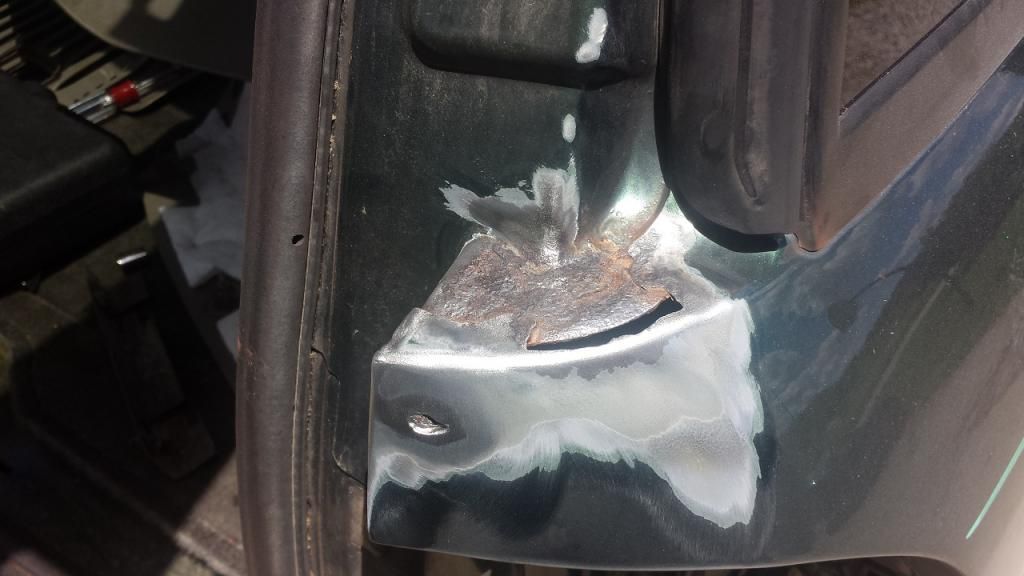
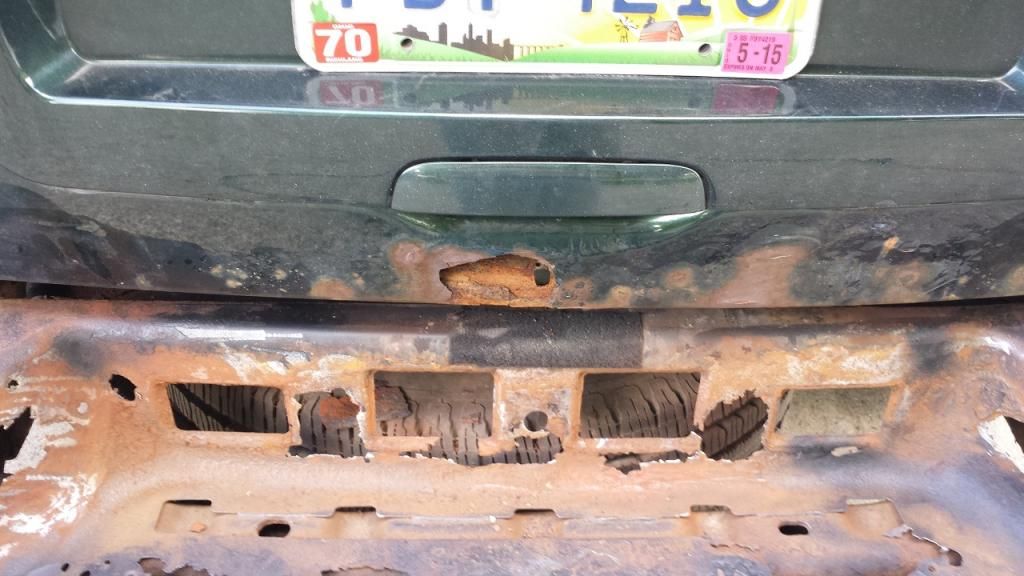
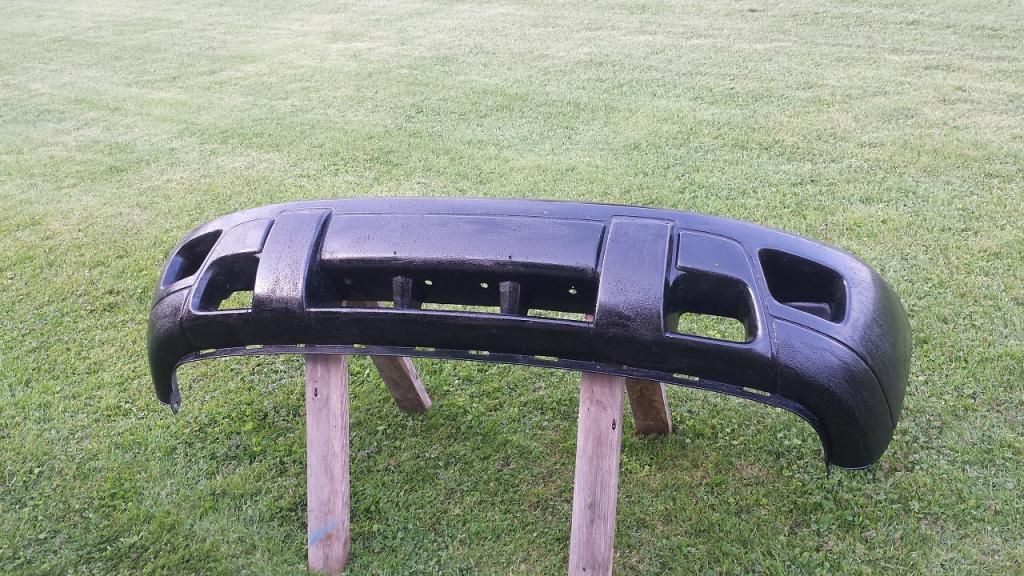
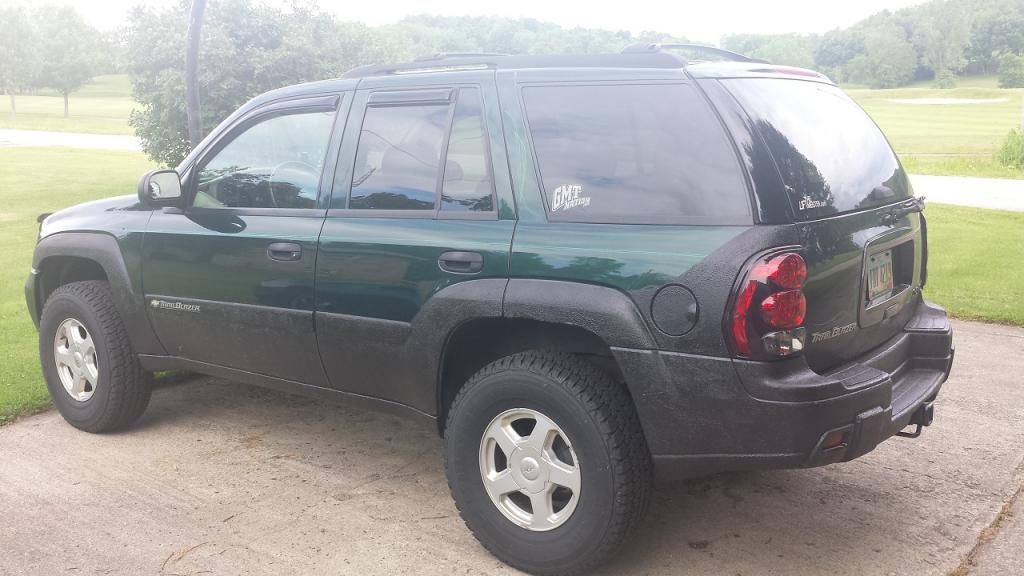
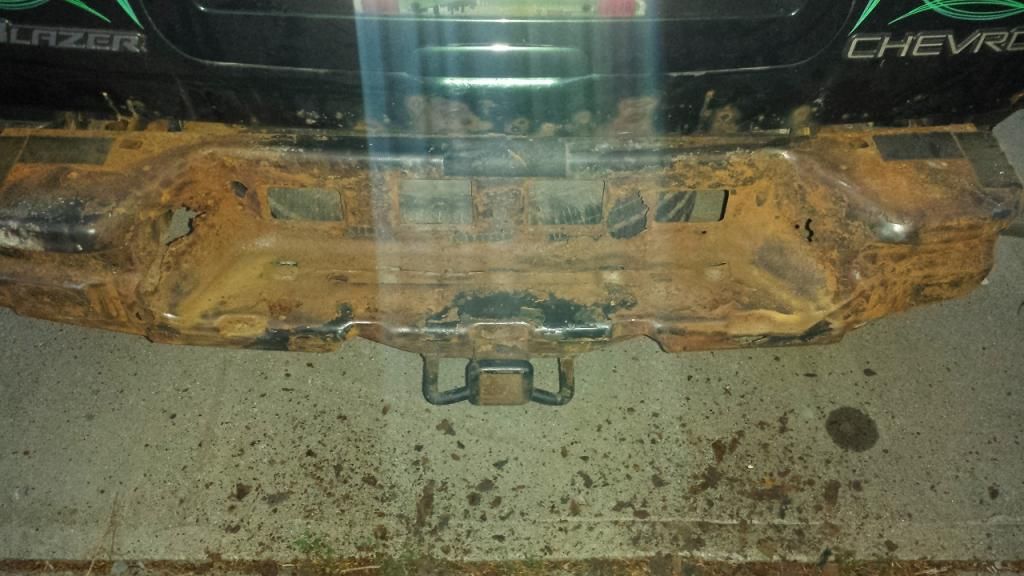
Then I removed the rear bumper cover to better get to the exterior edges of the quarter panels. In the process it uncovered quite the mess of a bumper. This pic was taken AFTER I hit it with a wire brush attachment on my angle grinder. The neighbor has a welder and is going to weld a plate back over the top to reinforce it.

20140523_210255_zps620ea0e5.jpg


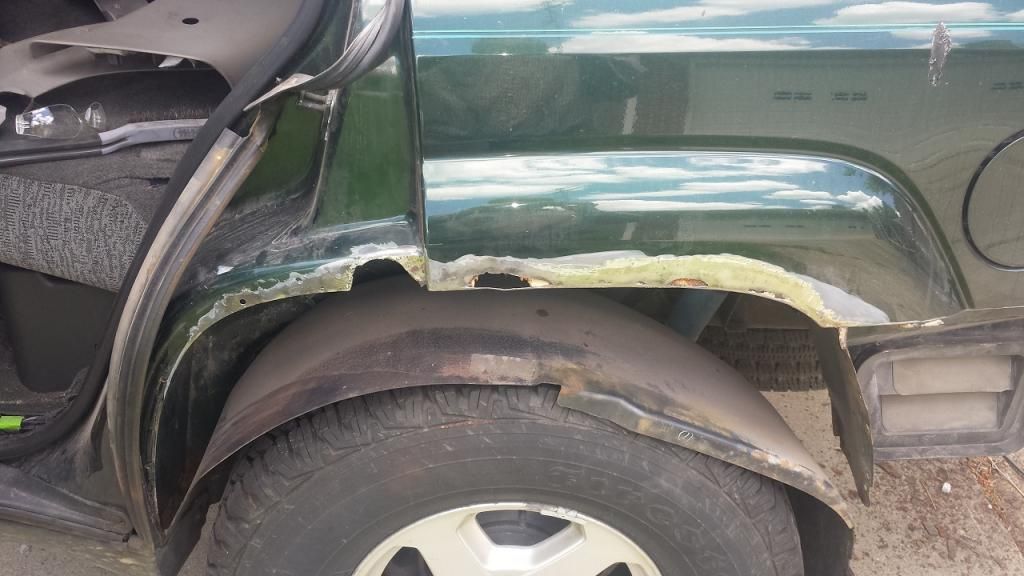
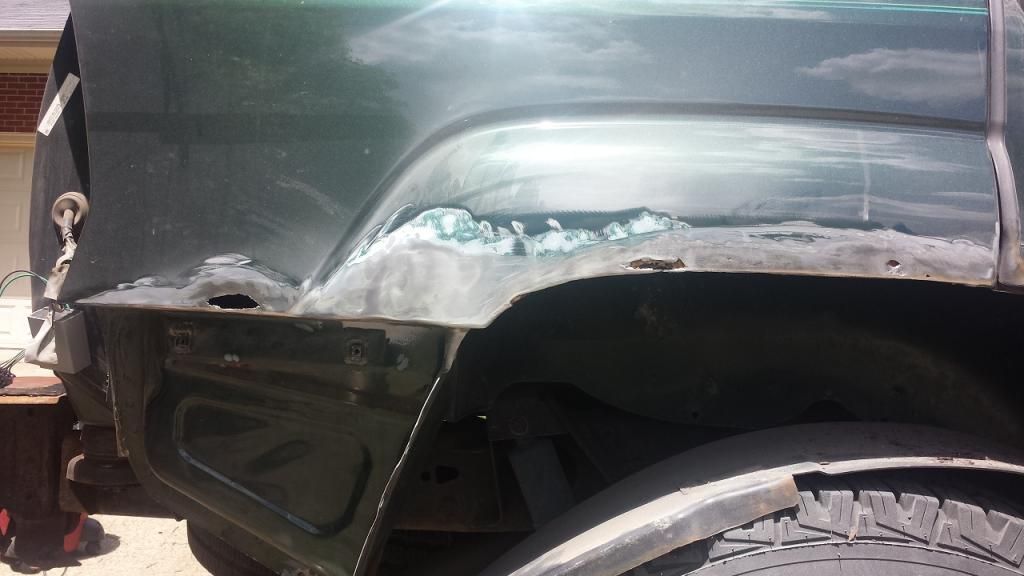
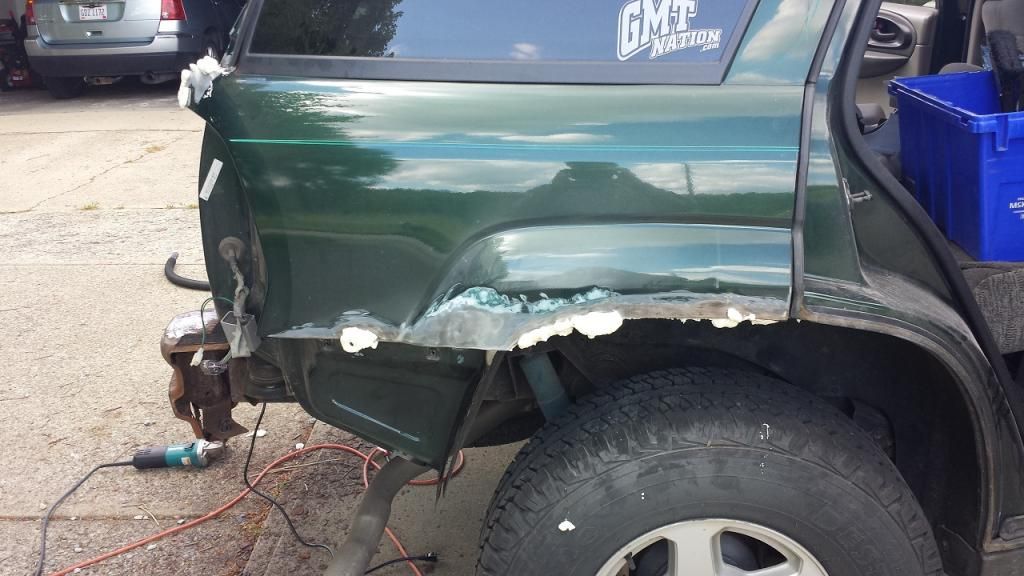
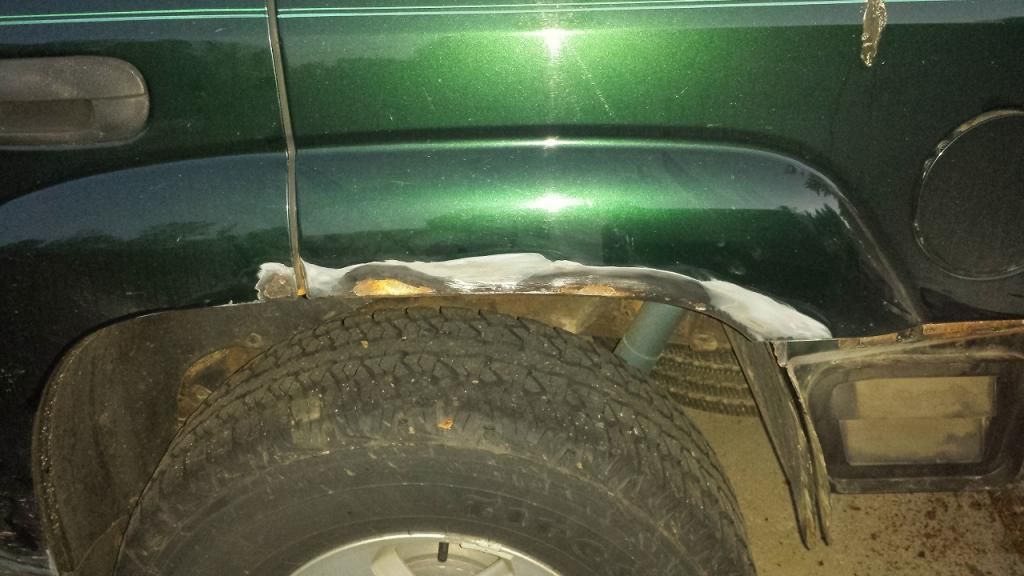
After I got a feel of how the brush felt (I haven't used it a lot) I went to town on the driver side rear quarter panel. I was pleasantly surprised that the exterior metal was more intact than I thought it was going to be, and I didn't have a huge hole to fill in after all. The brown spots are just the stained seam sealer in the holes, that will all be cleaned out. Oh, ignore the bird poo on the quarter, I got bombed.

20140523_210135_zps84930535.jpg


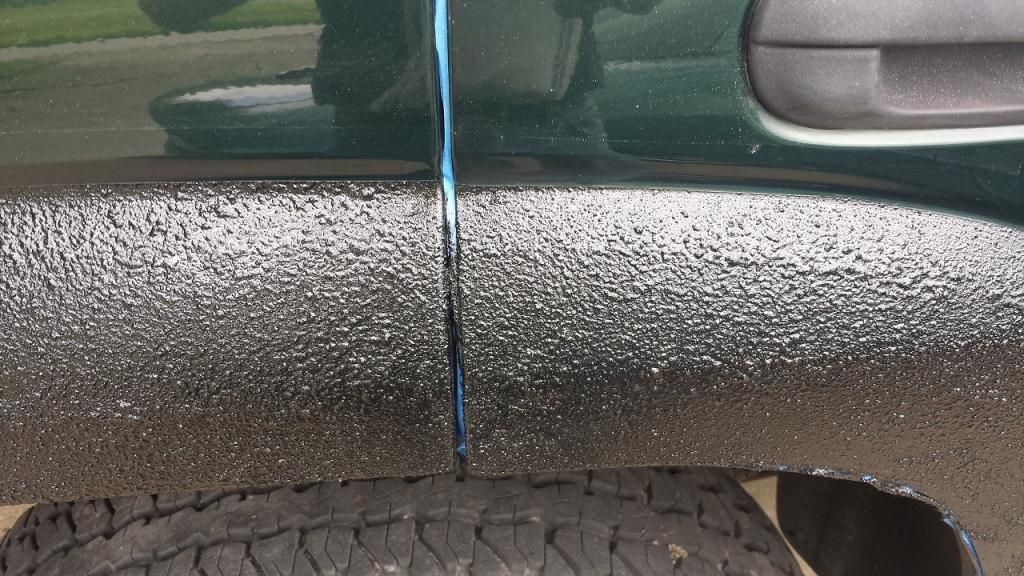
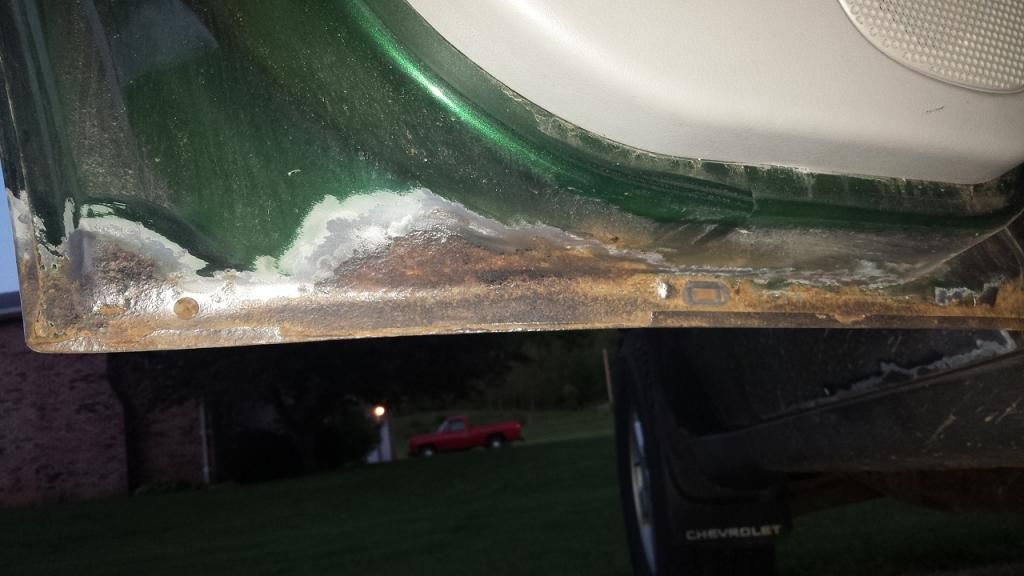
I was running out of daylight but I hit the underside of the rear driver side door to knock the worst of the rust off. It is pitted pretty good but still appears to be fairly solid yet. I'll probably pull the interior panel and see what kind of interior damage there is and what can be done there, if anything.

20140523_210154_zps635d98ec.jpg


That's where I stopped for the night. I'll continue tomorrow.

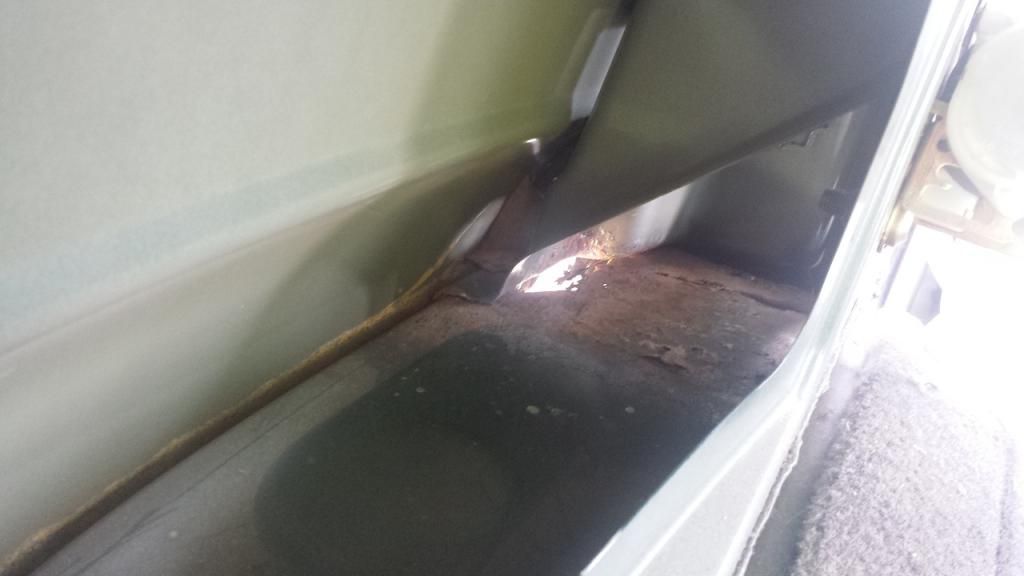
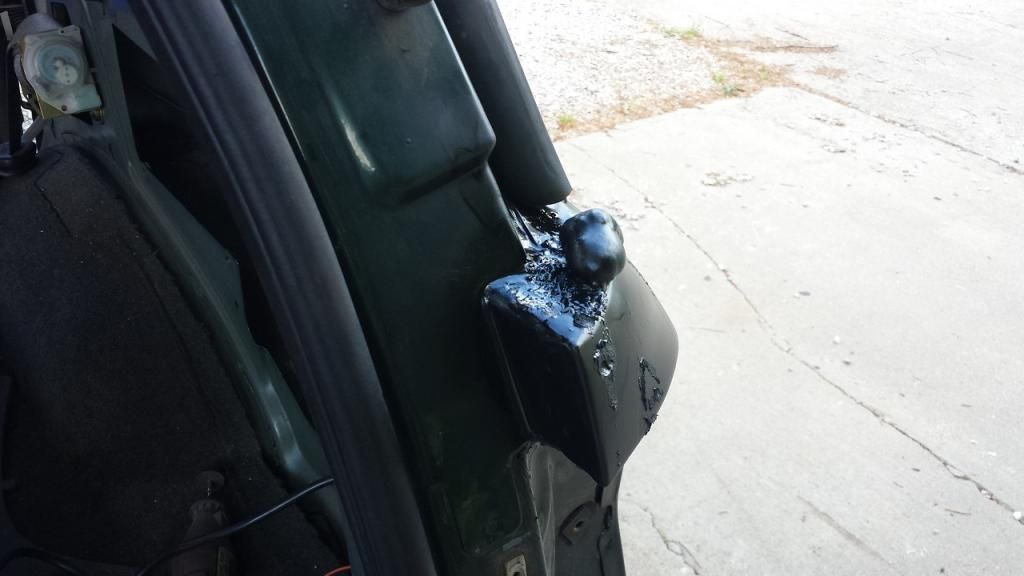
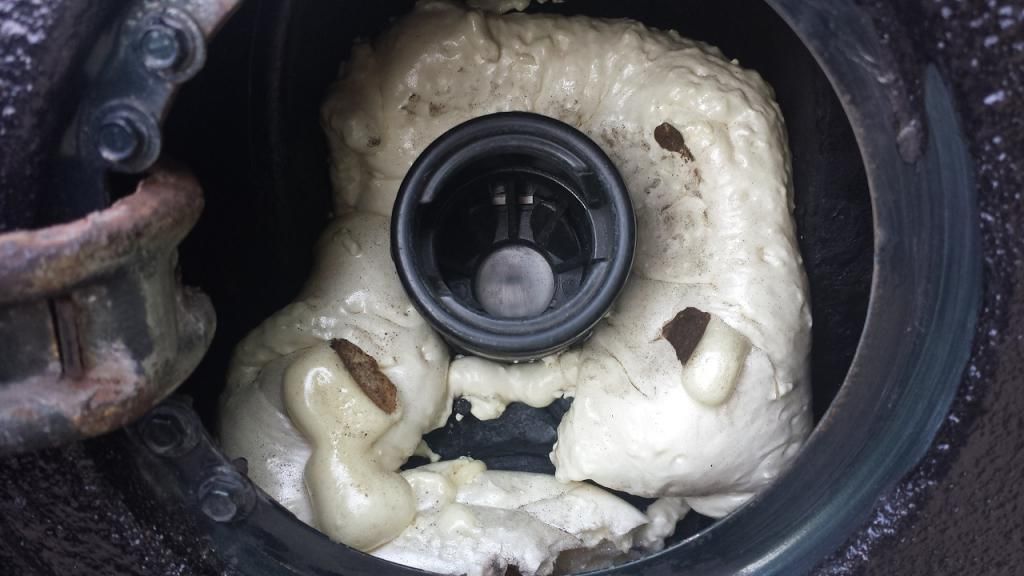
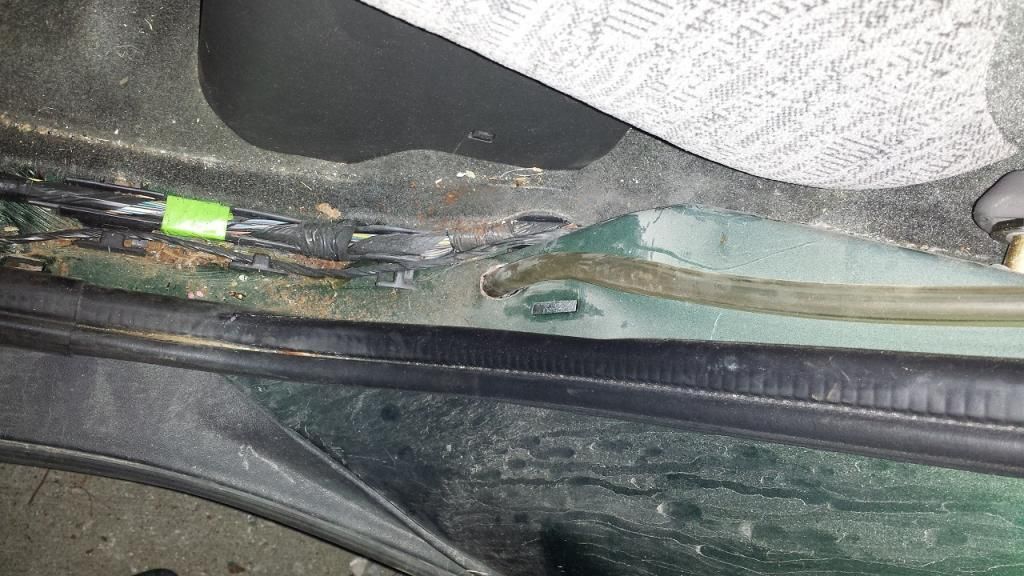
By the way, my truck is an LS and did not come with a sunroof from the factory. A previous owner had a sunroof installed, which has been pretty awesome. Well, they didn't do the best install inside the truck. The roof has been water tight, but they cut the headliner to fit instead of replacing it properly, so it is now hanging down in the back, and check out this hack job for the drainage tubing. They just drilled a hole down low INTO the interior of the rocker panel and stuffed the tube in it! Yeah, that's a great place to dump water the whole time, no wonder those parts of the truck are as rusty as they are :hissyfit:

20140523_210408_zps38db7842.jpg


I'm still trying to think of the exact "paint scheme" I'm going to follow since I have more rust above my original planned line in a few spots.

More to come tomorrow...
 

Blckshdw

Moderator
Nov 20, 2011
10,684
Tampa Bay Area, FL
Guess I better fit in as many 'rusty' jabs as I can, while I still can... :poke: :raspberry:
 

djthumper

Administrator
Nov 20, 2011
14,950
North Las Vegas
I have seen worse when I was stationed in FL.
 

Sparky

Original poster
Member
Dec 4, 2011
12,927
Blckshdw said:
Guess I better fit in as many 'rusty' jabs as I can, while I still can... :poke: :raspberry:
lol well you'll still be able to as it won't be all gone. That's not possible. The frame is pretty bad in a few places too but can't get to it with a welder without yanking the engine, which is something I'm not keen on doing :no:

This job is mostly to seal up the body again and make it not look quite so rustbucket-ish
 

HARDTRAILZ

Moderator
Nov 18, 2011
49,665
Doors look better than mine...:wink:
 

Sparky

Original poster
Member
Dec 4, 2011
12,927
That's not possible, mine have holes in them :tongue:


Some more progress pics while I take a break. Wow. Not sure what I got myself into, I hope it all goes together OK. This hole is pretty big, will be bigger when I can get in there somehow to cut the rust totally out.

20140524_135225_zpsd3d955ff.jpg


This side doesn't look good either, though the metal is a little better. I can't get my angle grinder with the wire brush attachment in there, so I'm still not sure how to clean it up.

20140524_135233_zps355ad791.jpg


I pulled the weather stripping out of the way and was surprised that the metal lip was in much better shape than I thought it would be aside from the missing chunk at the top I already knew about. Of course, now I'll have a droopy door seal like everyone else unless I glue it up there lol.

20140524_135005_zps283efcca.jpg


Passenger side outer edge is cleaning up OK.

20140524_135049_zps920059a2.jpg


Got almost all the rust scale off above the tail light.

20140524_135057_zps5dbaad2d.jpg


Doors are looking sad, the upper corners on both rear doors have holes. Maybe I can try my hand at some fiberglass to close that back up. Could be interesting.

I really want to get the main part of this finished today.
 
  • Like
Reactions: Mounce

Darkrider_LS

Member
Jan 25, 2013
9,332
Might be a good project to learn fiberglassing on in general... You said yourself you are covering it all up with bed liner anyway... Why not deal with as many holes as possible with a combination of the foam and fiberglass? Fill area with the foam, sand it flush with the metal then glass over it.
 

Sparky

Original poster
Member
Dec 4, 2011
12,927
I'll have to use fiberglass or something on the holes in the doors since they are at the corners where foam just wouldn't work.

Foam is put in the quarters (and around the gas fill neck), then after about 30 minutes I sprayed some rust converter/primer stuff on all the bare metal. I don't think I'll get to bedline it today, since the foam still needs cut and the entire thing sanded and prepped for the liner, but we'll see. More than likely though the liner will wait until Monday.
 

Sparky

Original poster
Member
Dec 4, 2011
12,927
OK I think I'm done for the day. Didn't get as far as I wanted but it was more work than I thought it would be (duh I should have known)

Foam inside

20140524_163403_zpsad40e0db.jpg


Oozing through the holes

20140524_163412_zpsb57fa77f.jpg


Then I coated all the bare metal with rust primer stuff to protect the bare metal until the foam cures and I can cut/sand it, and apply the liner.

20140524_171056_zps4006b1e2.jpg

20140524_171104_zps90aef3b2.jpg


A pic of one of the holes in the rear doors.

20140524_171118_zps2ee54587.jpg


Oh, I made the comment last night to the neighbor that I'll probably end up putting my hand through the liftgate skin soon when I close it. Well, it happened today. He's going to make a sheet metal patch for me and we'll replace the bottom few inches of the skin.

20140524_172708_zps975af9f2.jpg
 

Mooseman

Moderator
Dec 4, 2011
25,344
Ottawa, ON
Cool project for the "drive it into the ground" crowd. Mine isn't nearly as bad but starting to get some rust in the quarters. I'm just going to let it go until the doors fall off. Might relegate it to winter use and get another for summer.
 

HARDTRAILZ

Moderator
Nov 18, 2011
49,665
Lotta work. Nice job
 

sLAsh

Member
Jan 26, 2012
39
Thus is exactly the route I have planned for my sons pt cruiser. I have done a fair amount of fiberglass before and I think the great stuff foam will make a perfect backer for you.
 

Rogue92

Member
Apr 19, 2014
83
Wow, that is some project. Keep up the good work....I'm going to be following this thread for the day that mine really blows up into rust. In Western Wisconsin, and store it outside....tons of salt each year hits it. Thanks for posting pictures of the progress.
 

Sparky

Original poster
Member
Dec 4, 2011
12,927
This is simply to extend the life past what most people would call sane :biggrin:

I have never sold or traded in a car yet. Every car I've had has been driven until some sort of catastrophic failure. My first car died a rusty death when the suspension effectively fell off of it.

Tomorrow I'm hoping to get the fiberglass laid and bedliner painted. Seems Autozone will be open, so I'll be picking up a fiberglass repair kit and an extra quart of herculiner since I need to coat more than I initially thought I would and I don't know if the 1 gallon will be enough or not. If I don't need it I can always return it.

By the way, that foam has worked awesome at holding my fuel filler neck in place after its bracket rusted away :biggrin: I need to make some water drain holes in it yet, but it is doing its job.
 
  • Like
Reactions: Rogue92

Mooseman

Moderator
Dec 4, 2011
25,344
Ottawa, ON
My only concern is the foam at the filler neck. I've seen what gasoline can do to foam cups, basically it just instantly melts. Have you tested the foam with gas in case of spillage?
 

Sparky

Original poster
Member
Dec 4, 2011
12,927
No I haven't, but that's what the rubber boot is for. I have only ever once had any spillage worth noting when a pump malfunctioned.

If I get a spill that melts the foam, well, I guess I'll have to redo it. I didn't have any other idea how to fix it. Someone suggested using pipe strapping but I had no idea how to attach it to anything as there is no room to work in there.
 

Sparky

Original poster
Member
Dec 4, 2011
12,927
I realized I should have put this in "member builds" sorry guys.

I don't have any pics of my fiberglass/body filler work, but it isn't anything special. My first time, not very smooth, but the liner seems to be hiding it pretty well :biggrin:

Well, the whole thing is sanded and I have put the first coat of Herculiner on it. Waiting for that to dry for an hour-ish before I apply the second coat. I had read that I would need some sort of UV protectant coating to keep it from turning gray on me, but that is no longer listed on their site. Apparently they have improved the stuff to be UV resistant. I guess we'll see. I hope it doesn't turn gray on me.

Anyway, first coat pics of the side and one of the bumpers. Bumpers will get a roller treatment for the second coat to get rid of the brushed look.

20140526_193229_zpse5e11d37.jpg

20140526_193258_zps3663f773.jpg
 

Sparky

Original poster
Member
Dec 4, 2011
12,927
Second coat is on, tape removed. It got dark so no good over all pics, and the bumpers are still removed while everything cures, but I did manage to grab this shot :biggrin:

20140526_214024_zps25e4c0d5.jpg
 

HARDTRAILZ

Moderator
Nov 18, 2011
49,665
Atta boy!
 

Hatchet

Member
Nov 21, 2011
2,405
Can't wait to see full on pics. I have been debating on doing this to mine for years. Maybe this will finally get me to do it.
 

Sparky

Original poster
Member
Dec 4, 2011
12,927
Bumpers and tails aren't reinstalled yet and I haven't removed the tape on the door seals, but this should give you an idea of how it looks. I'm not putting the rear bumper back on until the neighbor has a chance to weld the metal back there.

20140527_172358_zps21cd310c.jpg


A closer pic to show the texture. Part of me is thinking it could end up being a bear to get clean. There also used to be two holes in this area. Time will tell if I did the repair properly or not, but for now it looks good.

20140527_172428_zps871f26f3.jpg
 

HARDTRAILZ

Moderator
Nov 18, 2011
49,665
Its not too bad to clean really
 

Hatchet

Member
Nov 21, 2011
2,405
I should just go ahead and do it. Have you tried do a spot letting it dry and decided to add more to it? did it come out looking the same or is it clear it was 2 different times. I was thinking about staying lower and if I don't like it I can add more to it. Just wonder if it blends well or not.

Was the one box kit all you needed?
 

Sparky

Original poster
Member
Dec 4, 2011
12,927
It seemed like you can blend into existing stuff OK. I had some obvious thin spots after the first coat and when I hit it with the second it totally hid those lines. This stuff sticks to itself so it can be patched if it ever got messed up somewhere, so I don't see why you couldn't add on later. I could see maybe it weathering some and the fresh being obviously fresh.

I used about 2/3 of the gallon can it came with for the two coats. I was expecting to use more so I bought an extra quart that I'll be returning. I did buy an extra paint brush and a pack of red scotch brite pads since the single tiny green pad they include would definitely not be enough. I wore out 2 red pads and a third is about half used up. Also need a can of Xylene (not paint thinner) to do initial prep cleaning.
 

Sparky

Original poster
Member
Dec 4, 2011
12,927
Last night I put the rear interior panels back together. I also noticed that I missed a couple small spots on the lip of the rear bumper cover, so I'll be touching it up this weekend after the neighbor patches the bumper and liftgate metal. Guess this will confirm how well more can be added. Should do fine since that's what they claim and I've read, but we'll know for sure soon enough.
 

Sparky

Original poster
Member
Dec 4, 2011
12,927
Sure, forgot to get some since I was just trying to get it all back together in time for the meet. I'll take some pics today if it isn't pouring rain when I get home.
 

HARDTRAILZ

Moderator
Nov 18, 2011
49,665
Came out good
 

Sparky

Original poster
Member
Dec 4, 2011
12,927
Pardon the dirt runs, it rained last night.

20140611_174610_zps0d4fd8d5.jpg

20140611_174626_zps1a42a362.jpg

20140611_174647_zpsd464a501.jpg

20140611_174703_zps689bf0b1.jpg

20140611_174733_zpsa100d053.jpg


And the gas fill neck foam fix, works great :biggrin: I have punched a drain hole at the bottom for any water that may find its way in there, and the rubber boot hides all that normally.

20140611_183648_zpsf28e9479.jpg
 

Mooseman

Moderator
Dec 4, 2011
25,344
Ottawa, ON
Not bad at all!
 

Ed H

Member
Oct 18, 2012
167
Awesome work. I am curious what you did with the inside of the doors. I have the same situation on my 02 and would like to tackle it before it gets worse. I just keep spraying it with silicone lubricant hoping that will slow down the rust a little. :undecided:
 

Sparky

Original poster
Member
Dec 4, 2011
12,927
I sanded them down and hit them with rust converter. Not sure how well it is going to work long-term since the rust is pretty far into mine.
 

Hatchet

Member
Nov 21, 2011
2,405
Sparky said:
I sanded them down and hit them with rust converter. Not sure how well it is going to work long-term since the rust is pretty far into mine.
That is the one thing I have been holding out because of. My original plan was to take off the door panels and line a little bit of the inside of the doors as well. Grind off the plastic as needed to get the panels to fit back on. A lot more work than I want to do right now. Maybe this summer.

Side note: I thought you were gunna do the whole tailgate with the way you ran it up over your tail lights.
 

Sparky

Original poster
Member
Dec 4, 2011
12,927
Hatchet said:
That is the one thing I have been holding out because of. My original plan was to take off the door panels and line a little bit of the inside of the doors as well. Grind off the plastic as needed to get the panels to fit back on. A lot more work than I want to do right now. Maybe this summer.

Side note: I thought you were gunna do the whole tailgate with the way you ran it up over your tail lights.
I wasn't sure how well the door seals would seal against the liner.

I considered doing the whole gate but that would have been more work and time, plus I didn't want all the green gone back there, and I wasn't sure how much liner I had left to do that with. I ran it up over the tails because on the passenger side I had that big rust spot I had cut out and needed to cover and seal that back up with something.
 
  • Like
Reactions: Hatchet

Darkrider_LS

Member
Jan 25, 2013
9,332
Looks good! Seriously considering doing the liner to mine now lol...though in my case it will be to prevent the rust!
 

sawicksted

Member
Dec 7, 2011
366
Looks awesome. I live in the east coast and rust is not an if - it's a when. I'll be keeping this build / mod in mind for that eventuality (unless I can find the money for a body and paint job) as I really like my TB and plan on driving it into the ground!!
 

Forum Statistics

Threads
23,330
Posts
637,976
Members
18,531
Latest member
MEHMET ONUR

Members Online