Longtime lurker, first time poster so if I screw up please don't scorch me.
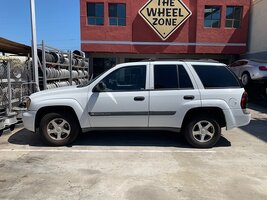
I had the same problem as most people, the 16" stock wheels with the high offset have that undesirable minivan look, but the bolt pattern is a nuisance to deal with without getting into the bling-bling wheels that attract the car thieves. I wanted to keep a factory-like appearance and get less offset. I use the truck for a lot of highway driving and only rarely drive on unpaved roads so I don't need a lift or an aggressive tire. I still need it to handle in wet/dry highway conditions.
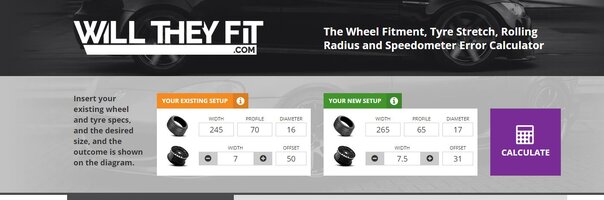
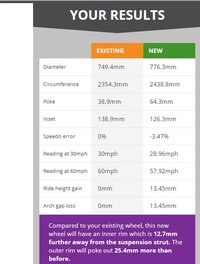
Stock offset for ours is 50mm, center bore on the wheel is 78mm. Popular spacers put these wheels 1.25" - 1.5" and some people don't like the poke in the fronts that the 1.5" spacers provide. A good set of spacers is $250-$300.
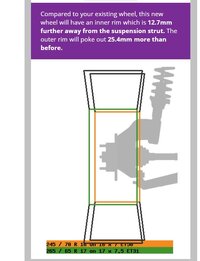
Stock offset on the Tahoe/Suburban/Silverado wheels is mostly 31mm-33mm, so with a 7.5" width that puts the outer face of the wheel very nearly even with what a 1.25" spacer would to with a stock 7" wide TB wheel. They also have the same 78mm center bore. That's how I knew there would be enough face to hold the smaller bolt pattern.
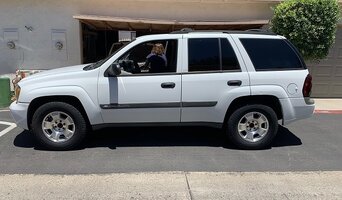
So I considered the less popular option of picking up a set of Tahoe alloys from the same generation as my TB so that the look would more/less fit without getting into the try-hard category, and found a good wheel machiner who specialized in re-drilling the bolt patterns, drill-n-fill, and wheel repair. I live in the San Diego area so I went with one of the local vendors that had good reviews.
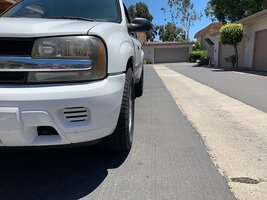
It looks like they pressed in a new insert and drilled it for our pattern, so it's really not obvious unless you look closely. I bought a set of very streetable ATs by Hankook at 265/65/17 and the combo fits the stock suspension with zero rub. Call me crazy, but I think GM should have used this bolt pattern and wheels in the first place. I can't put the center cap that goes with these alloys so I'm probably just going to run them without a cap. Clean up and paint my hubs and maybe swap the open lugs for covered lugs and leave it alone.
Cost for the wheels via craiglist was $100 for all 4, cost of the redrill for all 4 wheels was $160. I've got a set of the Bilstein 5100s on order 'cause I needed new shocks anyway so I'm just going to lift the front to level it with the stock height in the rear and be done with it. Obviously this setup isn't for most people on this forum but it works for me. YMMV
I had the same problem as most people, the 16" stock wheels with the high offset have that undesirable minivan look, but the bolt pattern is a nuisance to deal with without getting into the bling-bling wheels that attract the car thieves. I wanted to keep a factory-like appearance and get less offset. I use the truck for a lot of highway driving and only rarely drive on unpaved roads so I don't need a lift or an aggressive tire. I still need it to handle in wet/dry highway conditions.
Stock offset for ours is 50mm, center bore on the wheel is 78mm. Popular spacers put these wheels 1.25" - 1.5" and some people don't like the poke in the fronts that the 1.5" spacers provide. A good set of spacers is $250-$300.
Stock offset on the Tahoe/Suburban/Silverado wheels is mostly 31mm-33mm, so with a 7.5" width that puts the outer face of the wheel very nearly even with what a 1.25" spacer would to with a stock 7" wide TB wheel. They also have the same 78mm center bore. That's how I knew there would be enough face to hold the smaller bolt pattern.
So I considered the less popular option of picking up a set of Tahoe alloys from the same generation as my TB so that the look would more/less fit without getting into the try-hard category, and found a good wheel machiner who specialized in re-drilling the bolt patterns, drill-n-fill, and wheel repair. I live in the San Diego area so I went with one of the local vendors that had good reviews.
It looks like they pressed in a new insert and drilled it for our pattern, so it's really not obvious unless you look closely. I bought a set of very streetable ATs by Hankook at 265/65/17 and the combo fits the stock suspension with zero rub. Call me crazy, but I think GM should have used this bolt pattern and wheels in the first place. I can't put the center cap that goes with these alloys so I'm probably just going to run them without a cap. Clean up and paint my hubs and maybe swap the open lugs for covered lugs and leave it alone.
Cost for the wheels via craiglist was $100 for all 4, cost of the redrill for all 4 wheels was $160. I've got a set of the Bilstein 5100s on order 'cause I needed new shocks anyway so I'm just going to lift the front to level it with the stock height in the rear and be done with it. Obviously this setup isn't for most people on this forum but it works for me. YMMV