Power steering problem (rack and pressure lines)

jysp

Original poster
Member
Apr 29, 2013
21
I will apologize now for the length of this post.

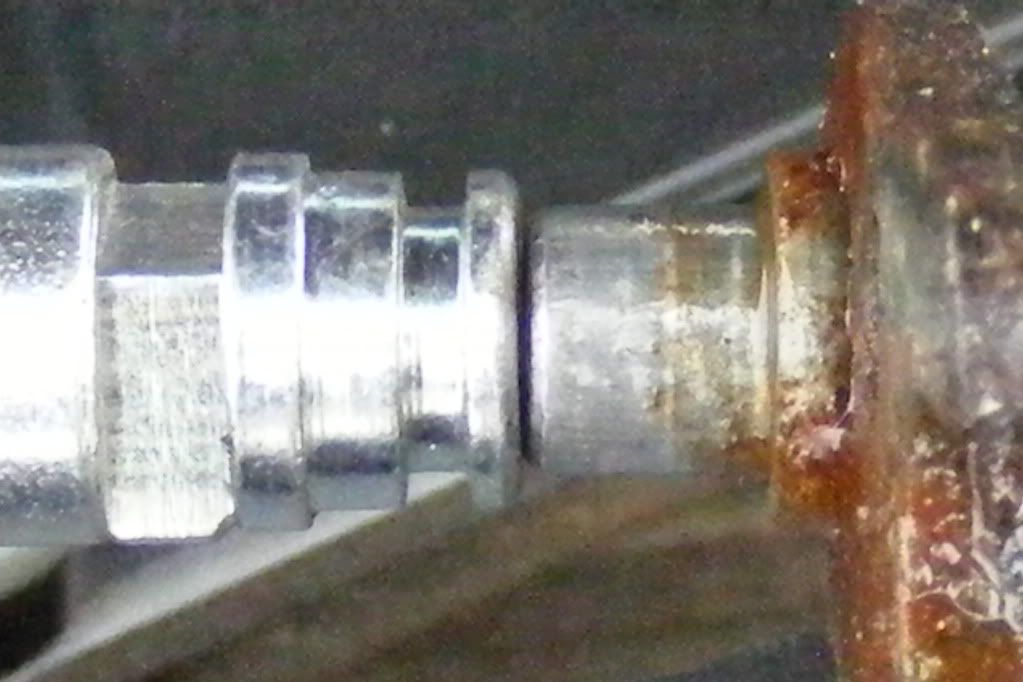
I have had a Power steering leak for quite some time, it was a slow leak so I just kept adding every couple of months. This past winter it turned into a big leak, I would top it off go for a drive and it would be low. OK I guess it’s time to fix it. I pull it in the garage and start looking. I topped off the fluid, started the vehicle, and turned the steering wheel a few times from stop to stop, could not see any leaks. I didn’t need it the next day so I left it in the garage jack stands. A couple of days later I went back and there was a wet spot under the driver side tie rod, I noticed that the boot was torn (according to posts found here the Rack is gone). It was wet but I could not see it leaking, I figured with how quickly the reservoir was draining I should be able to see something dripping while the vehicle was running and turning the steering wheel. So I kept looking, I noticed it was wet around the bottom of the rad, but could not see a leek. There is an 8” plate bolted to the frame on the right hand side where the lines come down from the pump and then run along the frame I took this off and got soaked with fluid. I turned the steering wheel again and could see a steady stream of fluid coming out of the pressure hose and hitting the rad.

OK so I have 2 problems:
- Rack – I found a very good write up https://gmtnation.com/forums/thread...-pinion-for-i6-ext-2006-4wd-trailblazer.2616/
- Pressure line – I found a couple of write up’s but still have some issues power steering hose replacement - Chevy TrailBlazer, TrailBlazer SS and GMC Envoy Forum


Using the write up for rack I was able to remove and replace the rack.

Using the picture on bottom of the post.

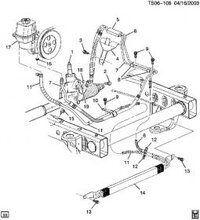
Now I move on to the lines. I figured while I’m there I may as well change the return lines also. To remove the bolts holding on #8 I had to remove the fender liner. To remove the bolt holding on #10 I had to use a long extention and a u-joint, not sure how I will get it back in (any ideas?).

Questions:
- How do I remove brackets #8 & 10 from the old lines and put them on the new lines. I thought of cutting them and getting new ones but when I called the dealer they had no information on those parts. They are not stocked in North America. If that is the case they must be easy to remove???
- After putting the rack in and torquing everything down I take a look at the mounting for the lines to the rack…how am I going to do that? It’s all hidden by the frame or the CV. Are there any tricks?
  • I have aftermarket lines so the pressure line comes with a separate plate to mount to the rack…
  • Do I take out the driverside bolt holding the rack and loosen the passenger side and rotate the rack so I can get to the lines to put the mounting plate and lines together and start the bolt mounting the plate and lines to the rack? Would there be enough movement in the lines?
  • Do I remove the CV I think that might give em enough room?
  • Other thoughts?

Thanks for taking the time to read this.
Jerry
 

Attachments

  • ts06-108.jpg
    ts06-108.jpg
    13.9 KB · Views: 163
Last edited by a moderator:

The_Roadie

Lifetime VIP Donor
Member
Nov 19, 2011
9,957
Portland, OR
Welcome! Never apologize for the length of a post with so many cogent and well-thought out details. It's the confusing, rambling, posts with zero punctuation or structure that make our eyes bleed.

I've never done the line replacement job, but I took my CV joint out to change the rack. I was so frustrated with the bolt #2 and the little nasty $20 seals after my brother put the first set in wrong and they leaked.

You can always use chewing gum to hold a bolt in a socket/extension to put it in position. Or hot glue.
 

gmac310

Member
Dec 4, 2011
174
I've had to do the line replacement not but twice because my replacement return line burst on me on a frigid morning this past winter. For the bolts along the side frame rail I just used a socket that I ground down to about 3/4 its original length and it fit between the bolt head and the liner. Of course your liner might be closer to the the frame than mine was. The front bolt is a PITA! Why, oh why would GM put a bolt directly under the balancer pulley is beyond me! I used the same technique you used, alot oif extensions and a universal but I'll tell you it's easier to take out than to put back in. I had to have another person help me with one of us topside with the socket and extensions and the other underneath guiding the bolt and socket to ensure they stay in position. The problem we ran into when we first started the bolt was that the socket either wanted to spin off the side or the universal locked up. It got easier the more the bolt got threaded in though. Good luck!
 

glfredrick

Member
Jan 14, 2014
172
I too pull the CV to do the rack and lines. I replaced my lines -- what a PITA! Never did get the bottom bolt in behind the balancer. Oh well... Perhaps this summer when my hands are not bleeding.

I also used a section of rubber hose to replace a rusted out portion of the return line (and added an aftermarket crud filter in that line -- it worked -- it plugged up in mid-winter and blew the return lines off the fittings!). Make SURE you get GOOD and RATED true power steering hose. I discovered the hard way that the auto parts places will sell you a piece of hose not rated for steering and that it WILL expand like an anyuerism and explode. Still waiting for the temps to warm up so I can pressure wash my driveway. Fortunately it happened there on a cold start instead of out on the highway somewhere. I did end up replacing the pump as well from all the abuse of running empty, but it was probably due anyway with over 150K on the odometer.

Also, expand the ends of the steel line with a bubble flare (any double flaring tool will produce a bubble if one only uses half the procedure -- insert the little button -- and expand just enough to create a bubble to hold the clamp in place so it will not slip off the end of the line under pressure.
 

jysp

Original poster
Member
Apr 29, 2013
21
Thanks for the replies.

Looks like I will be pulling the CV, I don't recall that being too difficult.

I never thought of grinding a socket to get the front bolt on the frame in bracket #8. That may have worked in my case.

How did you guy's get brackets #8 & 10 off? I have left the lines in for now so I don't forget how they go in. From underneath I was able to pull the lines down to see #10, I can't see how to get them off.
 

jysp

Original poster
Member
Apr 29, 2013
21
Well I finally got back to the job...

- I pulled the CV.
- I took the steering gear cross member off,
- disconnect the intermediate steering shaft
- loosened the passenger side steering gear bolt, and
- removed the driver side steering gear bolt allowing the steering gear to rotate
- then using a jack I could raise and lower the steering gear

This made it easier to get in and attach the lines to the plate and attach the plastic retainer clip.


NOW I can't get the pressure line into the rack. Parts:
Steering gear - A1Cardon - 022-4791-8
Pressure hose - Edlman - 92081 - the pressure line is not the same as OEM, it has a seperate mounting plate and a different end that uses a rubber o-ring instead of the metal seal.
DSCF1929.jpg


I put the metal seal into both ports when I put the steering gear up then I removed the seal from the pressure port to attach the lines. The return line breaks through the seal but the pressure line does not go in the port. The return line seats nicely, but the pressure line would go just up to the o-ring. I took the lines apart and tried to insert just the pressure line, using a flat screw driver I was able to get it in a bit more but still not all the way.

I compared the old and new lines, they looked the same except tor the end, Is it possible they have 2 lines that are similar with different ends?

Has anyone else had issues inserting an after market pressure line into the steering gear?
 

gmac310

Member
Dec 4, 2011
174
I think that type of line doesn't require you to replace the metal seat. The o-ring and the bigger end of the hose take up the space of the insert. If you bought the hoses from Rockauto.com it says in the listing to remove the cup seal before installation.
 

jysp

Original poster
Member
Apr 29, 2013
21
Yup that is what I did. I put the seal in while I installed the rack to keep debris out then I removed it to attach the pressure line. But the darn thing won't go in. I would consider taking the pressure hose and the rack out to try make sure it fits, but I'm not sure I can get the line out. To get the old ones out I cut them.
 

jysp

Original poster
Member
Apr 29, 2013
21
The instructions on the pressure hose said to lubricate the o-ring before putting it on (which I did). Should I have re-lubricated it before putting it into the rack?
 

jysp

Original poster
Member
Apr 29, 2013
21
I ended up taking the presure line back and picked up an OEM style hose. Got every thing back together, bled the system, no leaks. Took for a test drive. alignement was out but the stearing was fine. Took a look for leaks, everything was good.

I was out of town for a couple weeks. When I got back I took it in for an alignment, all is good...

Then we were parallel parking and started and started to hear the power steering wine. The next day I look under the vehicle, there is a wet spot by the drivers side tire...I finally got a chance to jack it up and take a look. It's leeking where the lines go into the rack. I had about 90km on it since with out a leak.

Is the seal in worng? - Roadie mentioned they had put the seals in wrong. What is the correct way? The way I thought they should go in to the rack was so that the cup would face out of the rack. Is this wrong?

Is it possible that the bolt holding the lines to the rack was to tight or to loose would cause this? In JerryIrons artilce he says the the bolt should be put on with 105 in lbs. I don't have a torque wrench that can read in lbs, I use a 1/4" ratchet.

I believe I overfilled the pump with fluid would this cause the seal to blow?

If I replace the seals again would it be wrong to push the seal onto the line all the way before trying to inset the lines into the rach?

I read in this http://gmtnation.com/forums/topic/10224-steering-rack-leak/?hl=%2Brack+%2Bleaking about a restrictor poppet being missing. Can anyone show what this is?

Thanks,
Jerry
 

glfredrick

Member
Jan 14, 2014
172
The seals need to be properly installed into the rack, then the lines pushed into the seals. No possible way to install the original style factory seals by placing them on the lines then insert them into the bores in the rack. They will be crushed and will leak.

Make sure you are not using double seals, i.e., that the old seals come out before installing the new ones.

Also, it is much easier to install the lines if one pulls the CV joint -- sounds like a lot of extra work, but it is not that bad and it SURE makes proper line install easier.
 

jysp

Original poster
Member
Apr 29, 2013
21
I figured out what my problem was.

Confirming glfredrick's comment about not being able to put the seals on the lines and then put them into the rack...
When I pulled the cup seals out I found that the pressure side had a loose flap of rubber that went about half way around the outside of the metal cup. When I was trying to attach the lines to the rack I took the lines out to see if they had broken through the rubber insert of the cup seal. My guess is that after the lines had broke through the cup seal I took them out or the rack one last time, but when I put them back into the rack I pinched part of the rubber seal tearing it and creating a hold for fluid to run out.

I took both of the seals out and tossed them out.

I picked up 2 new seals, put them in the rack. This time when I put the lines in I did not pull them out of the rack I kept pushing until the I could get the bolt to grab. It takes a lot of pressure to break through the rubber. I used a long flat screwdriver and pried on the mounting plate using the strut tower (I believe) for leverage to push the lines through the seals far enough so the bolt threads would catch and push the lines the rest of the way in to the rack.

Why couldn't they have made the shoulder on the bolt a bit longer so that the threads would grab before the lines have started through the seal.

I also agree with the comment about removing the CV it makes the job a LOT easier.

Any way the job finally got done. I have put on about 3,000km's and the seals are still holding.

Thanks GMTnation members for your help, DIY saved me about $1,000. It did take time thankfully I had that luxury.

Jerry
 

The_Roadie

Lifetime VIP Donor
Member
Nov 19, 2011
9,957
Portland, OR
If I was a suspicious guy, I'd think GM designers did that to make sure DIY'ers might be FORCED to take it in to a dealer to fix up a self-repair mess.

We're actually running a bit of a beg-a-thon to help support this non-profit enthusiast-run site's fourth year hosting fees coming due soon. Especially if we helped save you a couple of $$, you might consider hitting the "donate" button on the upper right navigation bar (not shown if you're on Tapatalk, though). Memberships help keep this free resource available for all those who locate us after we left Trailvoy in 2011 when they want to a greedy profit-sucking business model. As time goes on, we're seeing more and more folks adopt used and abused trucks, and not have the deep pockets to be able to afford regular professional maintenance. Thanks if you're able to consider this.
 

Forum Statistics

Threads
23,314
Posts
637,846
Members
18,520
Latest member
Firebaugh86

Members Online

No members online now.