New concept for light bar

Shdwdrgn

Original poster
Member
Dec 4, 2011
568
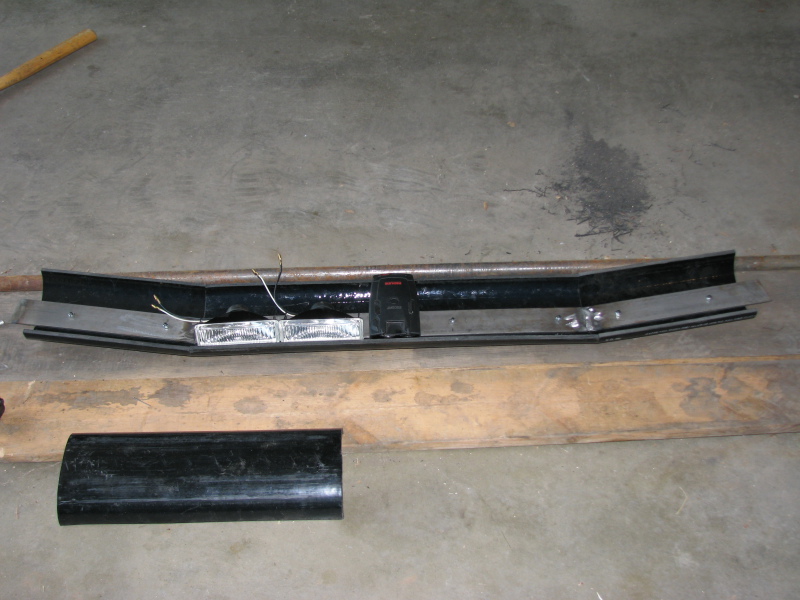
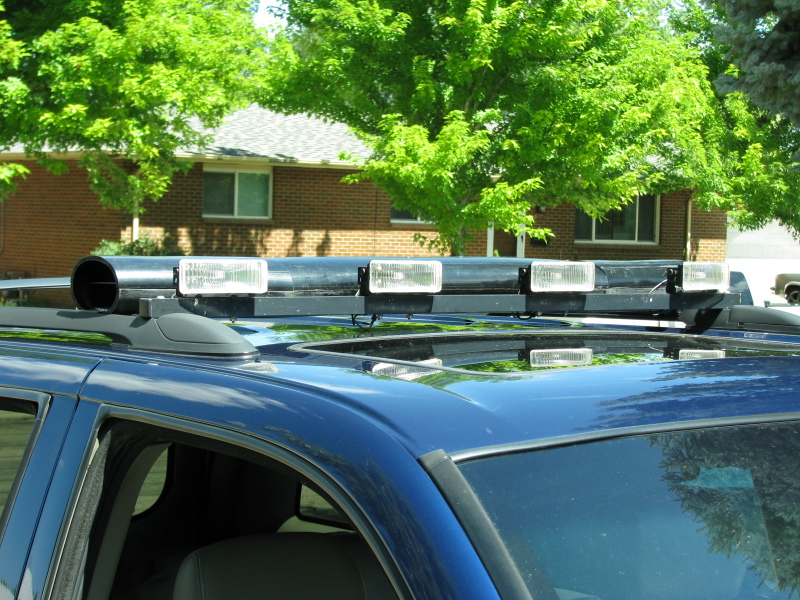
I've been wanting to streamline my roof lights, and thought it would be nice to mount them inside an oval-shaped bar. My lights are nothing special, but they do help when needed. I have the extra criteria that I want to mount the sensor for my radar detector inside the bar, so metal is out of the question. Fiberglass would be nice, but I have no experience working with it, so my next option is PVC pipe.

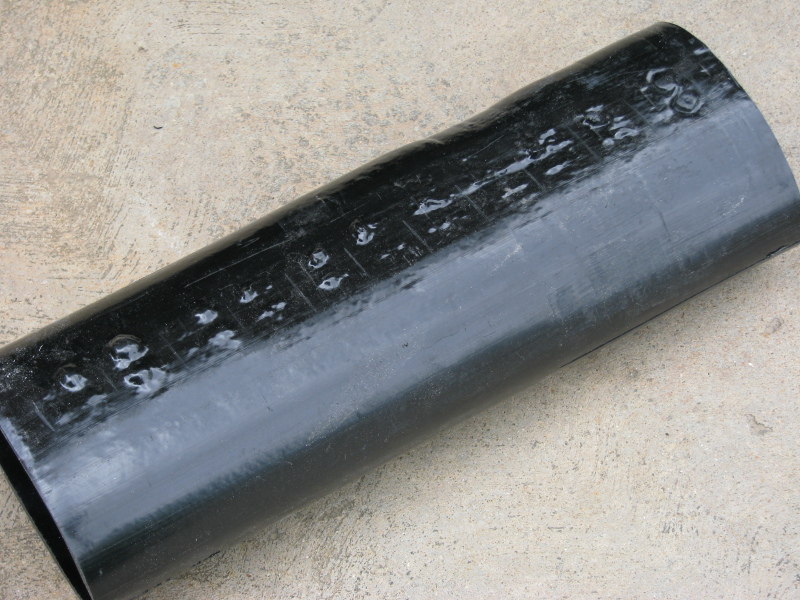
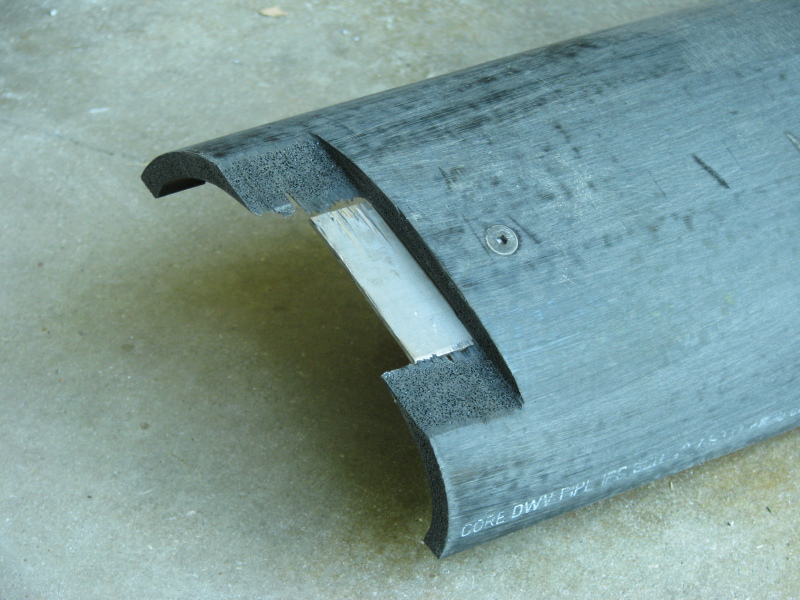
My biggest concern with plastic is the heat generated by the lights, so I did a test today... I dropped one of the lights inside a scrap piece of pipe, and let it run for awhile. Even though the light itself was too hot to touch, the PVC was still only warm to the touch, and nowhere near warm enough to start deforming. Since I plan on opening up the front of the pipe and covering it with a metal mesh, thre should be no danger of it getting too hot.

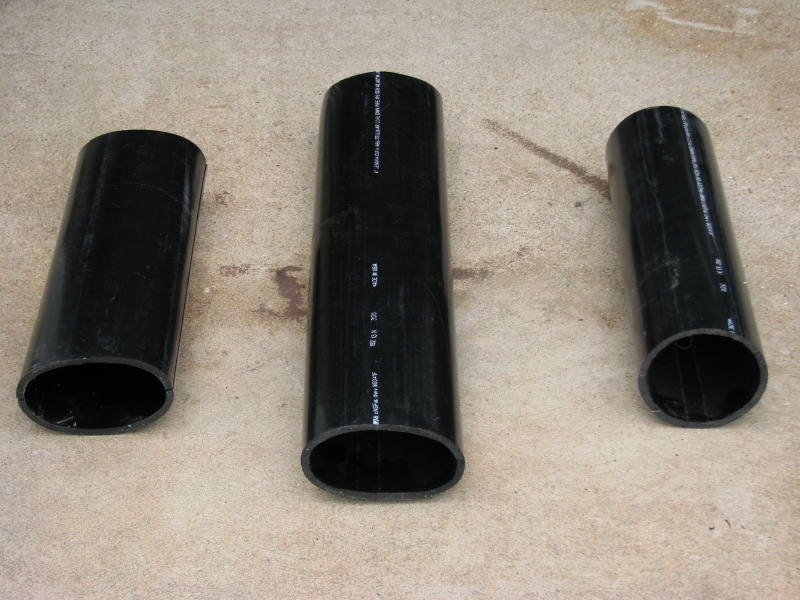
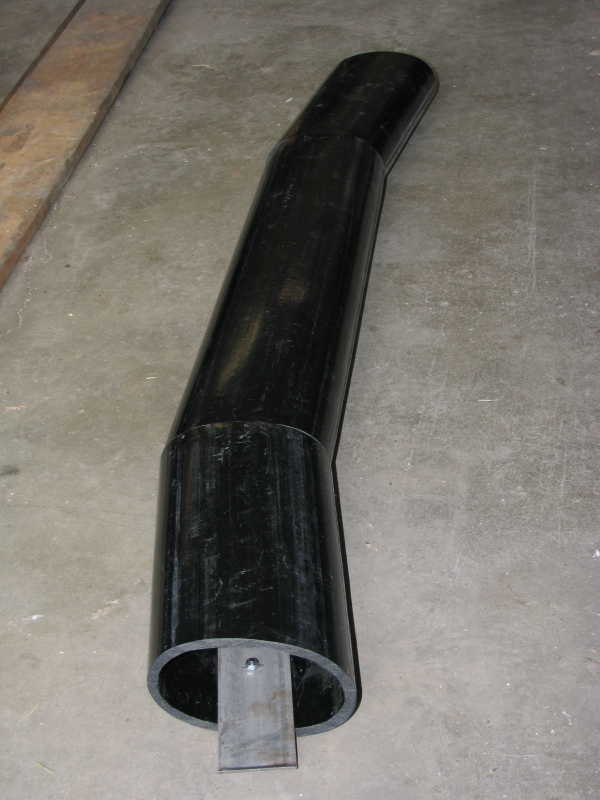
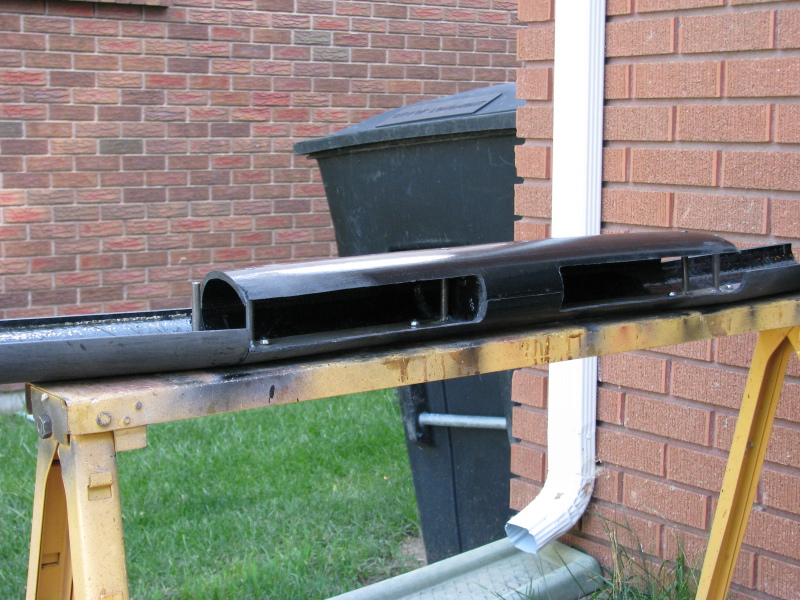
My next obstacle was that I wanted to make the bar into a smooth curve, so that the lights on the outside would face at an angle... Too bad I don't have the equipment to heat up and form such a large piece of pipe at one time. Oh well, I came up with another solution last night -- I made some 5 degree cuts in the pipe pieces, so the ends are sitting at 10 degree angles. I made up some pieces today, and this actually looks pretty good. It is angled, without looking too industrial.

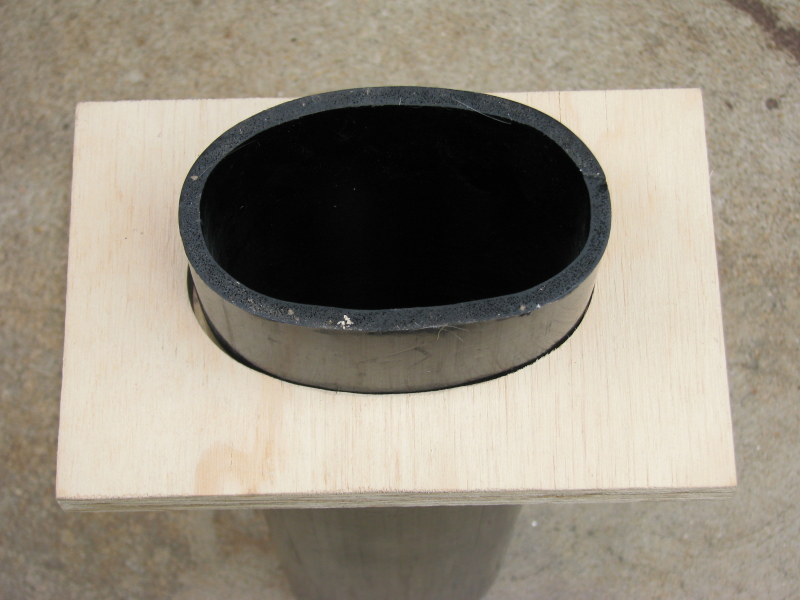
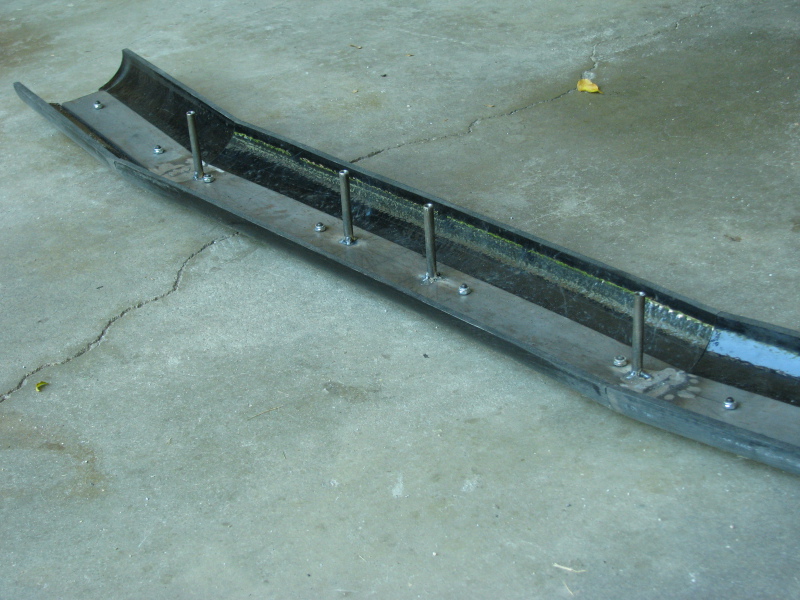
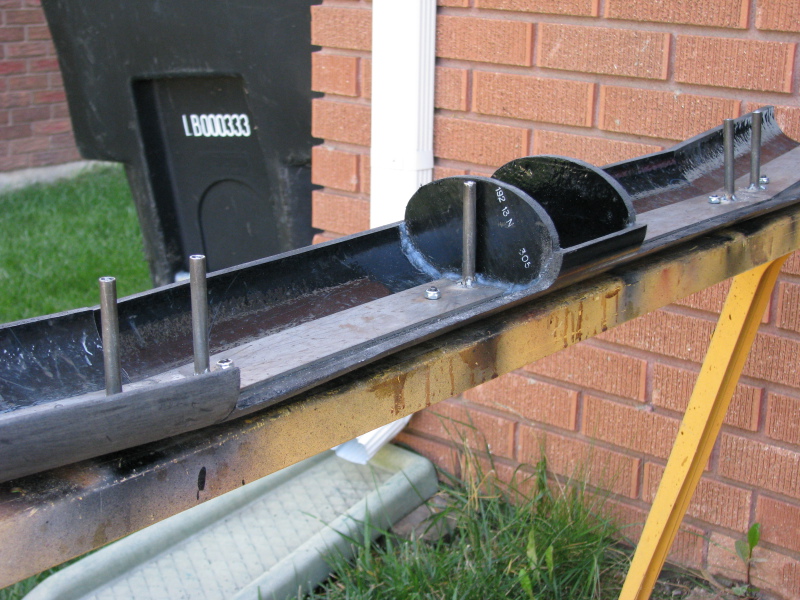
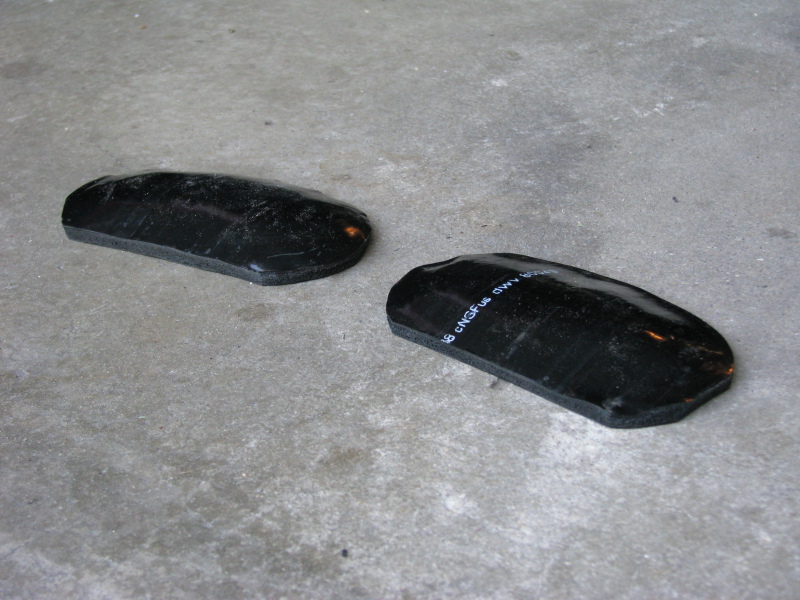
So the overall concept is to start with some 4" PVC, heated and shaped into a 3x5 oval. This gives move than enough room for my lights, and the finished item will sit at the same height as the existing lightbar. I have pieces cut from thinwall PVC, and was thinking of using wood blocks inside to maintain the shape and seal off the area where the radar sensor will be. I have space for six lights -- 2 forward and 2 to each side, and the whole unit will mount to the luggage rails.

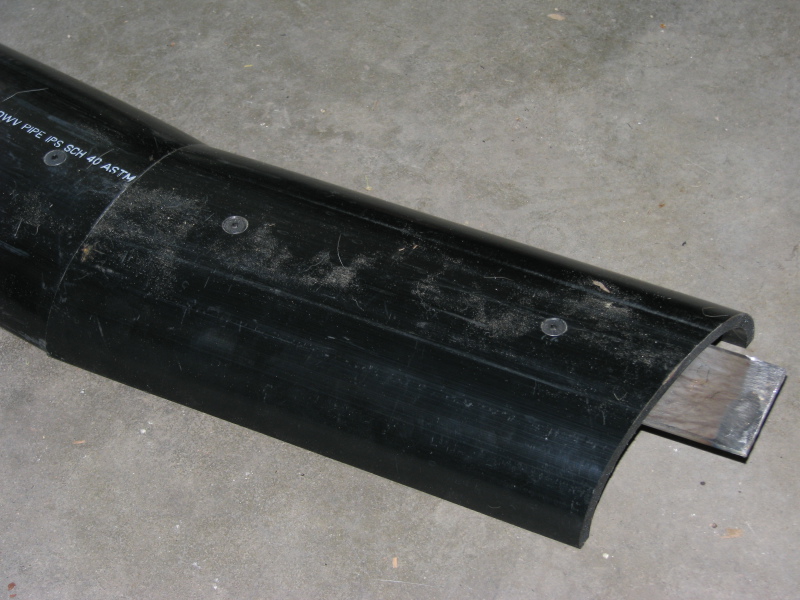
I'm debating changing over to thickwall PVC for the added rigidity, but it will also make it harder to work with. I've seen some nice aluminum mesh available on ebay to finish off the front face after cutting the openings for the lights, and of course I'll have to drill some drain holes... but overall it seems like I should be able to fit all the components and make a fairly strong unit. The worst problem is that it will require disassembly to change a bulb, but that doesn't happen often anyway. Any other thoughts on this idea?
 

Playsinsnow

Member
Nov 17, 2012
9,727
Sounds like a project. Two thoughts. LED's shouldn't require bulb changing and take pics of the build? I'm currently debating lighting setups for the TB.
 

IllogicTC

Member
Dec 30, 2013
3,452
Are you just playing this by eye or some notebook measurements, or have a CAD file of what you want or something?

From what I'm gathering, the lights would actually be integral to the bar rather than an exterior mount, correct? If you have CAD or have a way to clearly demonstrate your needs to the appropriate person/place, you could probably get clear lenses formed to mount on the front of the bar to give it a flush look.
 

Shdwdrgn

Original poster
Member
Dec 4, 2011
568
There's no LEDs involved here. I haven't found any LED setups that put out a suitable floodlight without getting into the 5-600 dollar range, so I'm sticking with my halogens until the prices come down.

Yes this is all being done by eye, nothing fancy here... chopping 5 degree angles on a compound miter saw. The lights would go inside the pipe, and I would make a structure to mount the lights on which could bolt in place inside the pipe. The idea is to make the entire lightbar more aerodynamic. I know, it probably doesn't make any noticeable difference in mileage, but I think it would *look* cleaner. I could probably form some lenses out of plexiglass, but I would rather cover the lights with an open mesh for two reasons... 1) I want some airflow around the lights to help keep them cool, and 2) this bar is already going to look too much like a cop lightbar, and I'm hoping the mesh will help take away from that (also the whole thing will be finished in black). Last thing I need is people in front of me slowing down.
 
Feb 16, 2012
202
Shdwdrgn said:
There's no LEDs involved here. I haven't found any LED setups that put out a suitable floodlight without getting into the 5-600 dollar range, so I'm sticking with my halogens until the prices come down.

Check these out. Lifetime LED Lighting Some of the larger units do start getting up there in price, but from what I have found, these are pretty comparable to the Rigid Industries, with some better pricing, and a Lifetime warranty.
 

Shdwdrgn

Original poster
Member
Dec 4, 2011
568
Have you actually tried any of these? I would love to go with all LED lighting, but I have not seen any good reviews regarding how well the lights project. Sure they're bright if you look directly at them, but will they light up objects 1/4 mile away so you can see it while you're driving?
 
Feb 16, 2012
202
Shdwdrgn said:
Have you actually tried any of these? I would love to go with all LED lighting, but I have not seen any good reviews regarding how well the lights project. Sure they're bright if you look directly at them, but will they light up objects 1/4 mile away so you can see it while you're driving?

My GoRhino grille guard just came in the other day. I am still debating which one of the several selections they have, I am going to get, but I will in fact be getting some.

Linked below is a review one of the members on my other forum did on some of their products. Don't know if you can view it or not unless you are logged in. If not let me know.

My review of Lifetime LED off-road lamps in 30 watt & 50 watt versions
 

Playsinsnow

Member
Nov 17, 2012
9,727
I agree, haven't seen any LEDs that will project a good distance without costing so much. What about making the bar/rack streamlined with the lights? Similar to what heeps do?


Second thought. Screw it. Go for the cop look and get the cops to wonder what authority you're with.
 

Tofer76

Member
Dec 8, 2011
148
That's what i wanted to do. Have a aerodynamic light bar fitted with all "takedown" lights. Front side and 2 rear facing. Takedown is what they call the blinding lights in the middle that lights up your car when pulled over
 

Shdwdrgn

Original poster
Member
Dec 4, 2011
568
I'm not sure how well it would work to have rear-facing lights from this position. Seems like it would work better to have a smaller bar across the back? I'm still debating how I want to set up my switches as I currently only have a single switch for the four existing lights, but it seems practical to add a second switch so I can control the center and side lights separately. I *could* use three switches to really divide up the set, but that's starting to feel like overkill.

The more I think about it, the more I'm leaning towards using the thickwall pipe. The individual pieces are only about 15" long, so I can put them in the oven to bake and soften up for shaping. Still debating a method of attaching the sections together though.
 

Hypnotoad

Member
Dec 5, 2011
1,584
I'm an electrician, and I can tell you we bend PVC conduit all the time by heating it up with something called a hotbox or else a large propane torch, then put it in the shape you want it and let it cool.

PVC conduit isn't the same as pipe, so I don't know if it would bend like conduit would.
 

Shdwdrgn

Original poster
Member
Dec 4, 2011
568
My dad was an electrician for most of my life. He just closed up shop and retired a couple years ago, and when I mentioned this he said they had an electric blanket they used to heat up the conduit for bending. Of course 4" pipe is going to want to collapse when you bend it. I thought about plugging the ends and adding some air pressure inside the pipe, or possibly filling it with sand, but I just don't have anything large enough to heat up nearly 4 feet of pipe, so cutting it into sections seems like the best option considering what I have to work with. Been too busy lately to get any more work done on it though...
 

Shdwdrgn

Original poster
Member
Dec 4, 2011
568
So it's been awhile, but I've still been kicking around this idea and slowly making some progress when I could. I thought I would share some pics of what I've been up to...

The first step was making a form to shape the pipe into the oval shape I wanted. This just took some quick calculations and then making an oval to dimensions on the computer and printing it out. I ended up going a little too small to start, but some sanding opened it up to where it slid down the pipe easily...
IMG_8302.JPG


I am making this in three pieces so that the pipe would fit inside my oven. 250 degrees F is just about perfect for ABS -- if you let it bake for 10-15 minutes the plastic will be almost like rubber and you can easily shape it as it cools down. Don't go any hotter, or the plastic will start to melt!!!
IMG_8299.JPG


The next step was trying to cut the pieces in half. I figured out quickly that because of reshaping the pipe, there was tension in it. The first piece I tried to cut through (I used the melted piece above to test with) clamped in on itself as I cut through it, and the hot plastic grabbed the blade. I solved this by adjusting my blade height so it left a thin bit of the plastic in place when I cut it. The next problem I encountered (which was NOT done with a test-piece) was trying to eyeball the center of my bend as I drew the pipe across the saw. I found the best practice was to take a piece of chalk and mark the centerlines to give myself a starting point when I began the cut. Here I have two formed pieces, and re-cut another end piece to replace the one that I cut incorrectly. You can see where I made my cut marks down the sides of the left piece.
IMG_8298.JPG


After making the deep cuts with the table saw, I used a hand saw to finish splitting the pieces. I also kept the one that was cut of-center just in case I screw up another piece along the way.
IMG_8307.JPG


I'll use a belt sander to finish smoothing out the cuts and get my lines leveled, but this is what I finished up with today. Now that I have the flat sides on each piece, I can lay them out on my miter saw and cut 5-degree angles to set the final shape of the bar. The bottom halves will be bolted together with some flat steel bar, then I can glue the half-pipes together to make a single solid piece. Each of the top pieces with be fitted individually and I'll set in some mounting screws so the caps can be removed to work on (or replace) the lights.

After the entire bar get assembled back together, then I can build the mounting points to set it into the luggage rack, and start cutting out holes in the front for the lights to sit in. The lights I have are 55W halogens, each just slightly less than 2x5 inches, so I have room to place 6 lights across the length of the bar.

So it's finally starting to look like something... we'll see how it goes from here.
 
  • Like
Reactions: Blckshdw

HARDTRAILZ

Moderator
Nov 18, 2011
49,665
Missed this somehow, but definietly a different idea. Curious to see how it all works out for you.
 

Shdwdrgn

Original poster
Member
Dec 4, 2011
568
I'm thinking I want to run four lights across the center, and one angled light on either side. I also have to leave room in the center for my radar detector sensor, so I think the center piece is *just* long enough to accomodate. The radar will make things a bit tricky because I have to create a waterproof compartment for it with a thinner shell over the top to not interfere with the signal, but still leave an open trough along the back to run wires to either side of the light bar.

Hoping to have some time this weekend to get the pieces sanded flat and make the angle cuts, then I can start assembling the base.
 

Shdwdrgn

Original poster
Member
Dec 4, 2011
568
Lots of work, little apparent progress. The good news is I'm finally done with all these oddball 5- and 10-degree cuts. Trying to fit everything together is what takes the most time and patience.

I picked up a 4' piece of 2" wide by 1/8" steel bar to hold together the base of the light bar. I used some countersink bolts to hold it in place. There are thick washers between the plastic and the steel to take up the gap from the curve of the plastic.
IMG_8313.JPG


The bottom side, showing the countersink bolts. The excess steel sticking out the end will be bent up at a 90-degree angle and create a bracket that I can screw the endcaps to.
IMG_8315.JPG


There's still a little mis-match of the curves betwen plastic pieces, but I'll use a heat gun and get those lined up before gluing the pieces together.

Some test-fitting of the lights and radar detector... I wish I'd made the center piece about an inch wider. It will be a close fit, but everything should drop in place, and I have room for a couple lights on the sides as well. There is still a lot of space behind the lights. I'll get some air holes drilled, but I don't think there will be any probem with overheating.
IMG_8316.JPG


With the bottom tray roughly assembled, I went ahead and cut the top pieces to size. Once I finish levelling all the pieces, the finished height will be less than 3.5", and it is currently 5.25" wide. If I ever find a small computer that will support it, there's plenty of room to also stash some USB webcams for security recodings and maybe even some other electronics.
IMG_8318.JPG


So its finally taking shape. Next step is to finish cleaning up the shape of the plastic and add screw-down points to hold the top caps in place, then I can cut out some end caps.
 

Shdwdrgn

Original poster
Member
Dec 4, 2011
568
I've been poking at this project here and there, working out the assembly. Last week I made some stand-offs with internal threads at one end that I could use to screw top the top caps. Finally got a chance to start welding them on today. I will be adding two more for each end when I have another chance.
IMG_8399.JPG


The next item was cutting flat spots so the light bar can sit on top of the luggage rails. This was down with a cross-cut saw and a lot of passes. The final depth is about 3/8" to the bottom of the steel plate.
IMG_8396.JPG


Once I got those slots cut, I was able to do a test fitting. It looks like the top of the plastic is almost exactly the same height as my original lights, which means the new lights will sit about 3/4" lower. This assembly is only slightly higher than the onstar antenna, so overall the light bar is tucked pretty low to the roof.
IMG_8394.JPG


Once I get the stand-offs welded for the side caps, I'll have to do some work to adjust the curves of the plastic so everything lines up right, then sand the whole thing down smooth and make some ends to finish it off. Then I'm ready to cut out the holes for the lights...
 

Blckshdw

Moderator
Nov 20, 2011
10,684
Tampa Bay Area, FL
You do some pretty impressive design fab work man :thumbsup:
 

Shdwdrgn

Original poster
Member
Dec 4, 2011
568
Thanks, but PVC and ABS are easy to work with if you can fit the pieces in your oven. There's still some waves to straighten out, but it's coming along. It's more time-consuming than anything -- fab work takes forever.

Glad I stopped when I did. Cleaned everything up, got started mowing the lawn as the clouds were rolling in. I just finished the yard as it started raining, and it came down so quick I didn't even try to put the mower away... Last check was 0.98 inches of rain in a little over half an hour, but it's letting up now.
 

Shdwdrgn

Original poster
Member
Dec 4, 2011
568
Making progress slowly but surely...

Today I cut out some ovals for the end caps and the center dividers. The center section has to protect the radar detector from and rain that will get in behind the lights, and it also helps make a more rigid section in the center. I set the pieces in place with silicon, and will probably find some type of rubber piece to seal off the top side.

With these in place, I finally got to start cutting the slots for the lights. Because of the width, it wouldn't fit under my drill press, so I had to drill out the corners by hand, then use a jigszw held at a steep angle to cut the straight lines. It came out fairly decent, but it still needs a bit more clean-up with the dremmel.
IMG_8440.JPG


IMG_8443.JPG


The end caps are shaped a bit, but it will take a lot of work with a sander to smooth out the curves and flatten out the bottom so they sit flush to the ends. Yeah, they're not much to look at right now...
IMG_8445.JPG


I'll ned to drill holes through the center dividers to run wires through, and add a flat piece in the center for the radar detector to mount to. Next time I'll get the holes cut out for the side lights, then get everything cleaned up so there's enough room to fit a metal grill around the lights. Then I can add mounting brackets for all the lights to bolt them in place. I'm hoping to get the shell completed before the cold weather hits so I can get a good coat of paint on the outside, and some rubberized coating on the inside.
 

Forum Statistics

Threads
23,330
Posts
637,976
Members
18,530
Latest member
jvest

Members Online