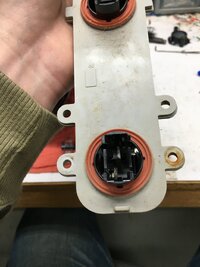
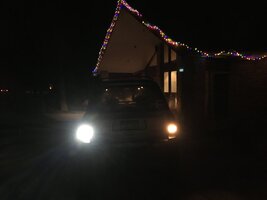
Has anyone cut apart their taillights and replaced the reverse lights with LED pods? I won a set in a giveaway a while back and don't have any good use for them but I'm thinking about fitting them into my tail lights where the original reverse lights were. Just looking at the opening and sizes of both it looks like they may fit. Has anyone done anything similar or does anyone have any advice/suggestions?
You are using an out of date browser. It may not display this or other websites correctly.
You should upgrade or use an alternative browser.
You should upgrade or use an alternative browser.
Light Pods in Taillights
- Thread starter wstuckey1
- Start date
Blckshdw
Moderator
I haven't done exactly that, but had a similar plan. Got a set of aftermarket tails that I baked open, stripped the chrome, and planned to retrofit SMD LEDs on circuit boards. (the specific parts I planned to use got discontinued, and I didn't know that until it was too late  )
)
My only suggestion, go to a junk yard and get a cheap pair of tails (or single even) just for practice and mock up. One with a busted lens would even work, just so you're not investing a ton of time and money in case something doesn't work the way you wanted it to, or you find out you need to do some cutting or modding that wasn't originally planned on.
 )
)My only suggestion, go to a junk yard and get a cheap pair of tails (or single even) just for practice and mock up. One with a busted lens would even work, just so you're not investing a ton of time and money in case something doesn't work the way you wanted it to, or you find out you need to do some cutting or modding that wasn't originally planned on.
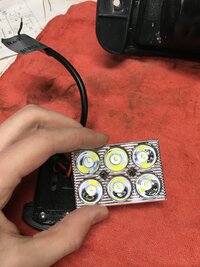
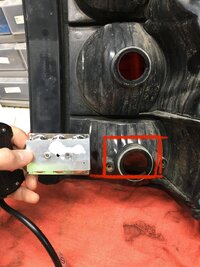
After looking further the full pod in the taillight would be a very tight fit. Would have to cut more that just the back where the bulb goes in. So I tore apart the pod and pulled out the reflector and board with the led’s on it. Going to cut a rectangle in the back of the taillight as marked in the picture and epoxy the board onto it.I haven't done exactly that, but had a similar plan. Got a set of aftermarket tails that I baked open, stripped the chrome, and planned to retrofit SMD LEDs on circuit boards. (the specific parts I planned to use got discontinued, and I didn't know that until it was too late)
My only suggestion, go to a junk yard and get a cheap pair of tails (or single even) just for practice and mock up. One with a busted lens would even work, just so you're not investing a ton of time and money in case something doesn't work the way you wanted it to, or you find out you need to do some cutting or modding that wasn't originally planned on.
Blckshdw
Moderator
You gonna rig up an alternate way to secure the circuit board then since you're cutting out the bottom mounts?
Do you mean the circuit board with the leds? If so then that’s getting epoxied into the taillight housing and I’m praying they last me a while. If you mean the plastic that holds the other bulbs, then I’m will be epoxy-ing the tapped plastic columns to the back of the pod.You gonna rig up an alternate way to secure the circuit board then since you're cutting out the bottom mounts?
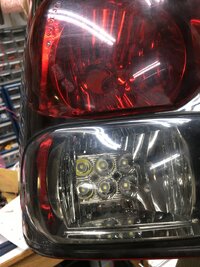
Alright. Got the led’s mounted in the taillight housing. Decided to use silicone caulk instead of epoxy due to it being easier to work with and it being far less runny so I don’t get it inside the taillight. Also knew I was going to have to seal it with caulk once I finished so I decided to just do it all at once. Now it’s just hooking everything up and seeing how she does eh. Hopefully tonight I’ll have this side back in the truck. 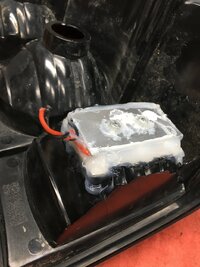


Blckshdw
Moderator
This one may be elementary to some of you guys but does anyone know how to figure out or just know which terminal is positive and which is negative in the bulb plug?
Hmm, well the one constant between the 3 is ground, So I'd test for continuity between the pins in the middle and lower sockets (since they only have 1 circuit) When you get a hit, you'll know those are the ground contacts, making the other 2, the turn signal and reverse contacts. Since you'll now have a known ground, you can then test the park/brake socket to find which ones there are ground. Not sure of a quick and easy way to determine which ones are which for the park/brake positive contacts, unless maybe you grab a bulb and test the pins to see which one lights up dim/bright, and compare it to the socket.

Looking forward to seeing the test fire on that LED pod.

Blckshdw
Moderator
richphotos
Member
Nice! I did something similar with my tails when I had a custom built set. They worked great.
The only thing I wish I would have done is added some sort of optics if possible. it did not project the light enough to give real usable light beyond 5-10 feet.
The only thing I wish I would have done is added some sort of optics if possible. it did not project the light enough to give real usable light beyond 5-10 feet.

