You are using an out of date browser. It may not display this or other websites correctly.
You should upgrade or use an alternative browser.
You should upgrade or use an alternative browser.
NEED HELP Intake manifold bolts
- Thread starter Raph
- Start date
Welcome to GMT Nation...
Try Using a 1/4” Drive using a 10MM Wobble Socket (Try using both the Deep and Shallow Sockets) and GearWrench “Slender” 1/4” Drive Ratchet… This is some additional Guidance via an Excerpt from a “TV” On Topic Thread:
Visit THIS Link for the Related-Mentioned Images:
https://forums.trailvoy.com/showthread.php?t=173346
(Please Advise as to the reason for the R&R of The Intake Manifold...)
Intake Manifold Removal 06 TB, 4.2 Engine
I had P0171 error code, bank 1 running lean, or too much oxygen. Research indicated either unmetered air or lack of proper amount of fuel entering the system. I started with focusing on unmetered air. I changed the air filter, checked PCV lines and connections, cleaned throttle body, replaced MAF, but problem persisted. I thought fuel filter might be clogged, but came to find out 2006 TB does not have it. I used four-five cans of fuel injector over a period of a month problem still persisted. I replaced oxygen sensors hoping that they were throwing the code erroneously. Problem persisted. I decided to replace the fuel injectors. Soon found out that it was more involved than I could imagine. The problem is the fuel rail is underneath the intake manifold and it had to be removed. Here is step by step instructions to remove the intake manifold. Allow 3-5 hours to accomplish this:
1) Start the engine, remove fuel pump relay (#41 on the fuse box) to take the fuel pressure out of the lines. The truck will stop running.
2) Disconnect battery. Put the fuel pump relay back on.
3) Remove air box and throttle body from the intake manifold.
4) Take serpentine belt off.
5) Remove the metal bracket on top of the alternator (three 15mm and one 10mm bolts, #1 through #4, in picture #1).
6) Remove the alternator bolts (three long 15mm bolts, #5 through #7, in picture #1). Start with the bolt at the bottom (#5). You may have to pry the metal part of the hose flush to the bolt a little bit to gain access.
7) Disconnect electric connections behind the alternator, and pry the alternator out completely. Some wiggling is necessary but it eventually comes out.
8) Disconnect three large wire connectors attached to the plate which is attached to the manifold (picture #2).
9) Disconnect the hose from the manifold that goes to the brake booster (#1 in picture #2).
10) Disconnect the top part of the hose in the middle of the manifold (#5 in picture #3) because there is one 10mm bold behind that hose (#2 in picture #3). You might want to replace that hose once the manifold is out. Mine cracked when I was prying it out. It did not have a clamp but I put one anyways.
11) Remove another metal bracket attached to the manifold which is on the alternator side. There is only one 10mm bolt holding it (#3 in picture #3). The bolt is underneath. You need to feel by your hand where the bracket ends to find that bolt. Unhook all the wires and lines attached to it and get it out of there. Once that bracket is removed, you should be able to reach all ten 10mm bolts holding the manifold (all circles in picture #3 except #3 which is bolt for the bracket and #4 which for plastic wire holder, I broke mine and put a zip tie instead).
12) You will need 3-4 inch extension to reach most bolts. The one closest to the firewall does not allow a straight extension (#6 in picture #3), but a small wrench works just fine. Don’t forget the bolt hiding behind the hose in the middle of the manifold that you unhooked. Bend the unhooked top part of the hose down to reach that bolt. All of the bolts will come loose but won’t completely come out, I guess to prevent them from falling down.
14) When all the bolts are out, the manifold should come off from the engine block. Pull it away from the engine block and push it down and back as much as possible to clear it off from the AC line in the front. You may have to pull the AC line out a little. With a little wiggling it can be taken out completely.
(I'm 'Irrationally Superstitious' of Certain Numbers... Ergo... I think that It's BAD LUCK to refer to the Number Between 12 & 14... and so I altered the above Count ...accordingly)
Last edited:

Hey,
Many thanks for your help, will do a trip to the store tomorrow to get the 1/4 wobble bit.
Just got a trailblazer for my daughter and was going to do a tune up. Had a rough idle, exhaust leak and terrible mpg (13.3!).
Changed the (really old) air filter and discovered that the exhaust leak was coming from the manifold - four broken bolts. Struggling to get the exhaust flange off, but I am getting an impact wrench tomorrow too.
Mea while I thought I change the spark plugs and of course they were covered in oil. So either tube or gasket leak. Which brings me to taking the intake manifold off. Man, never thought that you have to go through so many parts just to change the valve cover gasket! Crazy, can't believe that Haynes even suggests to disconnect the AC, most probably would have made it a lot easier to get the alternator off, but that is just crazy!
Many thanks for the advise, I will let you know if I can take it off without throwing things!
gmcman
Member
- Dec 12, 2011
- 4,656
When I remove my intake I remove the LF tire and lower the vehicle so I'm not climbing over the fender.
I used a 1/4" drive ratchet and a 10MM deepwell socket. It's a reach but once you get your hand back there you should be able to get it loose before fatigue sets in.
I tried the universal joint in the past but reaching back there it was easier for me to use a more rigid setup.
Here's a 1/4" drive ratchet with a 10MM deepwell, just enough room to the firewall to back the bolt out.
In lieu of using an "Impact Gun" on the Triple Flange Stud Fasteners, I have had some unbelievable "Good Luck" using THIS Stuff:

By simply Spraying Down each Rusted and Impacted Bolt/Stud/Nut Combo in 10 Second Intervals and then following up with using CAREFUL, SLOW AND STEADY CCW Turns with the Ratchet, Extension and.Socket.... I will be VERY Surprised if those errant fasteners do NOT Yield to Your Efforts.
However... If you go directly to using the Impact Gun.. there is a very high likelihood that Snapping off the Studs/Bolts will cause you to suffer a "Serious Mission Creep" when having to get the Old Remnants removed via the necessity of a Blow Torch and Vise Grips, etc. You would of necessity. have to Bench Vise Mount the Exhaust Manifold after you remove it completely from the SUV and then resort to threading on Two Fasteners, "Back 2 Back" and then wind out the Broken Stud from the opposite side while they're still Red Hot.
By the Way... Please Refrain from using ANY Open Flames around CRC Freeze-Off as the by-products of Igniting and Burning Solvents like these can produce Deadly PHOSGENE GAS Here are three Illustrative Videos touting the use of "CRC "Freeze-Off" ....NOTHING ELSE will Be as Good:
Amazon.com: CRC Freeze-Off Super Penetrant, 11.5 oz: Sports & Outdoors
Buy CRC Freeze-Off Super Penetrant, 11.5 oz: Coatings - Amazon.com ✓ FREE DELIVERY possible on eligible purchases
www.amazon.com
By simply Spraying Down each Rusted and Impacted Bolt/Stud/Nut Combo in 10 Second Intervals and then following up with using CAREFUL, SLOW AND STEADY CCW Turns with the Ratchet, Extension and.Socket.... I will be VERY Surprised if those errant fasteners do NOT Yield to Your Efforts.
However... If you go directly to using the Impact Gun.. there is a very high likelihood that Snapping off the Studs/Bolts will cause you to suffer a "Serious Mission Creep" when having to get the Old Remnants removed via the necessity of a Blow Torch and Vise Grips, etc. You would of necessity. have to Bench Vise Mount the Exhaust Manifold after you remove it completely from the SUV and then resort to threading on Two Fasteners, "Back 2 Back" and then wind out the Broken Stud from the opposite side while they're still Red Hot.
By the Way... Please Refrain from using ANY Open Flames around CRC Freeze-Off as the by-products of Igniting and Burning Solvents like these can produce Deadly PHOSGENE GAS Here are three Illustrative Videos touting the use of "CRC "Freeze-Off" ....NOTHING ELSE will Be as Good:
Thank you all for your help, got to the last bolt and was able to take it off. Cleaned everything and replaced all gaskets. Now the next problem: I am reattaching the intake manifold. I didn't pay attention to the bolts when I cleaned the manifold but also nothing seemed out of the ordinary neither during cleaning nor when I took the manifold of. BUT two of the bolts do not seem to catch. I have all the other ones aligned an tightened - even that nasty last one close to the firewall. I am dreading taking the manifold off(that blasted last bolt) to check if they are in fact broken off. Tried to pull one of the loose bolts out, it was mentioned in another thread that you should be able to do so, but I couldn't get one out. Didn't want to apply too much pressure though either since this woke thing is made of plastic and I don't want to break it. I tried wriggling the bolt around but no luck.
Any ideas? Am I just getting the angle wrong?
Do I need to take the whole thing off again?
Any ideas? Am I just getting the angle wrong?
Do I need to take the whole thing off again?
Thank you very much, that did it!Welcome to GMT Nation...
Try Using a 1/4” Drive using a 10MM Wobble Socket (Try using both the Deep and Shallow Sockets) and GearWrench “Slender” 1/4” Drive Ratchet… This is some additional Guidance via an Excerpt from a “TV” On Topic Thread:
Visit THIS Link for the Related-Mentioned Images:
https://forums.trailvoy.com/showthread.php?t=173346
(Please Advise as to the reason for the R&R of The Intake Manifold...)
Intake Manifold Removal 06 TB, 4.2 Engine
I had P0171 error code, bank 1 running lean, or too much oxygen. Research indicated either unmetered air or lack of proper amount of fuel entering the system. I started with focusing on unmetered air. I changed the air filter, checked PCV lines and connections, cleaned throttle body, replaced MAF, but problem persisted. I thought fuel filter might be clogged, but came to find out 2006 TB does not have it. I used four-five cans of fuel injector over a period of a month problem still persisted. I replaced oxygen sensors hoping that they were throwing the code erroneously. Problem persisted. I decided to replace the fuel injectors. Soon found out that it was more involved than I could imagine. The problem is the fuel rail is underneath the intake manifold and it had to be removed. Here is step by step instructions to remove the intake manifold. Allow 3-5 hours to accomplish this:
1) Start the engine, remove fuel pump relay (#41 on the fuse box) to take the fuel pressure out of the lines. The truck will stop running.
2) Disconnect battery. Put the fuel pump relay back on.
3) Remove air box and throttle body from the intake manifold.
4) Take serpentine belt off.
5) Remove the metal bracket on top of the alternator (three 15mm and one 10mm bolts, #1 through #4, in picture #1).
6) Remove the alternator bolts (three long 15mm bolts, #5 through #7, in picture #1). Start with the bolt at the bottom (#5). You may have to pry the metal part of the hose flush to the bolt a little bit to gain access.
7) Disconnect electric connections behind the alternator, and pry the alternator out completely. Some wiggling is necessary but it eventually comes out.
8) Disconnect three large wire connectors attached to the plate which is attached to the manifold (picture #2).
9) Disconnect the hose from the manifold that goes to the brake booster (#1 in picture #2).
10) Disconnect the top part of the hose in the middle of the manifold (#5 in picture #3) because there is one 10mm bold behind that hose (#2 in picture #3). You might want to replace that hose once the manifold is out. Mine cracked when I was prying it out. It did not have a clamp but I put one anyways.
11) Remove another metal bracket attached to the manifold which is on the alternator side. There is only one 10mm bolt holding it (#3 in picture #3). The bolt is underneath. You need to feel by your hand where the bracket ends to find that bolt. Unhook all the wires and lines attached to it and get it out of there. Once that bracket is removed, you should be able to reach all ten 10mm bolts holding the manifold (all circles in picture #3 except #3 which is bolt for the bracket and #4 which for plastic wire holder, I broke mine and put a zip tie instead).
12) You will need 3-4 inch extension to reach most bolts. The one closest to the firewall does not allow a straight extension (#6 in picture #3), but a small wrench works just fine. Don’t forget the bolt hiding behind the hose in the middle of the manifold that you unhooked. Bend the unhooked top part of the hose down to reach that bolt. All of the bolts will come loose but won’t completely come out, I guess to prevent them from falling down.
14) When all the bolts are out, the manifold should come off from the engine block. Pull it away from the engine block and push it down and back as much as possible to clear it off from the AC line in the front. You may have to pull the AC line out a little. With a little wiggling it can be taken out completely.
(I'm 'Irrationally Superstitious' of Certain Numbers... Ergo... I think that It's BAD LUCK to refer to the Number Between 12 & 14... and so I altered the above Count ...accordingly)
Great News, Brother! Glad You Finally  The Problem!
When you get some spare time... Visit THIS Link and Follow @Mooseman 's Instructions to Download and Save the Free Gift of a Genuine GM OEM Digital Service Shop Manual for Your particular Vehicle:
 gmtnation.com
When you get some spare time... Visit THIS Link and Follow @Mooseman 's Instructions to Download and Save the Free Gift of a Genuine GM OEM Digital Service Shop Manual for Your particular Vehicle:
Need service manuals? Get them here!
********* Please note that the FireFox browser has issues with the password handling and that these downloads are not under HTTPS, flagging them as security risks. Chrome and Edge work fine once you allow the download. ********* ATSG 4L60E Manual 4L60E Rebuild Manual 2005 GMC Envoy XUV...
Yeah, now I need to get the manifold back on. I think I will take it off completely tonight to see if the two bolts are snapped.Great News, Brother! Glad You Finally View attachment 90081The Problem!
When you get some spare time... Visit THIS Link and Follow @Mooseman 's Instructions to Download and Save the Free Gift of a Genuine GM OEM Digital Service Shop Manual for Your particular Vehicle:
Need service manuals? Get them here!
********* Please note that the FireFox browser has issues with the password handling and that these downloads are not under HTTPS, flagging them as security risks. Chrome and Edge work fine once you allow the download. ********* ATSG 4L60E Manual 4L60E Rebuild Manual 2005 GMC Envoy XUV...
Most of the "Durable Fasteners" are made of "Grade 8" or 10.9 Hardness Steel...and the more likely scenario will be that those Two Intake Manifold Bolts have stripped out the Thread Lines on the flat facing locales of the Aluminum Engine Head.
But just in case that turns out NOT to be true and the Two Fasteners DID Snap Off ....that will turn out to be easier to solve than if you have to Drill Out those Stripped Bolt Holes and repair them using a TIME-SERT Kit. IIANM... The Bolt Size should be M6 X 1.0 MM... But this will have to be confirmed before you wind up spending around $50.00 for the exact TIME-SERT R&R Kit to do the job right.
As a "Last Ditch Effort" ...You might venture over to eBay and consider getting this raggedy-ass looking Used Intake Manifold via the Link below... just to be able to scavenge the "Trapped Fasteners" and Rubber Grommets ...because they are VERY hard to locate in any Off The Shelf Nuts and Bolts Hardware Outlets. So... the ones still attached inside of this inexpensive Old Thing ...may save the day if you cannot find any Brand New Ones from gmpartsdirect.com.
If GM does not still carry those unique Bolts and Grommets... remember that the eBay Sale shown below has the "Make an Offer" feature ...and since the shipping for this Old IM is high at around $25.00... perhaps offer the Dude $15.00... and see if the Seller bites on the suggestion:
INTAKE MANIFOLD 4.2L 02 03 04 2002 2003 2004 CHEVY TRAILBLAZER GMC ENVOY | eBay
Find many great new & used options and get the best deals for INTAKE MANIFOLD 4.2L 02 03 04 2002 2003 2004 CHEVY TRAILBLAZER GMC ENVOY at the best online prices at eBay! Free shipping for many products!
rover.ebay.com
Okay...
Recently, I did a Write Up on “How to Repair Stripped Out Coil On Plug Fastener Holes” that turns out to be THE "Spot On Fix" for THIS Repair as well. I suspected that since the Intake Manifold, Valve Cover and Coil On Plugs all have the same 87-89 Inch Pounds Torque Tightening requirements... that ALL THREE would share the Same Size Fastener Dimensions.
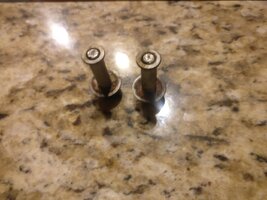
I just took out one Fastener from among the supernumerary Valve Cover “Trapped Fasteners” and screwed that item Directly into the Intake Manifold Bolt Holes and confirmed… their Thread Dimensions are IDENTICAL as M6 X 1.0 X 12-15MM Deep. I took some images to show you that if you need to repair those Threads in your Engine Head Intake Manifold Hold Down Fastener Holes… THIS is the flavor of The TIME-SERT Kit to Choose and Use:


These two Links cover the TIME-SERT Write-Ups on How This Job Gets DONE:
gmtnation.com
gmtnation.com
Recently, I did a Write Up on “How to Repair Stripped Out Coil On Plug Fastener Holes” that turns out to be THE "Spot On Fix" for THIS Repair as well. I suspected that since the Intake Manifold, Valve Cover and Coil On Plugs all have the same 87-89 Inch Pounds Torque Tightening requirements... that ALL THREE would share the Same Size Fastener Dimensions.
I just took out one Fastener from among the supernumerary Valve Cover “Trapped Fasteners” and screwed that item Directly into the Intake Manifold Bolt Holes and confirmed… their Thread Dimensions are IDENTICAL as M6 X 1.0 X 12-15MM Deep. I took some images to show you that if you need to repair those Threads in your Engine Head Intake Manifold Hold Down Fastener Holes… THIS is the flavor of The TIME-SERT Kit to Choose and Use:
These two Links cover the TIME-SERT Write-Ups on How This Job Gets DONE:
How to Repair Stripped Out 'Coil On Plug' Fasteners:
How to Repair Stripped Out COP Fasteners: If you make the mistake of “Honking Down” Too Hard on the Coil On Plugs Hold-Down Fasteners with anything more than 87 INCH Pounds of Torque… One of Two Bad things will very likely happen: (A) The Hold Down Bolt will Snap Off close to the Top of the...
NEED HELP - Ignition Coils
I was cleaning my engine bay and I notice that 2 coils were loose. I tried to snug the bolts down but they're both stripped. How can I fix this problem?
These two 😠😠😠. Broke off and I didn't even realize it! And of course my attempt to extract the stumps failed. Drilled the first one out completely will rethread tomorrow and put a new bolt in. 2nd one is a bit more difficult to reach, need an automatic center punch. No place to swing a hammer lol.
Attachments
EDIT:
Okay... THIS is perhaps The BEST thing to have happened of the two Bad Things that can go wrong. Realize that the Left Over Broken Threaded 'studs' are sitting in there with almost NO TENSION on them. So all you need to do is Center Punch an accurate dimple and drill out those Bolts with a Hand Drill using a Drill Bit about Half the Diameter of the Bolt. Get your hands on the appropriately small EZ Out Kit and Reverse Screw that tool carefully into the Drilled out Hole... THIS IS WHERE BEING EXTRA CAUTIOUS WILL PAY OFF... Because Small EZ Outs are Notoriously BRITTLE and WILL Snap Off if you get too enthusiastic or hasty in trying to UN-FUBAR the situation(s). The LAST thing you want to have to deal with is an impacted bolt...with a High Carbon Steel EZ out stuck inside...and you do NOT want to make matters worse by misaligning the Center Punch and wallow out those holes. If you get that part PERFECT (Center Punching)...the rest should literally be... "EZ".
Okay... THIS is perhaps The BEST thing to have happened of the two Bad Things that can go wrong. Realize that the Left Over Broken Threaded 'studs' are sitting in there with almost NO TENSION on them. So all you need to do is Center Punch an accurate dimple and drill out those Bolts with a Hand Drill using a Drill Bit about Half the Diameter of the Bolt. Get your hands on the appropriately small EZ Out Kit and Reverse Screw that tool carefully into the Drilled out Hole... THIS IS WHERE BEING EXTRA CAUTIOUS WILL PAY OFF... Because Small EZ Outs are Notoriously BRITTLE and WILL Snap Off if you get too enthusiastic or hasty in trying to UN-FUBAR the situation(s). The LAST thing you want to have to deal with is an impacted bolt...with a High Carbon Steel EZ out stuck inside...and you do NOT want to make matters worse by misaligning the Center Punch and wallow out those holes. If you get that part PERFECT (Center Punching)...the rest should literally be... "EZ".
Last edited:
Yeah like I said extraction failed. I guess they didn't get the message about the ez out and no tension lol. Well one of the bolts anyway, didn't get any reach on the other one for the center punch so need to get a small automatic one tomorrow.
Maverick6587
Member
Do you happen to have a welder of any kind? I think even JB weld would work. A month ago the same thing happened to me on an Escape. I welded a 10mm nut to the mm or 2 of the bolt that was sticking out. I had to reweld it a few times but, it worked.
Unfortunately the bolts are broken off inside the block or are flush. Nothing sticking out. Good idea though.Do you happen to have a welder of any kind? I think even JB weld would work. A month ago the same thing happened to me on an Escape. I welded a 10mm nut to the mm or 2 of the bolt that was sticking out. I had to reweld it a few times but, it worked.
Maverick6587
Member
I would still try it, if you can't get anything else to get it out. One of our was actually in the block and not even flush. We just had to keep welding small pin welds on top of each other, until the welds were sticking out of the block. Then we put the nut on those welds and welded the welds to the nut. Took about an hour or two.
Okay, I will try that one. Which one did you use to get it to cure that quickly?I would still try it, if you can't get anything else to get it out. One of our was actually in the block and not even flush. We just had to keep welding small pin welds on top of each other, until the welds were sticking out of the block. Then we put the nut on those welds and welded the welds to the nut. Took about an hour or two.
I have had success a few times using left hand drill bits as well. With a standard drill if you are drilling a hole in the center of the broken bolt and the bit happens to catch you wind up running the broken piece in deeper! With left hand (counterclockwise} drills sometimes they catch and unscrew the broken bolt. Not often I grant you, but it has happened for me.
Yeah that didn't work for me.I have had success a few times using left hand drill bits as well. With a standard drill if you are drilling a hole in the center of the broken bolt and the bit happens to catch you wind up running the broken piece in deeper! With left hand (counterclockwise} drills sometimes they catch and unscrew the broken bolt. Not often I grant you, but it has happened for me.
If you do have to resort to using an inexpensive Harbor Freight MIG Welder down inside of those Tiny Threaded Spaces... Please be sure to get some 2" Wide Blue Painter's Tape... Clean off the full length of the Intake Port Facing Flange... and cover all of the Intake Ports (Figure 8) and Threaded Holes so that NONE of those Melted MIG Wire Droplets invade inside of the Cylinders and worry the Pistons, Valves and Cylinder Walls or fall down inside of the M6 X 1.0 X 12MM Bolt Holes.
Set your Amperage pretty high...and your Wire Feed Speed Slow... Use Short, White Hot, Controlled Bursts and the immediate area of the mass of the adjacent Aluminum Head will dissipate the Heat from the Welding Tip too fast to allow the Aluminum to Melt. Take your time and use the "Touch and Peek" Technique. Protect your eyes and hands so you can concentrate on the job... and things should work out.
If needs be...sacrifice a Steel Nail or a Broken Drill Bit by inserting it down inside of each Bolt Hole and apply the Welding Tip to it to melt the whole thing into that small Bolt remnant and gain a good 'purchase'. After the Melted Mass gets piled up enough in the center to a height of 1/4" above the Manifold Flange surface... allow it all to cool down.
Then place a non-chrome plated Nut of the approximate size of "The Blob" and weld it up until everything is a Lava Hot Mass. Wait at least 5-10 minutes for everything to cool down before you attempt to SLOWLY unwind that Nut. I mean it... WAIT!
This is Important:
You MUST be Honest enough with yourself to admit that you have "Heavy Hands" when it comes to working with Fasteners... so cut ALL of your Motions in 1/2 and control your desire to quickly unwind these Broken Bolts. Work SLOWLY and these Broken Blt Bits WILL come out.
Last edited:
Maverick6587
Member
I have never attempted it with JB Weld. Waiting the 12-24 hours to cure is too long for me. I used mig welder as MRRSM gave instructions for using.Okay, I will try that one. Which one did you use to get it to cure that quickly?
Please know that the reason that GM focused on using an array of such Small Fasteners as the M6 X 1.0 X12-15MM sizes throughout on the Engine Head is due to the "Lost Foam" Aluminum Casting Method. Essentially, the Engine Block and Head are made by the use of Ultra-Hard Pre-Formed Styrofoam Planks for the Upper and Lower sections that get Hot-Glued together and then placed inside of Large Steel Casting Drums.
After that... the Drums gets Filled and Vibrated and then Compressed repeatedly with a lot of Extremely Fine Grain Re-Usable Sand used as the Medium of Shape Transfer. Then Buckets of Induction Coil Heated, Lava Hot Liquid Aluminum can be guided into Multiple Pour Holes and achieve the Internal and External Head Structures with almost Zero Machining required, Post-Cooling. During this Infernal Process... Every Last Bit of the Styrofoam Planks vaporizes on Contact with the Molten Aluminum and Boils, Burns and Vaporizes out of Multiple Sprue Vent Holes...Hence the expression... "Lost Foam" ...leaving an almost perfect replication of these necessary component shapes... right down to the appearance of those "Little Styrofoam Coffee Cup Dots" left within the Walls of these Aluminum Castings
The point of explaining all of this to you is to improve your understanding that while these Techniques achieve these remarkable results... Almost all of the Inner Oil and Coolant Jacket Dimensions end up having MUCH THINNER INTERIOR WALL SEPARATIONS than typical Cast Iron Coarse Sand Moldings. THESE REPAIR LOCATIONS MAY CRACK IF ANY FASTENER THREAD HOLES GET DRILLED OUT AND THEIR OVER-SIZED DIAMETERS HAVE APPROACHED THE THINNEST CASTING SECTIONS... MUCH TOO CLOSELY.
So once again... if you get too enthusiastic while tightening down those two New Much More Robust 10MM 'Stud-to-Nut' positions... you may Run the Unintended Risk of Cracking the Engine Head. This is because Aluminum expands and contracts at nearly (3) Times the rate of either Cast Iron or Steel. So you might want to make regular checks along the Intake Manifold for any Coolant Leaks. If you suddenly experience the presence of White Smoke billowing from your Exhaust Pipe... this could mean that a Crack has propagated through your repair(s) and that the GM DexCool is getting ingested into the Air Stream under the natural suction and vacuum caused by the descending pistons on the Intake Side... drawing that liquid down into All (6) Cylinders.
If such an Internal Coolant leak were to invade the Crank Case Oil Supply... you'll know it if your Engine Oil turns into a "Brown Milkshake"- like Goo. A Rapid Oil Change and Oil Filter replacement might save the Engine Bearings if acted upon Quickly. Otherwise, the Engine Bearings can get dissolved by the presence of the Highly Acidic Coolant... and the Motor might Seize Up. Good Luck with all of this...and Remember...
Go light on the Torque of those Over-Sized Fasteners... The Intake Manifold should STILL only have 87 INCH Pounds of Squeeze Applied at EVERY Contact Point. It is the "O" Ring Style Gaskets that perform the Sealing Action... NOT any Excessive External Clamping Force that gets Applied.
Last edited:
Maverick6587
Member
CEL cleared itself, YEAY. took it out on a quick drive around the neighborhood and runs smooth! No rough idling, nothing. Will revisit the spark plugs and everything in a month. Currently it stated 13 mpg seems very high, will reset and check that out soon too. AAAAAND the next thing I think is a loose sunroof. Anyone heard of that? Closed the front door and saw the glass jump up and fall back down
Maverick6587
Member
I haven't ever taken mine out or a trailblazer's sunroof but, I think they're pretty universally held on by 4 or so bolts attached to the moving portion of the sunroof frame.
You should be able to pull the two front visors, the center roof light control panel, and probably the oh s*&t handles. I can't remember off the top of my head if they have one or two of them though.
That would make it all visible for you. It might be easier if you can't get your hands in there very well to just remove the entire roof panel.
I'm sure someone else has had this issue and would be able to give better details for you.
EDIT: The 13 MPG that you listed is horrible even for city driving. Do you have a scan tool to read the PCM (computer)? I would be interested in your fuel trims, oxygen sensor, and MAF readings.
Have you ever changed the O2 sensors?
Last edited:
Changed the O2 sensor when I changed the exhaust manifold. I will get a chance to do a scan on Tuesday.
Dadwagon
Member
To loosen the rear bolt, use a 1/4 inch socket on a 1/4 inch short extension. You can only hold the extension at the end, and you'll push it against the firewall to give yourself a grip on it and not drop it. Use one finger as a guide and slip the 10mm on right next to your finger. This works to loosen or tighten. To first unlock the bolt from it's position (like from the factory), use a 1/4" tiny socket and a non-ratchet wrench that is just the 1/4" socket on a left-right pivot. Mine was from Craftsman.
This was the hardest automotive work I have ever undertaken. Literally all day, do not underestimate this project. If your intake manifold only leaks a little bit, LEAVE IT. The labor alone at a shop would be more than your truck is worth, and your time is worth more than this boring, tedious, time-consuming wrenching. Seriously consider if you really need to do it.
This was the hardest automotive work I have ever undertaken. Literally all day, do not underestimate this project. If your intake manifold only leaks a little bit, LEAVE IT. The labor alone at a shop would be more than your truck is worth, and your time is worth more than this boring, tedious, time-consuming wrenching. Seriously consider if you really need to do it.