In process of doing TBSS frame swap on 2002 Bravada. Any input welcomed.

RyanA

Original poster
Member
Apr 15, 2014
30
Long story short, the I6 is bad in a Bravada we purchased a while back and I could not bring myself to put an I6 back in it. Happened upon a donor 2008 TBSS that had an interior fire and bought it. This past weekend, I got everything from the top side of the TBSS done (heater hoses, AC lines, radiator/condensor, wiring harnesses, etc) so all that is left now is underneath (body mount bolts, parking brake cable brackets to body, steering shaft, etc). Once I have my car off of the lift, I'll pull the TBSS in and get the body off. After this, I'll bring the TBSS frame home to start getting it prepped. Here is what I know I need to do; any other info is appreciated. I WILL NOT be using the LS2 in the TBSS as I have to give it back to the guy I bought the frame from. I plan on either doing a 5.3 or an LQ9 in it in order to keep the cost down. Also, since the TBSS was an 08, it had the 58x wheel and I did not want to spend the money getting a 58x-24x conversion box.

Here is what I know I'm up against so far:

1. Move body harness from Bravada frame to the TBSS frame so it still is plug and play. Both vehicles have rear air suspension.
2. Get new engine installed in place of the LS2.
3. I purchased a 2003-2004 engine harness from a V8 TB. I know it's not plug and play as it sits since one of the I6 PCM plugs is in the main body harness. Question here is do I have to get a whole body harness to make it plug and play or is the section that passes through the firewall fairly short (does it connect near the steering column or does it travel through the whole body?) If the harness goes through the whole body, I'll just end up getting another plug (like the main body/chassis harness by fuse panel) and turn it the other direction so you could not accidentally plug it in the wrong spot so engine could be easily removed in future if need be.
4. Flash a PCM with 03-04 TB/Envoy V8 platform so everything still functions. Question on this is I have heard that 2002 is an absolute oddball year and there could be some obstacles to get the AC to work? Anyone have some input on that?
5. Once complete drivetrain is finished in the TBSS frame, I'll take the Bravada to the shop and remove the body from its original frame and roll the TBSS frame under it.

Anyone with any input, I'd appreciate what you have to say. Not doing this because it's cost effective; I'm doing it because my wife loves the Bravada and I'd rather have something fun to drive. I figure the TBSS frame should make both of us happy...
 

RyanA

Original poster
Member
Apr 15, 2014
30
Going to take lots of them. Will update this thread as I progress. Plan is to have the body off of the TBSS by the end of this coming weekend. Get LS1 pulled in the next week or two after that and then find a nice 5.3 or 6.0 to put in its place. Once frame is complete and ready to accept the body, I plan on spending that following weekend removing the frame from the Bravada body and putting the TBSS frame back. From there, it will be all of the final connections and (I'm sure) troubleshooting for some systems that may not yet be working properly.
 

RyanA

Original poster
Member
Apr 15, 2014
30
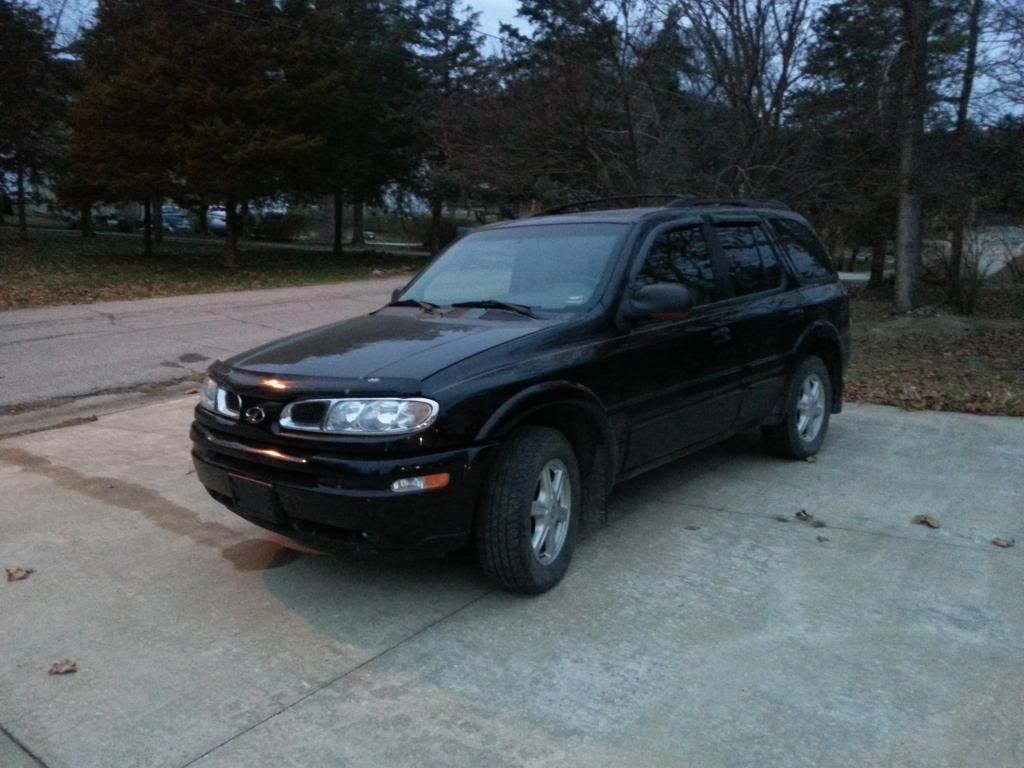
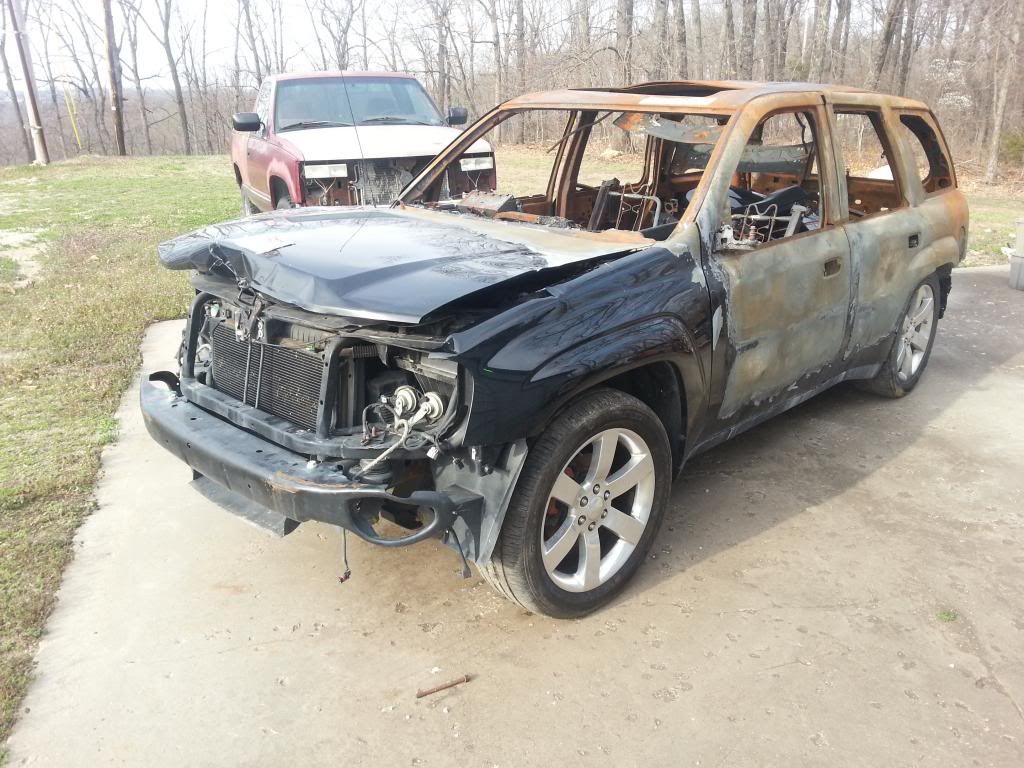
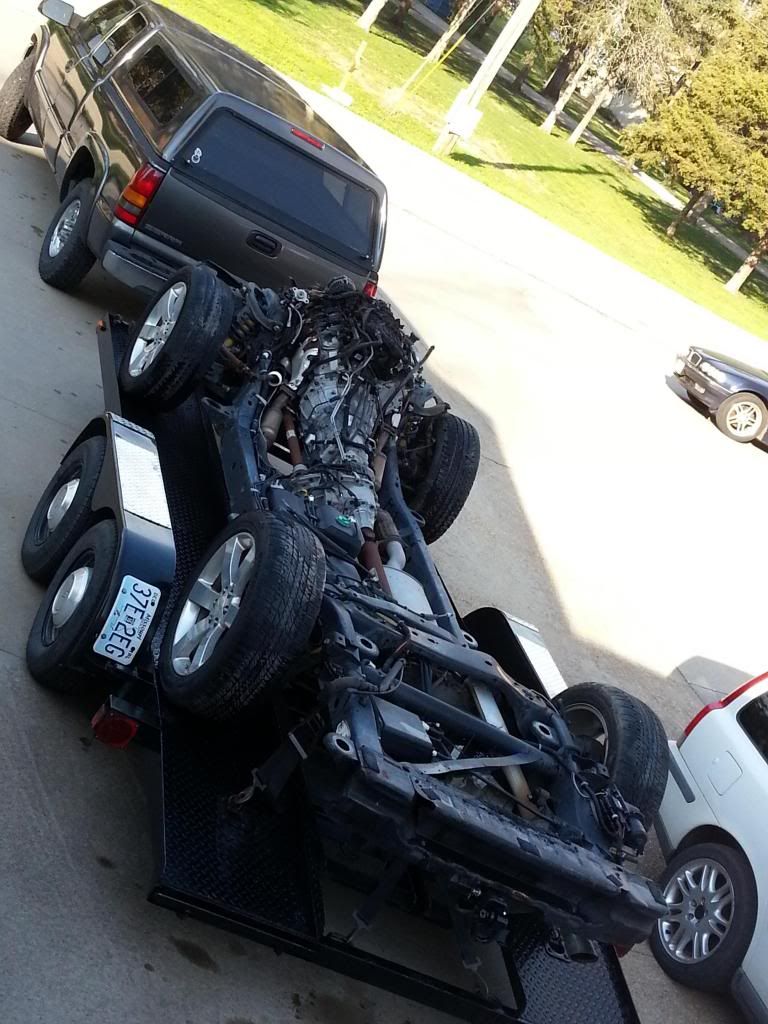
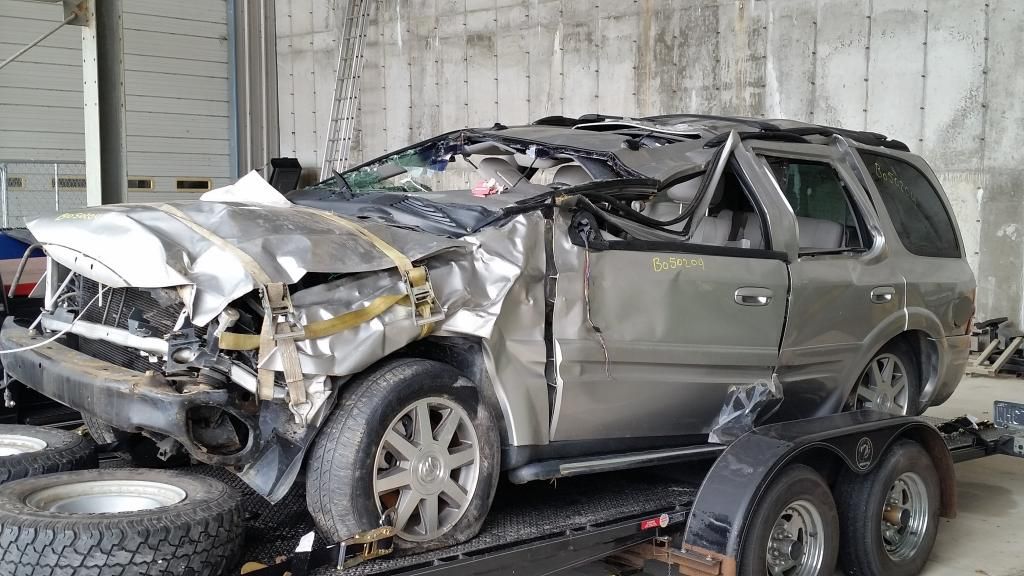
Not much for pics but here is the Bravada and the TBSS...
Bravada


ToaSSty


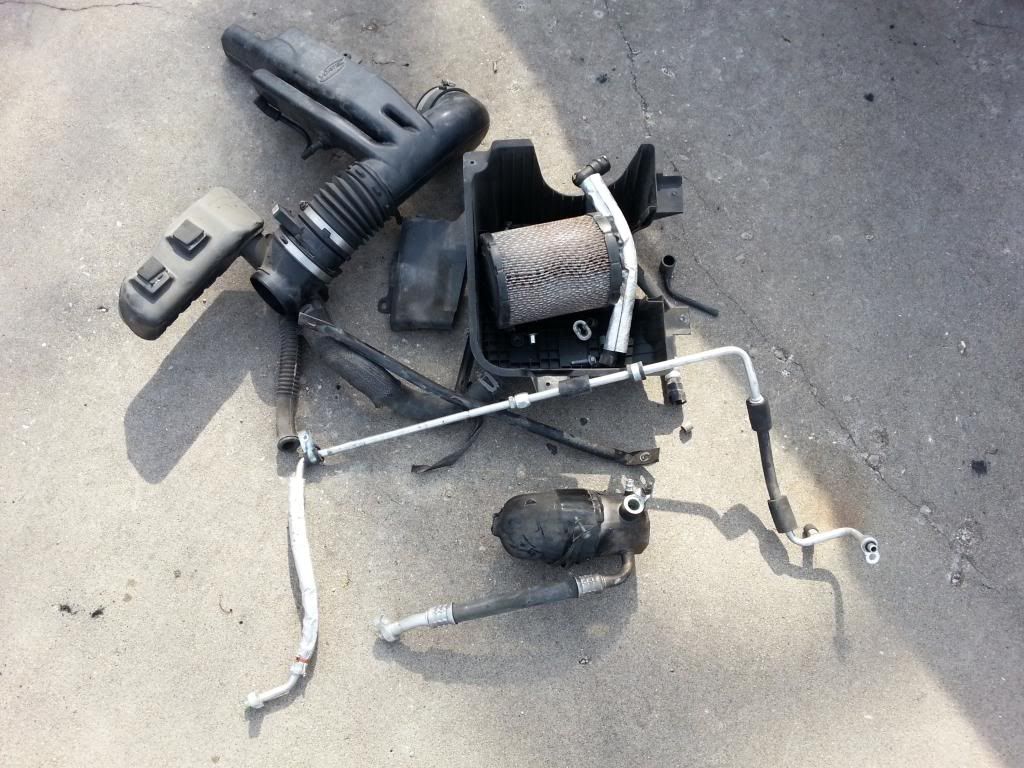
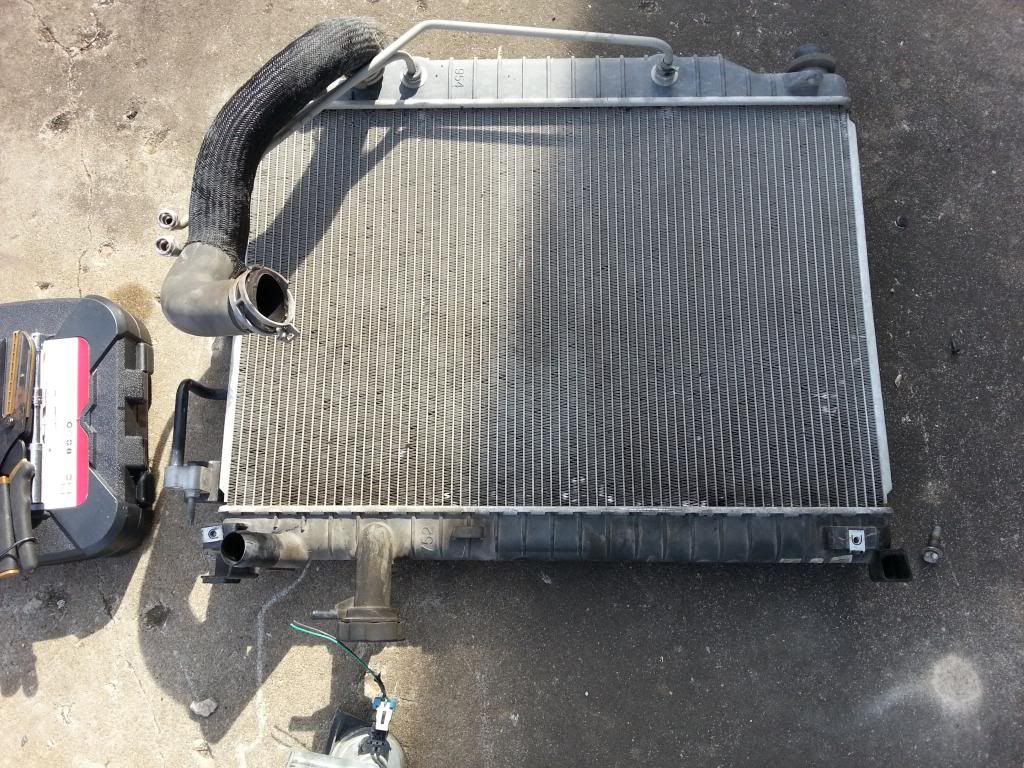
A few parts removed to have top side ready to remove body:


jimmyjam

Member
Nov 18, 2011
1,634
are you keeping the trans? did that guys driver door module catch fire?

Personally, if I was doing this, i would buy the alldatadiy subs for an 02 bravada and an 08 tbss at a minimum. maybe for a 2003 v8 tb as well because I don't think the connectors will all match up. its not super expensive and will be worth every penny.
RyanA said:
1. Move body harness from Bravada frame to the TBSS frame so it still is plug and play. Both vehicles have rear air suspension.
technically that's called the chassis harness. the body harness is in the car. ABS/ECBM wiring may be a problem?
RyanA said:
3. I purchased a 2003-2004 engine harness from a V8 TB. I know it's not plug and play as it sits since one of the I6 PCM plugs is in the main body harness. Question here is do I have to get a whole body harness to make it plug and play
that one is called the instrument panel harness and it runs from the hood fuse box to the rear fuse box. IDK if the rear fusebox's are the same between the 02 i6 and 03 v8? this is where an alldata sub for every year/engine you are dealing with will pay for itself. might be able to just do some repinning, or you might have to chop and splice.
RyanA said:
4. Flash a PCM with 03-04 TB/Envoy V8 platform so everything still functions. Question on this is I have heard that 2002 is an absolute oddball year and there could be some obstacles to get the AC to work? Anyone have some input on that?
I don't know if anyone can answer if a 2002 i6 bcm will communicate with a 2003 v8 pcm. the only i6->v8 i've seen (besides the carbed sbc that I don't count) the guy swapped all harnesses and everything. you're going to have to cross your fingers and hope for the best :smile:

good luck :thumbsup:
 

RyanA

Original poster
Member
Apr 15, 2014
30
jimmyjam said:
are you keeping the trans? did that guys driver door module catch fire?

Yes, I am keeping the trans. Not sure why it caught fire, it came from a salvage auction.

Personally, if I was doing this, i would buy the alldatadiy subs for an 02 bravada and an 08 tbss at a minimum. maybe for a 2003 v8 tb as well because I don't think the connectors will all match up. its not super expensive and will be worth every penny.

Already have AllData full so covered there. Thing that sucks is I either don't know how to get around in it well enough or they don't have a lot of the connector views in there...

technically that's called the chassis harness. the body harness is in the car. ABS/ECBM wiring may be a problem?

OK, chassis harness. I plan on using the chassis harness that is on the Bravada frame on the TBSS frame so it will plug directly into the harnesses currently sticking out of the Bravada firewall (whatever they are called...)

that one is called the instrument panel harness and it runs from the hood fuse box to the rear fuse box. IDK if the rear fusebox's are the same between the 02 i6 and 03 v8? this is where an alldata sub for every year/engine you are dealing with will pay for itself. might be able to just do some repinning, or you might have to chop and splice.

Technically, I think the engine harness is called the engine harness? It's the one that plugs into all of the components attached to the engine....

I don't know if anyone can answer if a 2002 i6 bcm will communicate with a 2003 v8 pcm. the only i6->v8 i've seen (besides the carbed sbc that I don't count) the guy swapped all harnesses and everything. you're going to have to cross your fingers and hope for the best :smile:

I would like to just find a complete 03-04 donor body at a pick and pull that I can simply strip all of the harnesses and modules out of and just set it up like it was originally a V8 vehicle. We'll see how that ends up panning out.

good luck :thumbsup:

Thanks.

Doors would be useless unless you wanted to make some sort of art out of them. Every single body panel is warped way beyond use. Only metal panel left that was good happened to be the passenger front fender and the guy I bought it from used it to repair another salvage TBSS.
 

TXBlazer

Member
Nov 21, 2011
533
Cypress, TEXAS USA
You may want to sign up over on TBSSOwners.com and check out this thread.

I6 to LS7 swap. Hate it, or Love it! - TBSSOWNERS.com Forums - The #1 TrailblazerSS Dedicated Owners Forum

Frank just went through waht you are trying to do, he has a wealth of good information that you will definitely need. He started with an 02, I6 TB and swapped an LS7 into it, but he bought a salvage TBSS and used tons of parts in the process. He may even have some of the harnesses left over.

Definitely worth the read!!
 

jimmyjam

Member
Nov 18, 2011
1,634
The thing is, Frank just swapped everything over. Besides tearing everything apart, not much in the way of making a v8 engine harness work with an i6 ip harness...
 

RyanA

Original poster
Member
Apr 15, 2014
30
TXBlazer said:
You may want to sign up over on TBSSOwners.com and check out this thread.

I6 to LS7 swap. Hate it, or Love it! - TBSSOWNERS.com Forums - The #1 TrailblazerSS Dedicated Owners Forum

Frank just went through waht you are trying to do, he has a wealth of good information that you will definitely need. He started with an 02, I6 TB and swapped an LS7 into it, but he bought a salvage TBSS and used tons of parts in the process. He may even have some of the harnesses left over.

Definitely worth the read!!

Thanks. I will definitely read it over. Not planning on updating all of the harnesses on the vehicle (only benefit to me would be if I planned on keeping the '08 LS2 which I will not) but I'm sure they will have a lot of information that will be useful.

jimmyjam said:
The thing is, Frank just swapped everything over. Besides tearing everything apart, not much in the way of making a v8 engine harness work with an i6 ip harness...

Making a V8 harness work with an i6 IP harness really shouldn't be that big a deal if you can read a schematic or pinout for a plug. However, if I can get the V8 parts for reasonable, I'd rather make it plug and play like it was a factory vehicle.
 

RyanA

Original poster
Member
Apr 15, 2014
30
Think I just crashed the TBSS site. Got to page 7 and now it's stuck....

EDIT: Site started working again. Read the whole thing. Pretty neat build but way more than what I'll be doing. This thing will be my wife's daily driver to and from work and on occasional trips. Idea of my build is to be able to go to nearly any parts store in the US and be able to get what I need to fix it in case it would ever break down away from home. I'd like to do a build like he did but he has more money in his LS7 long block than I will probably have in my whole build including the purchase price of the Bravada. My goal is sub-$5,000 for the complete build, all inclusive. Poor folk gotta build like poor folk....
 

RyanA

Original poster
Member
Apr 15, 2014
30
C-ya said:
Is there any particular reason to do a frame swap if all you wanted was a V8? Does the Olds frame not have V8 mounting points? (Why wouldn't it??) Did I miss something? I hate it when I miss memos!

Engine mounting location on frame is the same but the trans crossmember is in the wrong spot and it's welded in. This is not that big a deal on a RWD but it kind of is on a 4wd/AWD. To me, it's easier to spend a day swapping the body to a V8 frame instead of potentially compromising the strength of the frame by cutting out and welding the trans crossmember back in. Also, I get better suspension, different ride height, larger rear differential, better gear ratio, etc. Basically, in the long run, this is the cheaper option for me.

Should have the body off of the TBSS this weekend. Once I do, I'll move the frame to my house so I can start getting it cleaned up and pull the engine.
 

RyanA

Original poster
Member
Apr 15, 2014
30
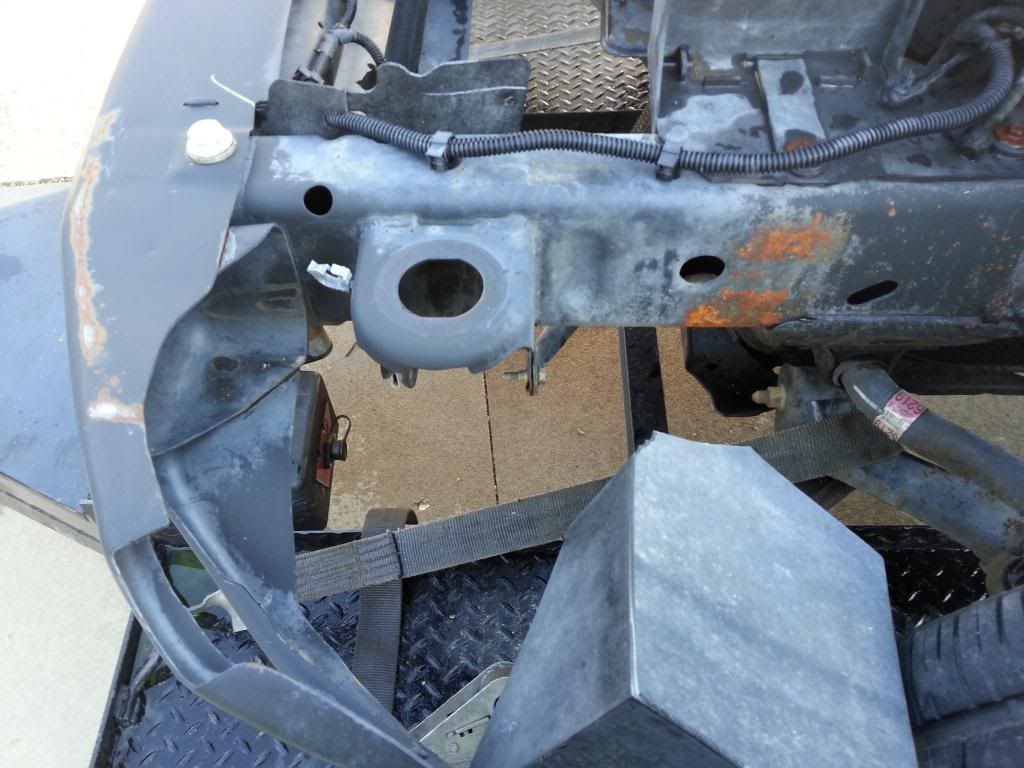
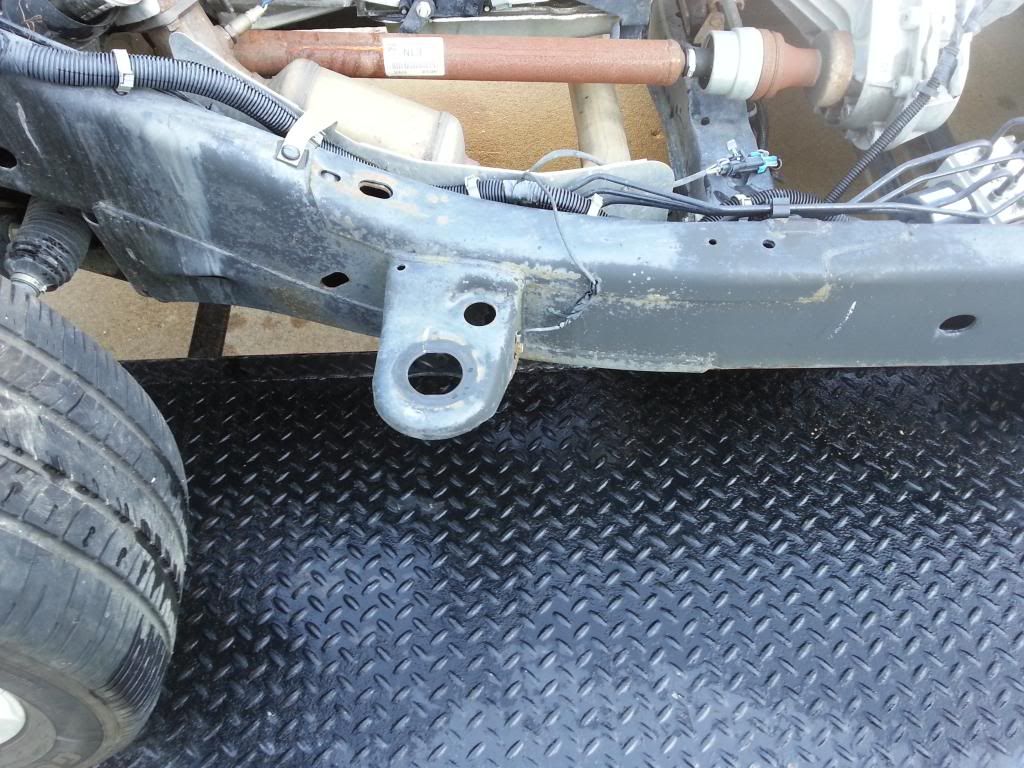
Update on progress tonight, pics later on tomorrow. Pulled the body off of the frame this evening. I'd already done everything from the top side so all that was left was things on the bottom. Here is what I did:

1. Disconnect steering shaft
2. Unclip fog light harnesses (the connect to front of frame but go to body).
3. Unclip parking brake cables. Used a 13 mm open end wrench to compress the locking tabs and pulled them out of their bracket in trans tunnel.
4. Removed 4 10mm headed nuts that attach parking brake cables to floor pan. All but one are very obvious. Only one you have to look for a bit is the one above the gas tank.
5. Removed shifter cable from trans linkage and bracket.
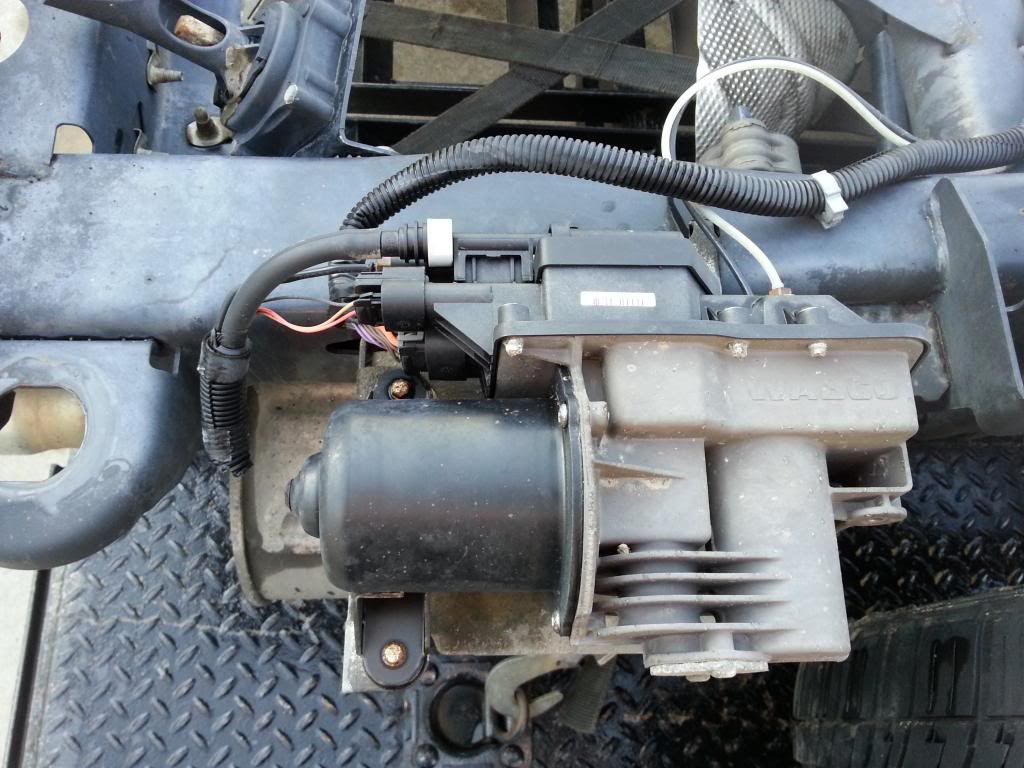
6. Unplugged harness coming from body that plugged into rear air suspension compressor unit.
7. With my lift pads placed on the FRAME, I removed the 12 (TWELVE) frame to body mounting bolts. 6 on each side (contrary to another write up I had seen that said 10 bolts).
8. Set truck back on ground and moved lift pads to body. Carefully lifted the body to verify there were no other obstructions and lifted it high enough that I could push the frame out from under the body.

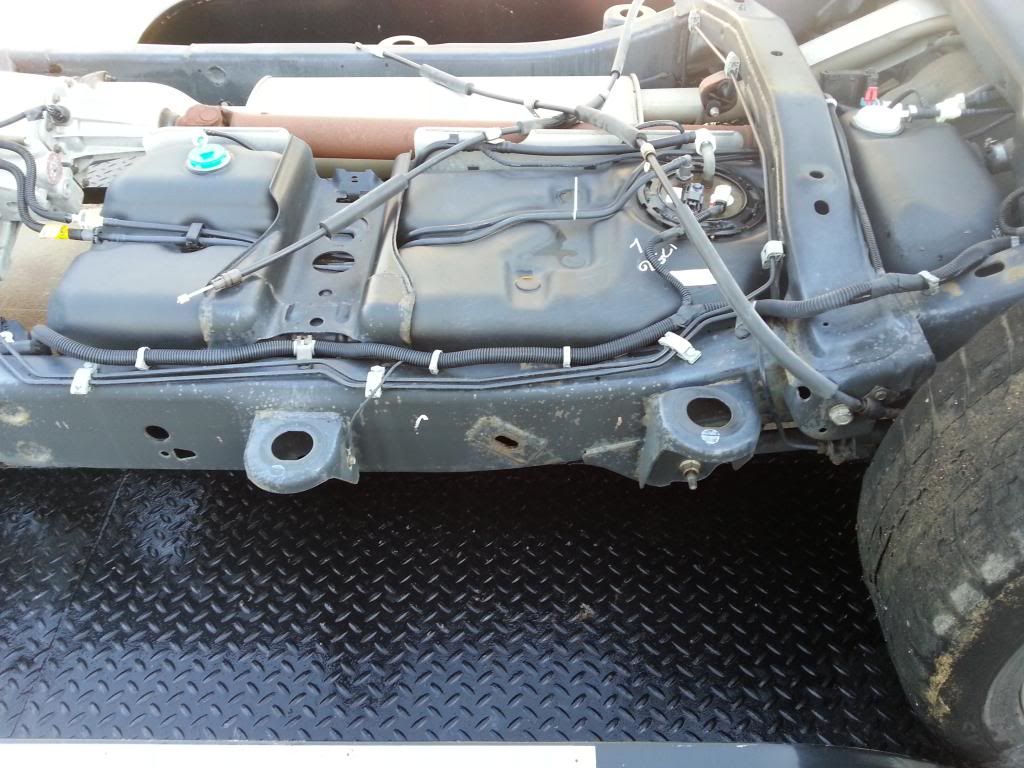
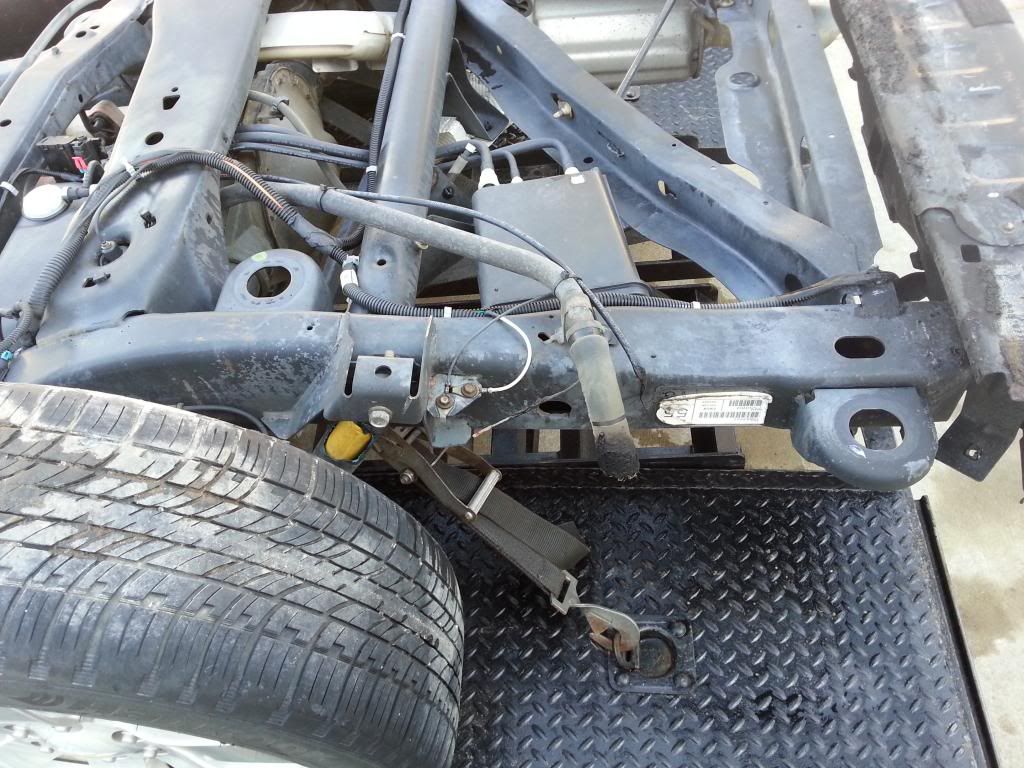
Tomorrow, I'll try to get decent pics of the underneath to show where all of the points you need to deal with are. I'll also take pics of the parts that remain attached to the frame. Probably take the frame to the car wash and get it rinsed off so I have a head start on my cleaning.

All in all, took me about 1 1/2 hours by myself to remove the body from the frame (top side things were done previously, this is only bottom side work and removing body)
 

RyanA

Original poster
Member
Apr 15, 2014
30
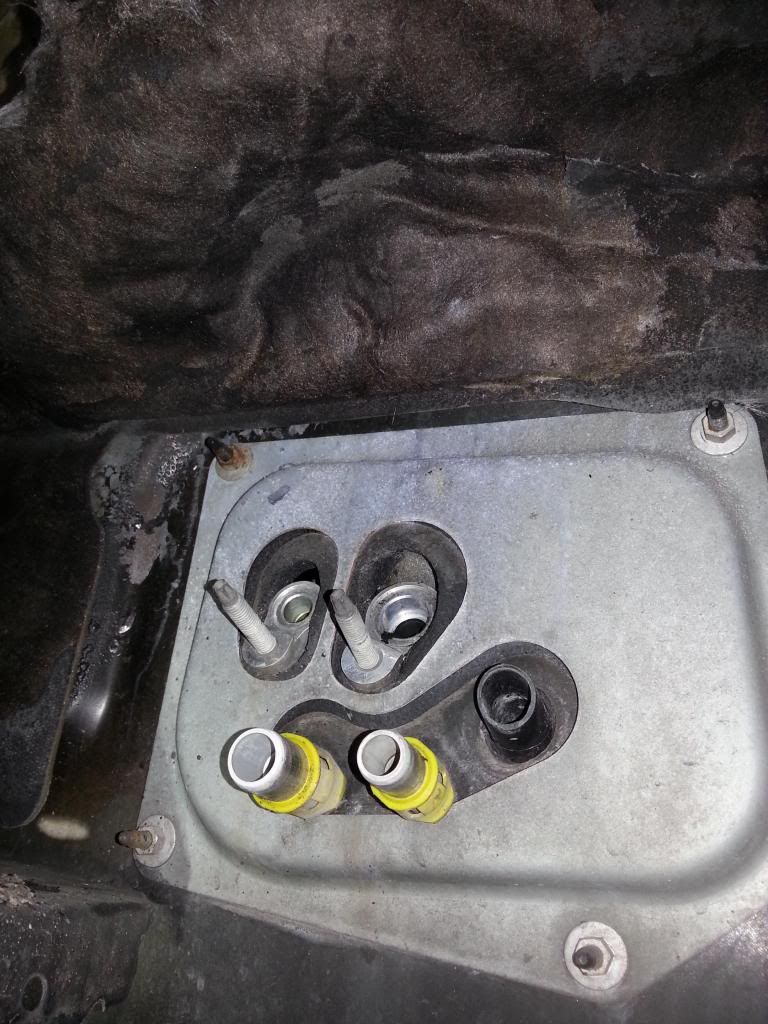
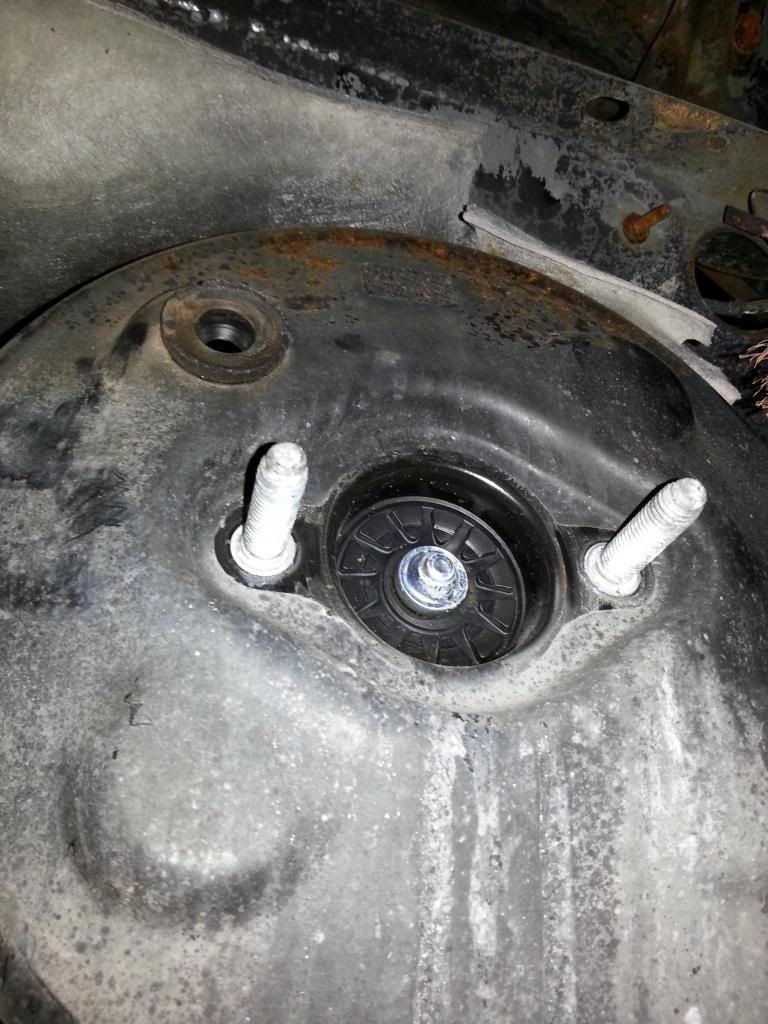
From top side, here is what needs to be done:

1. Although you don't HAVE to, I removed the radiator and condensor. You do need to remove the fan shroud and fan.
2. Remove heater hoses and AC lines from firewall. (I also removed them from the engine to keep from having things in the way when I pulled body)


3. Remove master cylinder from booster along with the vacuum hose that attaches to the booster.


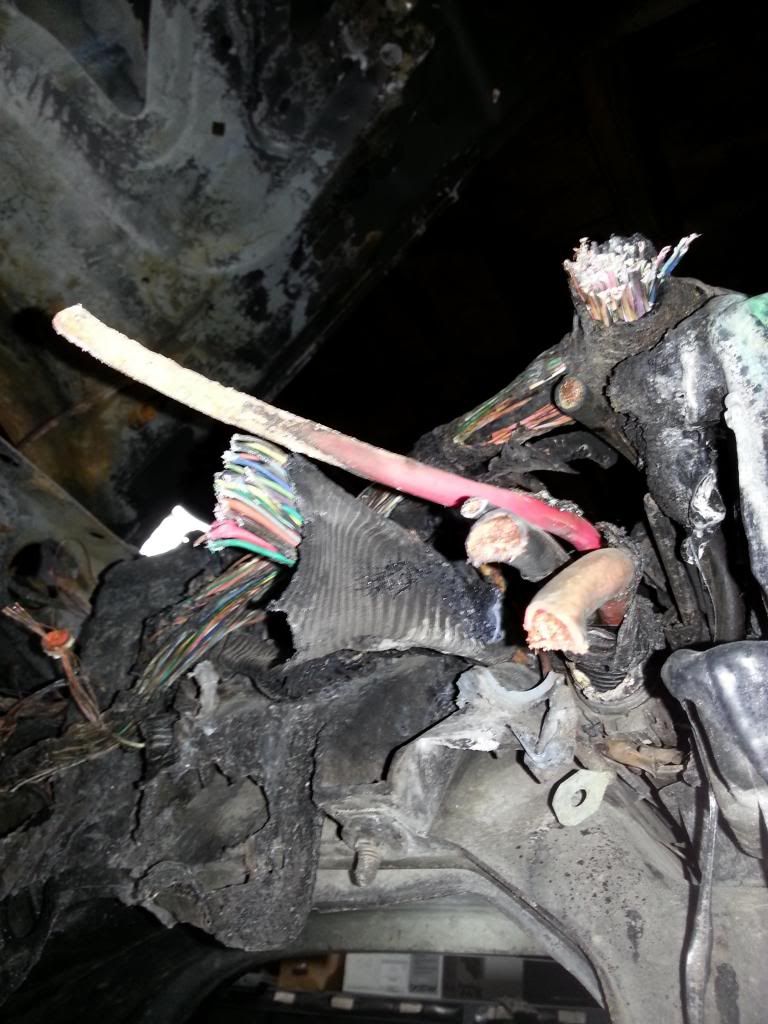
4. Unplug plugs near driver side strut tower that attach to engine or frame. Also remove the fog light wires from the frame as they are part of the body (not shown). There will also be a larger power, alternator charge wire, and I think maybe a ground (hard to tell with my charred remains).
 

RyanA

Original poster
Member
Apr 15, 2014
30
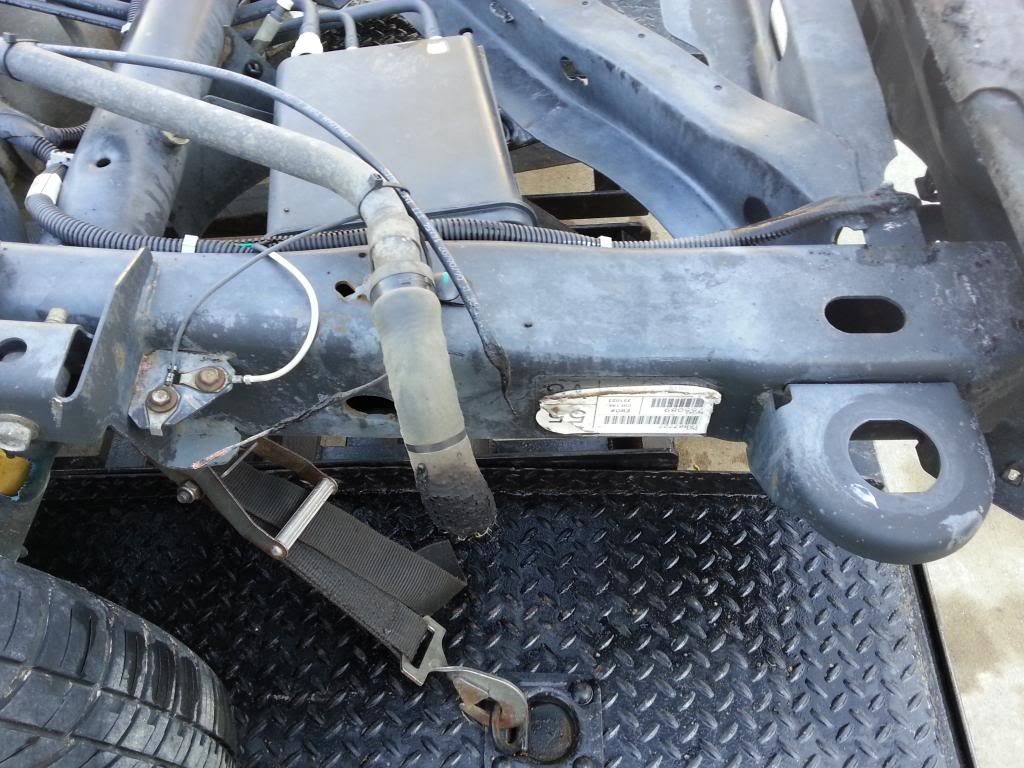
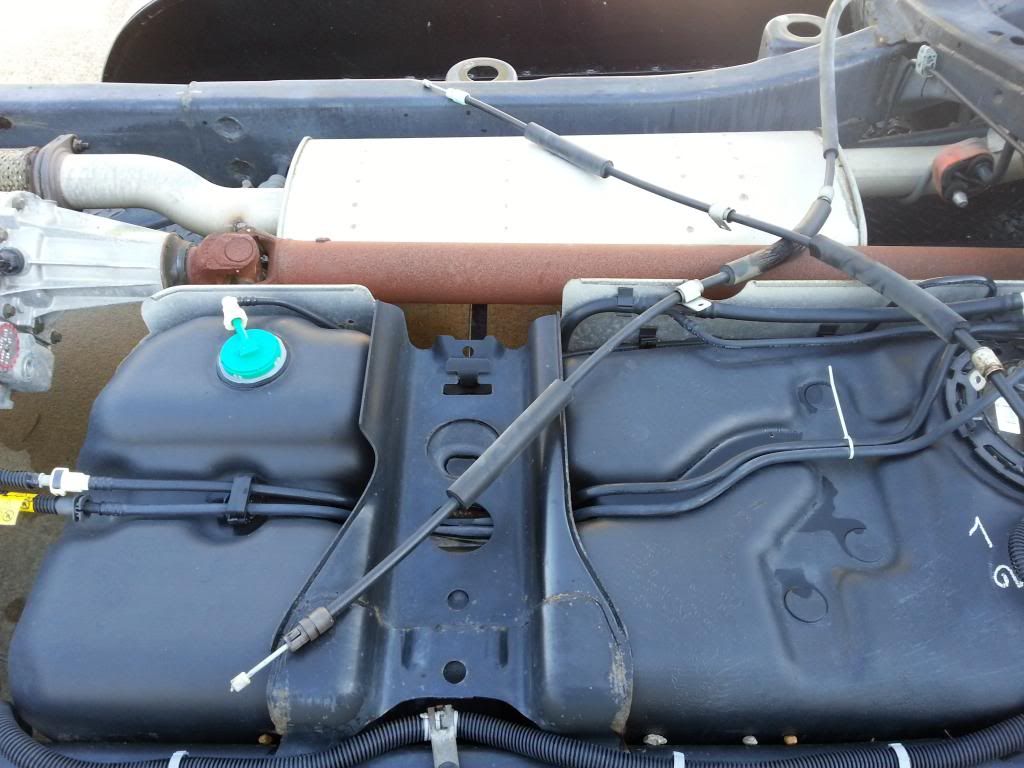
Bottom side.

Unplug the leveling harness along with the air hose that goes inside. Mine was burned so I simply cut it of and left pigtails in case my plug is different.


Loosen 2 10mm headed nuts so the filler neck can be moved out of slots on body. on mine, the hose was burned so I just removed the band and turned the remains of the hose downwards to keep from getting any more debris in the tank.


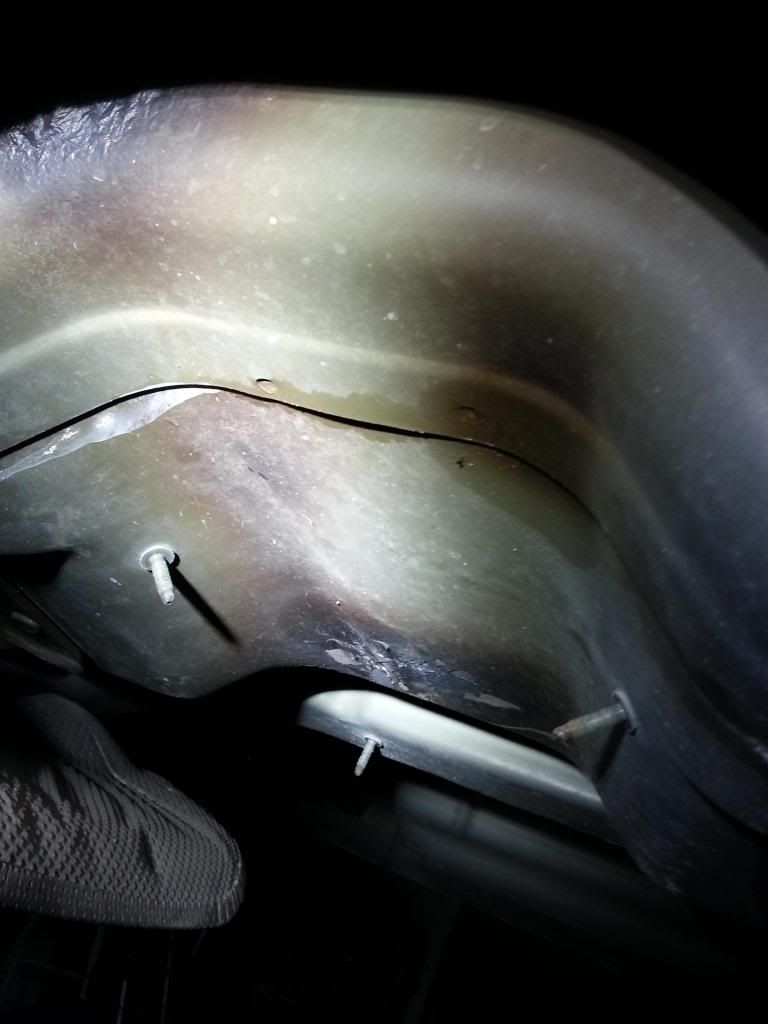
Remove parking brake cables by using a 13mm open end of a wrench to compress the locking tabs. Then, remove 10mm headed nuts at the studs on trans tunnel. There is one bolt above the fuel tank that is hiding. standard depth socket with ratchet not quite in the socket to begin with to clear the stud. Gear wrench would have been a lot quicker but I did not have one over there.... The pic of the single stud is the one above the fuel tank.


Remove the shifter cable from the bracket on the trans and snap it of of the shifter linkage (no pic)

Remove steering shaft (no pic)
 

RyanA

Original poster
Member
Apr 15, 2014
30
Still bottom side

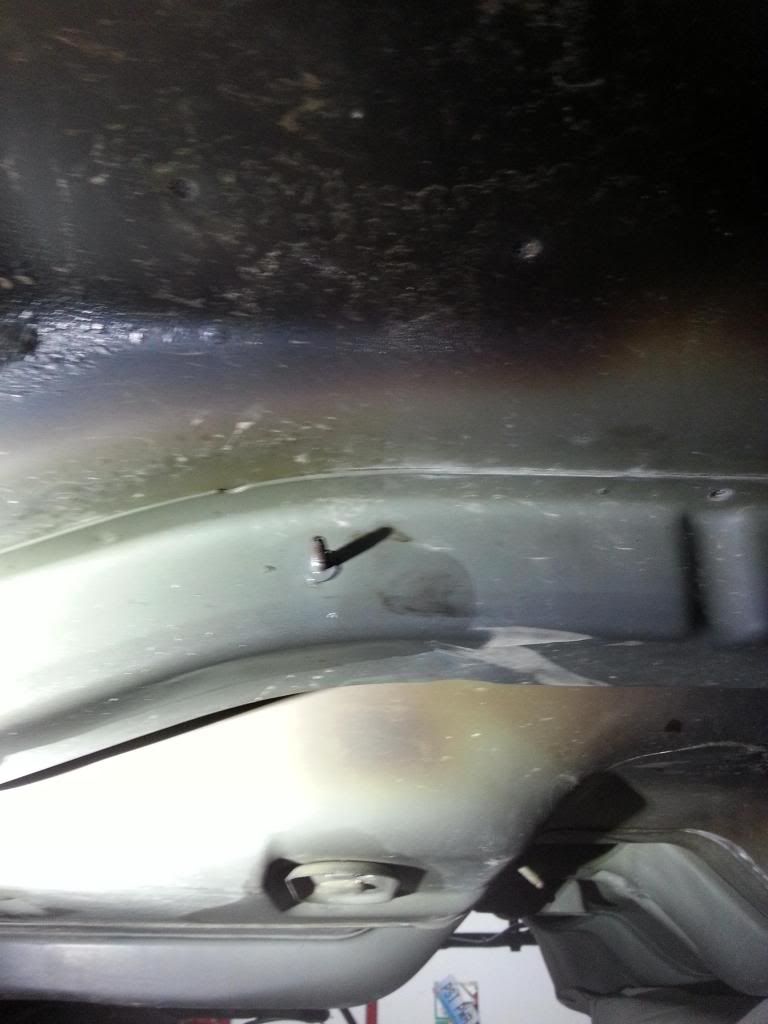
Finally, remove 12 (TWELVE) body mount bolts. One write up I read said there were 10. There are 10 on the outside of the frame (one in front of front wheel, one behind front wheel, two in front of rear wheel, and one at back) and two on the inside (near rear differential).


Finally, lift the body off of the frame. Lift slowly to make sure nothing is catching and that you did not miss anything.
 

RyanA

Original poster
Member
Apr 15, 2014
30
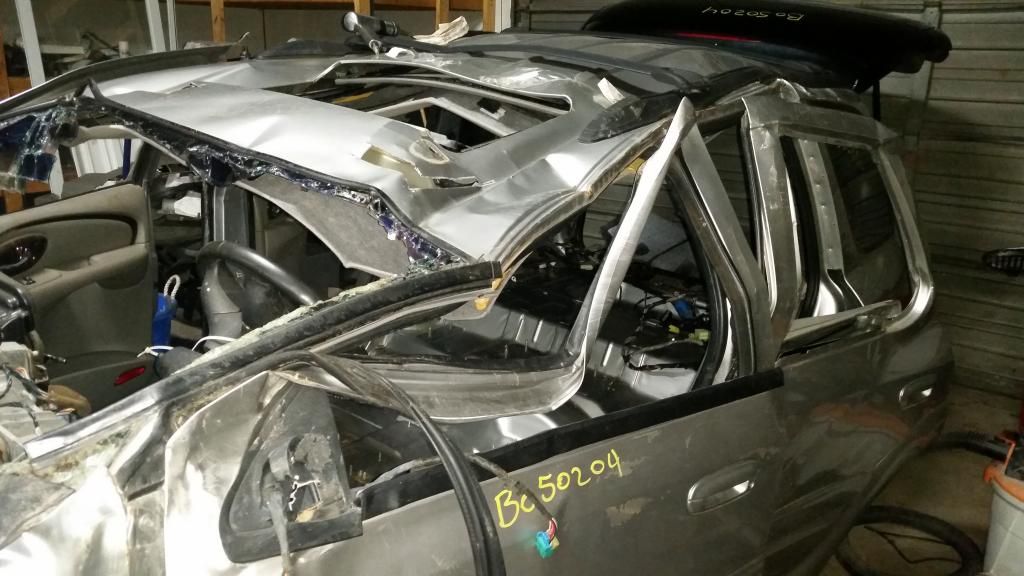
OK, work has finally slowed down a bit so more progress will happen now. Things have changed a bit.... A few days ago, I purchased a rolled 2004 Buick Rainier CXL Plus. I bought it with intentions of pulling all of the harnesses from it to install in the Bravada. This way, I can keep the truck OBD2 and everything will work just like it's supposed to. A few bonuses that the Rainier has: Tilt/Telescoping steering column, Adjustable pedals, Navigation, some sort of voice recorder up by the homelink buttons, and a few other small things. I plan on transferring all of that to the Bravada. It was raining a lot of the day today so I just spent the time cleaning glass from the inside and getting the doors pried open with my 5' pry bar. All doors now open but driver door; I'll have to cut the striker to get it open as it is stuck shut due to the bend in the B pillar. Starts right up and drives right now.

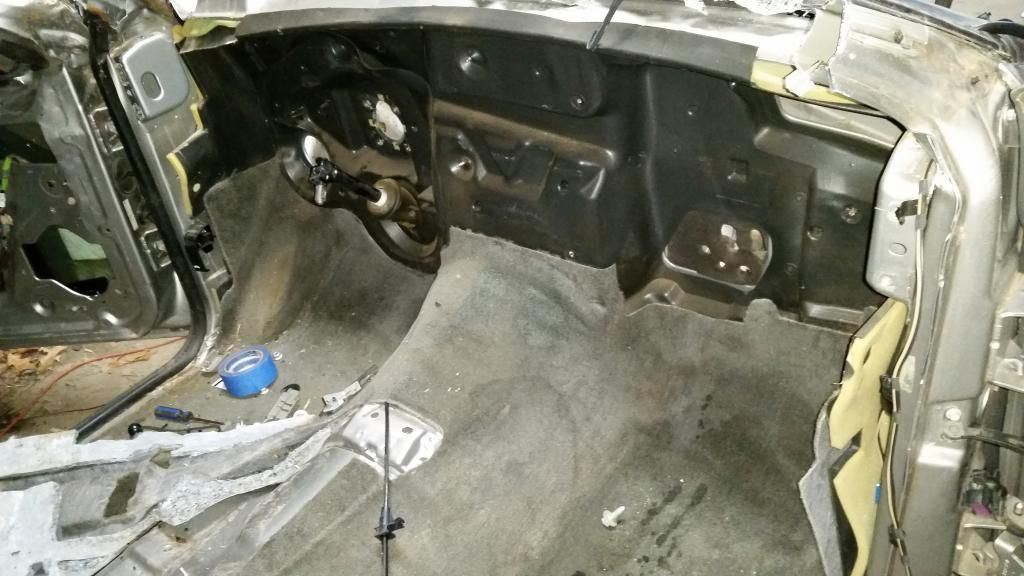
So, hoping to have the dash, seats, console, and carpet pulled my next day working. Then, it will just be a matter of marking everything on the harness (locations of the fasteners, too) so it all goes back in like factory. After all the stuff inside is done, I'll drop the frame out of the Rainier and put the shell back on the trailer to go to scrap. After that, the TBSS frame will come over to the shop to get all of the 2004 frame harness fitted, ABS module installed, and the air compressor at the back into place. Once the frame is prepped, I'll bring the Bravada over to pull it off of the 6 cylinder frame and drop it right back on to the TBSS frame.

Hoping to have the thing running and driving within 30 days at this point. Wife wants something AWD to drive for winter....
 

RyanA

Original poster
Member
Apr 15, 2014
30
Frames are identical EXCEPT for the transmission crossmember. On the 6 cylinder, it is farther back and welded in. While you could grind all of the welds and remove the crossmember from the frame, move it forward and reweld it, I already have a TBSS frame. No disasembly/reassembly required as far as the frame goes. With the frame, I get the big rear diff, too.

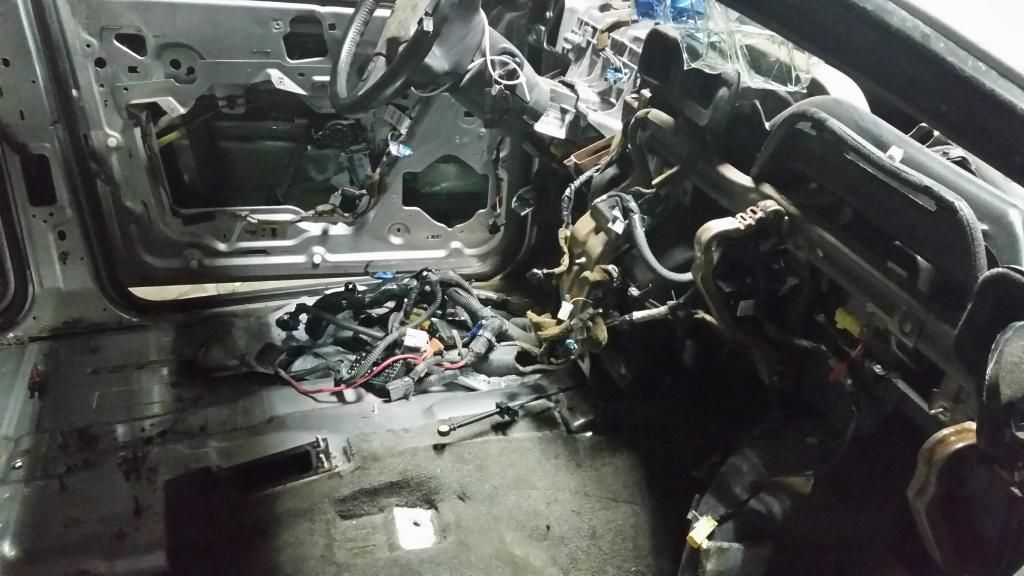
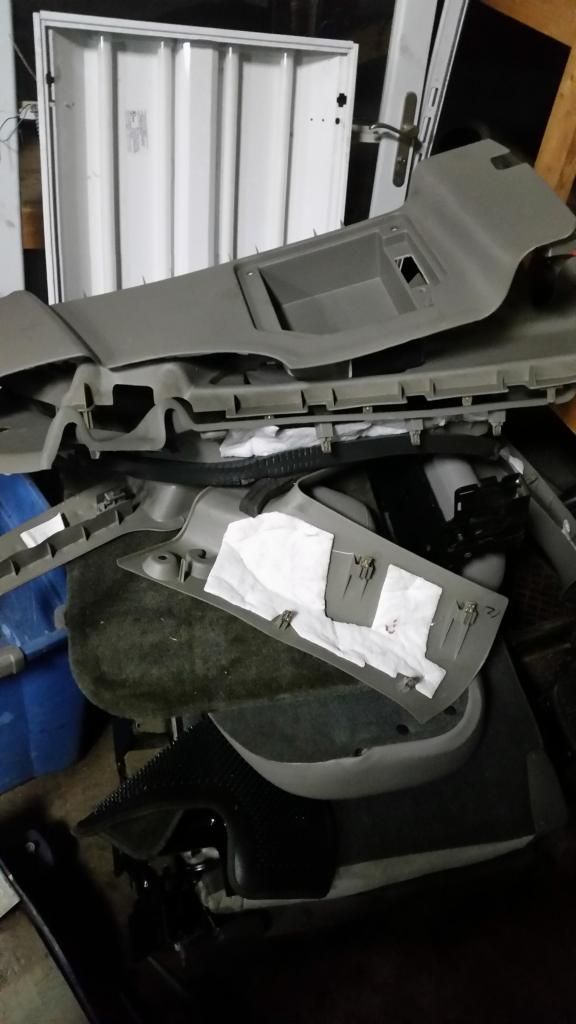
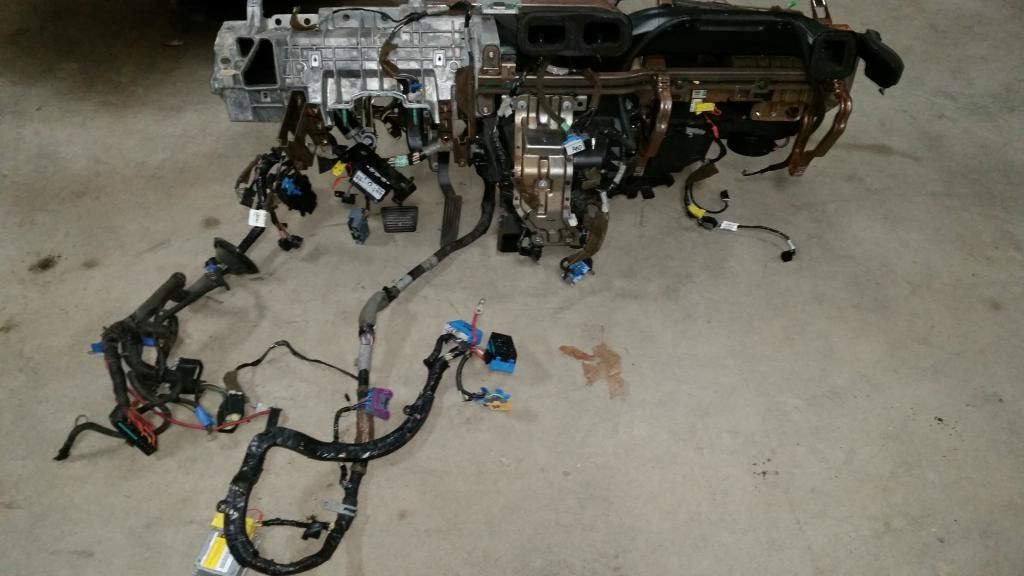
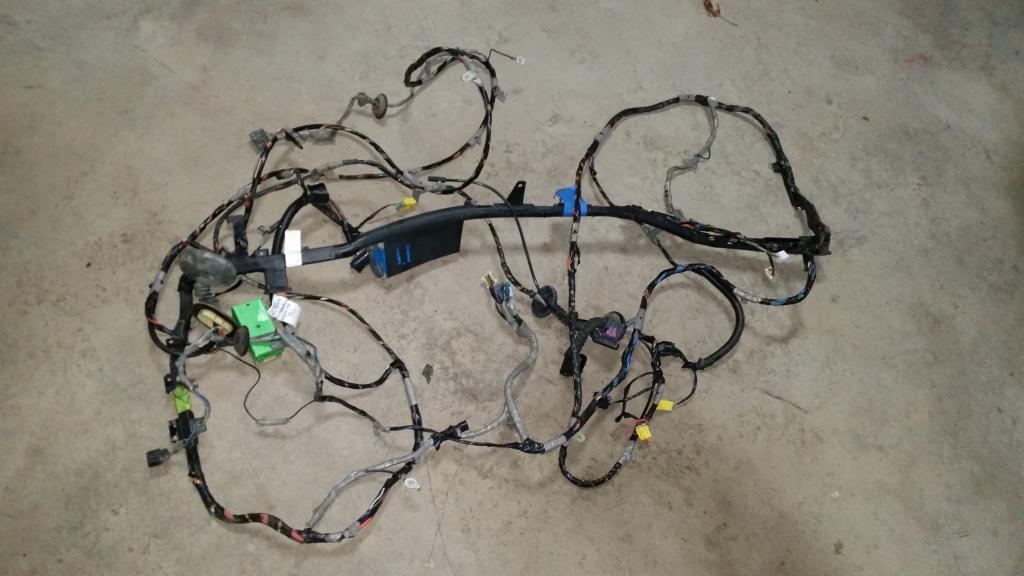
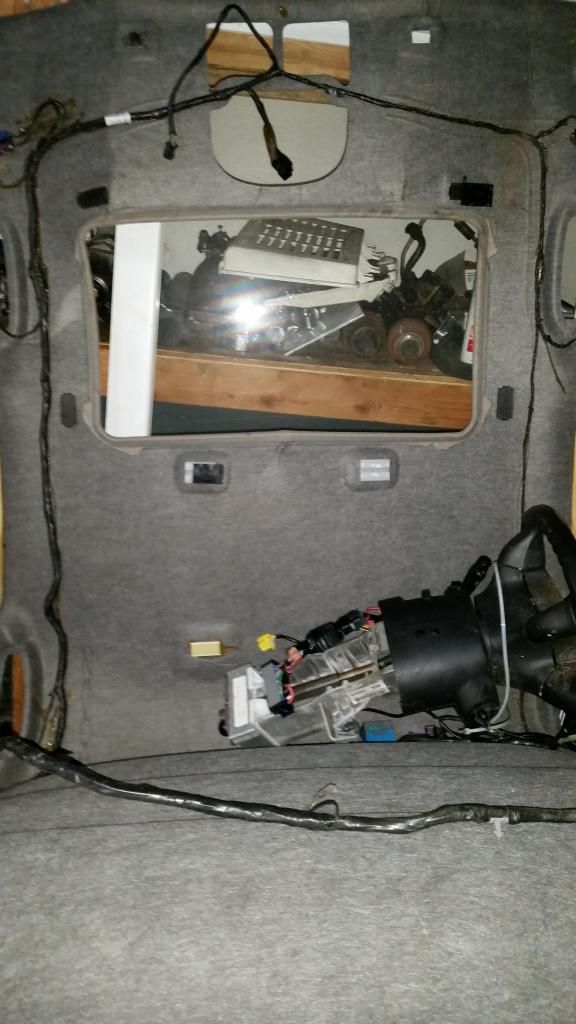
More progress today. I pulled the headliner so I could get to the headliner harness. On the Rainier, it has wiring for dome lights, XM antenna, OnStar antenna, overhead console and rear view mirror. Rest of harness that goes to doors/rear hatch/rear fuse panel was pulled and marked. Dashboard chassis/frame was removed complete minus the steering column. All wiring intact so I can just swap frames between vehicles. Every piece of wire on the inside has now been pulled. All that is left on the Rainier is to drop the frame and drivetrain tomorrow. I will finish removing the harness that is attached to the frame along with the load leveling compressor and ABS computer (hoping to simply swap the computer out on the ABS module instead of swapping whole module...) After that, the Rainier shell remains will go on the trailer and head to scrap. I will then get the wiring harness, load leveling setup, and ABS computer (hopefully) put on the TBSS frame. At that point, I will be able to trailer the Bravada over and start getting it ready to pull the frame from it....

Still shooting for 30 days to have it on the road.
 

RyanA

Original poster
Member
Apr 15, 2014
30
Pics of the harnesses I removed from inside:


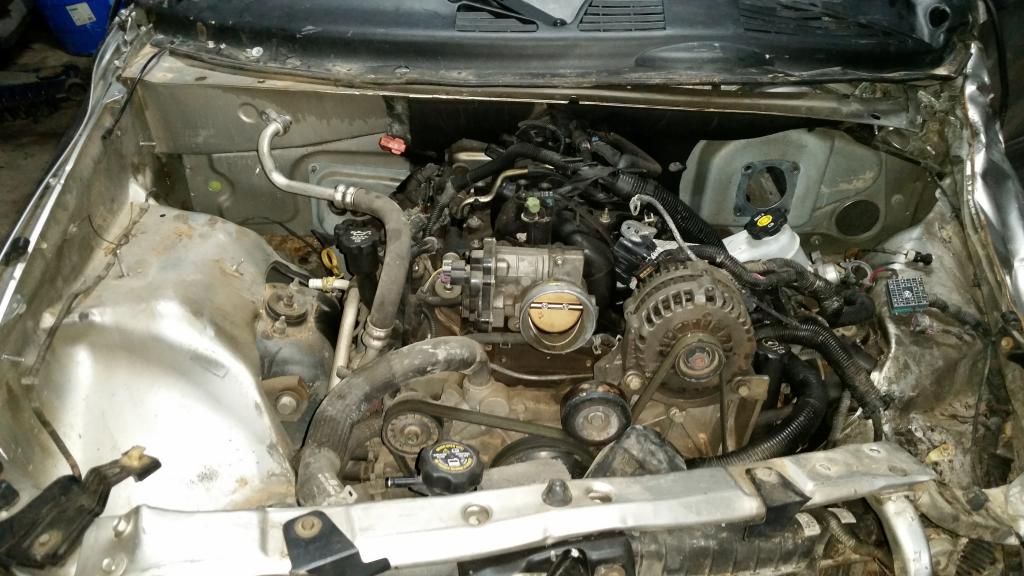
Most parts removed from engine compartment to ready frame/drivetrain for removal:


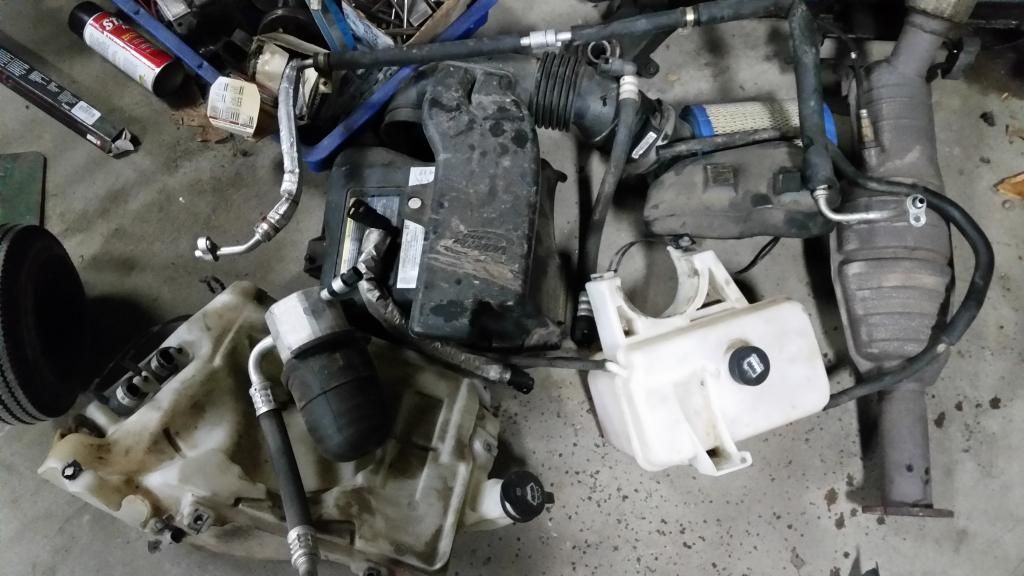
AC lines, coolant tank, and other misc parts removed from engine compartment (actually removed all the the stuff on the passenger side so I could unhook the hose that went to the rear wiper squirter; that hose is in one of the harnesses I removed.
 

RyanA

Original poster
Member
Apr 15, 2014
30
Although the crossmember bar is bolted in, the critical part that locates it fore/aft is welded to the frame. You can do two things if you are dead set on using your 6 cylinder frame:

1. Modify the bolt in crossmember in the center where the trans mount is. You can simply build a shelf that extends forward and gusset it or you can cut out the center and build a new and larger box that extends farther forward.

2. Grind all welds where the crossmember brackets attach to the frame and position it forward and reweld.
 

RyanA

Original poster
Member
Apr 15, 2014
30
Body is pulled off of the frame. Only wiring left on body is the doors and rear hatch; plan on pulling that before it goes to scrap. Pics will be up later tonight.
 
  • Like
Reactions: BlazingTrails

RyanA

Original poster
Member
Apr 15, 2014
30
I have a welder, too. If swapping the frame is some huge feat for someone wanting to do a V8, you should probably just give up before you start. I can pull a frame in between 45 minutes and an hour and a half. However, the trans crossmember is about the easiest part of a V8 swap. WIRING it to operate correctly (retain ABS, not have cobbled up wiring going into the vehicle, etc) is WAY more work than the frame issue. Keep in mind, the V8 uses completely different under hood fuse panel, harness that goes through the firewall to the under seat fuse panel, and I'm pretty sure even that fuse panel is different. To correctly do the harness swap, you need to pull the dash shell, the seats, console and carpet. Unhook the booster cylinder and either remove it (makes getting the harness in and out of the firewall easier) or let it hang. Make sure to unhook the AC lines and heater hoses at the firewall connections; it is easier to pull the dash chassis if you remove the 4 nuts holding the plate on the firewall. Unhook the shifter cable and unplug the plug from the shifter. Remove the shifter metal framework. Then, you simply unbolt the dash chassis and pull it out with the harness all attached. Either swap your new harness to your dash chassis or install another chassis with the harness already installed. Now, snap the harness back to the floor, put the carpet back in, re install the under seat fuse panel, re install the seats, re install the dash shell. After that, you are good to go.

As I said, getting the trans crossmember right pales in comparison to getting the wiring right. If someone is willing to cut out a crossmember and weld it back in (potentially weakening the frame) they are probably also willing to use a couple value packs of butt connectors to make their harness (kind of) work. To me, the very small amount of time savings on the front side will not be worth the troubleshooting on the back side.

Not saying your way or anyone else's is wrong. I'm just saying I want mine to be just as is it was built at the GM factory and be able to be diagnosed at any dealer if I ever sell it to someone that can't do their own work. As far as VIN's matching, who cares? I have no problem saying "My 2002 Bravada has a 2008 Trailblazer SS frame. Here is the title and documentation to prove it's all legit". I really doubt that will devalue the vehicle.... However, saying "I have a welding machine in my garage and I cut the crossmember out of the frame and then welded it back in and I think the drivetrain angle is correct could raise a few brows. Especially if they come back wondering where that drivetrain vibration is coming from.
 

RyanA

Original poster
Member
Apr 15, 2014
30
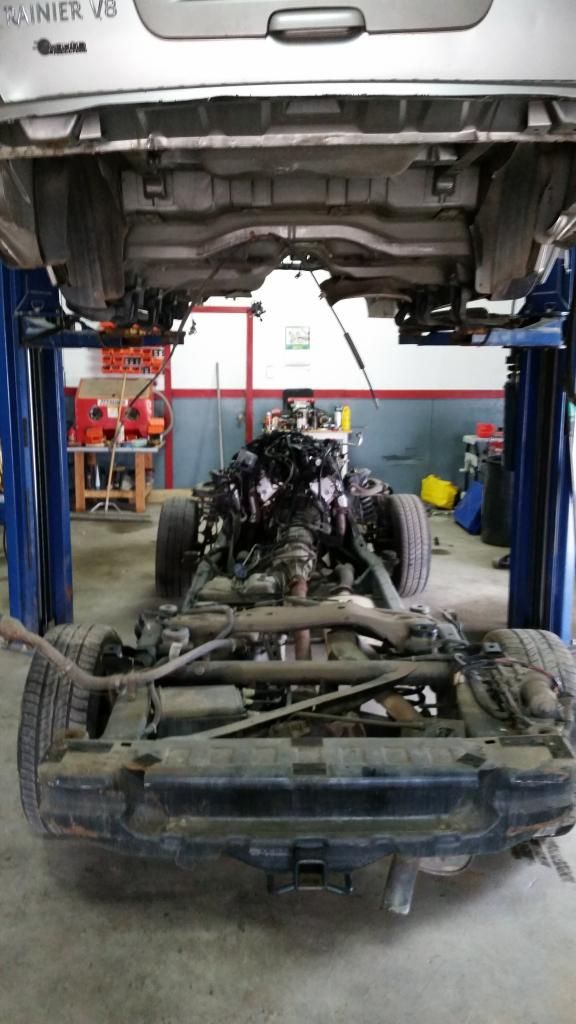
Here's pic of the frame from the Rainier and the Rainier shell still on the lift. Scrapper will be here tomorrow evening after I get off work to pick up the shell.


BlazingTrails

Member
Apr 27, 2014
19,409
BTW you're doing a great job man, looking forward to your pics and videos of the finished product.

:thumbsup:


Edit: I also want to ad that my TB has been paid off, for quite a while, and also I venture to say you will not be able to find one in better condition. there is not a spec of dirt or any rust ANYWHERE. were it to be inverted you could eat off of the bottom of my truck. I will never sell that truck period.
 

RyanA

Original poster
Member
Apr 15, 2014
30
Trying to put into perspective that moving the crossmember is merely about .5% of the swap. The other 99.5% will be pulling the interior and swapping all of the wiring. I'll probably have a total of less than 3 hours into all of the frame pulling and reinstalling I do. I'll probably have 100-150 hours in the interior and wiring.

Any time you solder or crimp a connection in a car, you've added a potential failure point. That is why I try not do do that. When I did R&D for Code Alarm in the early 90's (yeah, I'm getting to be an old fart) we did testing of solder joints in cars. Once you factor vibration and harness movement, the break point of a wire with a solder joint is at one end of the solder joint (due to going from a hard, non-flexible area to a softer, flexible area). Because of this, Code Alarm recommended against soldering joints but instead suggested using a target wiring method. This meant you would strip back some insulation, split the conductors with a pick or other sharp instrument, strip the wire you want to connect about 2"-2 1/2" and insert it through the "hole" you made in the factory wire. Pinch the hole closed and wrap the remaining wire around the conductor of the factory wire until no wire is left. Tape over the joint and place a zip tie over the joint. With that method, the wire was more flexible and far less prone to breaking. With crimp connectors, I think it's obvious why that can be a bad connection over time. As far as my credentials for electronics, I went to school for electrical engineering. Nothing wrong with doing it either way, swapping harnesses is just the way I chose. Mostly to avoid future frustration when trying to figure out why something is not working right.

Also remember if you do the swap, the fuse panels will probably need changed. And, if you are not doing the swap with a donor vehicle using all of the matching modules, plan on spending some money at the dealer getting them reflashed. Yes, I know that you can simply turn off the anti-theft using a PCM reflash (I have been tuning and flashing PCM's in GM vehicles for almost 20 years now) but that won't turn off warning lights that are created by the BCM. Also, most newer BCM's no only turn off the fuel enable on the PCM but they also have a starter kill relay that will keep the starter from engaging. Not to mention the other modules that need to have things reflashed to be happy with the changes. There are a lot of little things that can create problems when it comes to the wiring and modules and I just did not want to deal with them. For me, spending the 1700 on the Rainier was the way to go. Especially when I knew I'd be selling the whole drivetrain out of it to someone to recoup a good chunk of my money (Did I mention the 2004 Rainier comes with the aluminum 5.3 that is not DOD??). Yes, I'm sure the way I'm doing it is considered way more work than needs to be done to many people....

I never said you were an idiot. Never said your TB was not clean. Not real sure why you even added your input about cutting and welding in this thread as I obviously don't need that input due to the way I'm doing this swap. That is great that you are certified. Because of that, I see why you would want to weld on a vehicle you are working on, to show off your skills. I am a pretty decent welder when it comes to steel but nowhere close to a pro when it comes to stainless, aluminum, or anything else that requires a TIG. Two different ways of doing things (and many more besides our two ideas) but I'll continue doing this my way. This thread is about doing the swap by swapping the frame and using all of the factory plug and play harnesses. Not a single wire will have to be cut or spliced. That is because I don't want to cut or splice, not because it can't be done that way. Also so any future owner can simply go to the dealer or online to find any harness that could be damaged in an accident. Trying to figure out how someone re-wired can be a real pain in the butt; I learned that from many of the swap cars I've worked on throughout the years.

Yes, having a lift really makes the frame thing simple and I understand that someone without a lift probably could not do it the way I am. I worked on F bodies for years with no lifts and it sucked dropping drivetrains and putting them back in with only a couple floor jacks, an ATV jack, and some wood. Getting to the point now that I don't do many large projects. After this one is done, the lift will actually be moved to a friend's shop as he will get more use out of it than I will (he does a lot of hot rod car work and has a chassis dyno).

Anyway, any future input in this thread I'd appreciate it if it could stay related to the way I'm doing this swap. Anyone that wants to say how they'd do it, that does not directly pertain to the method being employed in this thread, can start another thread. If they are doing it the same way or have already done it the way I'm doing it, feel free to add any pics or input you have. I don't want this thread getting sidetracked with a bunch of bloat posts (like there already are...). Would rather this thread stayed clean so someone that wants to do a conversion this way, can read through and find the obstacles I've run into and see the solutions I (or someone else) have come up with. Would appreciate it if all of the extra stuff in this thread would be deleted so it's easier to go through. If I need to delete all of this and start over, that is fine. Just let me know what I need to do, Mods.

Back on track, my wife and I have discussed things we'll be doing while the Bravada interior is pulled for the harness swap. Plan is to deaden all metal panels (rear quarters, door skins, inner door structures, roof, floors) and do whatever we can to quiet down the vehicle. I have considered putting Buick Rainier front glass into the Bravada doors since they use laminated glass for sound deadening. Had no clue they were like this until I saw the driver door glass in this Rainier broken. It had not shattered like tempered glass but had cracked and remained in one piece like a windshield. Did some reading and saw that they installed that glass in the front doors to quiet the vehicle. Other things we'll probably do is move the OnStar antenna from the factory location of an 02 (rear driver quarter glass) to the roof like the newer vehicles have. Already have the XM and OnStar roof antennas from the Rainier so it's simply a matter or drilling the holes and installing them.
 

The_Roadie

Lifetime VIP Donor
Member
Nov 19, 2011
9,957
Portland, OR
Mods will support the thread cleanup. It's inspiring and will be referred to for years as owners continue to keep vehicles on the road creatively!
 

RyanA

Original poster
Member
Apr 15, 2014
30
Rainier shell is gone. When it was all said and done, the only wire left inside of it were the plugs that used to be attached to the mirrors. Looks like it's supposed to be nice this weekend so I am going to try to get the interior pulled out of the Bravada and start getting the interior wiring swapped. I removed all of the sound deadening mats from the doors and I'll be putting them into the Bravada, too. Everything to do the sound deadening should be here later this week or next week so it will be done before the interior goes back in.

After the inside is done, I'll trailer it over to my shop with the lift and get the body pulled so I can get the new frame under it. That will be another weekend...
 

RyanA

Original poster
Member
Apr 15, 2014
30
Yes. Between work, life, and trying to find factory GM brake lines for the master cylinder and front brakes, things had been at a stop. Later this morning, I am going to look at a 2005 Envoy Denali parts vehicle. Engine and trans are already pulled; it appears that 2004-2005 use the same ABS module location and brake line configuration. Depending on how the truck is sitting, I may or may not get to pull the brake lines today.

Once I have brake lines, the engine is ready to go in with new engine mounts. Only other things on frame will be replacing the fuel tank with the 2004 Rainier tank (due to sensor and solenoid locations and pinouts) and I'm going to replace the air suspension air hoses (already have them). Once engine is bolted in, the Bravada body is ready to set on. I had already pulled the body off of the frame but set the body back on and secured it with 2 bolts so I could use my lift. Bravada body will be a matter of rolling it back inside and then removing 2 bolts and lifting. After that, roll one frame out, roll the TBSS frame in and plumb bob the body mounts to make sure it's pretty close when I drop it.

Once the body is on the TBSS frame, the Bravada will come to my house and go into one of my garages here so we can pull the interior and install all of the harnesses. Bravada originally had non-adjustable pedals. When I'm done, it will have adjustable pedals. I think the Bravada and Rainier bodies had the same options otherwise (well, besides the Rainier having a Bose Lux system with navigation).

More progress pics should be coming very soon. My work will be slowing down a bit for the winter so I should be able to get through this pretty quick now.
 

Forum Statistics

Threads
23,721
Posts
642,585
Members
19,251
Latest member
Sheik480

Members Online

No members online now.