- Dec 12, 2011
- 4,656
I meant to submit this a couple months ago, hopefully this article is complete enough for anyone to tackle this job, I guess we can edit in the future if needed.
I started this job as I was changing my front struts/springs and steering rack. I figured I would get everything into place before the alignment.
I was able to complete this job with a few simple tools, I did source a ball joint tool which is avail for rent at a parts store, I lucked out and my neighbor had one. I'm sure there are other more "dedicated" tools that could work more effectively but this turned out easier than planned. I'm confident that by viewing this thread, any tool changes could be substituted easily by the user as they see fit.
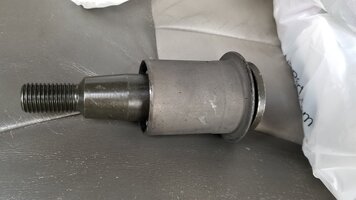
I replaced both of the lower strut bushings with the MOOG K200270.
MOOG K200270 Lower Strut Bushing
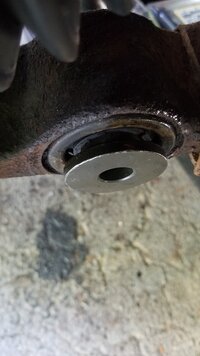
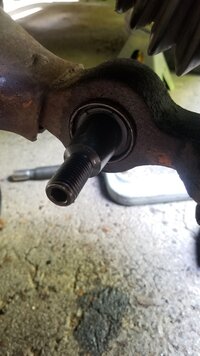
These were in dire need of replacement, I could easily move the RH stud inside the bushing with a screwdriver.
You will likely need to raise both front wheels and loosen both strut assemblies by their two upper mounting bolts before you remove the lower strut mounting yoke from the lower control arm, thus allowing the LH & RH suspension to fully hang down. This should keep you from needing to loosen or remove a sway bar link.
Once the front end was secured on the frame with jack stands allowing the entire suspension to hang, I loosened the top two strut mounting bolts on both the LH & RH struts to ensure there was no tension on the lower strut yoke at the bushing.
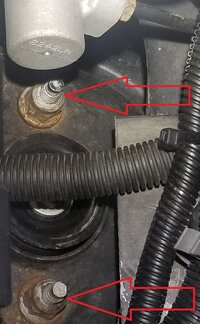
DO NOT REMOVE THE CENTER NUT OF THE STRUT ASSEMBLY
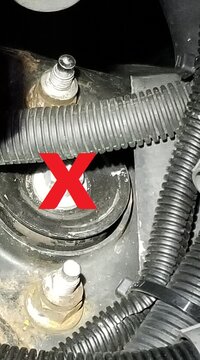
You may need a floor jack to lift the lower control arm to re-position the lower strut yoke onto the new bushings once installed. I used this as a secondary safety to the tire and wheel under the frame also.
The worn original bushings
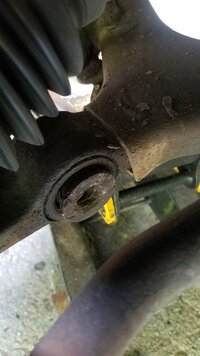
The lower strut yoke may come off with a few blows of a 3lb sledge, this side needed more persuasion.
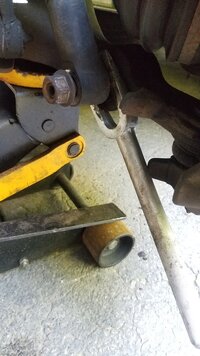
Once the strut yoke is free from the bushing, remove the two upper mounting bolts and set the strut assembly aside.
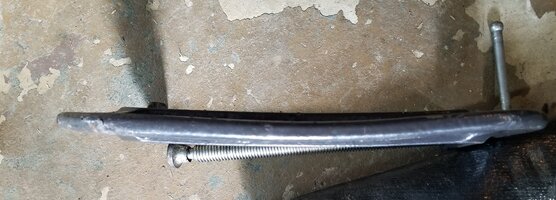
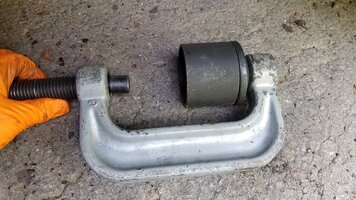
I borrowed a ball joint tool and used these 2 pieces in conjunction to the press:
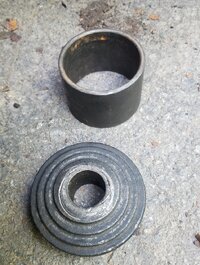
For removing the strut yoke mounting stud from the old bushing, the press used with the ball joint kit wasn't large enough to fit around the stud and the receiving collar on the other side. However it was fine for pressing the remaining portion of the bushing from the lower control arm.
I had to use my 8" C-Clamp which was originally delegated for compressing brake calipers.
The idea here is to force the mounting stud or post, back through the bushing housing by breaking it away from the rubber, thus destroying the bushing.
Once you begin to press the mounting stud, there is no turning back, the bushing will need to be replaced before you can operate the vehicle again so have the new one handy.
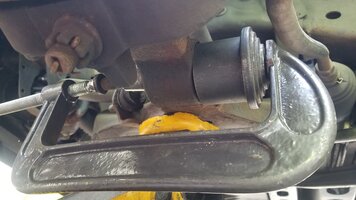
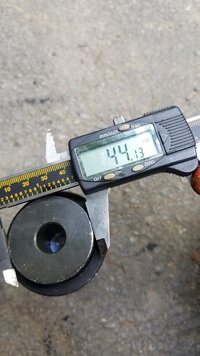
I used the collar that was just larger than the bushing, I believe the collar was 3". The largest part of the bushing measures just over 56MM which is roughly 2 1/4".
The RH side broke free without much force, the LH side put up more of a fight and was taking a toll on my C-Clamp. Just continue until you feel the back side of the mounting stud bottom out into the end of the clamp.
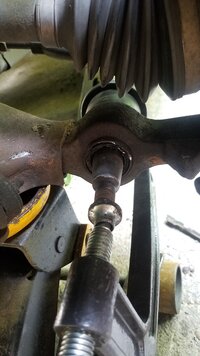
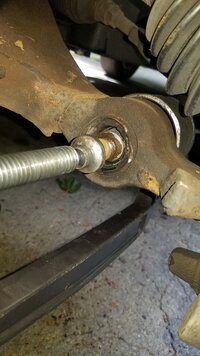
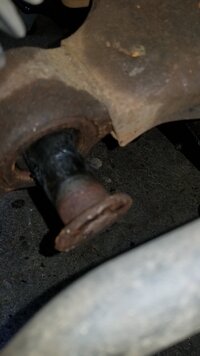
At this point just push it through
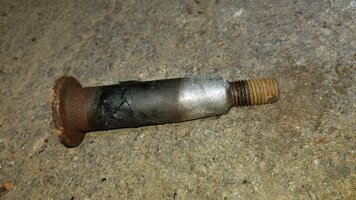
I could not find anything to match the size of the bore so it turns out that the large head of the strut yoke mounting stud, was the exact size of the bore.
If you have a tool this size then you could press the bushing out without breaking the rubber surround, but the stud works perfectly.
 ]
]
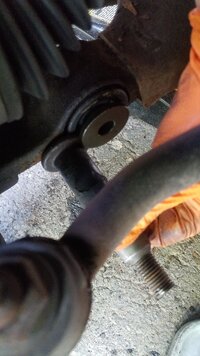
Placing the mounting stud back through the bushing in the opposite direction, you can now use the ball joint press to remove the remaining portion of the bushing.
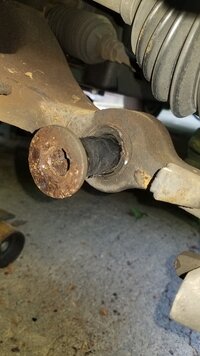
Set the tool up in this manner
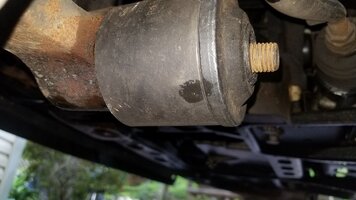
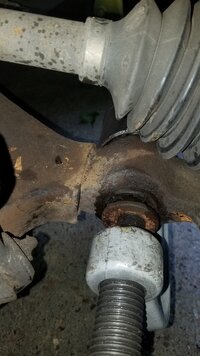
This is easier than a C-Clamp since you can use a ratchet or breaker bar on the press. Also doubtful a cheap C-Clamp would hold up to these forces.
At this point you may or may not need any heat. I didn't need any heat on the RH side, but needed some heat on the LH side. Also, some PB Blaster or equivalent is a good idea.
Once I started to press the bushing out, I had to stop and apply some heat.
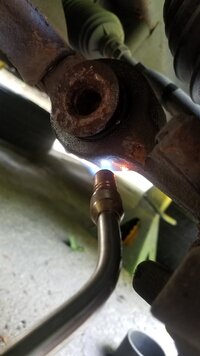
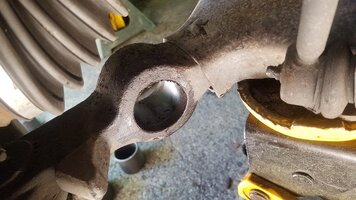
Continue to press the bushing until you feel it break free. You will see the head of the stud is a perfect fit inside the bore, I felt no binding during the process.
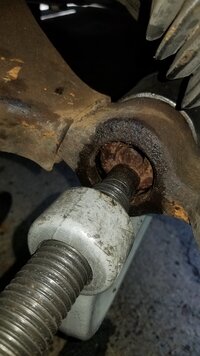
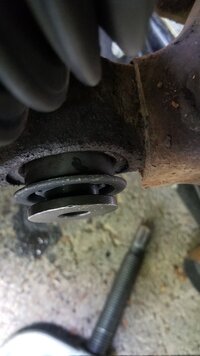
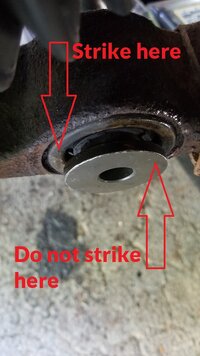
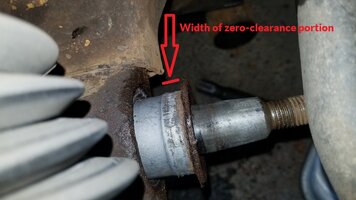
The portion of the bushing that has a press fit is not that wide
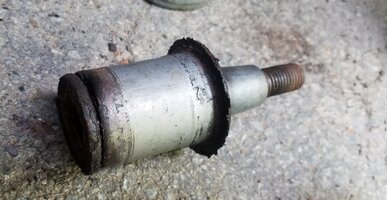
Continued.......
I started this job as I was changing my front struts/springs and steering rack. I figured I would get everything into place before the alignment.
I was able to complete this job with a few simple tools, I did source a ball joint tool which is avail for rent at a parts store, I lucked out and my neighbor had one. I'm sure there are other more "dedicated" tools that could work more effectively but this turned out easier than planned. I'm confident that by viewing this thread, any tool changes could be substituted easily by the user as they see fit.
I replaced both of the lower strut bushings with the MOOG K200270.
MOOG K200270 Lower Strut Bushing

These were in dire need of replacement, I could easily move the RH stud inside the bushing with a screwdriver.
You will likely need to raise both front wheels and loosen both strut assemblies by their two upper mounting bolts before you remove the lower strut mounting yoke from the lower control arm, thus allowing the LH & RH suspension to fully hang down. This should keep you from needing to loosen or remove a sway bar link.
Once the front end was secured on the frame with jack stands allowing the entire suspension to hang, I loosened the top two strut mounting bolts on both the LH & RH struts to ensure there was no tension on the lower strut yoke at the bushing.

DO NOT REMOVE THE CENTER NUT OF THE STRUT ASSEMBLY

You may need a floor jack to lift the lower control arm to re-position the lower strut yoke onto the new bushings once installed. I used this as a secondary safety to the tire and wheel under the frame also.
The worn original bushings

The lower strut yoke may come off with a few blows of a 3lb sledge, this side needed more persuasion.

Once the strut yoke is free from the bushing, remove the two upper mounting bolts and set the strut assembly aside.
I borrowed a ball joint tool and used these 2 pieces in conjunction to the press:

For removing the strut yoke mounting stud from the old bushing, the press used with the ball joint kit wasn't large enough to fit around the stud and the receiving collar on the other side. However it was fine for pressing the remaining portion of the bushing from the lower control arm.
I had to use my 8" C-Clamp which was originally delegated for compressing brake calipers.
The idea here is to force the mounting stud or post, back through the bushing housing by breaking it away from the rubber, thus destroying the bushing.
Once you begin to press the mounting stud, there is no turning back, the bushing will need to be replaced before you can operate the vehicle again so have the new one handy.

I used the collar that was just larger than the bushing, I believe the collar was 3". The largest part of the bushing measures just over 56MM which is roughly 2 1/4".
The RH side broke free without much force, the LH side put up more of a fight and was taking a toll on my C-Clamp. Just continue until you feel the back side of the mounting stud bottom out into the end of the clamp.


At this point just push it through

I could not find anything to match the size of the bore so it turns out that the large head of the strut yoke mounting stud, was the exact size of the bore.
If you have a tool this size then you could press the bushing out without breaking the rubber surround, but the stud works perfectly.
 ]
]Placing the mounting stud back through the bushing in the opposite direction, you can now use the ball joint press to remove the remaining portion of the bushing.

Set the tool up in this manner


This is easier than a C-Clamp since you can use a ratchet or breaker bar on the press. Also doubtful a cheap C-Clamp would hold up to these forces.
At this point you may or may not need any heat. I didn't need any heat on the RH side, but needed some heat on the LH side. Also, some PB Blaster or equivalent is a good idea.
Once I started to press the bushing out, I had to stop and apply some heat.

Continue to press the bushing until you feel it break free. You will see the head of the stud is a perfect fit inside the bore, I felt no binding during the process.

The portion of the bushing that has a press fit is not that wide


Continued.......
Last edited:

