Summary: Replacing your CV Boot
Difficulty: 2 out of 10
Estimated Time:30-45 minutes
Part Numbers:614-004 Dorman
Cost: $23 ($18 on ebay)
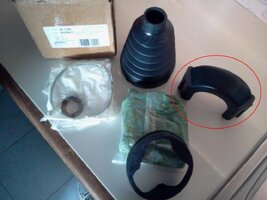
The CV boots rip on our 4WD trucks occasionally. Maybe it's due to lifting or lowering, maybe something just smacked the boot and tore it. It's pretty well documented how to pull these puppies, so I'm going to skip all that. If you're axles weren't making any noise and you didn't drive around with a ripped boot for a month you can probably disassemble, clean it with some brake cleaner and regrease it with some CV grease and be good to go. I used Dorman part number 614-004. Here's how to do it.
pulled off the old clamp

took off the snap ring

removed the bearings

axle with no bearings

removed the boot and cleaned up the parts

pulled the silicone boot down past the groove in the axle for the stock boot (the silicone boot is longer and needs more space).

clamped it

put the bearing and snap ring back on the axle after it was cleaned and regreased with CV grease. I generally fill the tripot about 3/4 of the way up with CV grease.

the directions in the silicone boot box said you needed to retain the rubber piece on the tripot. This piece doesn't exist on the aftermarket axles and you cant use the stock piece because the aftermarket tripots are a different shape than stock (If you are replacing the boot on a stock axle you can reuse the rubber piece).


so i cut the after market boot to retain the rubber piece that goes around the tripot, cleaned both up and put a dab of silicone to help hold it in place on the tripot.

I became a little worried about the sharp edges of the clamp so I wrapped some electrical tape around it. I have since replaced this clamp with a worm clamp and wrapped it with electrical tape.


new boot stretched... plenty of flex

Here's some pics of the difference between the stock and aftermarket axles. If you're replacing the boot on a stock shaft know that you have to remove a second ring before you can remove the stock boot.


Difficulty: 2 out of 10
Estimated Time:30-45 minutes
Part Numbers:614-004 Dorman
Cost: $23 ($18 on ebay)
The CV boots rip on our 4WD trucks occasionally. Maybe it's due to lifting or lowering, maybe something just smacked the boot and tore it. It's pretty well documented how to pull these puppies, so I'm going to skip all that. If you're axles weren't making any noise and you didn't drive around with a ripped boot for a month you can probably disassemble, clean it with some brake cleaner and regrease it with some CV grease and be good to go. I used Dorman part number 614-004. Here's how to do it.
pulled off the old clamp
took off the snap ring
removed the bearings
axle with no bearings
removed the boot and cleaned up the parts
pulled the silicone boot down past the groove in the axle for the stock boot (the silicone boot is longer and needs more space).
clamped it
put the bearing and snap ring back on the axle after it was cleaned and regreased with CV grease. I generally fill the tripot about 3/4 of the way up with CV grease.
the directions in the silicone boot box said you needed to retain the rubber piece on the tripot. This piece doesn't exist on the aftermarket axles and you cant use the stock piece because the aftermarket tripots are a different shape than stock (If you are replacing the boot on a stock axle you can reuse the rubber piece).
so i cut the after market boot to retain the rubber piece that goes around the tripot, cleaned both up and put a dab of silicone to help hold it in place on the tripot.
I became a little worried about the sharp edges of the clamp so I wrapped some electrical tape around it. I have since replaced this clamp with a worm clamp and wrapped it with electrical tape.
new boot stretched... plenty of flex
Here's some pics of the difference between the stock and aftermarket axles. If you're replacing the boot on a stock shaft know that you have to remove a second ring before you can remove the stock boot.