"How To" Remove, Repair & Replace Broken Fuel Tank Filler Neck, R&R Delphi Fuel Pump & Quick Disconnects

mrrsm

Original poster
Lifetime VIP Donor
Supporting Donor
Member
Oct 22, 2015
7,700
Tampa Bay Area
This Video covers the following repairs that will apply to a wide range of GM & GMC SUVs and Trucks to deal with the following problems:

(1) Fuel Tanks with Snapped-Off Filler Necks at the Tank Interface.
(2) Inoperative Fuel Pumps (Replaced with OEM Delphi with Very Good Tips and Info on this R&R).
(3) Damaged Fuel Line Quick Disconnect- Connectors (WITHOUT using any Expensive Repair Tools).

It would have been much better (and MUCH Safer) for the VOP (Video Original Poster) to have used “Spark-Proof” Brass Drift Tools for this series of Repairs around a partially filled Fuel Tank. However, it is doubtful that there is a more Comprehensive Instructional Video available on how to accomplish ALL three aspects of this ‘R&R&R’ in One Go as depicted on this Video (Remove, Repair & Replace):

 
Last edited:
  • Like
Reactions: Eric04 and Mooseman

Mooseman

Moderator
Dec 4, 2011
25,323
Ottawa, ON
I just learned something today. You can use the SWB pump in a LWB. Just the gauge will not quite go up to full mark.

That kit had been mentioned here before:

It's a bit pricey IMHO. This guy used a common threaded barb with some epoxy. I wouldn't have put the anti-rollover valve back in as this would reduce the fuel flow. There's already the gas cap so to me, it is redundant.


And I remember someone here or on YT using brass fittings basically doing the same thing as the kit without a valve. Unfortunately I can't find it.
 
  • Like
Reactions: mrrsm and Eric04

m.mcmillen

Member
Apr 29, 2016
554
Wisconsin
My father in law has a Rainier and I used a soldering iron and pieces of plastic to "weld" and seal it back up. That was about 3 or 4 years ago and it is still holding up.

This solution looks a bit easier than mine.
 
  • Like
Reactions: mrrsm and Eric04

mrrsm

Original poster
Lifetime VIP Donor
Supporting Donor
Member
Oct 22, 2015
7,700
Tampa Bay Area
If you notice in the Video... the VOP (Video Original Poster) is using a Brass Hammer to Pound Hell out of the End of a High Carbon Screw Driver...so the problem with this is that the “Sparking Ends” are STILL present where the Screw Drive Blade digs into the Rusty Steel Lock Rung Grooves. It only takes One Spark to ignite Fuel Vapors in and around an Open Fuel Tank...

Yet ALL of these potential problems are completely avoidable. For the sake of covering all of these Safety Issues, these Brass Tools and Gas Tank Visual Probe Light are indispensable for the “Care Free-Spark-Free” removal of the Ferrous Metal Lock Ring of the GM Plastic Fuel Tanks and for working around all other flammable vapour saturated environments:

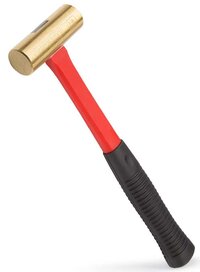
(1) Brass Hammer.

https://www.amazon.com/dp/B00U1F0JXM/?tag=gmtnation-20

TEKTONBRASSHAMMER.jpg

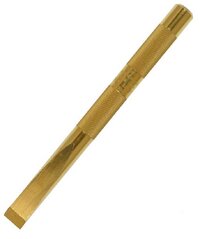
(2) Brass Chisel (recommend dulling the edge before attacking the Lock Ring Removal).

MAYHEWBRASSCHISEL.jpg

https://www.amazon.com/dp/B01MS758FA/?tag=gmtnation-20

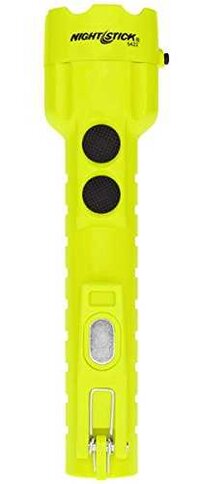
(3) Explosion Proof - Fuel Proof Flashlight.

NIGHTSTICKFLASHLIGHT.jpg

https://www.amazon.com/dp/B012CUNWNW/?tag=gmtnation-20
 

Forum Statistics

Threads
23,314
Posts
637,845
Members
18,519
Latest member
Bigboylove

Members Online