- Dec 5, 2011
- 1,584
This How-To will show you how to use the Alltrade Tools Kit 46 Ball Joint/U Joint Service Set to replace your lower ball joints. It is important to use this tool kit because it is the only one that I have found to have the correct pieces. I will only cover the steps on how to press the ball joint in and out of the lower control arm, since getting to the ball joint has been covered in other threads.
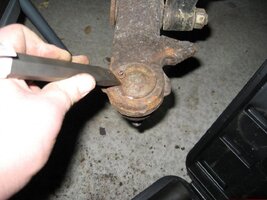
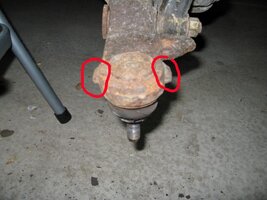
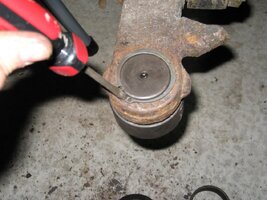
The first step was to remove the crimps that ensure the ball joint stays in the knuckle. I used a cold chisel and a hammer to remove the lip.
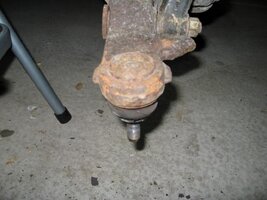
Before:
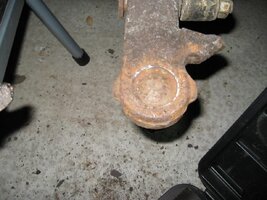
After:
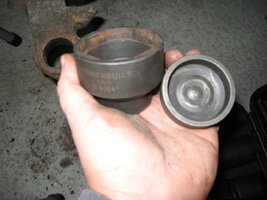
These are the pieces from the kit used to remove the old ball joint.
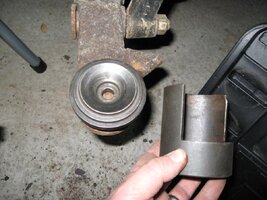
For some reason, GM decided to make the collar on the ball joint the same size as the outer radius of the lower control arm. This makes it impossible to use the 7 piece ball joint tool that most auto parts stores carry.
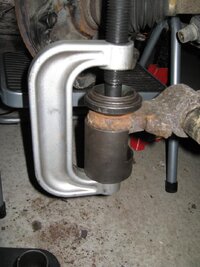
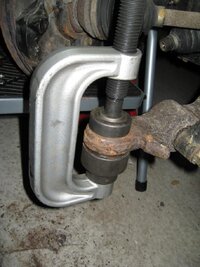
It's hard to see in the picture, but there are tabs on either side of the lower control arm that you place the receiver cup onto from the bottom.
Press the ball joint down as far as it will go.
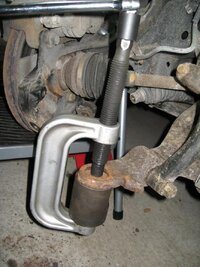
Then, push it out the rest of the way with the C Clamp.
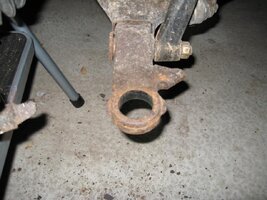
The ball joint pressed out.
I used these pieces to press the ball joint into the lower control arm. It was hard to find a sleeve that fit around the preinstalled boot, but was also small enough to press around the perimeter of the ball joint. If the sleeve was too small, it would have damaged the rubber boot. The way I used them was not the way they were intended to be used, but it worked.
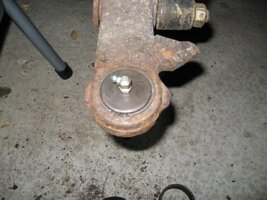
Install the snap ring.
Install grease fitting.
Lastly, enjoy saving hundred of dollars.
The first step was to remove the crimps that ensure the ball joint stays in the knuckle. I used a cold chisel and a hammer to remove the lip.
Before:
After:
These are the pieces from the kit used to remove the old ball joint.
For some reason, GM decided to make the collar on the ball joint the same size as the outer radius of the lower control arm. This makes it impossible to use the 7 piece ball joint tool that most auto parts stores carry.
It's hard to see in the picture, but there are tabs on either side of the lower control arm that you place the receiver cup onto from the bottom.
Press the ball joint down as far as it will go.
Then, push it out the rest of the way with the C Clamp.
The ball joint pressed out.
I used these pieces to press the ball joint into the lower control arm. It was hard to find a sleeve that fit around the preinstalled boot, but was also small enough to press around the perimeter of the ball joint. If the sleeve was too small, it would have damaged the rubber boot. The way I used them was not the way they were intended to be used, but it worked.
Install the snap ring.
Install grease fitting.
Lastly, enjoy saving hundred of dollars.
Last edited by a moderator: