Hey everyone, finally got around to putting this article up as promised.
So my ECT sensor died and wasnt giving me a reading on my dashboard and my A/C would not blow cold air. I had the issue narrowed down to the ECT sensor, but as a few of our awesome members suggested that if I was changing my ECT sensor it would be a good idea to change the thermostat as well.
So to change the thermostat, you are going to have to dig into it a bit. Don't be intimidated by all the wires and hoses going around the engine!
The first thing to do is to disconnect the battery and let it discharge completely. Also it is strongly advised to change the thermostat when the car is cool. If you have been running the car, it's strongly advisable to let it sit through the night and tackle this the first thing in the morning without running the cars engine.
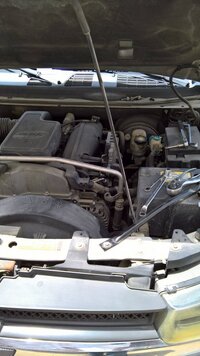
The thermostat is located under the PCM, behind the alternator. There is no easy way to get the thermostat out without removing the alternator, at least from my experience.
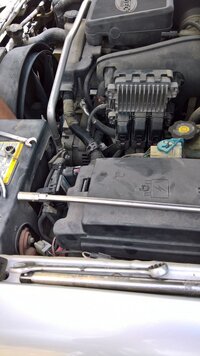
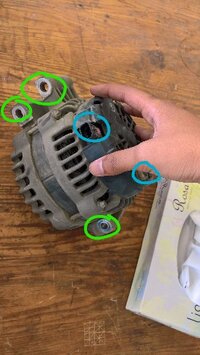
Removing the alternator is a matter of three bolts and two electrical connectors. The top two bolts are a breeze, but the bottom one will be a bit tricky.
The bolts are shown in green and the electrical connectors in blue below
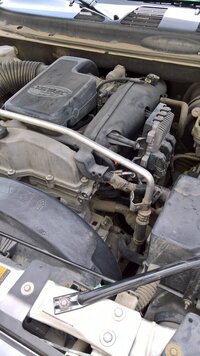
Once the alternator is out you can see the thermostat, which is attached to a hose
The hose is clamped to the thermostat. Took a while to get the clamp out as I didn't have the correct tool. Used some pliers and it came out after a few trails.
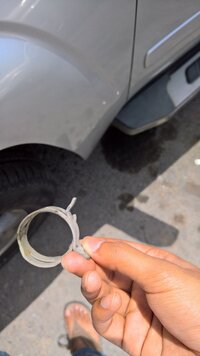
Remember as soon as you disconnect the hose there is going to be a mess! So to avoid getting covered in coolant, place a drain bucket, or so to drain the coolant into.
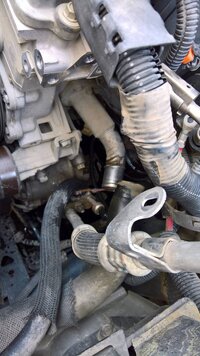
The coolant drain in action !!!
The thermostat is a matter of two bolts, one on top and the other on the bottom and its out.
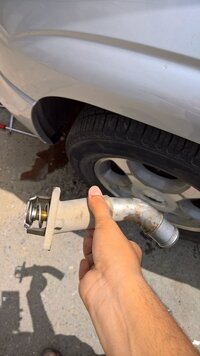
Install the new thermostat in place of the old one and reconnect the hose using the hose clamp
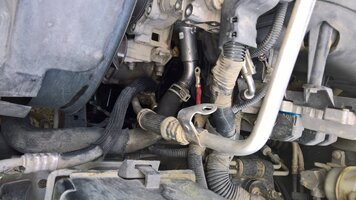
Shiny!!!
The final step is to reconnect the alternator, with its two electrical connectors and three bolts and most IMPORTANTLY refill the coolant as there will be nothing left after the coolant flush, also check your radiator, and top off with water as well.
Run the cars engine, with the A/C running and top off the water in the radiator and check the coolant level as well. Once normal, congratulations you have just changed your thermostat!!!
Took me about an hour and half as I took it slowly to avoid messing something up, should take an hour if you know your tools!
Thanks, hope you all enjoy and hope it helps someone having problems with their thermostat
So my ECT sensor died and wasnt giving me a reading on my dashboard and my A/C would not blow cold air. I had the issue narrowed down to the ECT sensor, but as a few of our awesome members suggested that if I was changing my ECT sensor it would be a good idea to change the thermostat as well.
So to change the thermostat, you are going to have to dig into it a bit. Don't be intimidated by all the wires and hoses going around the engine!
The first thing to do is to disconnect the battery and let it discharge completely. Also it is strongly advised to change the thermostat when the car is cool. If you have been running the car, it's strongly advisable to let it sit through the night and tackle this the first thing in the morning without running the cars engine.

The thermostat is located under the PCM, behind the alternator. There is no easy way to get the thermostat out without removing the alternator, at least from my experience.

Removing the alternator is a matter of three bolts and two electrical connectors. The top two bolts are a breeze, but the bottom one will be a bit tricky.
The bolts are shown in green and the electrical connectors in blue below

Once the alternator is out you can see the thermostat, which is attached to a hose

The hose is clamped to the thermostat. Took a while to get the clamp out as I didn't have the correct tool. Used some pliers and it came out after a few trails.

Remember as soon as you disconnect the hose there is going to be a mess! So to avoid getting covered in coolant, place a drain bucket, or so to drain the coolant into.

The coolant drain in action !!!
The thermostat is a matter of two bolts, one on top and the other on the bottom and its out.

Install the new thermostat in place of the old one and reconnect the hose using the hose clamp

Shiny!!!
The final step is to reconnect the alternator, with its two electrical connectors and three bolts and most IMPORTANTLY refill the coolant as there will be nothing left after the coolant flush, also check your radiator, and top off with water as well.
Run the cars engine, with the A/C running and top off the water in the radiator and check the coolant level as well. Once normal, congratulations you have just changed your thermostat!!!
Took me about an hour and half as I took it slowly to avoid messing something up, should take an hour if you know your tools!
Thanks, hope you all enjoy and hope it helps someone having problems with their thermostat

