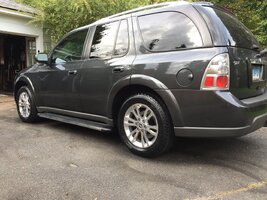
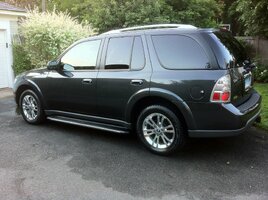
so i replace the air bags on my 07 envoy denali 2wd (swb) for the arnotts gen one bag and they work awsome. my only problem is that the rear end is max out at 35 inches from the ground to the edge of the wheel well...
i found this procedure for recalibrating the ride height but im not sure what fuses to pull since on my 07 i dont see a fuse for ride (15)
has anyone recalibrated their trailvoys using this?
I found a much more practical and easier way.
BOOK METHOD:
----Turn key on for 2 minutes to let the airbags deflate (I call bs-its always hit and miss)
----Turn vehicle off.
----Remove airbag sensor fuses.
----Support frame of vehicle on jackstands, remove rear wheels.
----Jack axle up to the desired measurement.
This is goofy- it says 1" more than the numbers below
tb ss - 5.3"
Denali or XL - 6.33"
this is the "D-Height ( From top of axle to bottom of the frame )
----Hold that position, put fuses back in and start the vehicle.
----Done
Method I used that worked:
2 floor jacks are needed
----Start the vehicle.
----Jack the frame up on one side to where tire is barely grounded. Hold this for 10 seconds. Let it down. This is done to let the air out
----Quickly repeat this on opposite side. (You can do both sides at once)
----Wait for vehicle to deflate.
----Turn vehicle off.
----Remove airbag sensor fuses
----Found a common area from flat level floor to bottom of link perch to measure.
----Jack vehicle up on both sides to your desired height. Hold.
----Reinstall fuses. Turn ignition on-not vehicle. wait until all indicators stop flashing.
----Start.
Thats it- worked for me and took all of the guesswork out. What I would recommend for anyone lowering or lifting is to know what it sat at from the factory (center of wheel to bottom of fender, or anyplace where a solid and reliable measurement can be made) For instance, if you wanted to lower the rear 4 " you would simply get the vehicle to normal ride height and before it deflates the rear take your reliable measurement. Then, follow the instructions above and decrease that measurement by 4". DONE.
It would be nice for a few people to post there factory measurement while at normal height. I guess we would only need a tbss and add an inch for whatever else. (I know this measurement is posted a billion times, but I personally dont like measuring from center of the wheel. A level floor to a point on the frame seems easier to be exact) I took a test drive and *after* I got out of vehicle with ignition off I measured again. Exact to the 10th of an inch. Again, sorry if I over looked this posted somewhere but I had post because I know what a pain this is and this worked for me with ease.
note: the reason for doing it this way is so you dont mess with the sensors....at all! Pulling the fuses and reinserting them recalibrates (memorizes) the new position. It is helpful also if you have moved the sensors because the sensor location does not matter when it is reprogrammed. However, I do recommend moving the sensor to a close to factory location, if they have been moved, before programming so the distance of travel is a safe amount not to bind the sensor arms (plastic).


