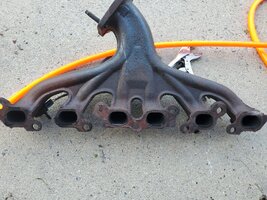
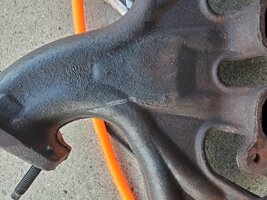
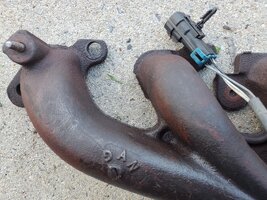
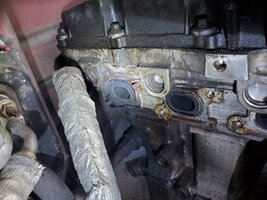
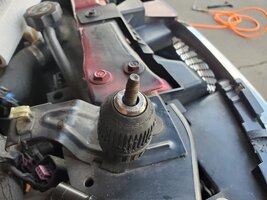
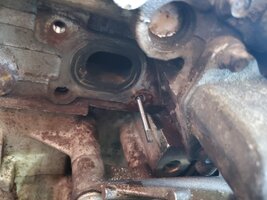
Exhaust Manifold Replacment - input requested

TequilaWarrior

Original poster
Member
Dec 5, 2011
576
Central Pennsylvania
I've finally had enough of the ticking noise from my multiple exhaust leaks. The noise, coupled with some performance concerns (mainly mileage related) have finally driven me to replace the exhaust manifold. I have a 2002 Olds Bravada - so it's the first design of the manifold and downpipe. I've ordered the replacement manifold and matching replacement bolts from RockAuto. I also ordered a replacement upstream oxygen sensor as the last time I had to troubleshoot some misfires I tried to remove the oxygen sensor and failed miserably. I have no hope in saving it, so in the bin it goes with the manifold.

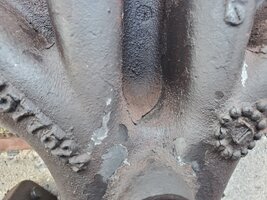
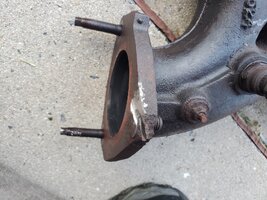
All that being said, I have yet to attempt to turn any of the exhaust manifold bolts. I'm seeking input to maximize my potential to remove these bolts without snapping any. I realize the chances of removing all of them without breakage is incredibly small, but I'd like to try. Complicating the issue is the fact that I have 2 flange cracks and already 1 exhaust manifold bolthead has disappeared before I've even turned a single bolt.

I have reviewed countless videos on removing exhaust manifolds - including several covering this exact application. I will attempt to incorporate as much of the useful advice and procedures that I've gathered as possible including "soak with penetrating oil", "loosen, tighten, loosen", and "apply heat/shock". However, I have some crazy ideas and sometimes need a reality check to put me in my place. Has anyone considered drilling the flanges perpendicular to the bolts and soaking with penetrating oil? What are the best penetrating oils? (I already have WD40(mediocre) and PB Blaster(never tried it) as well as FreezeOff spray and will likely acquire "Knock'er Loose" as well). I've also purchased a pneumatic die grinder as I'm 100% certain the downpipe studs will not budge, so I'm counting on cutting them. Now I'm wondering if the die grinder can be used to cut/section the manifold to remove as much of the flanges away from the bolts giving better access to the bolts themselves and the holes they go into. Has anyone tried this?

As part of my exhaust manifold adventure, I have also purchased intake manifold and valve cover gaskets as well as a VVT solenoid. I have valve cover leaks that I'd really like to address and I suspect that the intake ports are gunked up with sludge/blowby oil. I'll have a fair portion of the top of this motor open so I should gain decent access to the manifold and bolts.

Does anyone have good experience or advice?
Thanks!
 

Mooseman

Moderator
Dec 4, 2011
25,317
Ottawa, ON
Funny you should ask. I had just watched this video recently and the way he does it makes a lot of sense, especially retightening the bolts after you've cracked it loose to prevent the distortion from the manifold.


mrrsm

Lifetime VIP Donor
Supporting Donor
Member
Oct 22, 2015
7,691
Tampa Bay Area
This next link also has a great deal of useful information from quite a few GMTN Members for anyone in need of replacing their GM Atlas 4.2L LL8 OEM Cast Iron Exhaust Manifold with either the Dorman or other After-Market Brands. It is important to know that they sport THICKER FLANGES and thus require LONGER than Stock OEM Fasteners to ensure a proper hold on the IM. Post #20 & #34 has all the information on what to obtain as replacement Bolts:

 
Last edited:

TequilaWarrior

Original poster
Member
Dec 5, 2011
576
Central Pennsylvania
Funny you should ask. I had just watched this video recently and the way he does it makes a lot of sense, especially retightening the bolts after you've cracked it loose to prevent the distortion from the manifold.


I literally watched this video less than 10 minutes before posting. It makes sense and I will attempt to incorporate his advice into what I'm attempting to do.
 

TequilaWarrior

Original poster
Member
Dec 5, 2011
576
Central Pennsylvania
This next link also has a great deal of useful information from quite a few GMTN Members for anyone in need of replacing their GM Atlas 4.2l LL8 OEM Cast Iron Exhaust Manifold with either the Dorman or other After-Market Brands. It is important to know that they sport THICKER FLANGES and thus require LONGER than Stock OEM Fasteners to ensure a proper hold on the IM. Post #20 & #34 has all the information on what to obtain as replacement Bolts:


The manifold I ordered is the Davico one from RockAuto. I suspect it's the original design with the original thin flanges. If it's the revised design with the thicker flanges I have a very well equipped local hardware store that has the third largest bolt selection I've ever seen. If they don't have the bolts I'd need, I'll gladly order them. I'm probably going to make a "broken bolt drill guide" before I start on the manifold as well. Regardless, I will absolutely not rush through this. I've been working from home for almost 10 weeks and probably have at least 4 more weeks of work from home. So, I won't be pressed for time, thankfully. If I have to leave it set over night or a few days to get the right tool or right bolts, I'm ok with that.
 
  • Like
Reactions: mrrsm

Mooseman

Moderator
Dec 4, 2011
25,317
Ottawa, ON
I used hardware store 10.8 hardened bolts. Since they didn't have the shouldered version, I used washers. They held up for 6 years and they came out without issues when I scrapped the truck and kept the manifold.
 
  • Like
Reactions: mrrsm

TequilaWarrior

Original poster
Member
Dec 5, 2011
576
Central Pennsylvania
Well, I'm more impatient than I had hoped. I couldn't resist and started taking things apart as soon as the manifold arrived earlier today. Aside from some shipping damage to the packaging and the fact that one of the downpipe studs is missing, the manifold looks "okay". I would consider it "cheap", but I also didn't pay much for it. My new O2 sensor and O2 sensor socket should arrive tomorrow.

So after removing some pieces to gain better access (you know the drill), I found that the bolt heads were a dead perfect 1/2". I literally soaked every bolt and it's corresponding position on the block with PB Blaster. I ended up using less than half a can. Over an hour later I started trying to loosen bolts and to my absolute shock I was able to loosen all but 3 bolts without what I would call "difficulty". I didn't even get out a breaker bar. The three that are yet to be loosened are the two outside and the one in the center. The front one because I still need to remove the steering pump, the rear one because I didn't have anything to stand on, and the center one.... because I ran out of (rhymes with "gas"). Tomorrow, I'll rehit those bolts with PB Blaster and let them sit for over an hour again, then try again. Loosening 8 without incident is far better than I feared.

Has anyone done any grinding to the ports on the exhaust manifold? Was it worth the effort? What did you use?
 

Mooseman

Moderator
Dec 4, 2011
25,317
Ottawa, ON
You mean gasket port matching? Haven't heard of anyone doing that here.
 

TequilaWarrior

Original poster
Member
Dec 5, 2011
576
Central Pennsylvania
You mean gasket port matching? Haven't heard of anyone doing that here.

Exactly. I wouldn't even consider it if the manifold that I got was a little higher quality. Man, these runners are ROUGH....
 

Maverick6587

Member
Dec 16, 2018
730
Sterling Heights, Michigan
I plan on gasket matching the exhaust manifold on the 6L. I saw the following youtube video for details, on if it actually increases HP or not (if it's worth it). It seems worth it, even if it's just a stock daily driver.


Mooseman

Moderator
Dec 4, 2011
25,317
Ottawa, ON
It certainly can't hurt. Anything that can help flow should help however how much is debatable.
 

TequilaWarrior

Original poster
Member
Dec 5, 2011
576
Central Pennsylvania
I'll post photos once I get the manifold completely out of the engine bay, but it's no longer attached to the head.
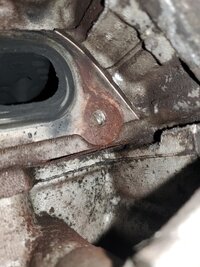
Broken Bolts: 2 1/2.... 2 before I bought it and one broke inside the head at the slightest application of loosening torque.
All told the last 3 bolts on the manifold for cylinders 6 and 5 were doing nothing... both of them were sheered off at the flange and the lower tab on the manifold port is broken off completely.
I gave up on the downpipe studs. I'll be purchasing impact extensions and socket (have everything else) tomorrow. THey'll either come off or snap.... then I get to attempt to extract the two rear broken bolts. The front broken bolt broke probably 5 or 6 threads in and based on its appearance I'm not yet 100% convinced that it wasn't broken before I started ..... not quite sure what I'm doing about that, yet. May use a drill guide and give the old 'easy out' a shot.... not hopeful for that though.
 
  • Like
Reactions: mrrsm and Mooseman

NJTB

Member
Aug 27, 2012
612
Flemington, NJ
Try using a left turning drill bit to get it out. I'm real wary of EZ outs because if they break in the hole, you have a real problem. They're harder than the drill.
If it happens, about the only shot you have is to try and break it with a punch, shatter it and get it out in pieces.
 

Mooseman

Moderator
Dec 4, 2011
25,317
Ottawa, ON
I don't suppose you have a welder? Apparently THE way to get them out is to weld a nut on them and back them out.
 
  • Like
Reactions: mrrsm

TequilaWarrior

Original poster
Member
Dec 5, 2011
576
Central Pennsylvania
I don't suppose you have a welder? Apparently THE way to get them out is to weld a nut on them and back them out.
I've seen that work VERY well.
Unfortunately, I don't. I've been tempted to build one (out of a microwave) a time or two, but haven't yet.

I ended up slotting the two broken bolts sticking out of the block. I got the back one to turn 1/4 turn with a flathead bit connected to a ratchet until it started slipping out of the slot too much. Then I switched to vice grips and got maybe two turns before it seized up good where it still sits. I put the vice grips to the second to last bolt and through repeated grip & 1/16 turn, regrip, etc.... I got it out.
So 50/50 for the day.

Oh, and I got the manifold out of the car. I ended up easily removing one of the nuts, cutting through the manifold to cut through another stud and by the miracle of (cursing and throwing tools around) removing the last nut with a makeshift 3 foot prybar. The absolutely baffling thing is that I was using a pneumatic impact rated for like 300 lb-ft and it wouldn't freaking budge or break the nuts/studs.

So, now I'm down to 1 broken bolt sticking out of the head and 1 bolt broken off in the head.

20200530_190457 (Large).jpg20200530_190502 (Large).jpg20200530_190519 (Large).jpg20200530_190408 (Large).jpg20200530_190532 (Large).jpg20200530_190438 (Large).jpg20200530_190516 (Large).jpg
 

TequilaWarrior

Original poster
Member
Dec 5, 2011
576
Central Pennsylvania
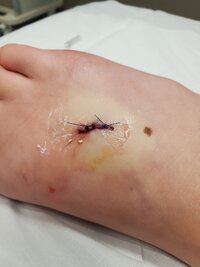
So, my 9 year old daughter decided she HAD to close the windows in the garage at 11 PM and ended up kicking the old exhaust manifold because she didn't see it in the dark. 3 stitches and 4 hours at the ER later, we finally got to go to bed. I'm so sick of working on this thing.
20200531_032341 (Large).jpg
 

TequilaWarrior

Original poster
Member
Dec 5, 2011
576
Central Pennsylvania
I'm ready to pour thermite into the top of this &^%$&^%$ thing. With a right angle drill adapter I was able to drill into the front bolt. I tried using a "speed out".... it just ground up the bolt right where it was. So I drilled more and tried an easy-out.... it wouldn't bite. Now I've got an off center hole 90% of the way through this bolt.
And the rear bolt will not budge, period. The vice grips are crushing the threads and it still won't budge.
 
  • Sad
Reactions: Mooseman

Mooseman

Moderator
Dec 4, 2011
25,317
Ottawa, ON
Only thing I can think of is to drill out the hole and tap it. Might have to go to one size larger. Only thing dangerous here is drilling into the water passage, which @MRRSM is acutely aware of and might be able to offer more advice.
 

bfairweath

Member
Oct 20, 2013
95
Neenah, WI
Dunno if you still have any broken off bolts that are sticking out of the head. If so, get yourself an Irwin 5/16-8mm bolt extractor. It works like butter. I bought a set several years ago when tackling this job based on a recommendation from another member. Think I removed three "headless" bolts with it. They came out easier than the unbroken ones.

I had one bolt that was broken flush with the head. That was another story...
 

BaconBandage

Member
Dec 24, 2018
16
NE Mass
:iagree:I'll second the Irwin bolt extractor. That and freeze-off got the headless bolts in the far back out easily. As far as the one broken flush with the head? It's still in there, with a bit of bolt extractor. Luckily it's in the middle of the flange and doesn't leak :woohoo:
 

Mooseman

Moderator
Dec 4, 2011
25,317
Ottawa, ON
I'd try to find a welder to beg, borrow or rent. Lots of videos on YT on how to use it to weld on a nut. The heat from the welding also helps loosen it up at the same time.
 

TequilaWarrior

Original poster
Member
Dec 5, 2011
576
Central Pennsylvania
I'm going to check my local hardware store in the next couple days for a set of the Irwin bolt extractors. Irwin also makes a multi-spline screw extractor - if I can find one with a deep enough reach, I may try that. If all else fails, I'll drill all the way through and use nitro glycerin from the back.
 

mrrsm

Lifetime VIP Donor
Supporting Donor
Member
Oct 22, 2015
7,691
Tampa Bay Area
Here are a few more suggestions:

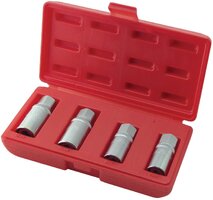
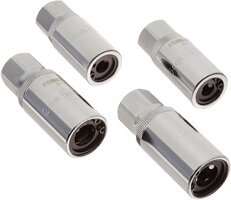
(1) Obtain the OEM Brand Model # 27140 Kit as it and other, more expensive ones like it (via Assenmacher & GearWrench on Amazon) that are the BEST Tools that will RELIABLY and EASILY remove any remaining Broken Off Studs WITH at least a 1/4" to 3/8" Length of the Stud present above the Aluminum Head Flange Surface. Make certain that Broken Off Bolt is NOT Lubricated:

Available via Amazon for just under $27.00 with FREE S&H:


OEMBOLTEXTRACTIONKIT1.jpgOEMBOLTEXTRACTIONKIT2.jpg

THIS is How These Tools Work:


(2) Take your Old MLS Exhaust Flange Gasket and place one end of the S/S holed area OVER the remaining Broken Stud and then use either a Dremel Tool or a Small Angle Grinder and Slowly and Carefully...Grind down the remaining Broken Bolt smooth and even with the S/S MLS Gasket surface.

(3) Then...use a Center Punch and carefully make a Centered Guide Divot in the top of the ground-off bolt end.

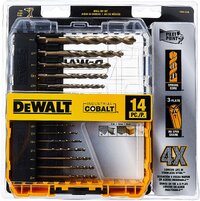
(4) Obtain a DeWalt Cobalt Drill Bit Set # DWA-1240 that features a PILOT TIP ends on the Drill Bit Flutes:

Available on Amazon for $27.00 with FREE S&H:

DEWALTCOBALTDRILLKIT.jpg

(5) Use consecutively Larger Drill Bits and Carefully and Slowly Drill into the Broken Bolt Shank no more that 10mm Deep. DO NOT TILT THE DRILL and DO NOT RUSH. The Maximum Depth of the Holes in the LL8 Aluminum Head is 30mm.

(6) Introduce a Carbide Steel Fluted Design EZ-Out after removing around 1/3 of the center mass of the Bolt. DO NOT BEND THE EZ-OUT using any lateral motions. These Bits are Very Strong... but only when going STRAIGHT IN AND STRAIGHT OUT. Take your Time. If the smaller EZ-Outs cannot remove the Broken Bolt shank... then move on to the Next Larger Cobalt Pilot Tipped Bit and use a Larger EZ-Out afterwards that until the Bolt yields and unwinds.
 
Last edited:
  • Like
Reactions: Mooseman

budwich

Member
Jun 16, 2013
2,043
kanata
I'm going to check my local hardware store in the next couple days for a set of the Irwin bolt extractors. Irwin also makes a multi-spline screw extractor - if I can find one with a deep enough reach, I may try that. If all else fails, I'll drill all the way through and use nitro glycerin from the back.
I like the nitro idea. :smile: It is a god ugly job. I had one done by GM under the warranty program (just inside the 10 year / 100k miles mark). It took them 3 days as opposed to the 1 day schedule. The work last 2.5 years. :-( Of course, I did the second replacement ... almost got thru it except for one broken bolt at the front. :-( Drilling is difficult at best. The odds of traveling off center / angle is high because of the work space. I ended up retapping the hole one size larger in the end because of the drilling result. The welding idea is probably the best.... check if you have any "mobile tech welders" in the area that might come out to your house on do something for you. Good luck. I also had some fun with the alignment / fit of the replacement manifold in terms of bolt holes. The old manifold was even more "hilarious" as it really didn't align at all... which I think the dealer mechanic heated to bend "a bit"... :smile:
 
Last edited:
  • Like
Reactions: Mooseman

TequilaWarrior

Original poster
Member
Dec 5, 2011
576
Central Pennsylvania
I'll probably take a day or two off from working on this thing. It's given me red tinted tunnel vision. I'm not thinking clearly and I've stopped being careful.
 
  • Like
Reactions: Mooseman

TequilaWarrior

Original poster
Member
Dec 5, 2011
576
Central Pennsylvania
I have the exhaust manifold, intake manifold, injectors, and valve cover all off the engine, finally. The intake ports on the head are awful! I haven't seen that much gunk built up in an intake since.... well, I guess it was literally 24 years ago, on another Oldsmobile.
Regardless, I've tried scraping as much of this gunk out of the head as I can. It's "so-so". Has anyone had any luck removing this stuff? Would kerosene be a possiblity?
I've sprayed down the intake manifold and valve cover with engine degreaser.... it barely did anything.
Also, I'm going to try and check out my injectors. I saw a how-to that showed using a 9volt to open the injector while you spray through it. I might give that a try.
Pics of cover, intake, and engine to come soon.
 

mrrsm

Lifetime VIP Donor
Supporting Donor
Member
Oct 22, 2015
7,691
Tampa Bay Area
These are the BEST "Solutions" for these different problems:

For De-Carbonizing the Engine Head:

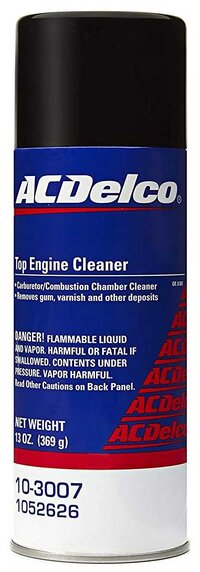
Use2-3 Spray Cans of ACDelco TEC (Top Engine Cleaner). This Foaming Chemical should be liberally sprayed all over the Engine Head after making a cardboard rectangular box along with using a large Garbage or Yard Trash Bag for a "Bath Tub" Liner. THIS Stuff will completely dissolve all Gas Gum and Carbon Build Up in 2-4 Hours. Do NOT perform this task inside of your home or garage as the fumes are extremely Toxic.


ACDELCOFOAMINGTEC.jpgACDELCOFOAMINGTEC.jpgACDELCOFOAMINGTEC.jpg

For the De-Greasing and Cleaning The Intake Manifold:

Same Trick with Plastic Lined Cardboard Box... but use GUNK Engine Cleaner first ...

LOOK at the Low Price Amazon has on the Smaller Cans of this stuff!


GUNKENGINEDEGREASER.jpgGUNKENGINEDEGREASER.jpgGUNKENGINEDEGREASER.jpgGUNKENGINEDEGREASER.jpgGUNKENGINEDEGREASER.jpg

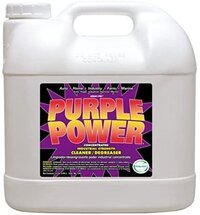
...and later if necessary... you can completely submerge the IM under a 1/2 Gallon of re-useable Purple Power De-Greaser and Hot TAP Water. Either Home Depot and Lowes online sell Deep Black Plastic Containers for Mixing Concrete that will serve to hold large items like the Intake Manifold while under submersion as well:


PURPLEPOWER.jpg


That should do it... :>)
 

TequilaWarrior

Original poster
Member
Dec 5, 2011
576
Central Pennsylvania
I think I have some purple power in a cabinet somewhere and thanks to multiple moves in the past 8 years I have containers to spare. I'll mix up the purple power and soak the intake and valve cover.
Question on the Top Engine Cleaner - I've seen various statements on the use of this stuff including yours. If any of that cleaner gets into the intake ports on the head, wouldn't that risk getting said cleaner and "gunk" into the combustion chamber? Would this create the potential for damaging the rings, or bending valves trying to compress liquids in the chamber?
 

TollKeeper

Supporting Donor
Member
Dec 3, 2011
8,052
Brighton, CO
I prefer to use Easy-Off Oven Cleaner to de-grease an engine. Works wonderfully.
 

mrrsm

Lifetime VIP Donor
Supporting Donor
Member
Oct 22, 2015
7,691
Tampa Bay Area
Please DO NOT USE Oven Cleaners containing Sodium Hydroxide on ANYTHING Made of Aluminum (Which this Engine and Engine Head are Primarily Cast from):


Moving on... Technically... According to GM TSB on their method for using this Amazing ACDelco TEC Stuff... Getting it INSIDE of all of the Cylinders in quantity is PRECISELY the idea behind its Use.

That TSB gives a long explanation about "How to Mix the Pure Liquid TEC (NON-FOAMING Flavor) with High Octane Gasoline...." and then... after disabling the Fuel Pump via removing the PDC Fuel Pump Relay, they hang the Pneumatic Cylinder filled up with Fuel-TEC Mixture from the raised hood and after connecting up the Pressure Line to the Fuel Rail, they Start the Engine and allow it to run on this "Chem-Gas Syrup".

Once the Motor Starts, they let this mixture Burn and Clean Out the Carbon Build Up inside the Combustion Chamber and from around the Four FUBAR'd Up Valve Seats in the Six Upper Combustion Chamber..." ...and so on and so forth.

So this Powerful"Purple Jesus" Stuff is meant to Bust Up any Horrendous Carbon Deposits and side-step any need to Remove the Engine Head on GM Atlas LL8s that are NOT presenting with the same symptoms your Motor presently evinces.

It WILL be necessary to Change your Engine Oil AND the Oil Filter afterwards... and you should perform this next procedure by FIRST by Draining the Oil presently inside the Crankcase after the ACDelco TEC Treatment has been allowed to remain on top of each open Cylinder long enough to dissolve ALL of the Carbon Build Up and turning it into some "Black Mung Carbon Soup". That Rancid Stuff will collect and pool on the tops of all Six Pistons. Afterwards, just wipe out each Cylinder and Piston Head with Clean, Low Lint Blue Scott Shop Towels. AVOID BREATHING THESE TOXIC FUMES!!!

After the Re-Installation of the Engine Head, Re-Fill the Engine Crankcase with (6) Quarts of Cheap Organic 5W-30 Motor Oil PLUS (1) Quart of High Detergent Automatic Transmission Fluid. Install a Cheap, Temporary Oil Filter just prior to this in order to collect and clean out all of junk inside the Engine that this solvent will dissolve and dislodge after the TEC De-Carbonizes your Stuck, Gas Gummed Up Piston Rings at the same time. This Chemical WILL pass those Rings and end up contaminating your present Motor Oil in the Crank-Case.

Follow the procedure of allowing the Engine to Idle for around 10-15 Minutes and Do NOT Raise the RPM. Immediately afterwards, Shut Down the Motor and immediately Drain the Junk Oil Out and R&R the Cheap Oil Filter in exchange for either a Mobil1 or a K&N Brand Oil Filter. Then Re-Fill the crankcase with (7) Quarts of a Full Synthetic 5W-30 Motor Oil...Like Mobil1 ...FTW.
 
Last edited:

gmcman

Member
Dec 12, 2011
4,656
Late to the party again, did you get the rear bolt out yet? I changed my manifold last year and the rear snapped flush. It was a mother to get out as I had to purchase a close-quarter drill, then carefully drill the bolt, then tap the head. The water jacket is very close to the bolt holes and exhaust port by design, so be careful if you have to drill.

Believe me, you want someone who knows how to get the bolt out, even if you have to pay them a hunge to come over.

May involve heat and wax, then welding a nut onto the stud.

As far as the intake, just clean it and roll on, install a new gasket.

I replaced my injectors also and it seemed to smooth the response, change the evap solenoid also while you are there. Also replace the fuel pressure regulator.

If your engine does not tick when starting for a few seconds I would leave the valvetrain alone. If it does tick, then maybe replace the lash adjusters.

Original starter? Now is a great time to replace it.

As far as top engine cleaning....look into the spark plug holes, are the piston crowns clean? If so, don't worry about the top engine cleaning.

Back to the exhaust bolt. You are in real good shape right now with an exposed portion. I would absolutely take your time and source someone to remove it, or yourself if you find the right method.

Once it snaps flush, it really is a PITA to re-tap or remove the remaining.
 

TequilaWarrior

Original poster
Member
Dec 5, 2011
576
Central Pennsylvania
Late to the party again, did you get the rear bolt out yet? I changed my manifold last year and the rear snapped flush. It was a mother to get out as I had to purchase a close-quarter drill, then carefully drill the bolt, then tap the head. The water jacket is very close to the bolt holes and exhaust port by design, so be careful if you have to drill.

Believe me, you want someone who knows how to get the bolt out, even if you have to pay them a hunge to come over.

May involve heat and wax, then welding a nut onto the stud.

As far as the intake, just clean it and roll on, install a new gasket.

I replaced my injectors also and it seemed to smooth the response, change the evap solenoid also while you are there. Also replace the fuel pressure regulator.

If your engine does not tick when starting for a few seconds I would leave the valvetrain alone. If it does tick, then maybe replace the lash adjusters.

Original starter? Now is a great time to replace it.

As far as top engine cleaning....look into the spark plug holes, are the piston crowns clean? If so, don't worry about the top engine cleaning.

Back to the exhaust bolt. You are in real good shape right now with an exposed portion. I would absolutely take your time and source someone to remove it, or yourself if you find the right method.

Once it snaps flush, it really is a PITA to re-tap or remove the remaining.

Over the past couple of days I've cleaned the intake and valve cover using a purple degreaser. I'm very impressed with how well that stuff works. Valve cover and intake look dang near brand new.
I have the fuel rail & injectors out. They actually look decent. I was worried they'd be gnarly but the nozzle area looks fabulous.
As for the intake ports, I'm going to clean them as best I can using a cloth and solvent. Not sure which solvent just yet. Might start with acetone. I already scraped out as much of the carbon/oil goop that was in there. It literally was choking the intake ports on the head and manifold to about 60-70% of their normal size.
As for the broken bolt protruding from the block, it still is. I bought a screw extractor set that I'm going to try to use the tap handle to back out the bolt. I'm also going to try to use the extractor on the bolt that's broken below the surface but I don't hold much hope for it.
 

gmcman

Member
Dec 12, 2011
4,656
I tried an extractor for the outside but didn't have enough bite, yours looks like it has potential. Before you start cranking on the stud, I would ask a machinist what they would use and try to prep it as much as possible. I believe they heat the bolt and apply a wax to let it wick inside the threads.
It may take a lot of heat as the head will act like a mega-heatsink.

Due to the location, the rear bolt requires more of a specialized approach to remove it if it breaks flush or recessed to get a straight-on angle, ie, drill, short drill bits, newly created swear words, etc.

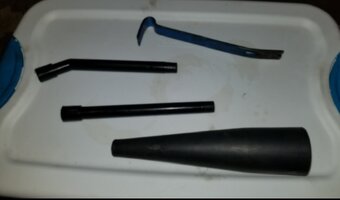
I would use a shop vac to clean the intake ports. The carbonized oil is definitely a pain but if you look behind the intake valves you will likely see that it's spotless.....let's cherish these times of non-direct injection...lol.

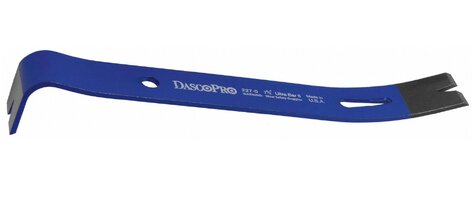
I used a mini prybar similar to this with a shop vac and scraped the goop back to the nozzle from inside the intake port.

Screenshot_20200605-112732_Google.jpg


The injectors will likely look great, but that's not saying what the spray pattern looks like. If you have....I don't know, 150K or more miles, and you have them out already.....might as well if you're debating it.
 
  • Like
Reactions: TequilaWarrior

mrrsm

Lifetime VIP Donor
Supporting Donor
Member
Oct 22, 2015
7,691
Tampa Bay Area
IIMS (If I May Suggest)...

(1) Get some "Scott Blue Shop Towels" as they have a very low threshold for shedding Fine Pulp Fibers into the Engine.

(2) Soak a few of them wadded up with the GUNK Foaming Spray and stuff them into the Intake Ports down the Length of the Engine Head soaking for around 30 Minutes or so.

(3) Gently wipe out the "Black Carbon Mung" and Motor Oil Build Up caused by the Oil Vapors passing through the Upper Valve Cover-> PCV Rubber Tube->Plenum->Throttle Body->Intake Manifold.

(4) Follow up with some more Dry Scott Blue Shop Towels and mind the chambers just above where the Valves are seated for anything "chunky" breaking loose and dropping down inside... as per @gmcman.
 
Last edited:
  • Like
Reactions: TequilaWarrior

gmcman

Member
Dec 12, 2011
4,656
Forgot, how old are your motor mounts? Now is also an excellent time to replace them. Use only genuine AC Delco mounts though.

Edit to add: I could go on and on, but trying to save your labor down the road. Also add to your list is the thermostat and coolant temp sensor, doesn't get much easier than with the intake off....:smile:

The molded PCV hose between cyl 3&4 is likely petrified by now and cracked at the ends, also may want to put that in your cart.
 
Last edited:
  • Like
Reactions: TequilaWarrior

gmcman

Member
Dec 12, 2011
4,656
(1) Get some "Scott Blue Shop Towels" as they have a very low threshold for shedding Fine Pulp Fibers into the Engine.

Those towells work well. After I vacuumed the loose crud, I cut up an old T-shirt and soaked the pieces with gasoline to loosen the crud around the intake port....not as safe or skin friendly though. I followed up with another vacuuming.

My weapon of choice for catching loose crud in the intake ports, PC cleaning attachments, plus mini prybar.

Screenshot_20200605-121748_Gallery.jpg
 
  • Like
Reactions: TequilaWarrior

TequilaWarrior

Original poster
Member
Dec 5, 2011
576
Central Pennsylvania
All good suggestions. Thanks guys.
I did remove the injectors. They look great. I might trigger them with a nine volt for testing/cleaning purposes.
I was able to clean the injector ports by stuffing towels into the valve area. The cleaner soaking into the towels also loosened up all the gunk in the intake ports. They are cleaner than any engine I've taken apart personally. I tried tightening my tap handle around the protruding bolt and it wouldn't grip. I might just break down and grab a collet/chuck style stud extractor. I haven't had the chance to try my new extractor set on the front bolt - that might be a lost cause. I may just punt, install the manifold (after giving the back bolt one more try) and trying to fab up one of those exhaust flange repair clamps. It's an odd spot and I haven't found one for this application, but maybe I'll have some luck. Depending on how annoyed/desperate I get I may call my local tool rental place and see if they have a small welder I can get, then weld a nut on the protruding bolt.

Thermostat and temp sensor were done shortly after I bought it.... but thinking about it that was like probably 100,000 miles ago.
With ~240,000 ish miles I'm just trying to get maybe 50k to 100k more out of it. Amazingly, motor mounts seem to be in great shape and I haven't experience any issues that I can blame on the mounts.
While I have it apart, I'm doing the CPAS, O2 sensor, intake gaskets, throttle body gasket, exhaust manifold, exhaust manifold gasket, and fire ring. I'm on the fence about the belt tensioner but admittedly it needs one.
 

mrrsm

Lifetime VIP Donor
Supporting Donor
Member
Oct 22, 2015
7,691
Tampa Bay Area
If the Engine "Shakes Like a Chihuahua Sh*tting a Peach Pit" at idle... Chances are ...the Motor Mount(s) may have "soured". Bad Motor Mounts WILL invite serious Flexing and Stress upon the Brittle Cast Iron Manifold (plus CAT Forward Piping) and the excess movement of the Motor, Left and Right as the Torque changes and easily Rocks the Engine to and fro... WILL encourage the Exhaust Manifolds to want to Flex and Crack within the Webbing areas ...and of course... Snap off some of the Exhaust Manifold Bolts over time.

You can determine if the Motor Mount "Rubber Bulbs" have any splits or cuts in their carcasses if you find the presence of any "Black, Sticky Goo-Gel" that has Oozed and Squirted out from them as the Motor bounces up and down. This Goo will wind up decorating the adjacent Wheel Wells with what looks like Old Motor Oil, but will NOT easily wash away from places where there will be NO other obvious sources for any Motor Oil to Access, Drip or Spray the Areas down.

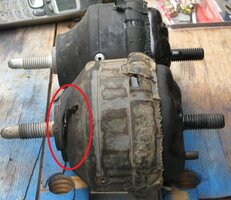
That Gel remains "sticky" forever and... with nothing else around the Wheel Well to dislodge any Oil Deposits that high up on them... its presence will convince you that the Motor Mounts might have been compromised if you find that any of this "Stuff" is really there. Please note that the sturdy Motor Mount Carcasses can still LOOK and maintain their shapes as Normal... but as you can see in the image below... ANY hole in their "Bulbs" will be the "Weak Points = Leak Points" :

Photo Courtesy TV:

TBENVOYLEAKINGMOTORMOUNT1.jpg
 

TequilaWarrior

Original poster
Member
Dec 5, 2011
576
Central Pennsylvania
Back bolt is OUT!
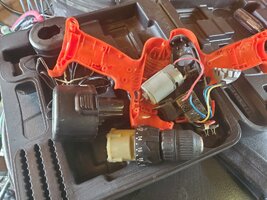
I had an epiphany last night. I have an old cordless drill that hasn't seen the light of day in probably 10 years. So I sacrificed it for it's chuck. I had to smash some plastic bits and use a pneumatic cut off tool but got it exactly the way I needed it and voila! I was able to turn the bolt out with a pair of channel locks.
20200606_140257 (Large).jpg
20200606_162243 (Large).jpg

As for the front bolt.... I decided to try what I originally wanted to do. I managed to drill through the dead center of a good exhaust bolt - by hand - right down through the shank. I cut it off and cleaned up the threads. I then screwed this drilled bolt into the hole with the broken off bolt and used it as a guide to redrill the broken off bolt in the dead center. I drill in deeper than I had prior. I was then able to get an EZ-Out to bite - first time in my LIFE. However, I can't get a tap handle around it. I've managed to make teeny tiny fractions of a turn with some serious grunting using two different sized adjustable crescent wrenches. I'm going to see if I can find a 4mm square drive socket tomorrow to hopefully get better/straighter torque on it using a ratchet.
20200606_175335 (Large).jpg
I was able to turn the EZ-Out about 1/4 turn from this picture. I've got it PB Blaster soaking into there now. Hopefully I can find the square drive socket tomorrow. I'm spent for the day.
 

Forum Statistics

Threads
23,312
Posts
637,815
Members
18,517
Latest member
javier perez

Members Online