SOLVED! code P0300. What to do next?

mark'stb

Original poster
Member
Dec 17, 2011
94
This is on my 2007 4.2l, 270,000+ mile TB. Short story made long. I added about 12 gallons of possibly bad fuel. My truck sat a few hours and when I went to drive it, it went about 1/2 mile, lost power, barely running, and a flashing cel. Stalled and would not start. I added some heet and pumped out the fuel. Added fresh 93 octane. It would then restart but ran poorly with a flashing cel and code p0300. Changed coils and plugs, same issue. Runs but continual misfire on cyl #5 and #6 reading the misfire graph on my tech2. Figuring water in the bad gas and laying in the fuel rail at those cylinders, I replaced all the injectors today. Still have misfire on 5 & 6. No signs of coolant in the oil, no white smoke from the tailpipe. Fuel pump replaced a 228,000 miles. Fuel pressure is 62psi key on, engine off and 62 psi running. Any suggestions? Next step is a cylinder leak test next weekend.
 

mrrsm

Lifetime VIP Donor
Supporting Donor
Member
Oct 22, 2015
7,700
Tampa Bay Area
With your Motor approaching the 300,000 Mile Mark (Which deserves "Much Kudos" for The Owner sustaining that platform for such a long time) it is very likely that you have an excessive amount of Black Carbon and Greasy Gas Gum built up around the Valve Seats. Remember ...there are Four Valves Per Cylinder here. These are some of the issues worth investigating along with suggested ACTIONS to take in response:

(1) Excessive Carbon Build Up can obstruct the Closing Off and Sealing Up of the Valves sufficiently to reduce an effective Compression Seal and manifest here as a Loss of Power.

(2) Excessive Carbon Build Up in the Upper Cylinder and Piston Heads can INCREASE Compression inviting Pre-Ignition Events and can cause P0300 Mis-Fire Codes once the "Quench" level is increased enough at just before TDC to cause the Fuel/Air Combo to ignite at the wrong time.

(3) Excessive Gas Gum and Carbon Build Up can cause the Two Compression Rings on and around each Piston to literally get them GLUED inside of the Lands and Grooves such that due to their "Low Tension"...they cannot rebound enough to maintain decent Compression at or near TDC. This results in a Power Loss from Poor F/A Combustion will Result. Piston Slap and Engine Oil Contamination from Fuel are also increased in this condition.

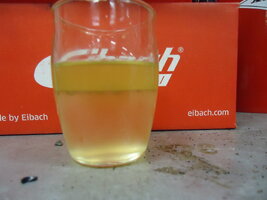
ACTION: Check the Engine Oil Dip-Stick for an excessive odor of Gasoline.
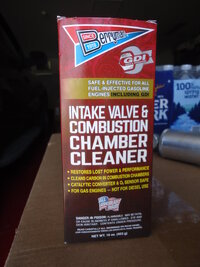
ACTION: Using ACDelco Top Engine Cleaner as described in these Threads can help with above Items 1,2 & 3:


ACTION: Perform a Cylinder Balance Test and Relative Compression Test.

(4) A Clogged CAT... can present with Too Much Back Pressure and prevent the proper exhalation of burned F/A By-Products. Take note that most of any Excess Fuel and Engine Oil residue that escapes the Cylinders through the Exhaust and into the CAT will never pass through the Tail Pipe or leave any Tell-Tale Signs of a problem. The Excess Fuel in the Exhaust of an unregulated engine will quickly destroy a CAT and a Blinking DASH Light means "FIX ME SOONEST ...OR ELSE".

ACTION: Perform a Back Pressure Test. This will reveal if this is a problem.

ACTION: Remove the Upstream O2 Sensor and drive the vehicle around for a short distance to see if the Engine Power substantially improves.

(5) A Loose Intake Manifold can be an unusual source for the P0300 Codes due to allowing unmetered Air to by-pass the ability of the PCM to use the other F/A Sensors to figure out precisely how much Fuel to deliver to each Cylinder as an Atomized Spray.

ACTION: This one is unlikely if you used NEW "O" Ring Style Figure (8) IM Gaskets and tightened down the IM with a mere 89 Inch Pounds of Force. Hopefully, none of the (10) 10mm IM Trapped Fasteners were broken off while you were replacing your Fuel Injectors as having P0300 Codes would become inevitable.
 
Last edited:

mark'stb

Original poster
Member
Dec 17, 2011
94
thanks for the reply. 1, 2, 3 possible but seems strange all of a sudden when it ran fine in the morning. This came on all of a sudden, not an over time problem. Item 4, cat has been gutted. I have one of the handful of I6 headers made by Kooks years ago. Item 5- new intake gaskets installed this morning. Have to remove the intake to get to the fuel injectors.
 
  • Like
Reactions: mrrsm

mrrsm

Lifetime VIP Donor
Supporting Donor
Member
Oct 22, 2015
7,700
Tampa Bay Area
These Three Links will put you in the Wheel House of what to do next...


I'm in favor of using an Oscilloscope for Diagnostic Situations like this one presents you with as well:


Mooseman

Moderator
Dec 4, 2011
25,324
Ottawa, ON
Before a leakdown test, do a compression test. If you have weak cylinders, try adding oil in the cylinders as a wet test to check the rings. If compression is good, a leakdown test is unnecessary.

I know you replaced the coils but did you check for actual spark? Maybe wiring damage is preventing them from firing.
 
  • Like
Reactions: mrrsm

mark'stb

Original poster
Member
Dec 17, 2011
94
Swapped # 5 & 6 coils with #2 & 3. Still missing on 5 and 6. I used GM coils and injectors. All good suggestions. Keep in mind, it ran fine going to work, added questionable gas, left work, and drove about 1/2 mile. That's when it stalled and would not restart.
 

Mooseman

Moderator
Dec 4, 2011
25,324
Ottawa, ON
Could have burned a couple of valves because of the gas (maybe, I don't know how that happens). But adjacent cylinders, I'd be thinking the head or gasket. Anything in or with the coolant? What's the oil like?
 

mark'stb

Original poster
Member
Dec 17, 2011
94
no oil in coolant, no coolant in oil, and no white smoke from the tailpipe. I pulled the plugs and they look crappy even though they don't have more than 5 minutes run time on them. I'll see if I can borrow a compression tester tomorrow. Cylinder leak tester I have, but it's at work. Could a bad maf cause this? Not sure how on only 2 cylinders though. I did look into the bores with a bore scope and nothing looks out of the ordinary.
 

TJBaker57

Member
Aug 16, 2015
2,900
Colorado
Just a thought or two here...

Are you using only the misfire graph to judge the misfires at #5 & #6?? Have you considered or done a cylinder balance test, punching out each cylinder one at a time with the the Tech 2 while observing the rpm drop or other??

Have you pulled all the spark plugs for a visual examination?

Just some thoughts...
 

59840Surfer

Member
Apr 19, 2020
85
Montana
1. Not likely that two cylinders developed burnt valves at the same time.
2. Bad fuel --- if there even is anything like that --- also cannot pick on just two cylinders.
3. Carbon buildup won't all of a sudden jump up and bite an engine either.
4. Ditto for errant fuel injectors, fuel pump or any filters --- they are not typically cylinder-selective.

What IS interesting is that two neighboring cylinders are reporting a problem.

I'd pull the Fuel Pump fuse and crank the engine, listening to the cranking rhythm.
You might be able to discern a "lump" or an uneven beat in the cranking rhythm --- and that might be a blown head gasket between the two.

If so --- this might be the first time I've heard of an actual blown head gasket on the Atlas engine line ... but at that mileage --- who knows --- this is kinda virgin territory.

But two adjacent cylinders with a problem is a red flag.
 

mrrsm

Lifetime VIP Donor
Supporting Donor
Member
Oct 22, 2015
7,700
Tampa Bay Area
At around 37:00 to 39:30 Minutes into this Excellent Misfire Diagnostics Video by Paul "Scanner" Danner during one of his Pro Training Course Sessions... He explains the reasons for precisely WHY the Cylinder that is adjacent to the one actually experiencing a "Primary Misfire" can cause this "Sympathetic" Misfire phenomena to occur:

 
Last edited:

mrrsm

Lifetime VIP Donor
Supporting Donor
Member
Oct 22, 2015
7,700
Tampa Bay Area
The OP has not as yet confirmed that he recently installed an OEM Quality Fuel Pump (Bosch, Delphi, ACDelco). This prompts me to suggest investigating the possibility of having Erratic Fuel Pressure as another possible cause of having Mis-Fires and the presence of the P0300 Code.

The Diagnostic Problem

Merely measuring Fuel Pressure will never reveal the actual condition of any working Fuel Pump. In order to prove out its functionality, it will be necessary to visualize its inner workings in a manner that is both effective AND mechanically non-invasive. To that end, using an Oscilloscope is the BEST way to manage this job:

The Diagnostic Tools:

(1) A Windows 10 Laptop Computer.
(2) A PICO-Scope Model #2204A Oscilloscope with USB Cable.
(3) A FREE Installed PICO-Scope Automotive Software Suite.
(4) A "Fuse Buddy" Loop installed in place of the Fuel Pump Fuse.
(5) A 'Low Amperage' Current Clamp with a BNC Connector.

The Diagnostic Purpose:

To Visualize the Fuel Pump Electric Motor Oscillations, their Frequency and the Pump RPM Measurements indicating its Pumping Strength becomes instantly available on screen while the Engine is Running that can be varied from Idle to WOT.

The presence of any Breaks or Gaps evident in the repetition of the graphed images showing the Electrical Peaks & Valleys displayed as "Voltage Over Time" caused by the passing of each Copper Commutator will become VERY clear on the Laptop Screen.

The Hands-On Diagnostic Procedures being Demonstrated:


The FREE-to-Download PICO-Software is available from this Link:


Dec 5, 2011
576
Central Pennsylvania
no oil in coolant, no coolant in oil, and no white smoke from the tailpipe. I pulled the plugs and they look crappy even though they don't have more than 5 minutes run time on them. I'll see if I can borrow a compression tester tomorrow. Cylinder leak tester I have, but it's at work. Could a bad maf cause this? Not sure how on only 2 cylinders though. I did look into the bores with a bore scope and nothing looks out of the ordinary.


"How this happened" is something to figure out after determining what's broken. "crappy" looking plugs will easily cause a misfire - but I may have things out of order.
I'm not sure I'm reading your posts correctly, but I believe you changed the plugs once already after this problem started... if that's the case and the crappy looking plugs are the NEW ones just installed (you said less than 5 minutes run time), you've got something going on that's killing those plugs. Can you post a good pic of the crappy plugs? You may be surprised how much info can be had from looking at the plug itself.
 

mark'stb

Original poster
Member
Dec 17, 2011
94
ok, here's where I am at. keep in mind 271,000+ mile engine. Compression test, all cylinders, 190- 215. 190 being #1. Leak test, 30-65%, 65 is number 1. Tech 2 is showing misfire on 5 and 6. A lot but not really for the mileage. Cyl 5 and 6 are at 35% each. Hear air from the oil fill cap so I am assuming ring sealing. I checked spark at coil 5 and 6 and both have spark. Spark looks the same as 1-4. I can get spark plug pictures tomorrow. When I looked at them 1-4 black and dry. 5 is black and moist. 6 is white and wet. New GM injectors and intake gaskets installed 2 days ago. I didn't notice any broken valve springs or wiped cam lobes when I replaced the cam cover gaskets on Saturday. But, I really did not look that close figuring bad fuel and the water /contaminents settled in the lower part of the fuel rail and replacing the injectors and blowing out the fuel rail would remove said contaminents. i don't hear any valve train noise with the engine "running". Runs rough, cel is flashing, sets code p0300, and cyls 5 and 6 continually scroll on misfire graph using tech2.
 

mark'stb

Original poster
Member
Dec 17, 2011
94
MRRSM, I did install a GM fuel pump installed approx 11,000 miles ago. I've never used a scope to diagnose a problem. Maybe now is the time to buy one and learn how to use it. Any thought of this being a pcm issue with bad injector drivers?
 
  • Like
Reactions: mrrsm

Mooseman

Moderator
Dec 4, 2011
25,324
Ottawa, ON
Since you have a Tech 2, do a fuel injector balance test. Maybe those two aren't firing?
 
  • Like
Reactions: mrrsm

mrrsm

Lifetime VIP Donor
Supporting Donor
Member
Oct 22, 2015
7,700
Tampa Bay Area
Using an Oscilloscope is actually pretty straightforward after you can get past all of the hype, mystery and myths surrounding its use. Take for example the Question of whether or not ANY of your EFIs are misbehaving. There are No "Mechanical" Methods that will compare with doing what follows to find the Truth:

(1) You'll Need a Basic Oscilloscope. Either a Hantek Model #1008C Kit or a PICO-Scope Model # 2204A Unit available on Amazon for around 100 to $150 that will be adequate. You will eventually need a set of HI and LOW Amp Current Clamps, a "Fuse Buddy" and a few inexpensive 20:1 Voltage Attenuators as well.

(2) Watch the available Training Videos. These particular sessions come from Paul "Scanner" Danner and focus on a Basic Introduction to the 4 Channel Professional Grade PICO-Scope that discuss the PICO-6 Automotive Suite that still applies to the less expensive versions of the PICO Scope I mentioned above.

Part 1:

Part 2:

(3) Obtain "Known, Good EFI Wave Forms". Finding out what the correct Wave Forms look like for any particular component in advance of setting up the Equipment on the Vehicle will be the Key to comparing them against what appears on your Laptop Screen during your Tests.

For Example... Here is a CLASSIC Known Good EFI Wave Form that shows a familiar "Bump" in the signal oscillation which proves that after the EFI actuated a spray of fuel, the Pintle Valve successfully closed:

PICOSCOPEEFIWAVEFORM.jpgGOODKNOWNEFIWAVEFORM.jpg

(4) Practice, Practice Practice... Learn how to use this equipment and there is almost nothing that uses Electricity that cannot be examined by using an Oscilloscope on a Laptop Computer as "Voltage Over Time" Graphed Wave Form.

These devices can help you figure out What is Broken versus What is WORKING in any Automotive setting. Science BEATS Guessing with a Parts Cannon... Hands Down. :>)

As for performing a Simple, Relative Compression Test in a Non-Invasive Manner... Watch from around 8:45 onward into this Excellent Video:

 
Last edited:
  • Like
Reactions: BrianF

mark'stb

Original poster
Member
Dec 17, 2011
94
I'm starting to lean towards carbon build up on the back of the intake valves. I don't think I have any sticking valves since there is no valvetrain noise. This engine has had nothing but Mobil 1 oil since the first oil change at 300 miles. The intake ports on the manifold and head have what I would call wet carbon build up. I'm trying to borrow a tool to inject top engine cleaner into the in take tract. I already have one for cleaning fuel injectors, but since they are new, I rather not use it. At 271,xxx miles, maybe I should just get a crate engine.
 

mrrsm

Lifetime VIP Donor
Supporting Donor
Member
Oct 22, 2015
7,700
Tampa Bay Area
Like most Owners of GMT360 Vehicles... We prefer the 'Demons We Know' to those that might come from "The Undiscovered Country" of either Brand New or Non-GM SUVs. There really has never been an adequate replacement SUV to compare with our Trailblazers, Envoys and Rainiers.

With that in mind... as long as the Body and Interior of your Truck is sound and without accident damage, obtaining a Summit Racing Re-Manufactured Engine in the Correct Year to PCM version is definitely a viable option and is one not fraught with the worry of either cobbling together your own Re-Build or relying upon the questionable condition of "Good" Used LL8 Motors lying pavillion around every single Salvage Yard in North America.

One precaution to be aware of is that regardless of where you obtain any GM 4.2L LL8 Crate Motor... Extra Care must be applied to Pre-Oiling the Engine with it Mounted on an Engine Stand... preferably through the Oil Gallery Port located on the Oil Filter Manifold facing front on the Passenger Side of the Engine:

LL8OILGAALLERYPORT1.jpgLL8OILGAALLERYPORT2.jpgLL8OILGAALLERYPORT3.jpg

This is the M16 X 1.50 to NPT Adapter required for inducing the Fresh Motor Oil (Hopefully, with ZDDP as with Royal Purple Brand Engine Break In Oil) under pressure externally into a Bone Dry Block until the Dip-Stick reports that it is topped off. Rotating the Crankshaft by Hand while this is under way is another way to refresh all of the Main Crankshaft Bearings and distribute the Motor Oil around the Valve Train, too:


51EYLRgq3fL._SL1016_.jpg

The reasoning behind this is that while in transit or when carried on transports as varied as Jumpy Freight Trains to Freight Truck Long Haul Carriers... the local vibrations experienced by the motor sitting inside of that Wood Crate will cause every single drop of Motor Oil to strip off and gravity drain from the Bearings, Oil Galleries and Journals...leaving all of the interior Rotating Assemblies... Bone Dry during its First Few Minutes of Running after Start Up.
 
Last edited:

Mooseman

Moderator
Dec 4, 2011
25,324
Ottawa, ON
6 new GM injectors installed last Saturday.
That doesn't prove anything. If there is an electrical issue, new or not, they won't fire.

And since your compression test came out normal, the mechanical health of the engine is not in question. If there was a valve hung up, those two would be way lower.
Compression test, all cylinders, 190- 215.
 
  • Like
Reactions: mrrsm

mrrsm

Lifetime VIP Donor
Supporting Donor
Member
Oct 22, 2015
7,700
Tampa Bay Area
As far as any Carbon Build Up on the Intake Valves.... it actually tends to collect MORE on the Hot Exhaust Valves, Stems and Seats ...since with the design of Modern ECU-PCM Controlled Fuel Injected Motors... No Fuel is EVER deliberately Inhaled along with ostensibly "Filtered Air" such as occurs with the Venturi Inhalation of Gas Vapours along with the incoming Air Stream found in the Old Designs of having fuel inefficient Carburetors mounted atop Intake Manifold Style Fuel/Air Systems from by-gone days.

I forgot to mention that spraying ACDelco Top Engine Cleaner into that Plastic Intake Manifold may have some very negative side effects of weakening or dissolving the PTFE Valve Guide Seals in the Upper Engine Head or perhaps softening or damaging the "O" Ring Style Figure 8 Gaskets surrounding the Intake Manifold Ports.

These images display an LL8 Engine with only 160,000 Miles on it, proving that the Gas Gum - Carbon Laden Two Top Compression Rings trapped alongside each Piston allowed an excessive amount of Combustion Blow By to pressurize the Crankcase and then drive this partially burned crap up and through the Small "Elbow" Tube in between the Valve Cover PCV Port and the Air Chamber Plenum.

Then this material passed through the Intake Throttle Body and down through the IM Runners where that Oily Carbon Paste 'Glommed' itself all over those passages inside of the Intake Ports of the Aluminum Head. So flushing this 'Stuff' down into the cylinders using ACDelco TEC may wind up doing more harm than good:

42761952794_62707d0513_c.jpg42573626825_48e3afd68d_c.jpg43478516241_1051363de9_c.jpg43430226652_f39a094b49_c.jpg42573624705_f0ae4857ac_c.jpg42761946704_f17f915560_c.jpg43430224412_f13627eb22_c.jpg43430223412_85f2a03b89_c.jpg43478511561_cde773a433_c.jpg

This kind of cleaning can only be done satisfactorily after the IM is removed and spraying it down inside and out with "Purple Power" then washing it out with Hot Water and drying it with compressed air. As you can see, the Intake Ports inside the Aluminum Engine Head can be cleaned, but only with great care when using Blue "Scott" Shop Towels soaked with Berryman's B12 so as not to drop anything 'solid' past any open Intake Valves and cause problems down inside of each cylinder.
 
Last edited:
  • Like
Reactions: BrianF

mark'stb

Original poster
Member
Dec 17, 2011
94
I was going by this TSB. Tomorrow's job is to do an injector balance test and verify that the injectors are getting power and ground
 

Attachments

  • carbon buildup.pdf
    1.7 MB · Views: 11
  • Like
Reactions: mrrsm

mrrsm

Lifetime VIP Donor
Supporting Donor
Member
Oct 22, 2015
7,700
Tampa Bay Area
THAT is a Splendid GM TSB Instructional Document that bears out the use and efficacy of ACDelco Top Engine Cleaner as THE Best Method for Carbon Busting the Upper Cylinder Combustion Chambers, Valves, Valve Seats and Piston Tops and Compression Rings...

We have had some members successfully attack this problem using the same solvent, but with a much more dramatic approach by first pulling out the Spark Plugs and either spraying in the Foaming ACDelco TEC... or by Partially Filling each Cylinder with the ACDelco TEC Straight Liquid and allowing that 'Stuff' to Cold Soak in there for around Three Hours.

After some time, the "Black Mung" Dissolved Carbon-Laden Liquid Goo needs to be extracted; either by placing ample "Scott's" Blue Shop Towels and then hand turning the engine over to extract and soak up this VERY Noxious Liquid in stages... or by using a "Turkey Baster" with a Rubber Extension Tube fitted in place to reach down deep inside of the Motor and thoroughly evacuate each Cylinder.

The Cylinders should have a complete elimination of this stuff in order to Avoid Hydro-Locking the Engine and accidentally Bending the Connecting Rods after installing the Spark Plugs back into the Engine Head. Performing an Oil and Oil Filter Change is also necessary, since during these actions... enough of the Solvent will have worked its way past the Piston Rings to drain below and contaminate the Motor Oil in the Crankcase.
 

mark'stb

Original poster
Member
Dec 17, 2011
94
Well, made some progress today, Actually a very little bit of progress. Re did compression test, and leak test. The results were similar to the first time. Compression ok, cylinder leakage is high at 30-60%. Did an injector balance test, all 6 within 2 psi of each other. Ran a can of intake valve decarbonizer. Idles a little better, misfire graph still shows 5 & 6 misfiring, but it doesn't scroll as fast as before .Took a fuel sample. Now here may be my problem. Looks like I still have contaminated fuel by looking at the separation. I did pump out all the fuel last week after adding some dry gas and added 10 gallons of fresh fuel, but this sample does not look right to me. Looks like lots of water and some fuel. But--- why only #5 and 6 missing but not #1-4 if fuel is common to all the injectors? What are your thoughts on the way the fuel looks? I guess I may have to drop the tanks and clean it out. Not looking forward to that. Is there anything I can pour into the tank to disperse or absorb the water?
 

Attachments

  • DSC07061.JPG
    DSC07061.JPG
    404.1 KB · Views: 14
  • DSC07063.JPG
    DSC07063.JPG
    455 KB · Views: 14
  • Like
Reactions: mrrsm

budwich

Member
Jun 16, 2013
2,043
kanata
"end of the bus line".... where is the connection(s) for the fuel rail (ie. what end?). Perhaps cylinders 5 and 6 are at the end and / or lower in engine "elevation" causing an issue with quality of fuel reaching them.
 
  • Like
Reactions: Mooseman

mark'stb

Original poster
Member
Dec 17, 2011
94
old school, very old school, mechanic said to add 99% isopropyl alcohol to the tank to disperse the water.
 
  • Like
Reactions: mrrsm

mark'stb

Original poster
Member
Dec 17, 2011
94
Budwhich, that's what I thought and removed the rail an blew out the rail and replaced the injectors. Still acting like fuel quality as the picture I posted clearly shows. For the hell of it, I marked the levels of the gas on the glass and added some 70% isopropyl alcohol. I looks like it combined with the water. I guess my next step is to pump out the fuel add a gallon or two of 99% ipa, pump it out, then add more fresh fuel/
 

mrrsm

Lifetime VIP Donor
Supporting Donor
Member
Oct 22, 2015
7,700
Tampa Bay Area
With the exception of having Water in The Fuel... THIS Video pretty much covers everything on a 2005 Trailblazer that you have been concerned with on your Vehicle, It will NEVER Get any Better than THIS.

This "True Field Diagnostician" goes through "The Works" with using the proper Diagnostic Equipment (High End Scanner, PICO-Scope with a Laptop and ACDelco Part) and shows his Equipment Set Ups while hunting down a variable P0302 High Misfire Count and nicely touching upon ALL of the prior posts in Your Thread along the way:

 
Last edited:

Mooseman

Moderator
Dec 4, 2011
25,324
Ottawa, ON
That is VERY contaminated fuel. Looks similar to what we pump out of my son's old 04 Silvy that ran like crap. We pump it ALL out and refilled with fresh fuel and water remover and it was fine. No amount of dry gas will remove all that water. We used the truck's fuel pump by disconnecting the fuel line at the rail and jumped the pump relay.

After letting the water separate from the gas to the bottom, poured the gas out and used that in the lawnmower.

The joys of ethanol :mad:
 
  • Like
Reactions: BrianF and mrrsm

mark'stb

Original poster
Member
Dec 17, 2011
94
Today's update. Pumped out the fuel and ordered 4 gallons of 99% isopropyl alcohol. My plan is to add 1 gallon and let it sit a few hours then pump it out. Repeat with gallon #2. Add fresh fuel and another gallon. Save the last gallon. Does this sound reasonable?
 
  • Like
Reactions: mrrsm and Mooseman

Mooseman

Moderator
Dec 4, 2011
25,324
Ottawa, ON
Sounds like a plan. It may sound like a bit of overkill but the amount of water in there is excessive. It's 3/4 water in that pic.
 

mark'stb

Original poster
Member
Dec 17, 2011
94
Today's update. The 99% arrived. $68 for 4 gallons. I poured a gallon into the tank and let it sit a few hours. Bounced the truck a few times to agitate it. Pumped it out and was clear and had a very slight goldish tint. Repeated this with the second gallon and it was clearer than the first. Added 5 gallon of fuel and 1/2 gallon of the alcohol. Started the engine and had a lot less misfires on 5 &6. I attributed this to still contaminated gas in the fuel rail. After about 3 minutes running at 2000 rpm. those cylinders cleared up and is purring at idle for the last 15 minutes. Next step is a test drive.
 

Mooseman

Moderator
Dec 4, 2011
25,324
Ottawa, ON
It might have had misfires on all the cylinders but misinterpreted them as 5 & 6. Looks like it's cleared up good.
 
  • Like
Reactions: mrrsm

Forum Statistics

Threads
23,314
Posts
637,846
Members
18,520
Latest member
Firebaugh86

Members Online

No members online now.