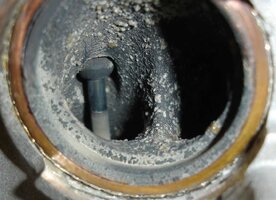
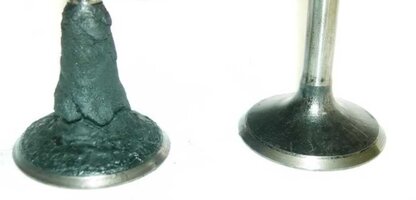
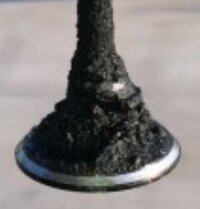
A while back, I made a suggestion to those of us who discover the problem of suffering from EXTREMELY Low Oil Pressure in our GM 4.2L VHME (Very High Mileage Engines) that suddenly present with the Horrible Sounds of Clattering Rotating Assembly Components ...signalling the impending Death Of The Motor just the like this GMTN Member experienced:
The argument I was making back then was that there WAS an Alternative Way to attempt to deal with this issue instead of having to go through the enormous effort to either Pull the Engine Out and Stand Mount it to be able to R&R the Oil Pan ...or perform the same "In The Vehicle Work".
Cavet Emptor:
However... If the Oil Pump Pick-Up Tube "O"-Ring was either Cut or Compromised... The end results of this effort would prove moot.
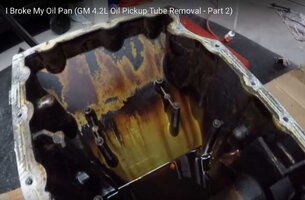
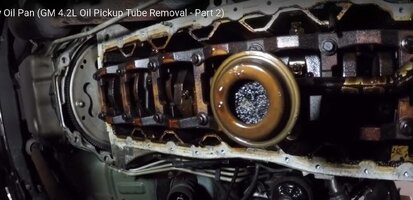
Ordinarily, all of this work is necessary in order to access the likely suspect of having a COMPLETELY CLOGGED OIL PICK UP TUBE or a Damaged "O" Ring. My suggestion back then was to consider trying out this "Passive-Aggressive Chemical Approach" as a Last Ditch - Desperation Effort by first Draining the Old Motor Oil, then Replacing the Old Oil Filter and then Over-Filling The Crankcase with Berryman's Chem-Dip for an extended period of Passive Soaking.
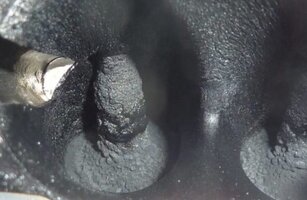
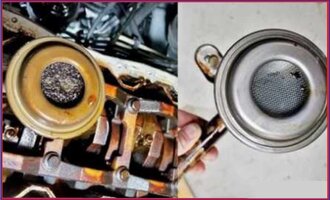
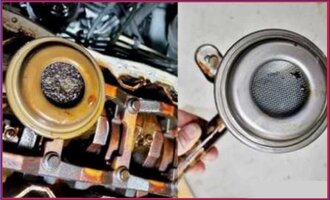
THIS Before and After Captured Image from the Video above shows just how effective this Berryman's ChemDip Passive Chemical Cleaning Solvent is and the Suggested Procedures for its copious use follow on:
(1) Drain-Remove the Old Motor Oil and Oil Filter and replace the Filter after Pre-Filling a Cheap One with Cheap 5W-30 Organic Motor OIl .
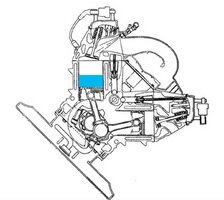
(2) Use a sufficient quantity of Berryman's ChemDip to OVER-Fill the Crankcase with this LOW VOC Carbon-Gas-Gum Lacquer Busting Chemical and allow the Vehicle to SIT for UNDER Four Hours and allow the Chemistry to reach the entire vacant spaces from the Bottom of the Crankcase to the area just above the Crankshaft Cradle.
(3) DO NOT START THE ENGINE OR ROTATE THE CRANKSHAFT... The Berryman's ChemDip Requires NO AGITATION OR SCRUBBING... PERIOD.
(4) Within a Four Hour Period... The Use of Berryman's ChemDip will NOT Harm ANY of the Various Components or Various Metal Types within. Even when being temporarily in an Over-Filled Condition... the Chemical Bath will be WELL BELOW THE POSITIONS OF THE FRONT AND REAR CRANKSHAFT PTFE TEFLON OIL SEALS AND IT WILL NOT DISSOLVE THE ACDELO OEM SILICONE GASKET SEALING THE ALUMINUM CRANKCASE TO THE BASE OF THE ALUMINUM ENGINE BLOCK.
(5) After a considerable period of time... Use a VERY Capacious Drain Pan... and allow the Berryman's ChemDip with all of the Dissolved Black Carbon Mung to Gravity Drain for 30 Minutes. If you want to... You can also use a Garden Pump Hand Sprayer Filled with either Kerosene or Diesel Fuel to follow up by guiding the Wand into the Drain Hole in the Crankcase and spraying upwards with enough of the Fuel Spraying around inside to wash out the remaining residue of the Berryman's ChemDip off of the Lower Rotating Assembly and drain clear of the Crankcase. It is NOT absolutely necessary to perform this latter step.
(6) Once the Draining process has been completed, re-install the Drain Plug (Remember ... the Pre-Filled Cheap Oil Filter is already installed) and Fill the Crankcase with (6) Quarts of Cheap Organic 5W-30 Motor Oil. Pull the Fuel Pump Relay and Turn the Ignition on to rotate the Engine over for 3 X 15 Seconds segments with 30 seconds in between each of the three cycles.
(7) Re-Install the Fuel Pump relay and Start the Vehicle out of doors. Allow the Motor to Idle for 10-15 Minutes and remain inside the Cab of the SUV to monitor the Gauges for Oil Pressure and Coolant Temperature rising and remaining within limits. Note Whether or NOT the "Clattering Sounds" are present. If they remain or have increased... SHUT DOWN THE MOTOR IMMEDIATELY. At this point... You must assume that the Engine is about to Fail and take appropriate actions NOT to cause any further damage by elevating the RPM or by driving the SUV.
(8) If the LL8 Engine responds properly with Good Oil Pressure and proper Dial Gauge readings... after 10-15 Minutes... Shut Off the Motor and while STILL WARM... Perform another Oil Change and Oil Filter R&R using either a Mobil1 or K&N Oil Filter. Drain the Crankcase for the second time of the USED Cheap Organic 5W-30 and remove the Used Crap-Filled Motor Oil then RE-FILL the Crankcase with Mobil1 5W-30 FULL Synthetic Motor Oil.
Keep the Cheap Oil Filter on hand to perform an Autopsy on it later in order to see what if any Additional Carbon Trash Material may have been dissolved loose and collected out from inside the Engine's Innards.
(9) Monitor the Vehicle while performing a 10 Minute Idle with the Final Oil Change and ensure that your Oil Pressure Gauge Readings are NOMINAL. Take the SUV for a SHORT, Local Test Drive with the Two Front Door Windows rolled down and LISTEN carefully for any sounds of untoward engine behavior. If things look and sound good... Take the Vehicle out onto the Freeway and Drive in a NORMAL manner to achieve gradual 4L60E shifts up to legal Highway Speed and Continue to Watch Those Gauges.
(10) If this Berryman's ChemDip Treatment proves successful... Keep the follow-on Consecutive Oil and Oil Filter Changes to Right at 3,000 Miles and Use A High Quality, FULL Synthetic Motor Oil and High Quality Oil Filters.
For "The Doubters" who can't imagine that 'mere chemistry' would actually be capable of bringing back the "Factory New" State of Cleanliness... Just observe what is covered in THIS Video:
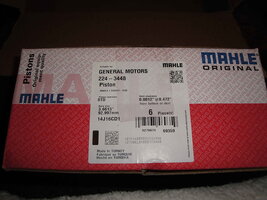
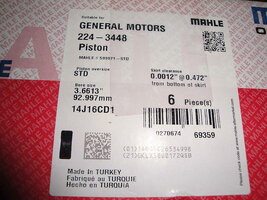
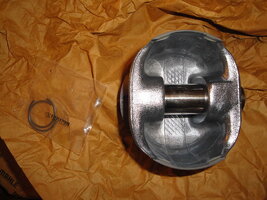
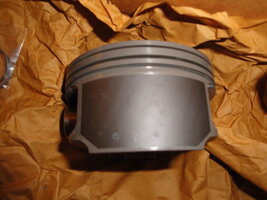
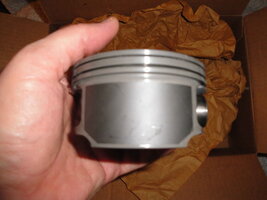
...and View the VOP's prior post about Cleaning Pistons using the Same Method of extended submergence in Berryman's ChemDip:
The argument I was making back then was that there WAS an Alternative Way to attempt to deal with this issue instead of having to go through the enormous effort to either Pull the Engine Out and Stand Mount it to be able to R&R the Oil Pan ...or perform the same "In The Vehicle Work".
Cavet Emptor:
However... If the Oil Pump Pick-Up Tube "O"-Ring was either Cut or Compromised... The end results of this effort would prove moot.
Ordinarily, all of this work is necessary in order to access the likely suspect of having a COMPLETELY CLOGGED OIL PICK UP TUBE or a Damaged "O" Ring. My suggestion back then was to consider trying out this "Passive-Aggressive Chemical Approach" as a Last Ditch - Desperation Effort by first Draining the Old Motor Oil, then Replacing the Old Oil Filter and then Over-Filling The Crankcase with Berryman's Chem-Dip for an extended period of Passive Soaking.
THIS Before and After Captured Image from the Video above shows just how effective this Berryman's ChemDip Passive Chemical Cleaning Solvent is and the Suggested Procedures for its copious use follow on:

(1) Drain-Remove the Old Motor Oil and Oil Filter and replace the Filter after Pre-Filling a Cheap One with Cheap 5W-30 Organic Motor OIl .
(2) Use a sufficient quantity of Berryman's ChemDip to OVER-Fill the Crankcase with this LOW VOC Carbon-Gas-Gum Lacquer Busting Chemical and allow the Vehicle to SIT for UNDER Four Hours and allow the Chemistry to reach the entire vacant spaces from the Bottom of the Crankcase to the area just above the Crankshaft Cradle.
(3) DO NOT START THE ENGINE OR ROTATE THE CRANKSHAFT... The Berryman's ChemDip Requires NO AGITATION OR SCRUBBING... PERIOD.
(4) Within a Four Hour Period... The Use of Berryman's ChemDip will NOT Harm ANY of the Various Components or Various Metal Types within. Even when being temporarily in an Over-Filled Condition... the Chemical Bath will be WELL BELOW THE POSITIONS OF THE FRONT AND REAR CRANKSHAFT PTFE TEFLON OIL SEALS AND IT WILL NOT DISSOLVE THE ACDELO OEM SILICONE GASKET SEALING THE ALUMINUM CRANKCASE TO THE BASE OF THE ALUMINUM ENGINE BLOCK.
(5) After a considerable period of time... Use a VERY Capacious Drain Pan... and allow the Berryman's ChemDip with all of the Dissolved Black Carbon Mung to Gravity Drain for 30 Minutes. If you want to... You can also use a Garden Pump Hand Sprayer Filled with either Kerosene or Diesel Fuel to follow up by guiding the Wand into the Drain Hole in the Crankcase and spraying upwards with enough of the Fuel Spraying around inside to wash out the remaining residue of the Berryman's ChemDip off of the Lower Rotating Assembly and drain clear of the Crankcase. It is NOT absolutely necessary to perform this latter step.
(6) Once the Draining process has been completed, re-install the Drain Plug (Remember ... the Pre-Filled Cheap Oil Filter is already installed) and Fill the Crankcase with (6) Quarts of Cheap Organic 5W-30 Motor Oil. Pull the Fuel Pump Relay and Turn the Ignition on to rotate the Engine over for 3 X 15 Seconds segments with 30 seconds in between each of the three cycles.
(7) Re-Install the Fuel Pump relay and Start the Vehicle out of doors. Allow the Motor to Idle for 10-15 Minutes and remain inside the Cab of the SUV to monitor the Gauges for Oil Pressure and Coolant Temperature rising and remaining within limits. Note Whether or NOT the "Clattering Sounds" are present. If they remain or have increased... SHUT DOWN THE MOTOR IMMEDIATELY. At this point... You must assume that the Engine is about to Fail and take appropriate actions NOT to cause any further damage by elevating the RPM or by driving the SUV.
(8) If the LL8 Engine responds properly with Good Oil Pressure and proper Dial Gauge readings... after 10-15 Minutes... Shut Off the Motor and while STILL WARM... Perform another Oil Change and Oil Filter R&R using either a Mobil1 or K&N Oil Filter. Drain the Crankcase for the second time of the USED Cheap Organic 5W-30 and remove the Used Crap-Filled Motor Oil then RE-FILL the Crankcase with Mobil1 5W-30 FULL Synthetic Motor Oil.
Keep the Cheap Oil Filter on hand to perform an Autopsy on it later in order to see what if any Additional Carbon Trash Material may have been dissolved loose and collected out from inside the Engine's Innards.
(9) Monitor the Vehicle while performing a 10 Minute Idle with the Final Oil Change and ensure that your Oil Pressure Gauge Readings are NOMINAL. Take the SUV for a SHORT, Local Test Drive with the Two Front Door Windows rolled down and LISTEN carefully for any sounds of untoward engine behavior. If things look and sound good... Take the Vehicle out onto the Freeway and Drive in a NORMAL manner to achieve gradual 4L60E shifts up to legal Highway Speed and Continue to Watch Those Gauges.
(10) If this Berryman's ChemDip Treatment proves successful... Keep the follow-on Consecutive Oil and Oil Filter Changes to Right at 3,000 Miles and Use A High Quality, FULL Synthetic Motor Oil and High Quality Oil Filters.
For "The Doubters" who can't imagine that 'mere chemistry' would actually be capable of bringing back the "Factory New" State of Cleanliness... Just observe what is covered in THIS Video:
...and View the VOP's prior post about Cleaning Pistons using the Same Method of extended submergence in Berryman's ChemDip:
Last edited:

 If that doesn't do it, I'm probably gonna replace the oil pump with a high pressure and volume pump.