Blckshdw's Projector Retrofit Builds

Blckshdw

Original poster
Moderator
Nov 20, 2011
10,684
Tampa Bay Area, FL
Figure it's about time to get all my projector retrofit stuff chronicled and documented. This will also be a way for you guys to keep me honest and motivated when I start slacking. (which tends to happen way too often.)

My first retrofit got started in the spring of 2013 and consisted of the following:

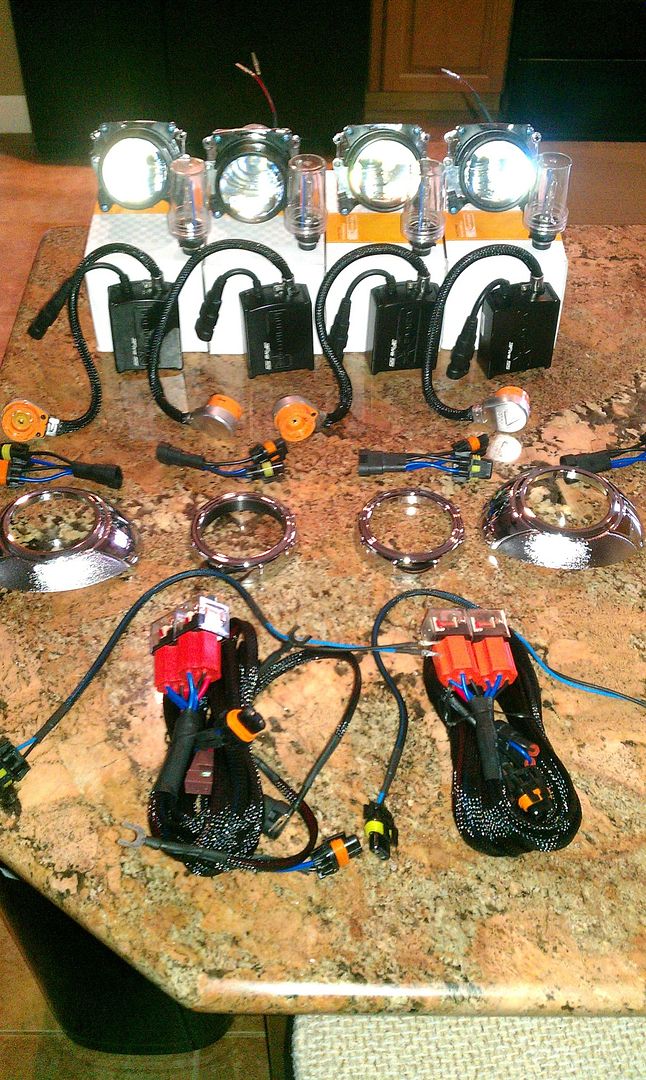
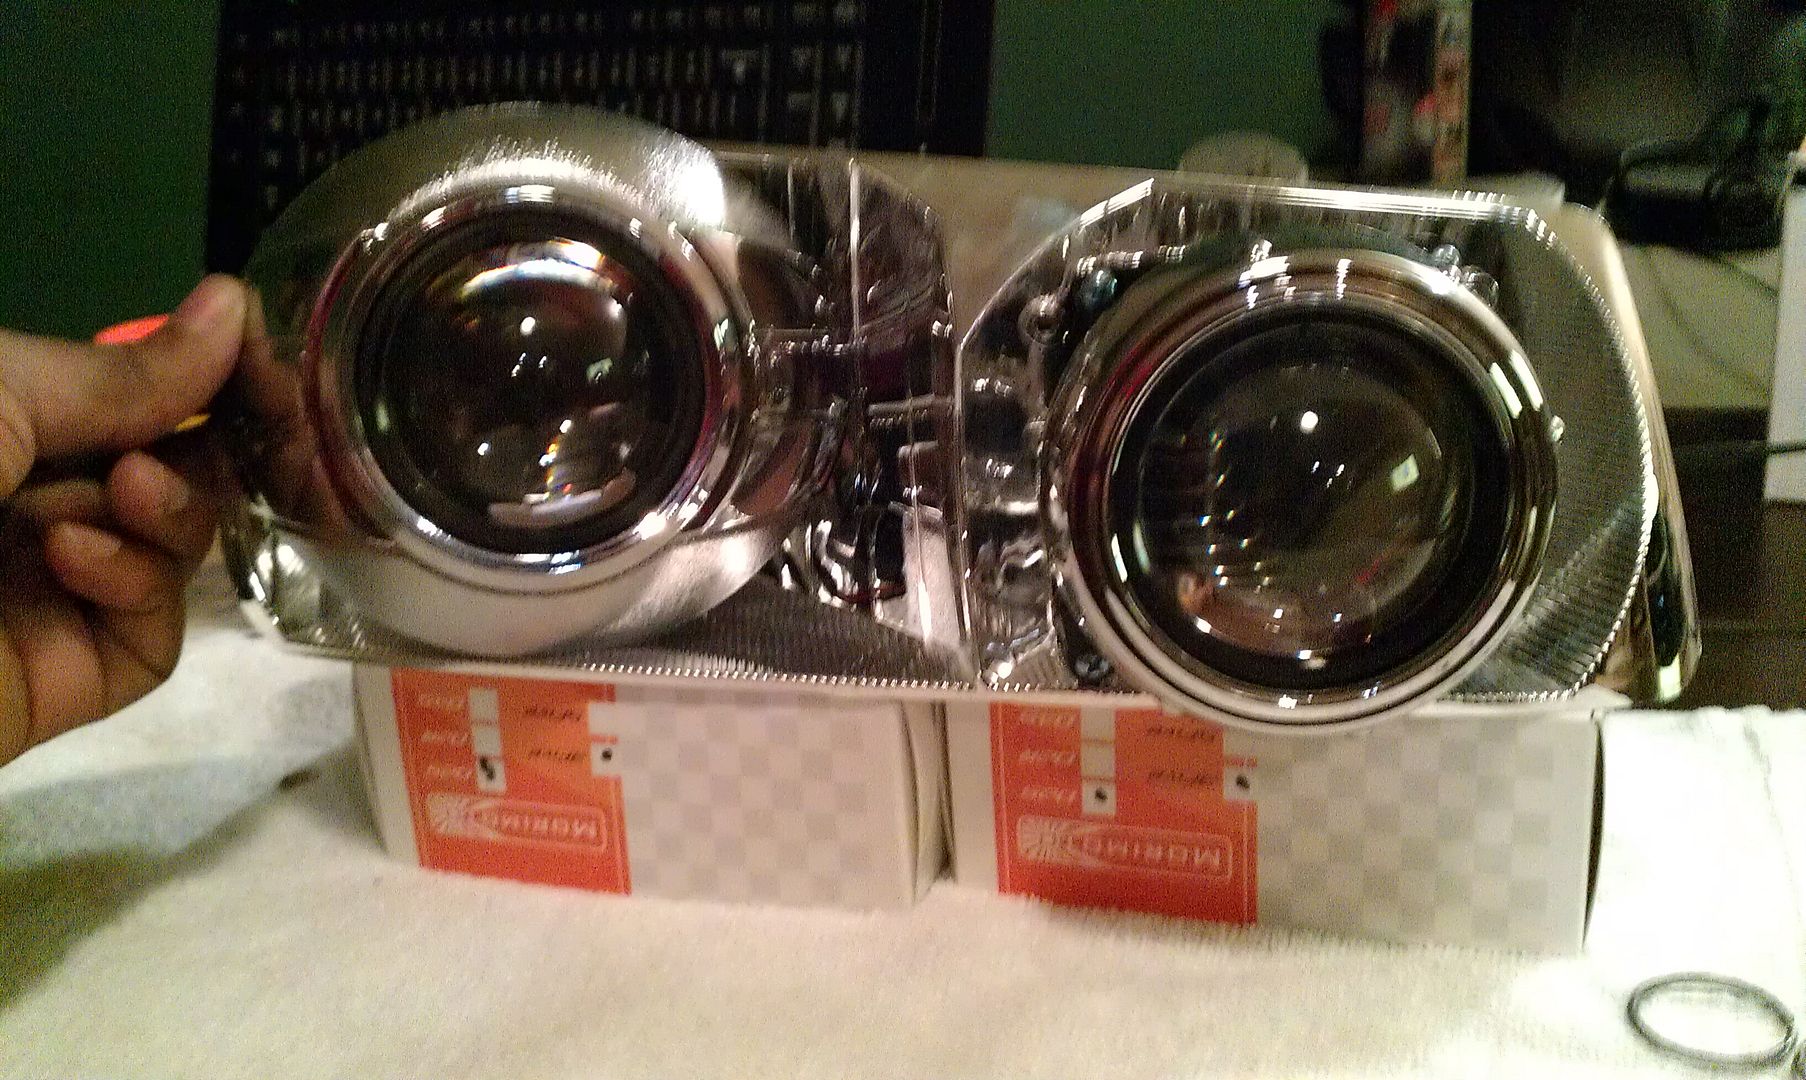
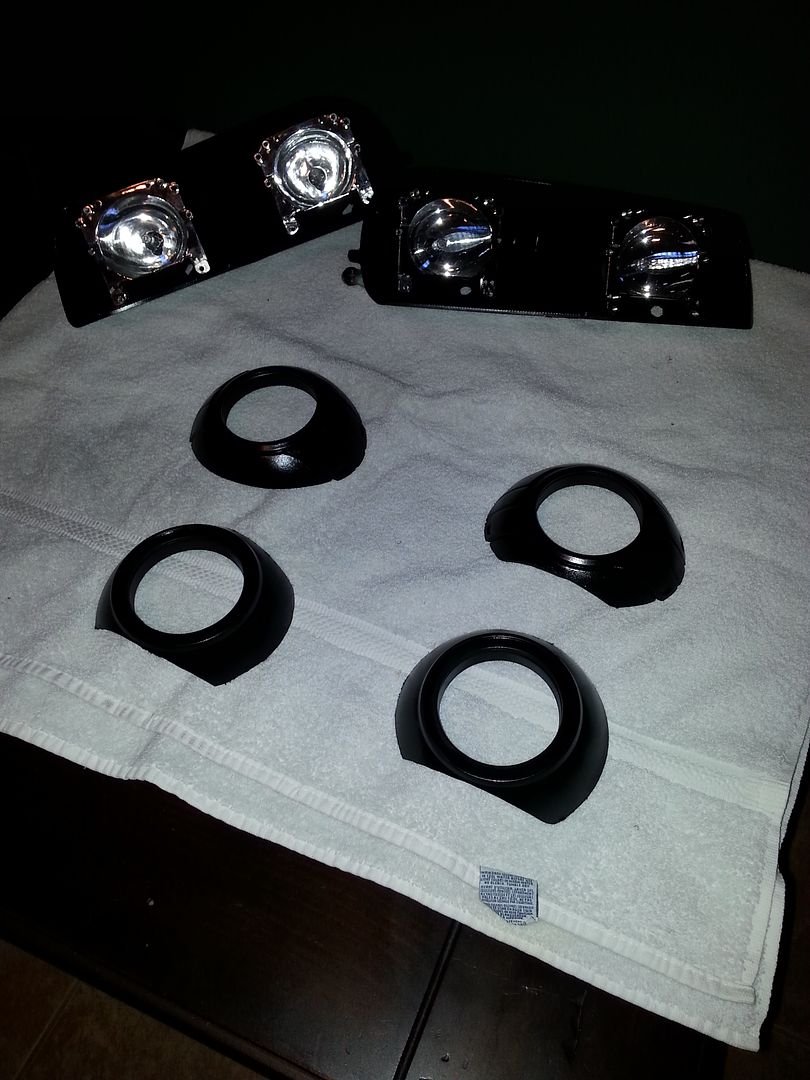
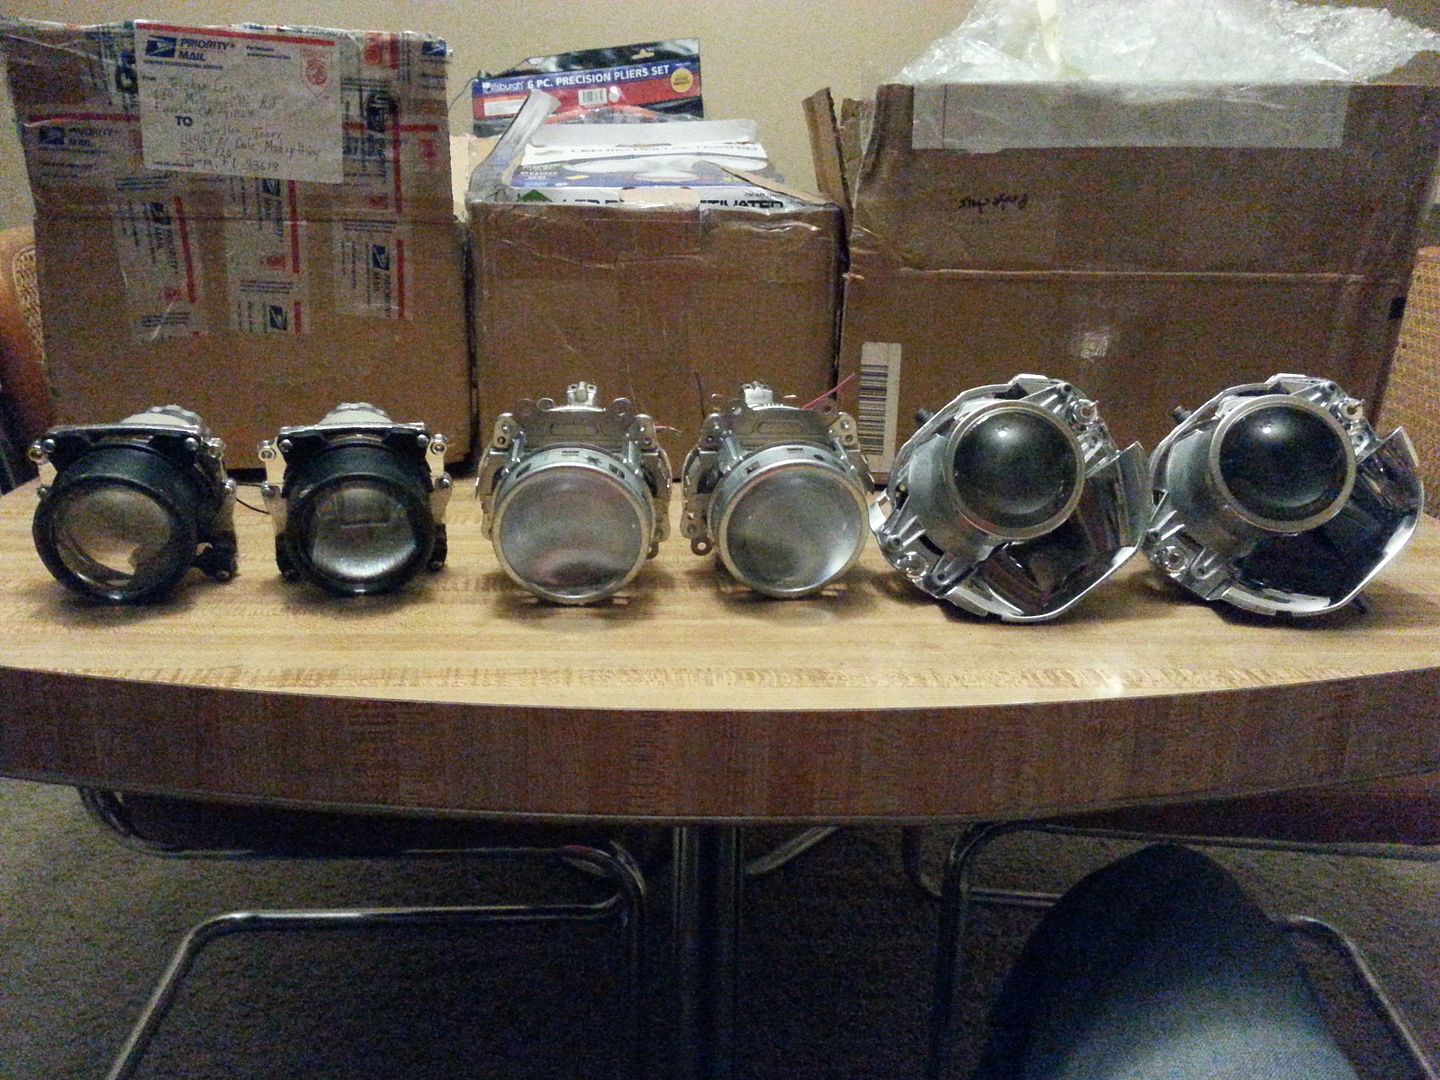
4 x Morimoto Mini D2S projectors
4 x Morimoto 3Five 35W ballasts
4 x Morimoto 3Five 6000K D2S bulbs
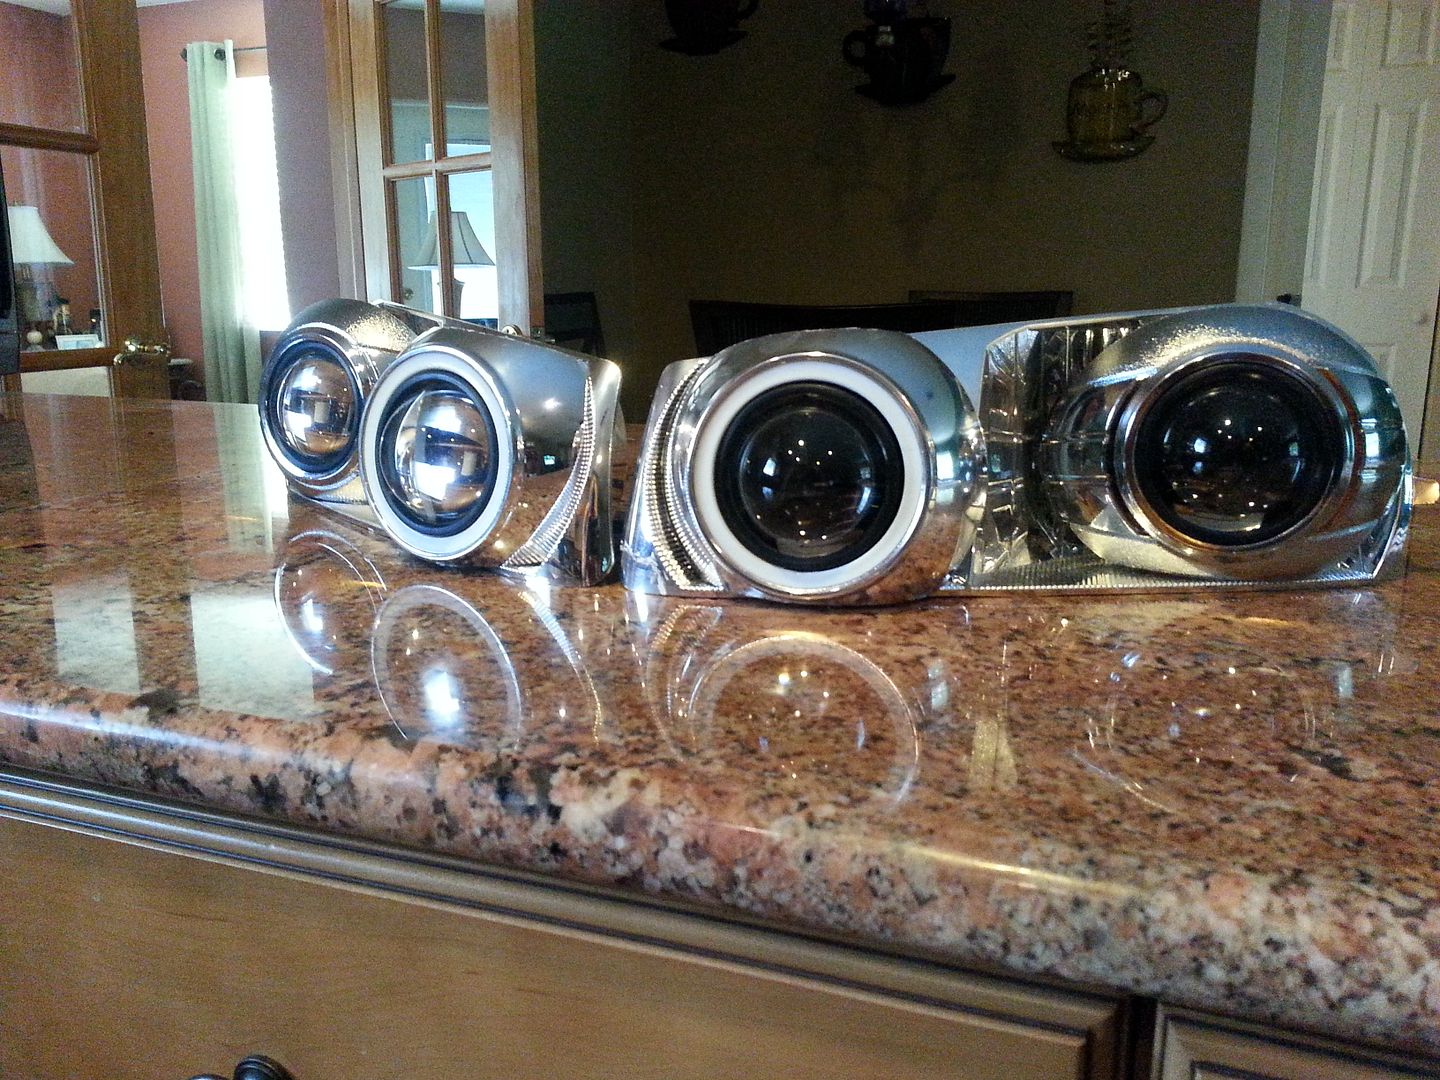
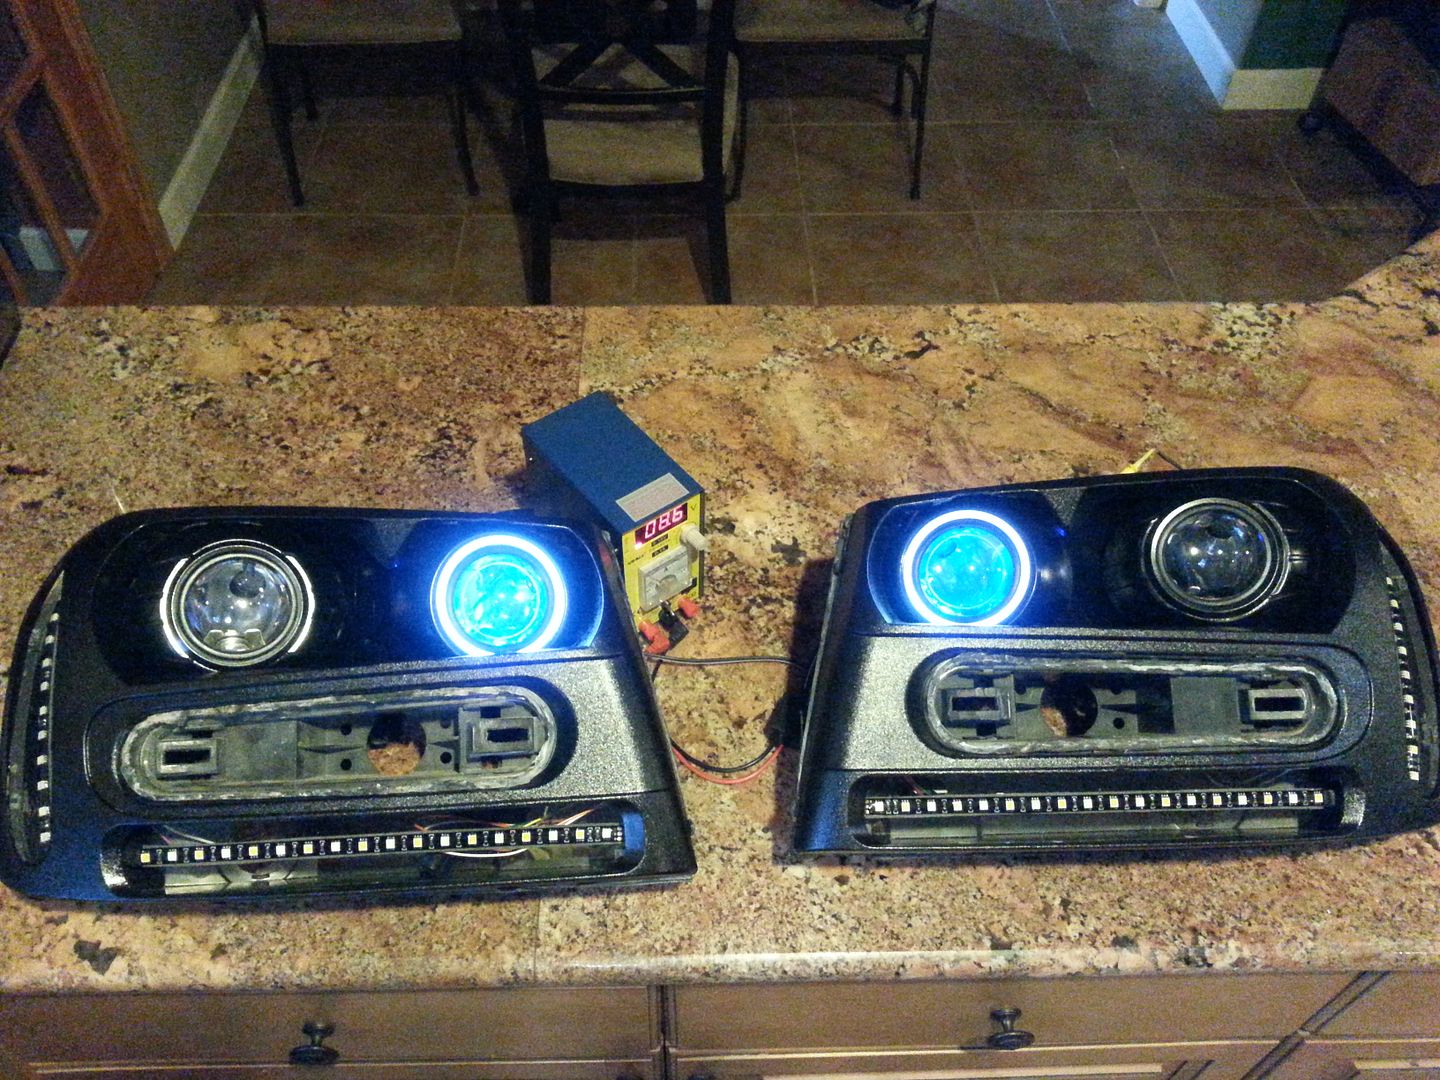
2 x Ocular shrouds
2 x Iris shrouds
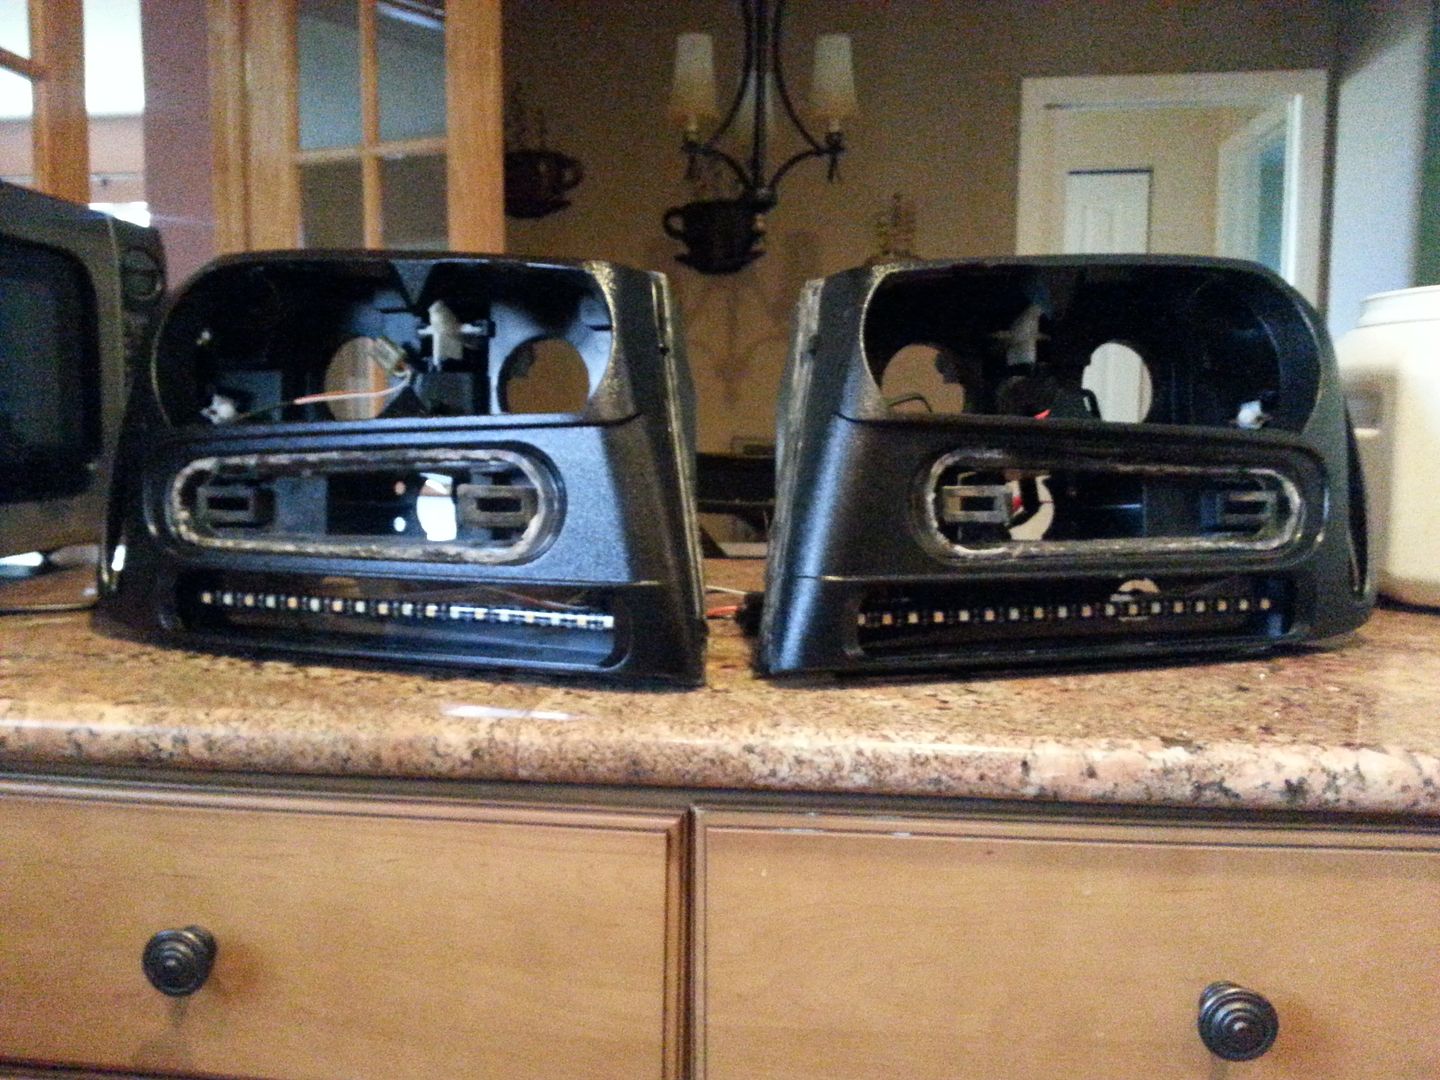
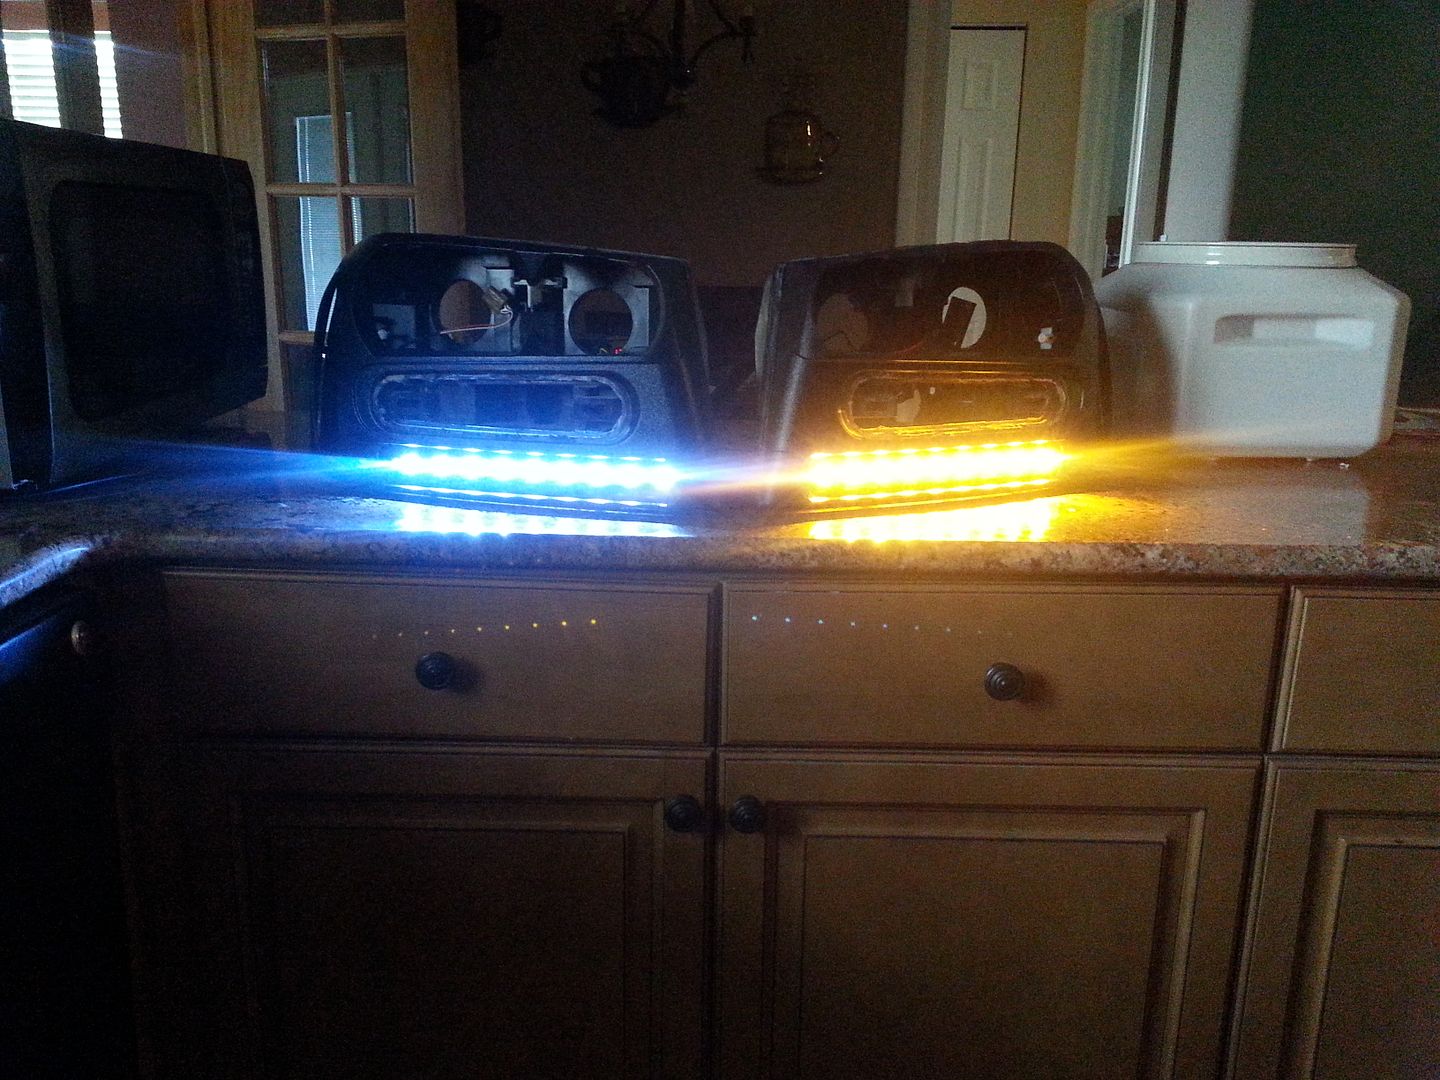
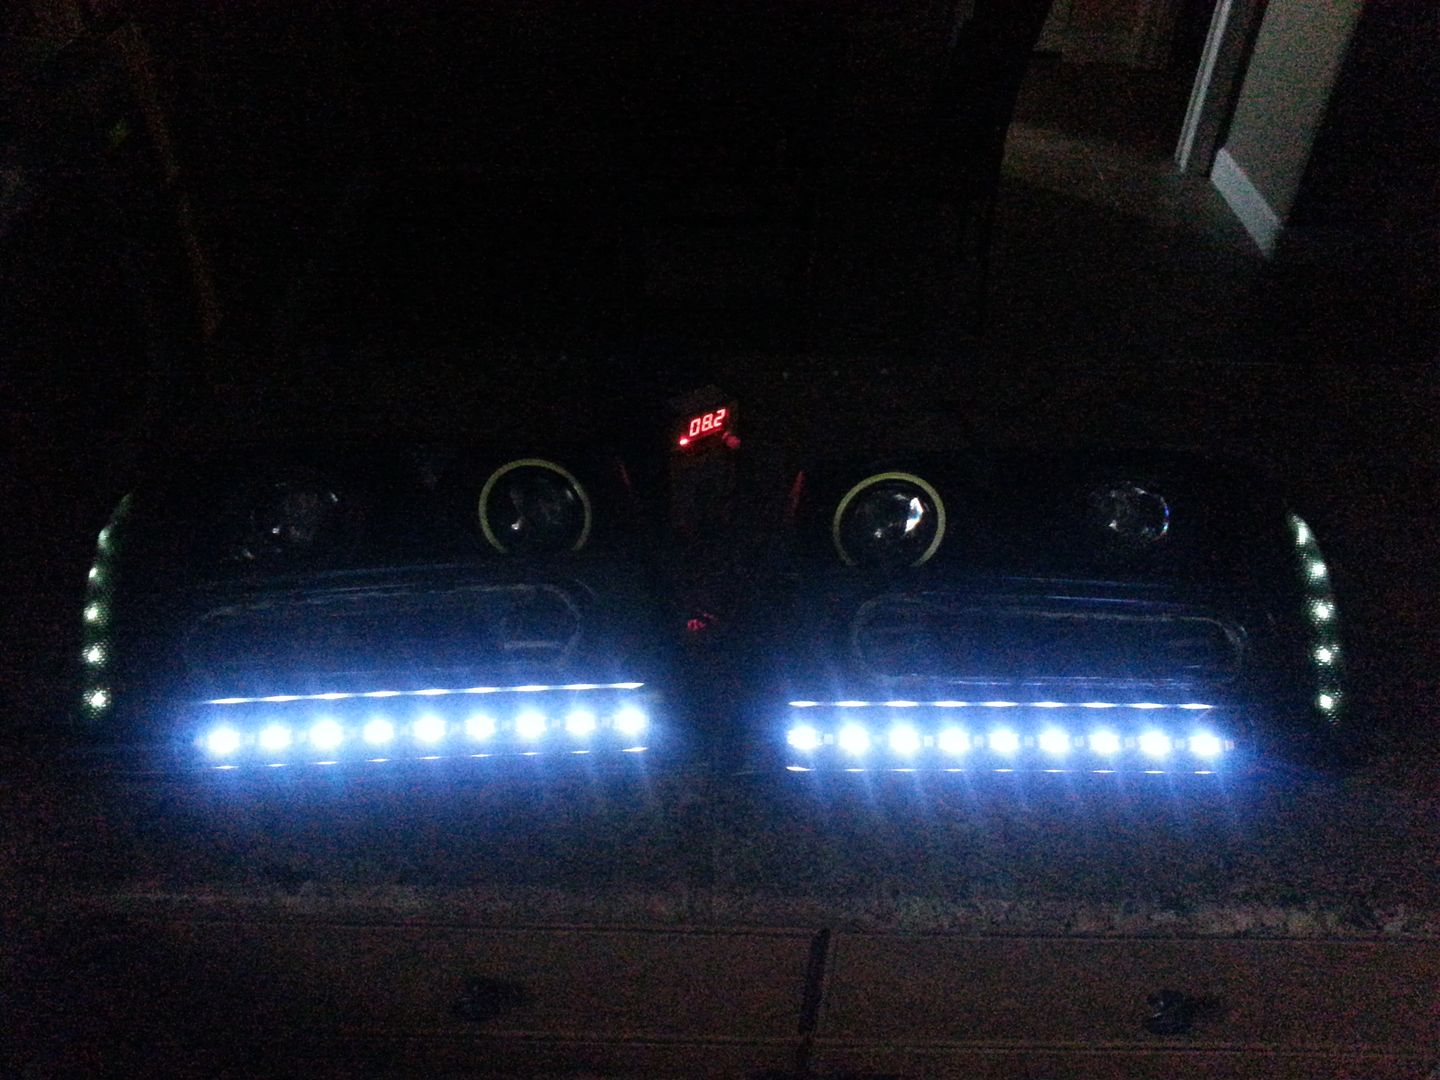
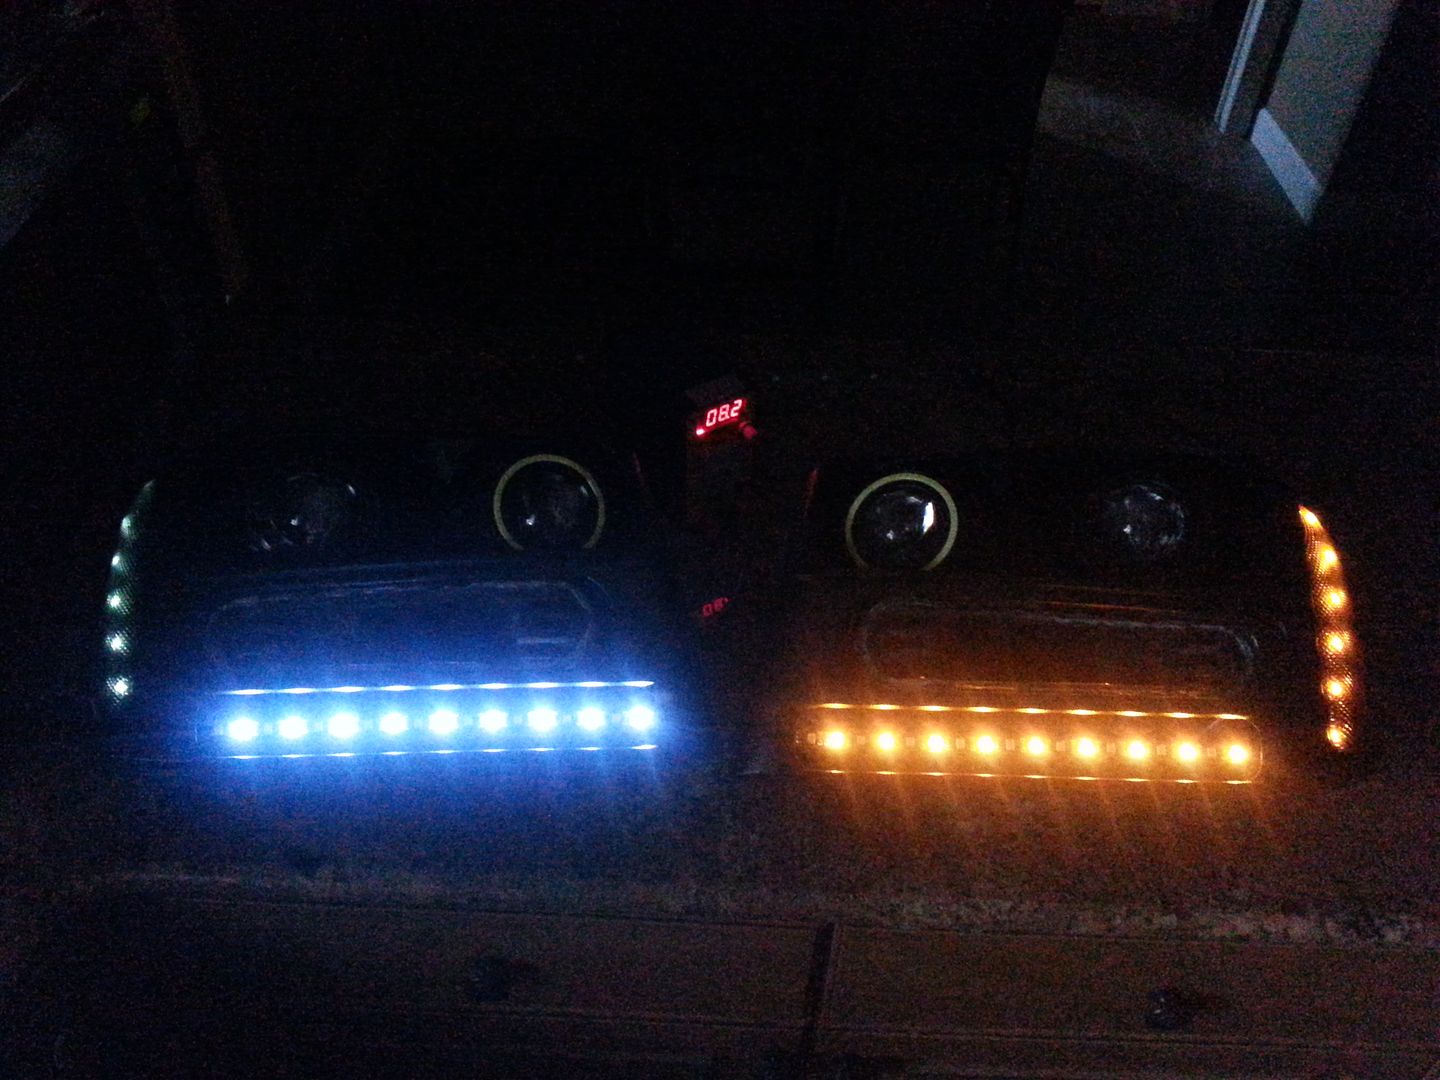
2 x 12" 5050 switchback strips
2 x 8" 5050 switchback strips
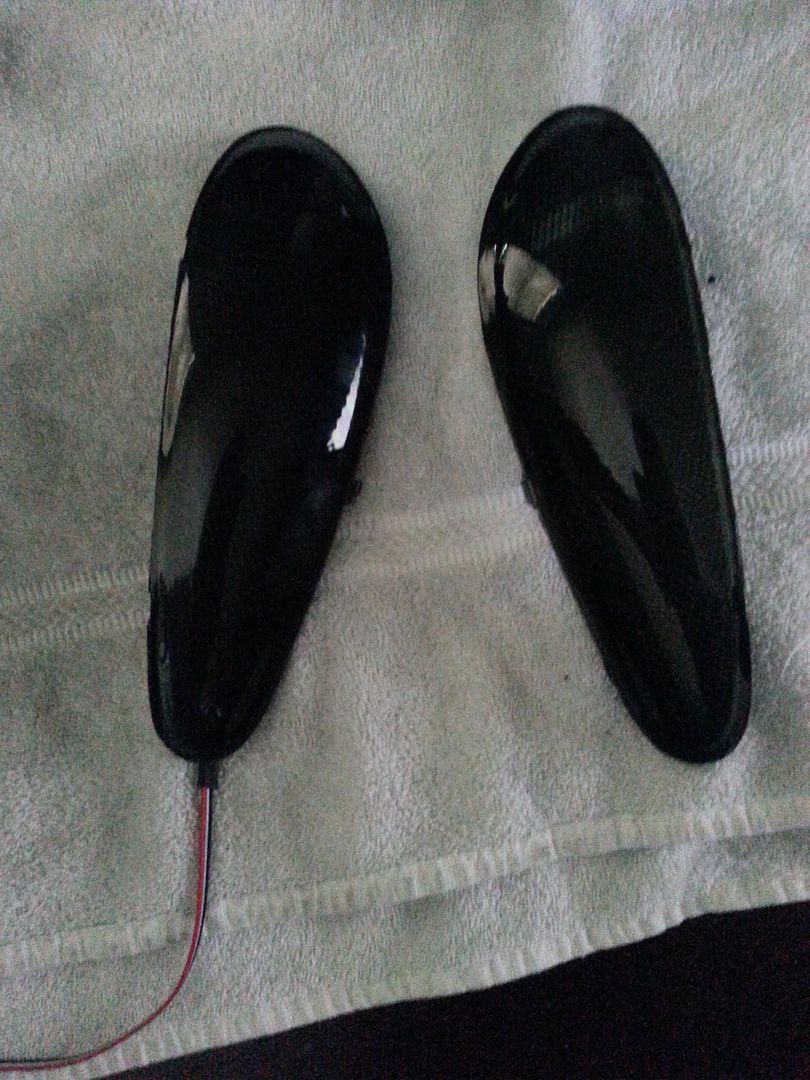
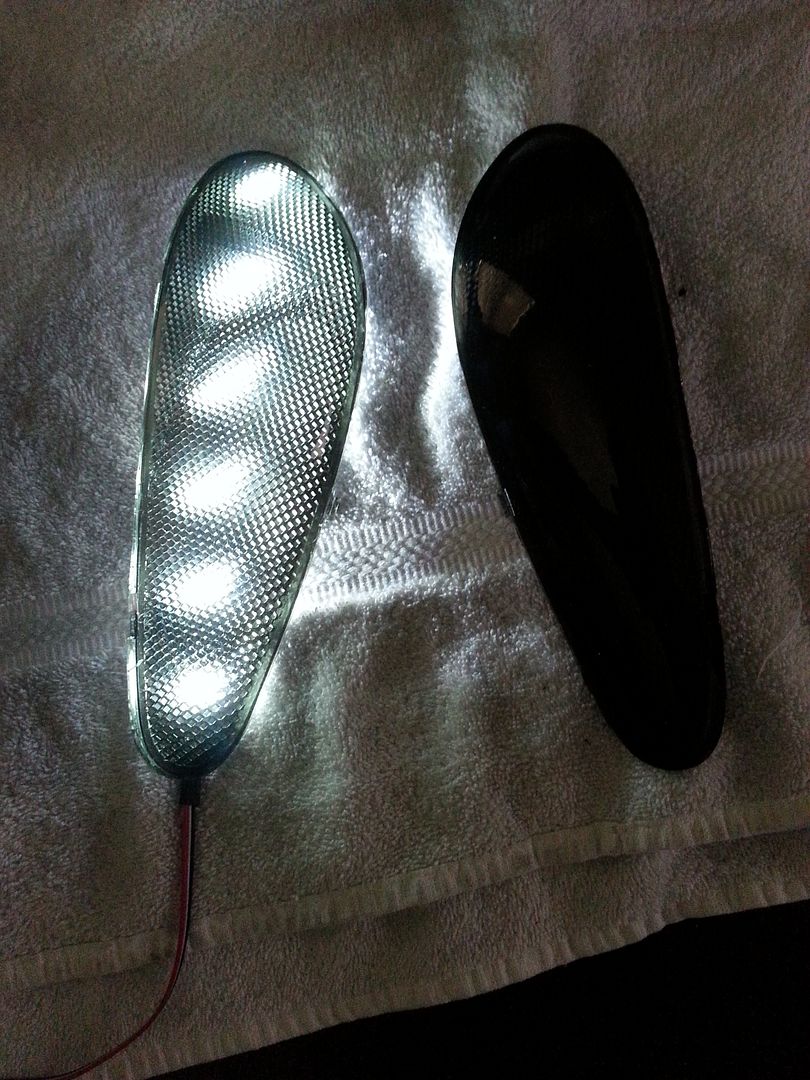
1 set of dark smoked OEM replica corner lenses
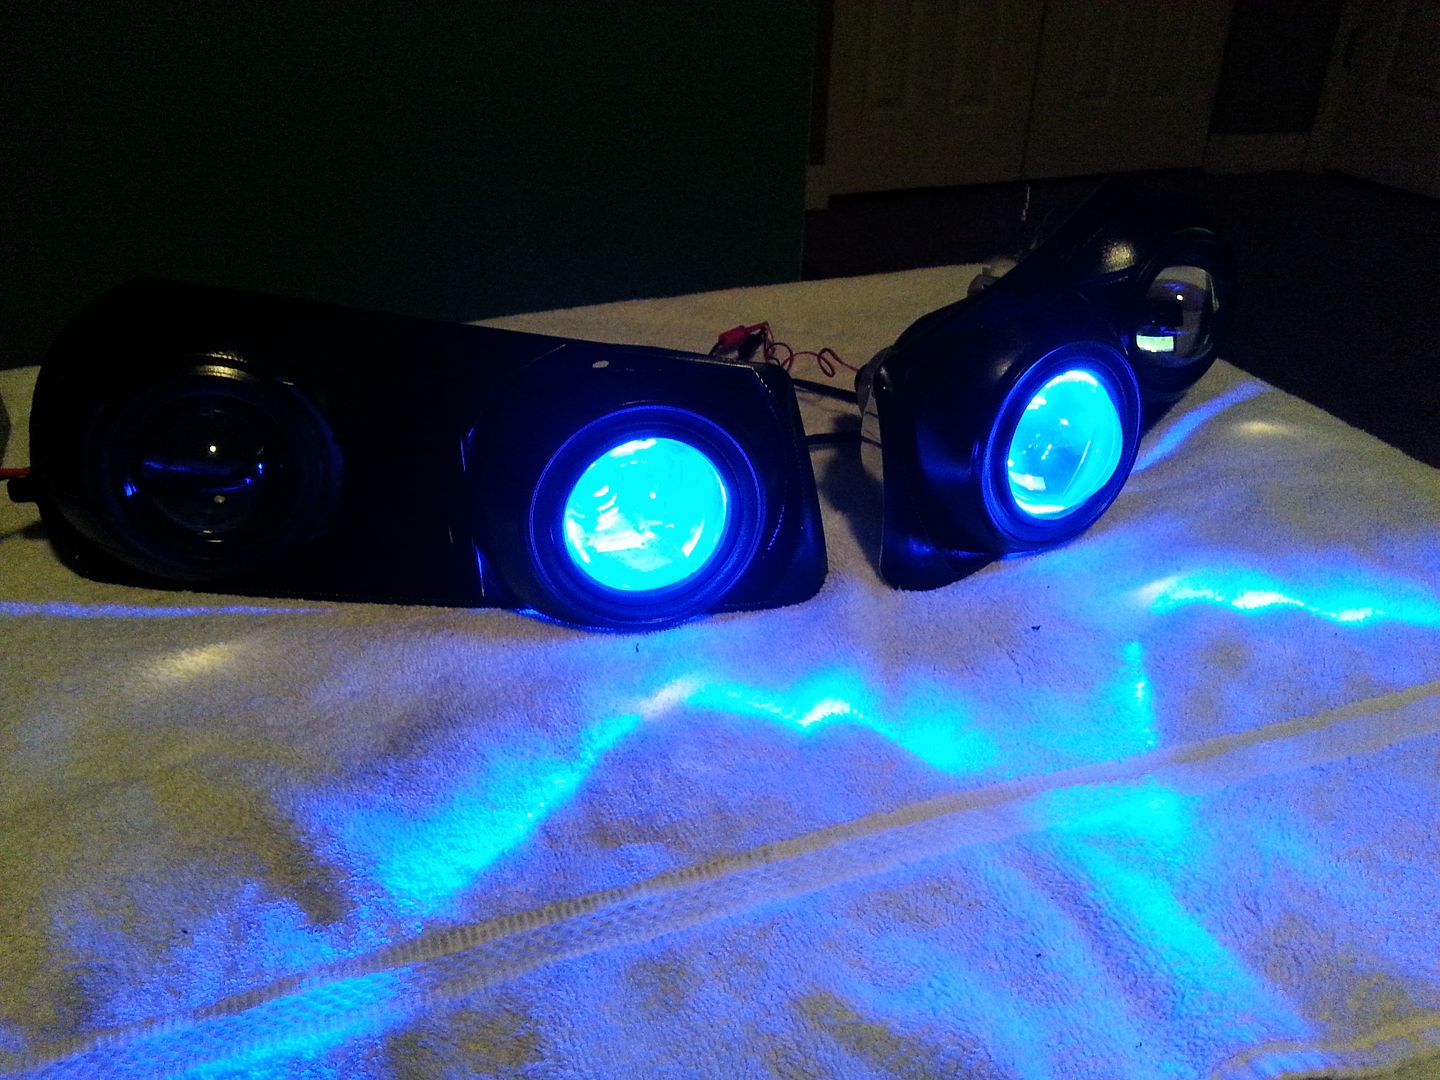
2 x 9" blue LED strips
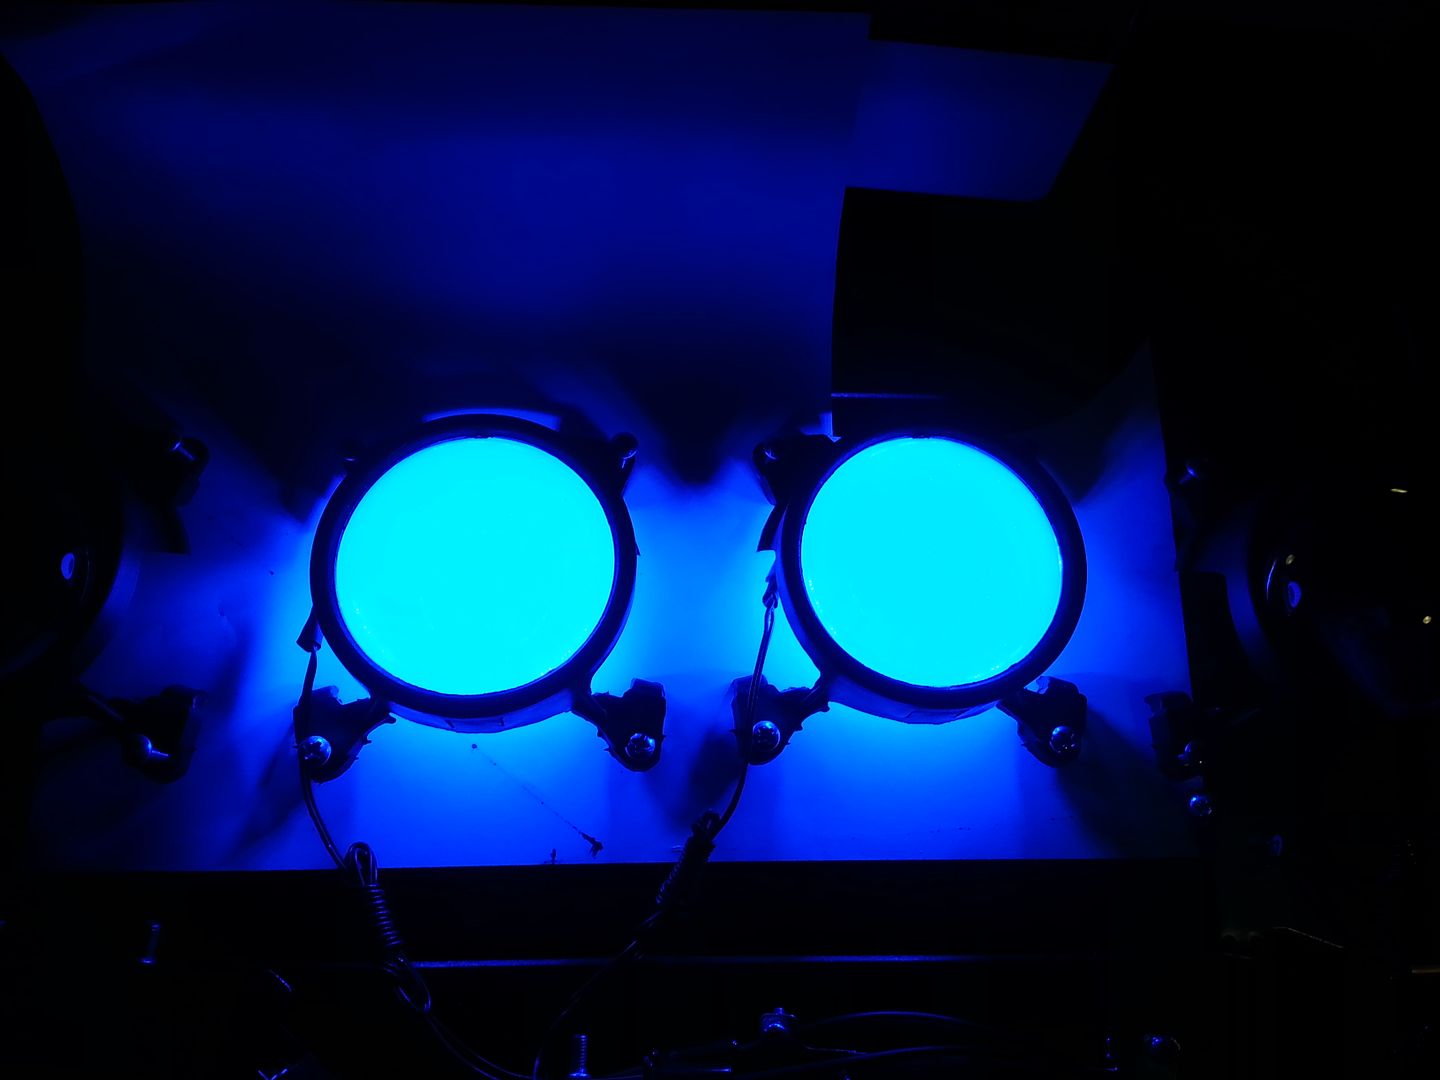
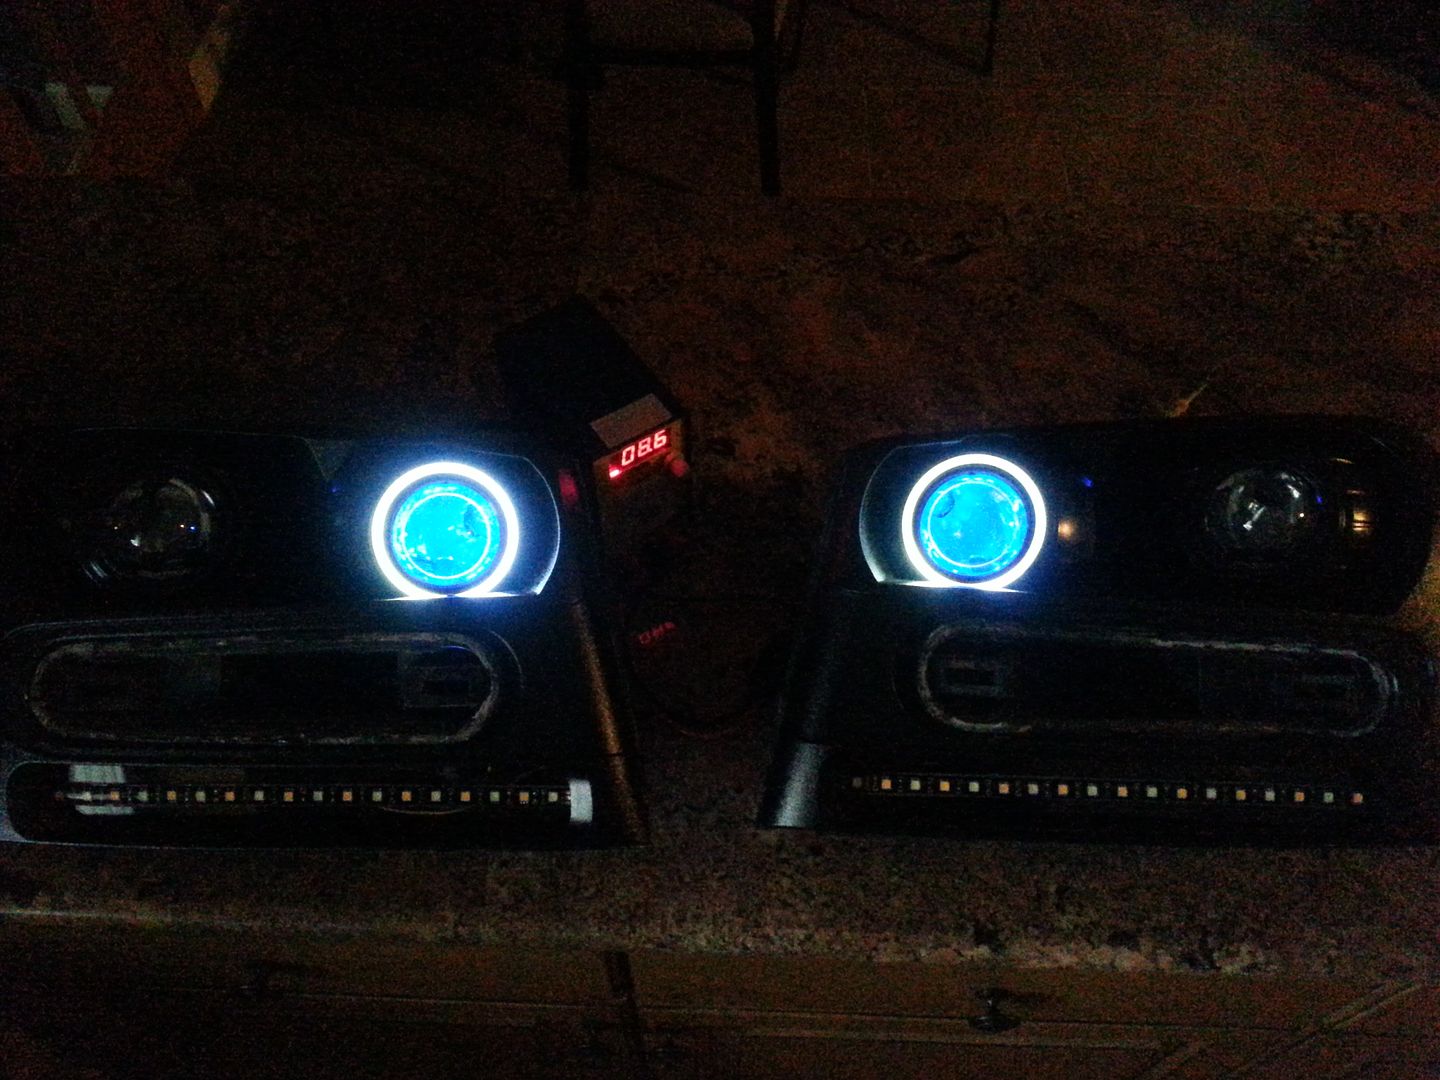
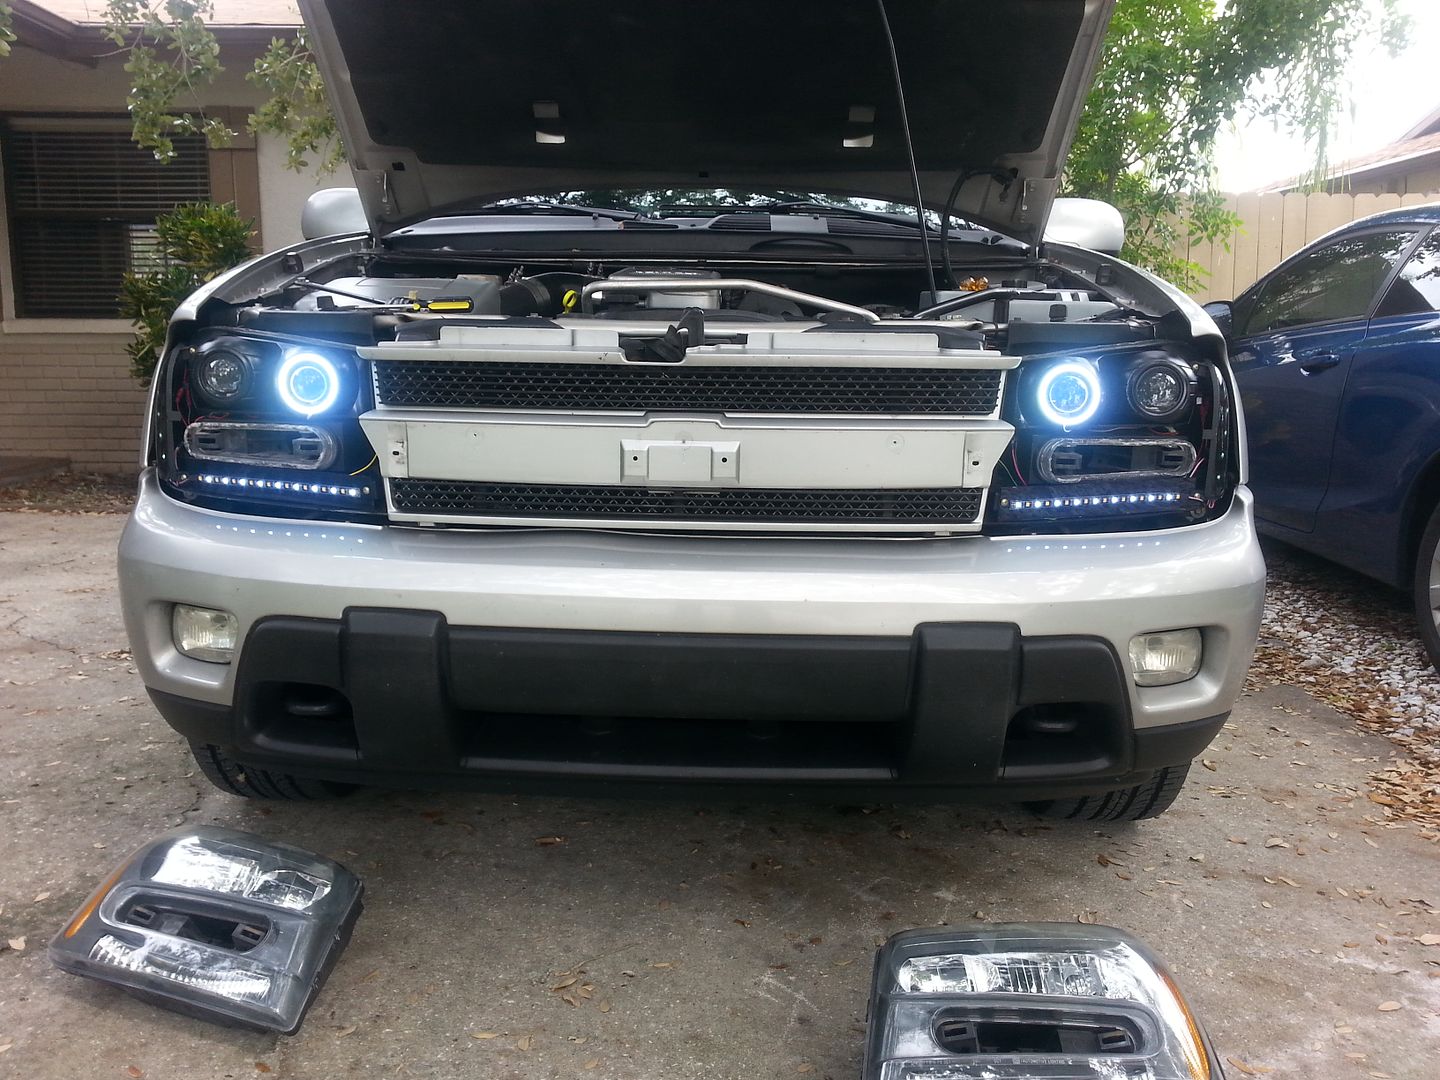
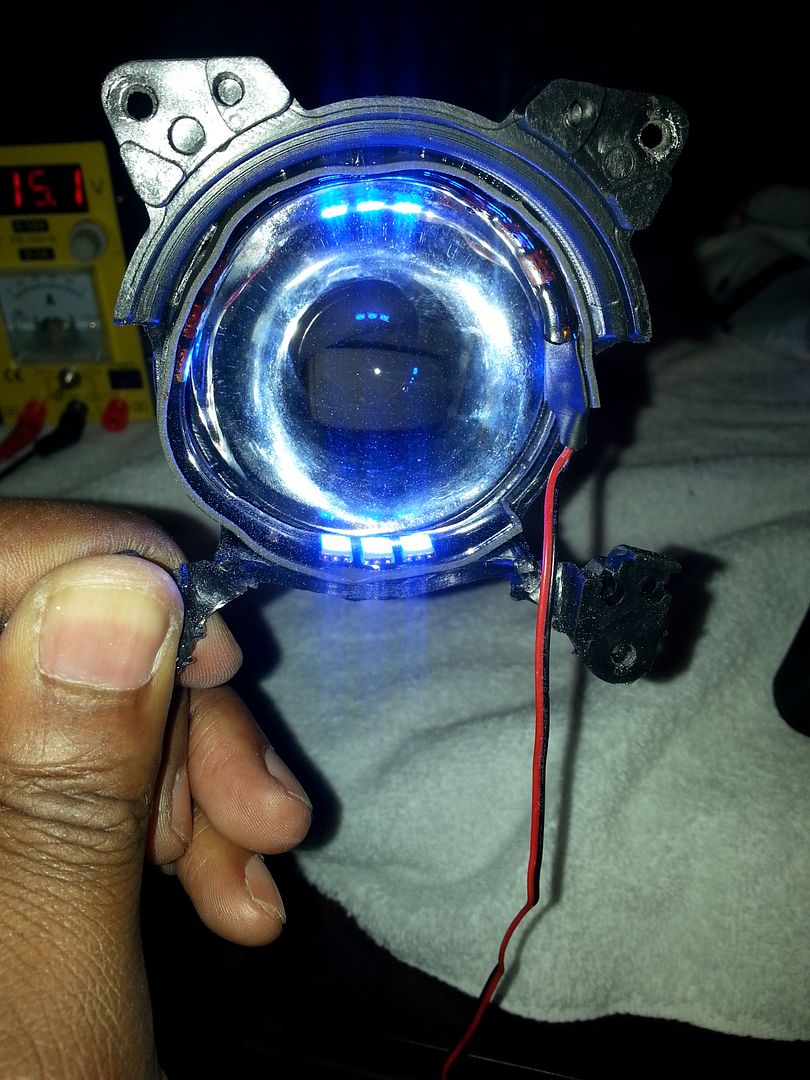
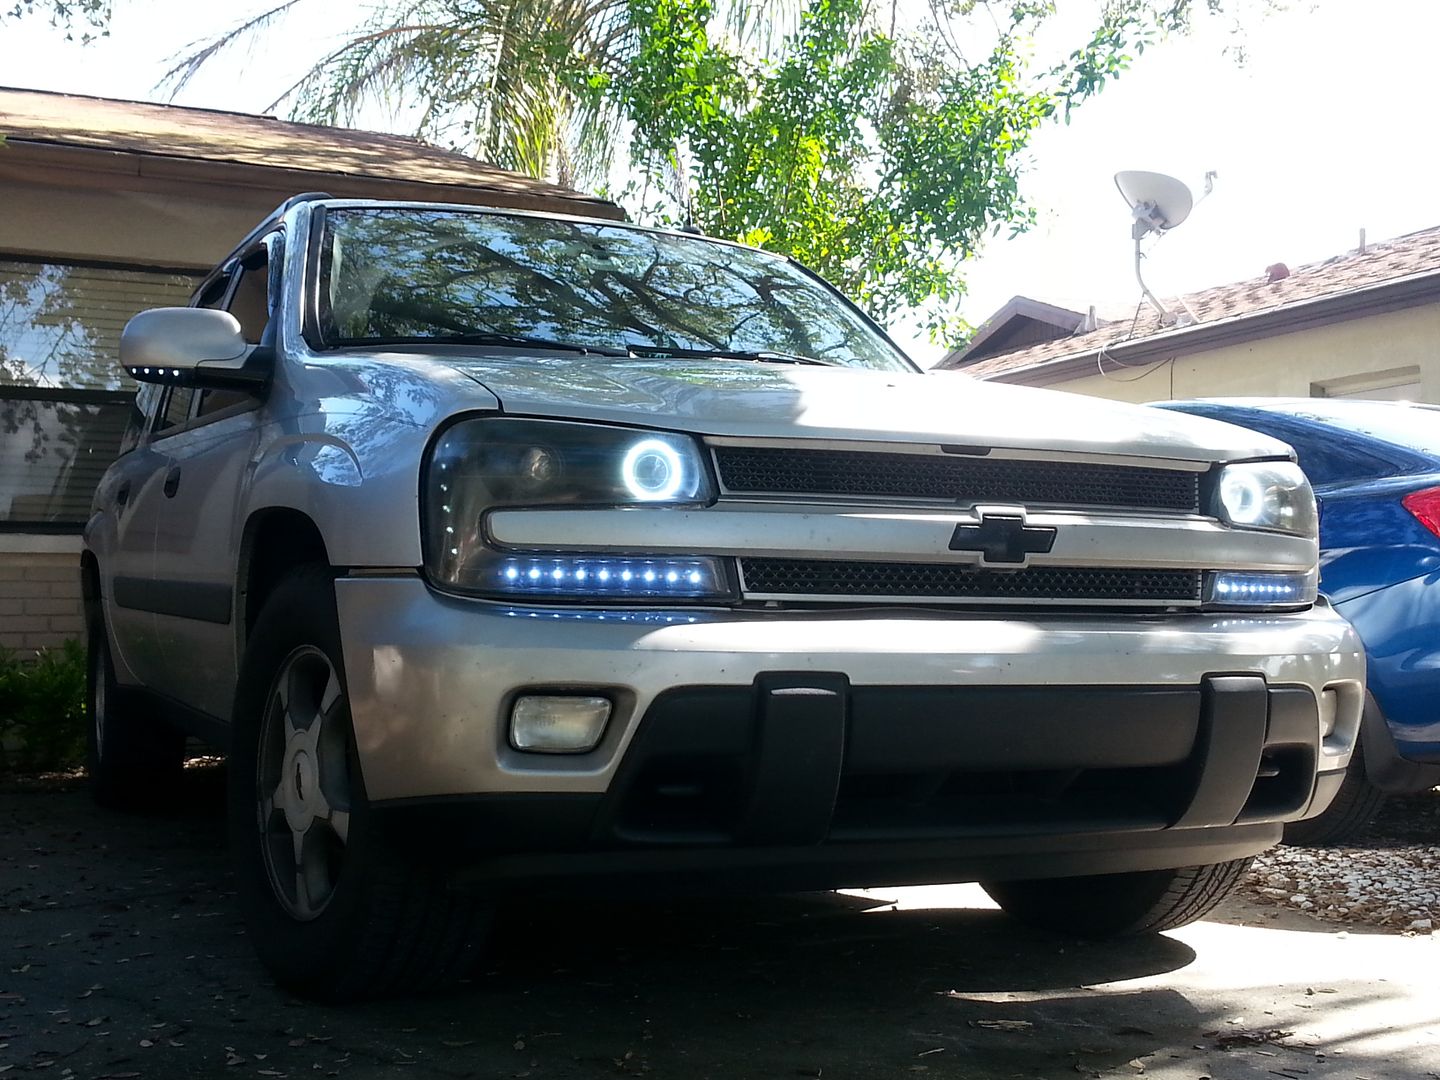
2 x white Morimoto XB halos


IMAG0588_zps15a81fa4.jpg


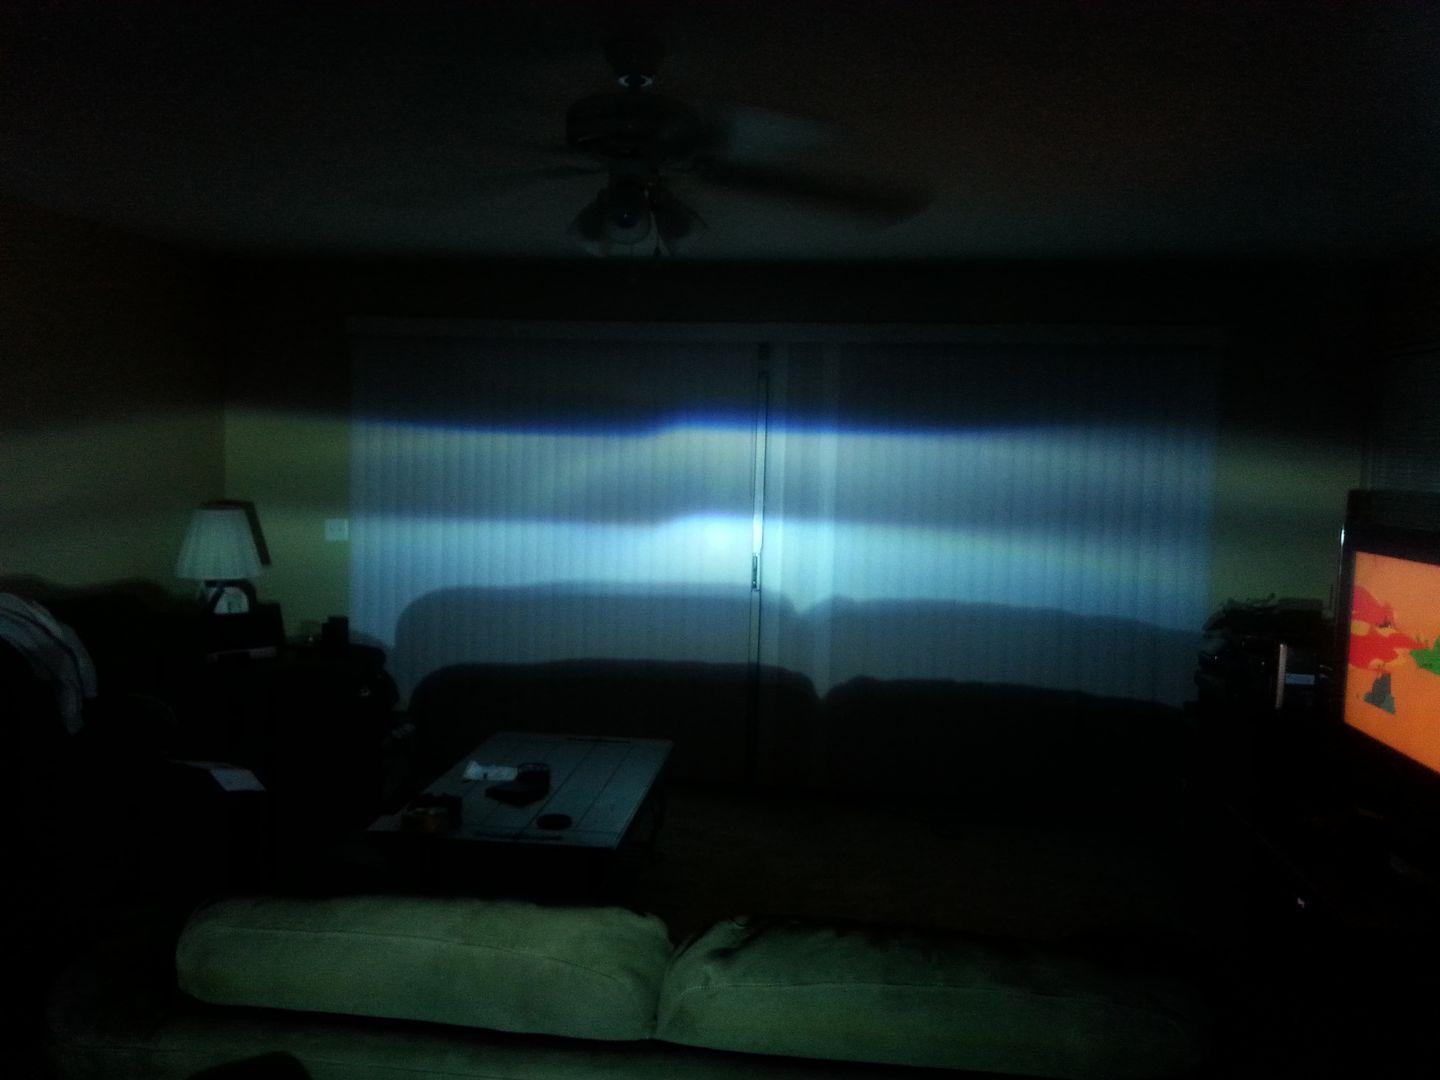
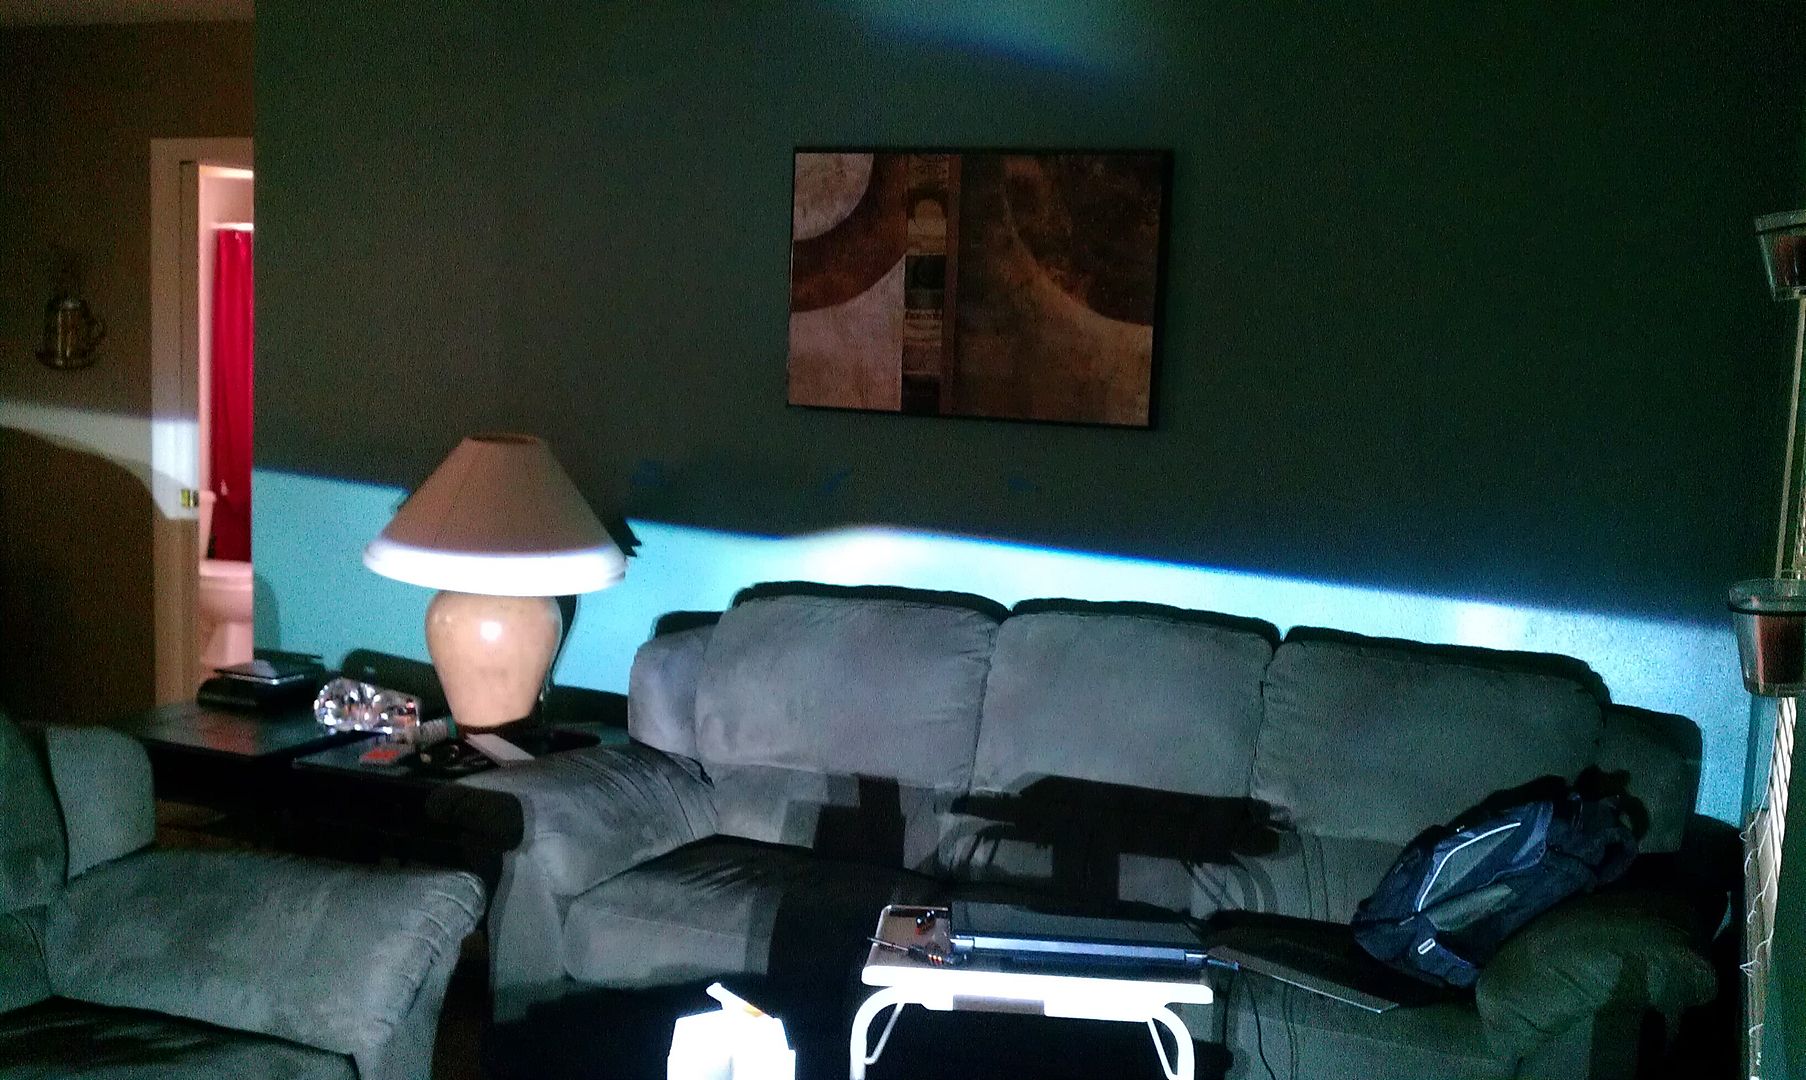
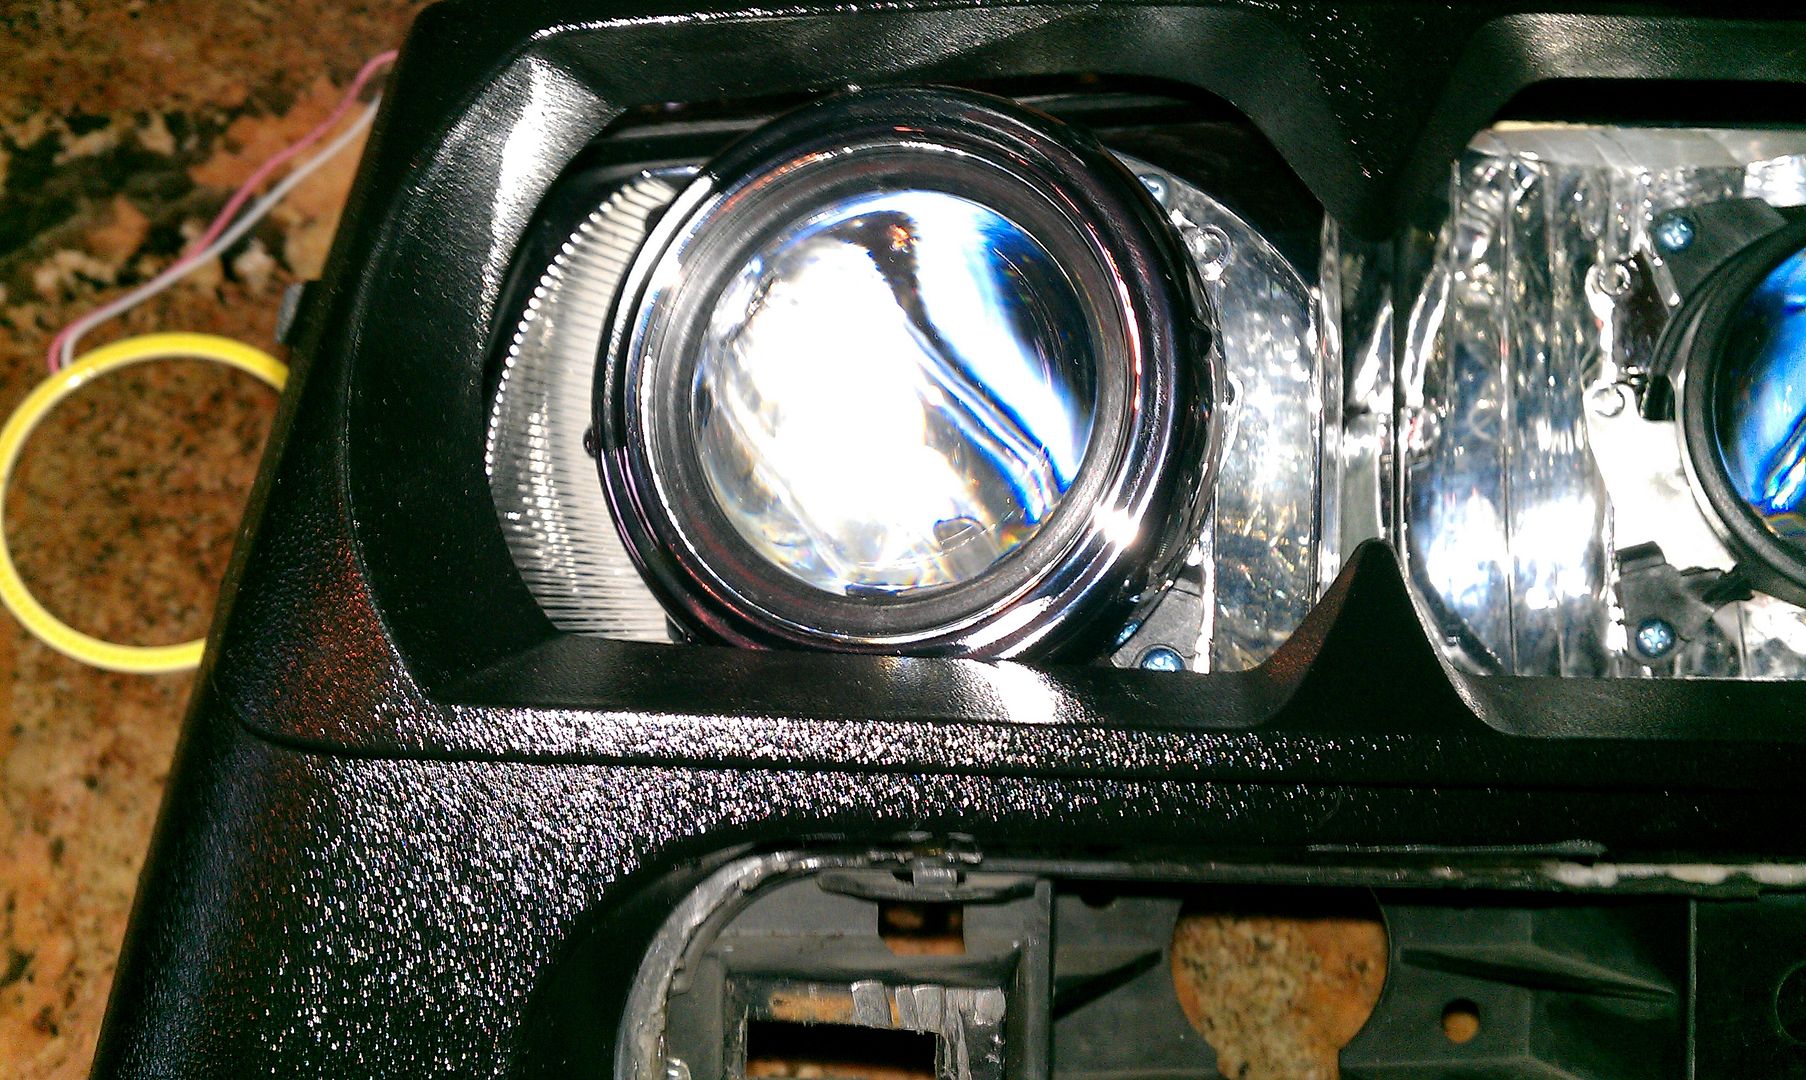
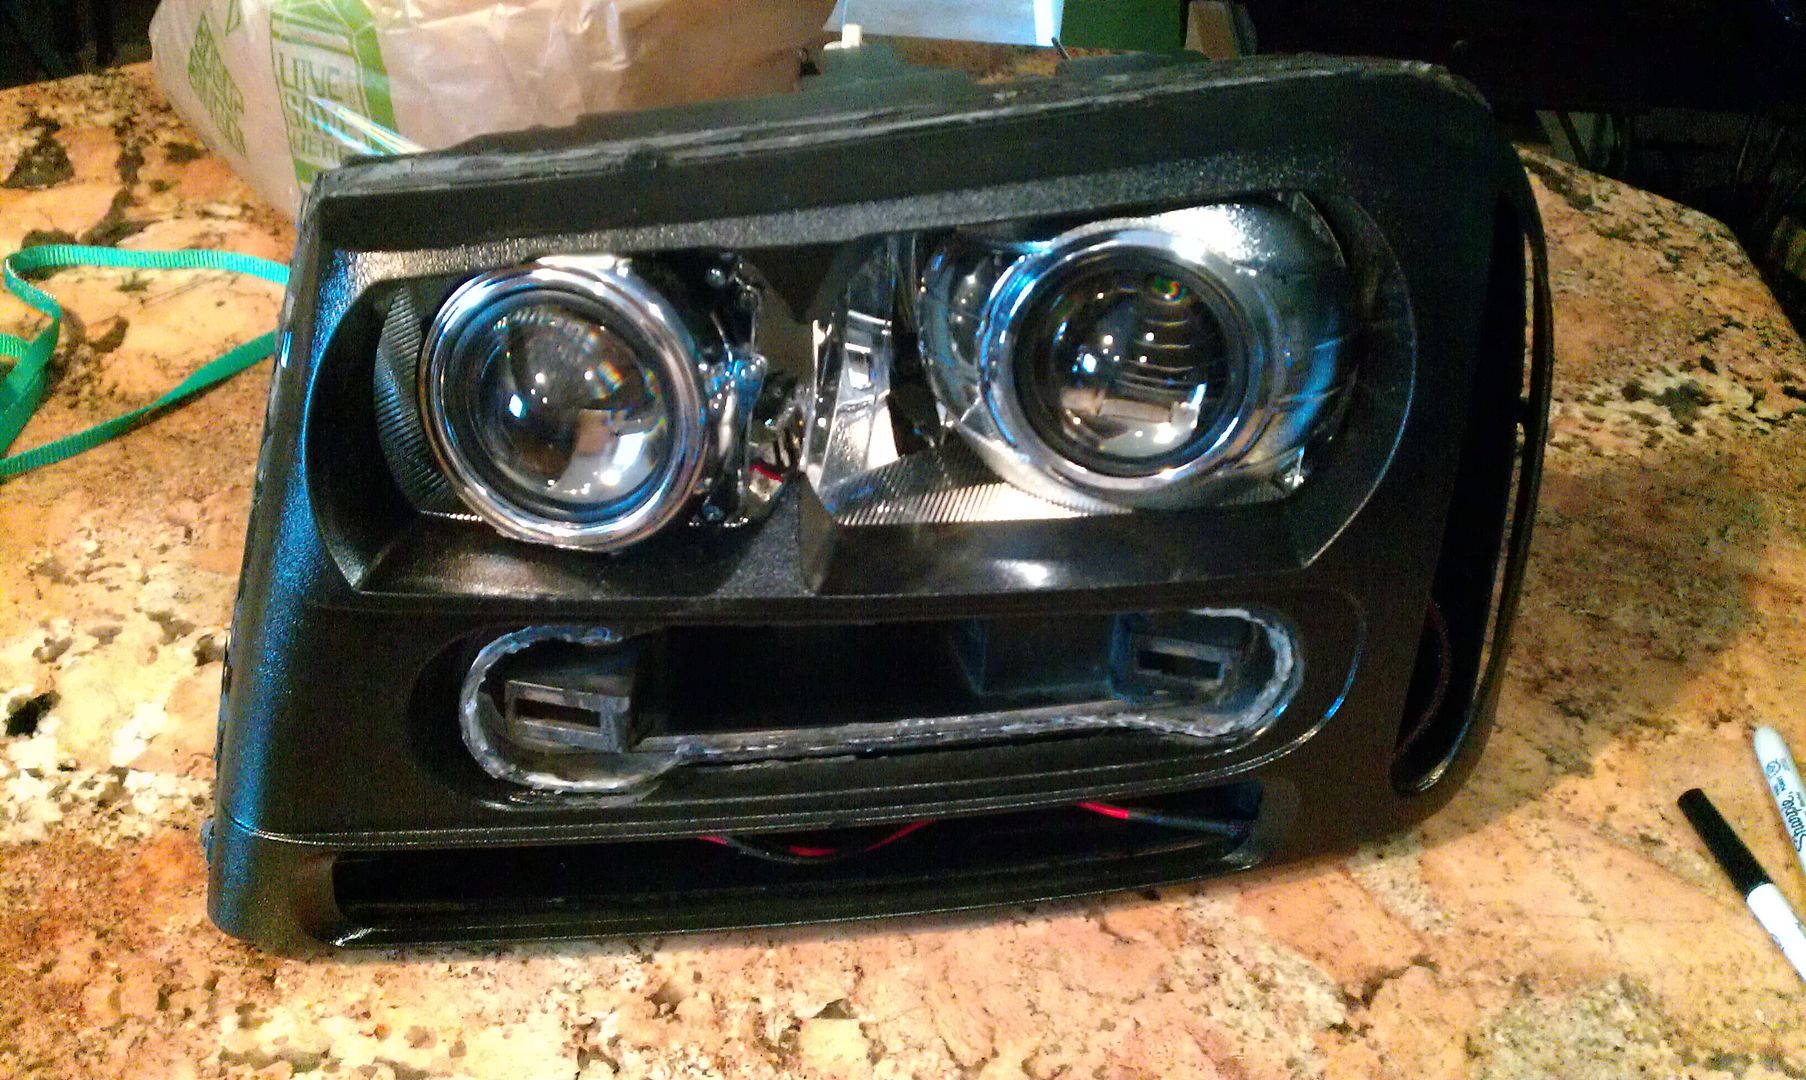
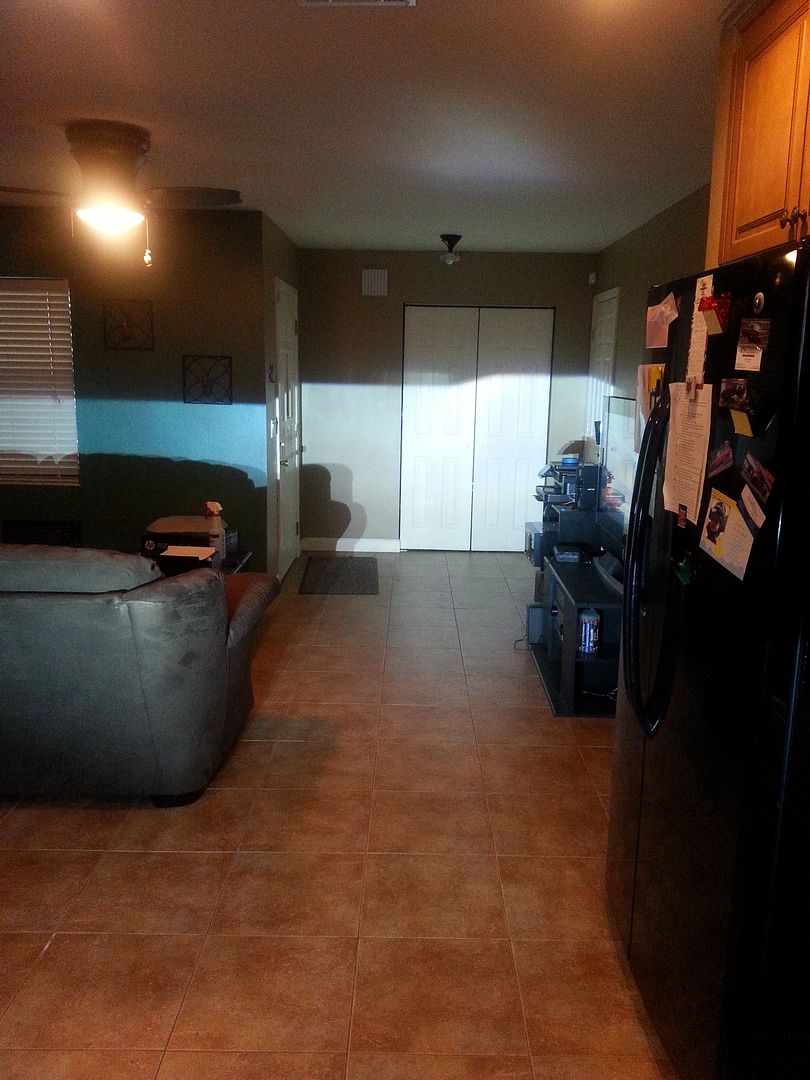
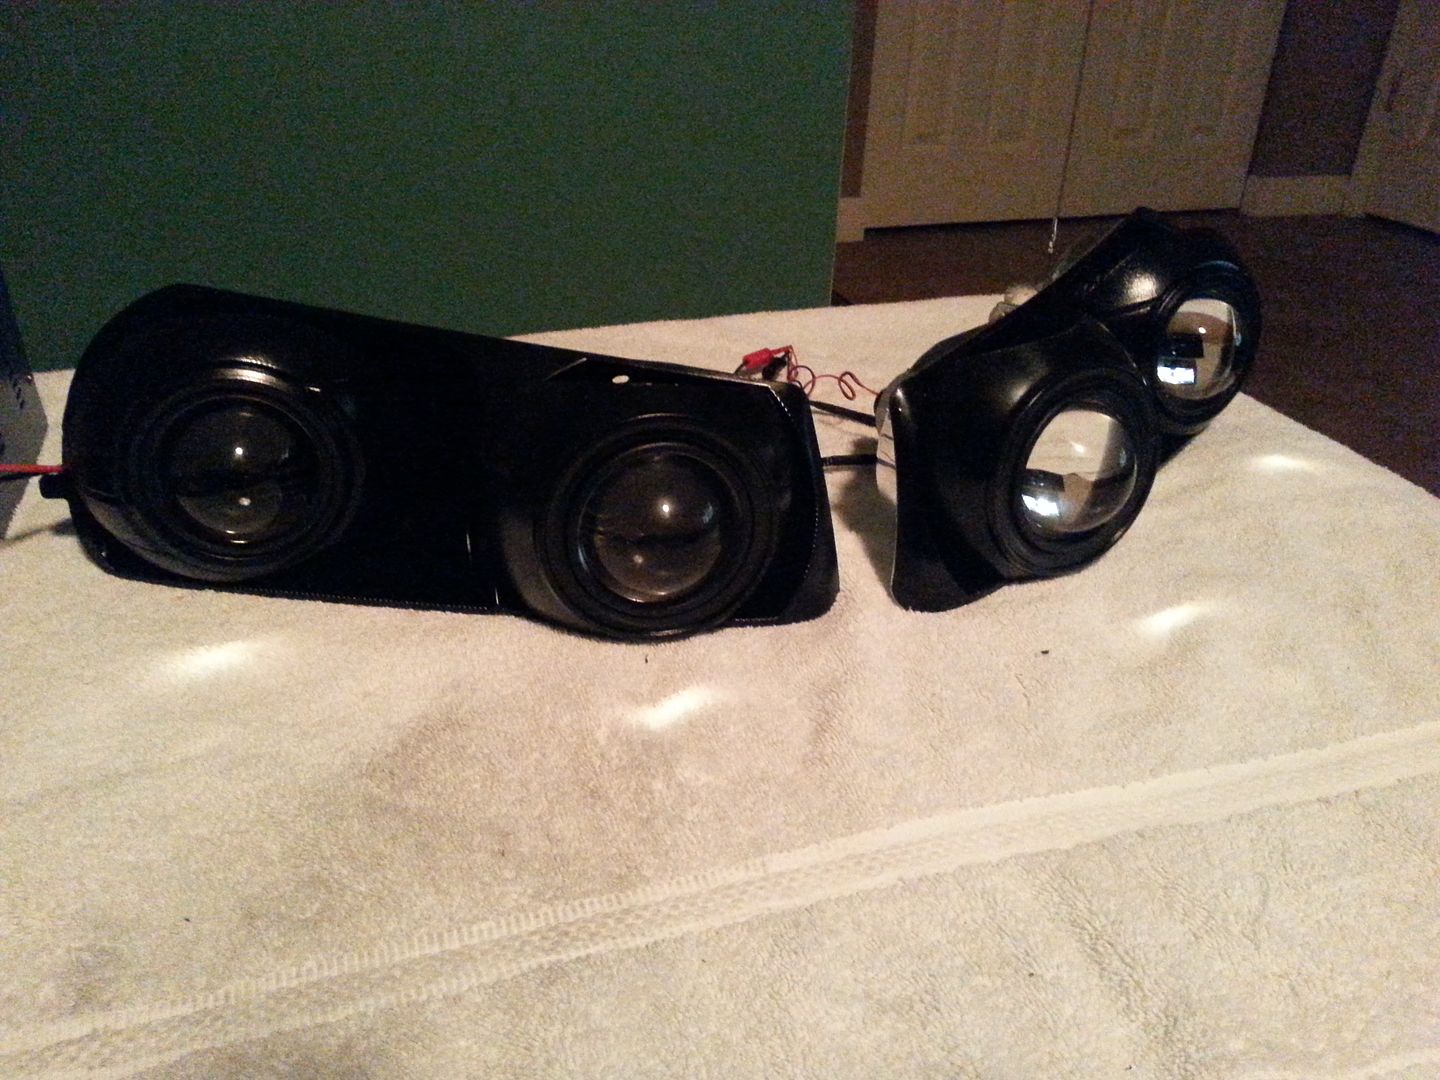
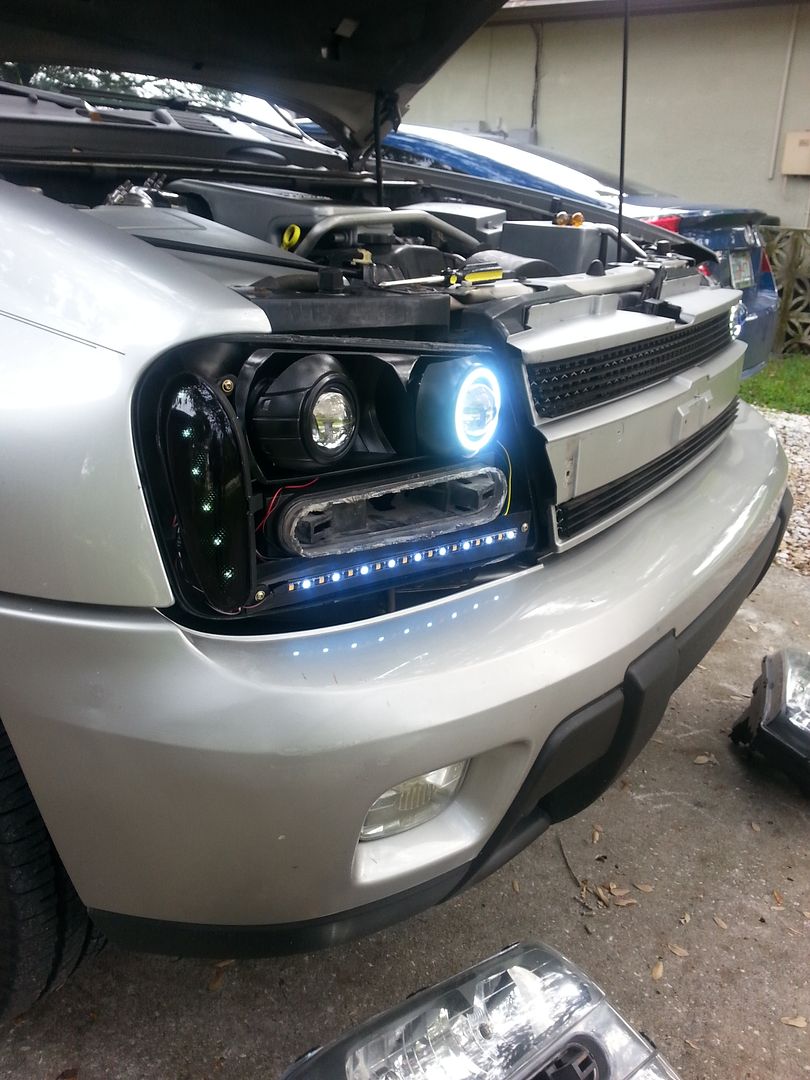
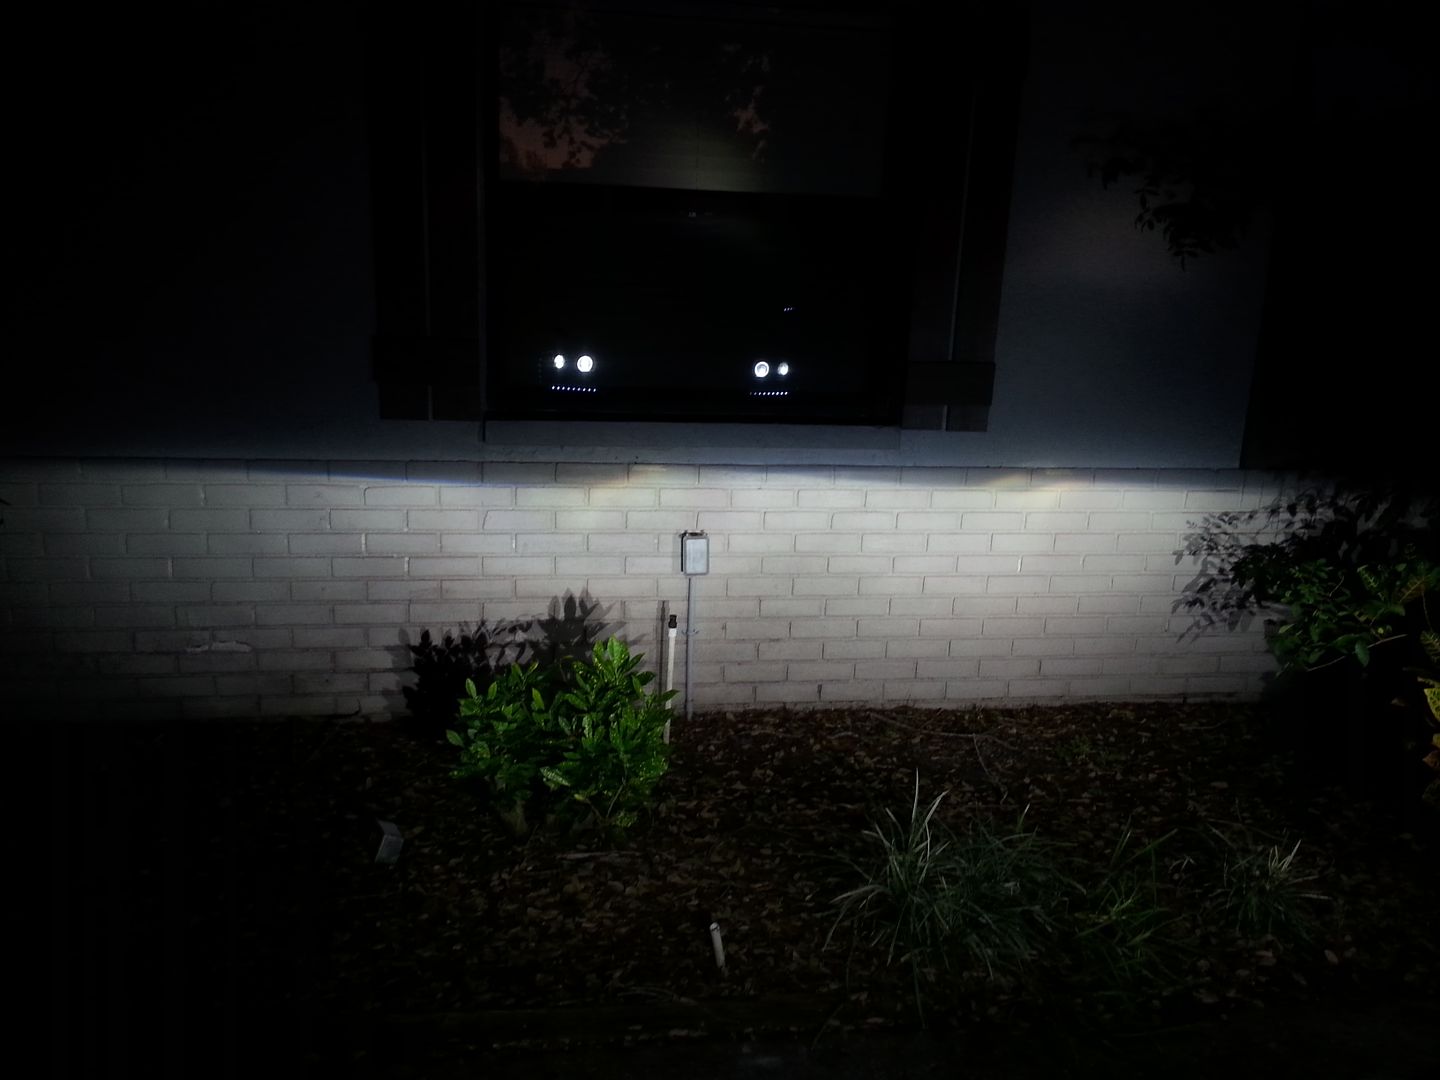
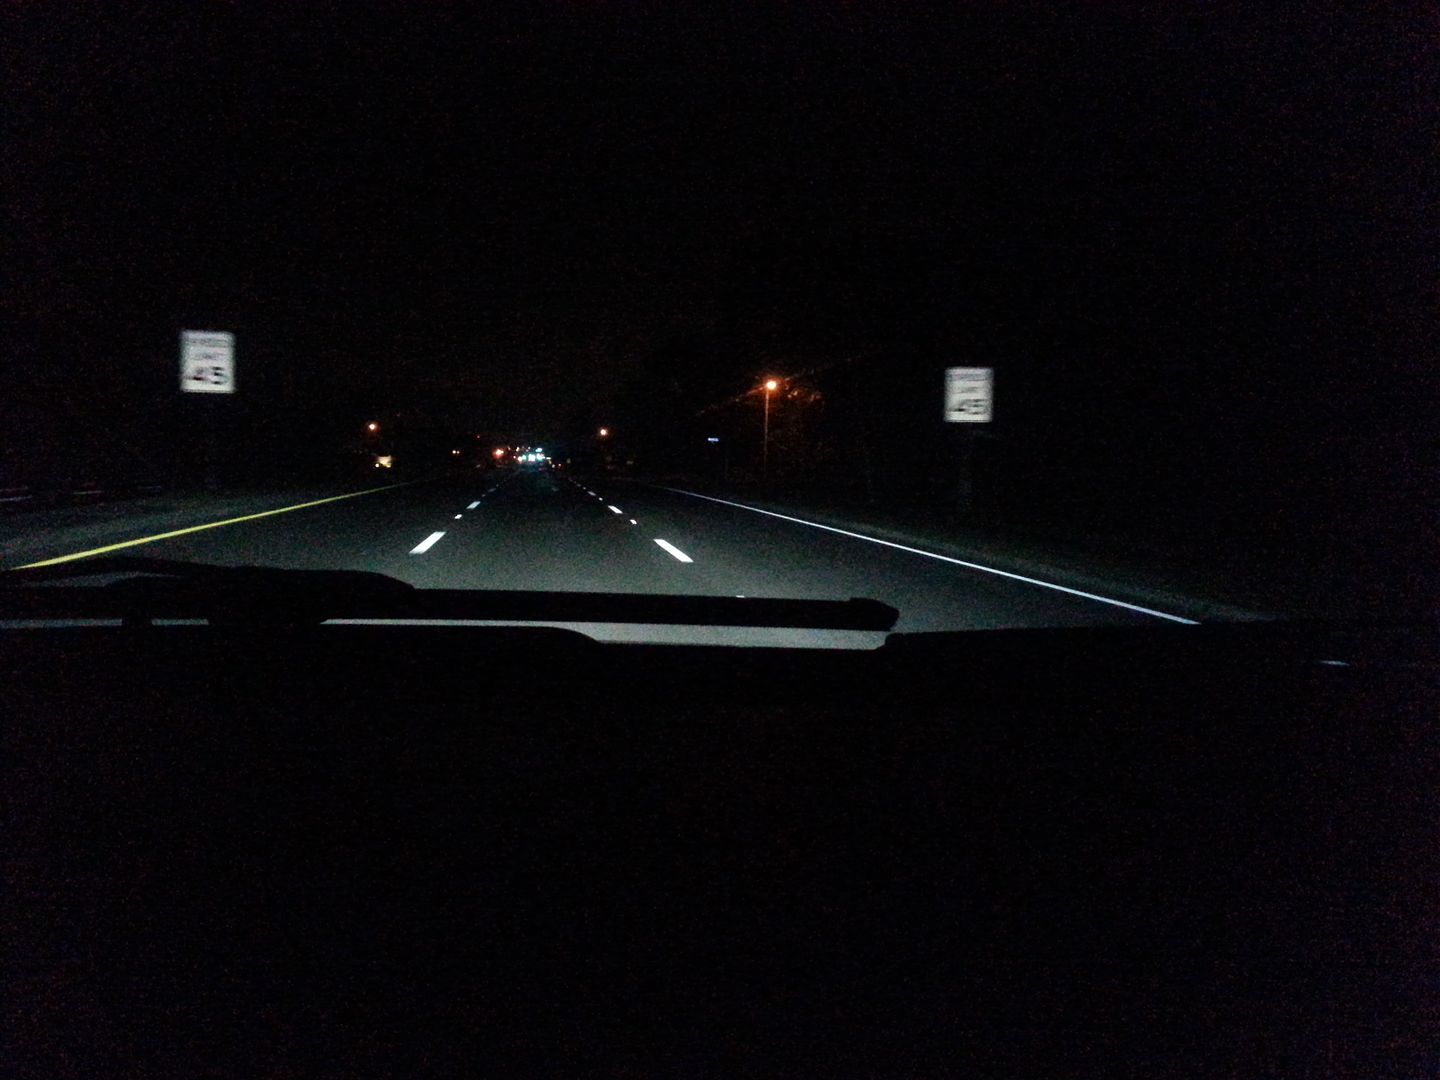
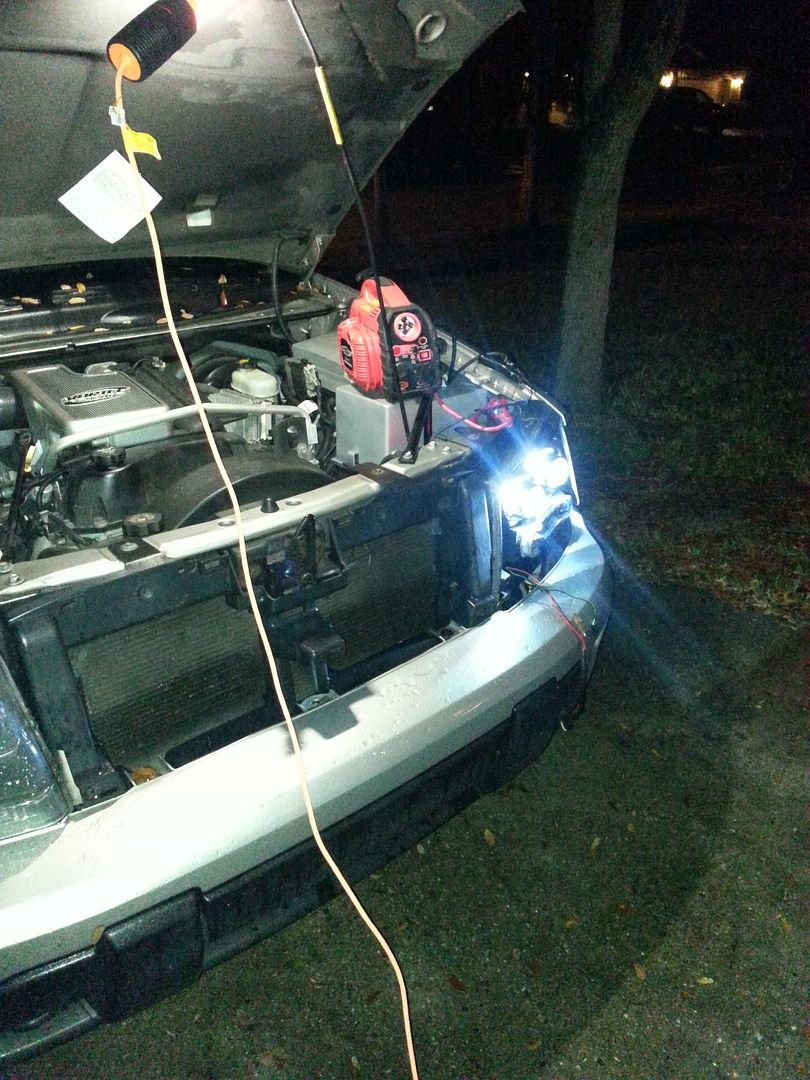
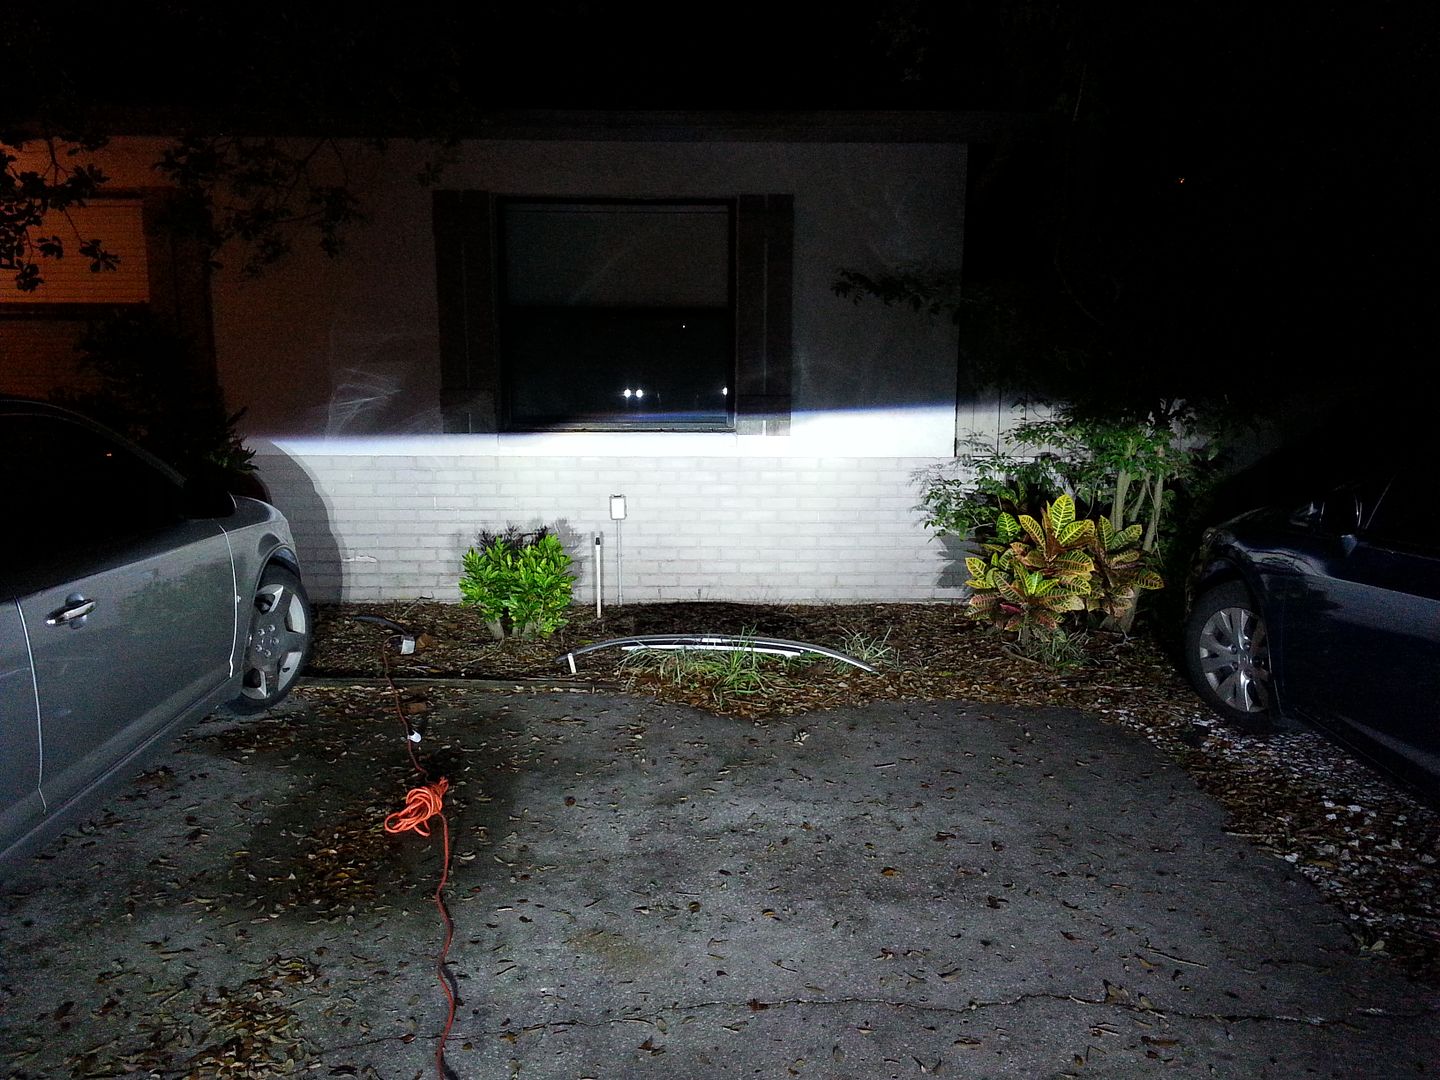
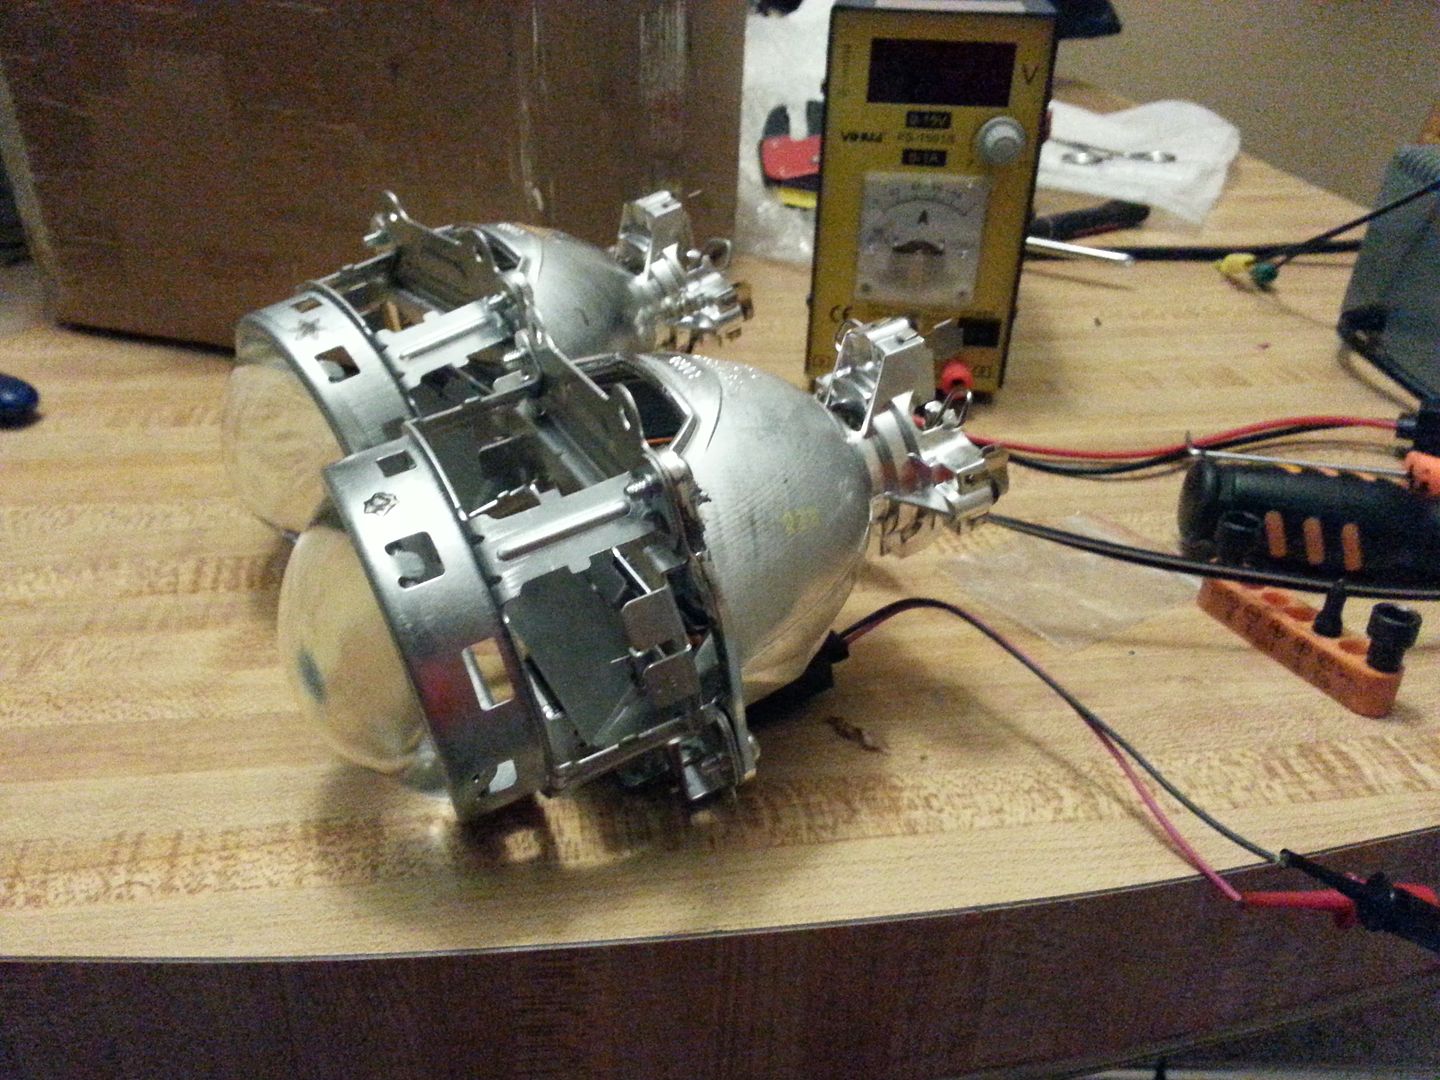
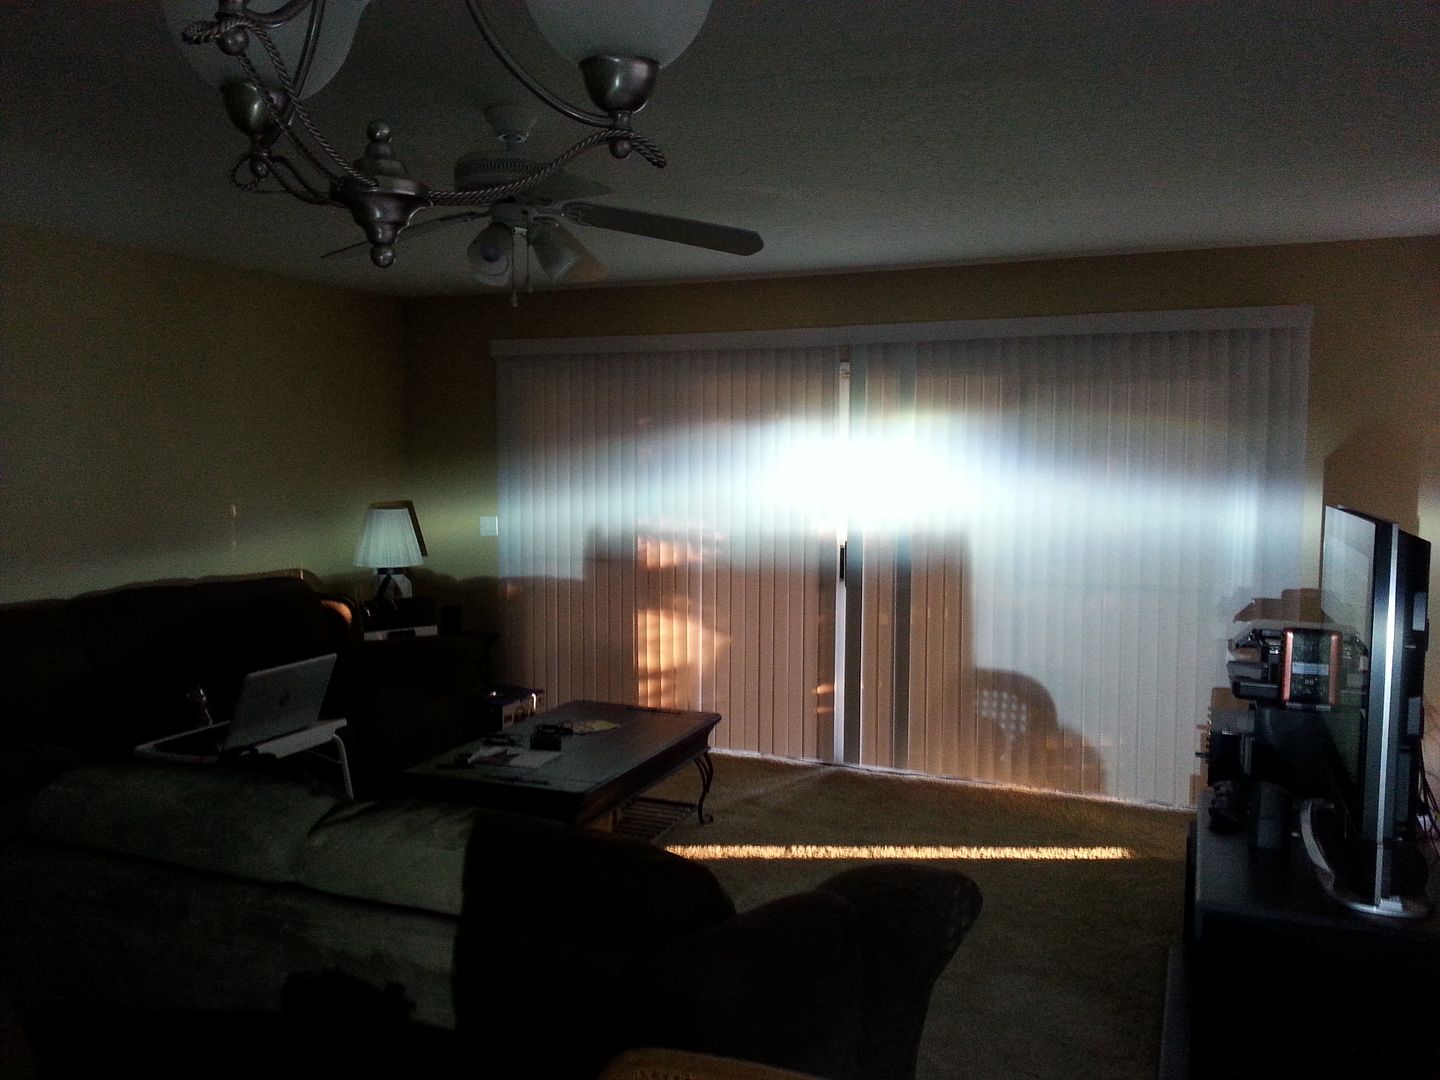
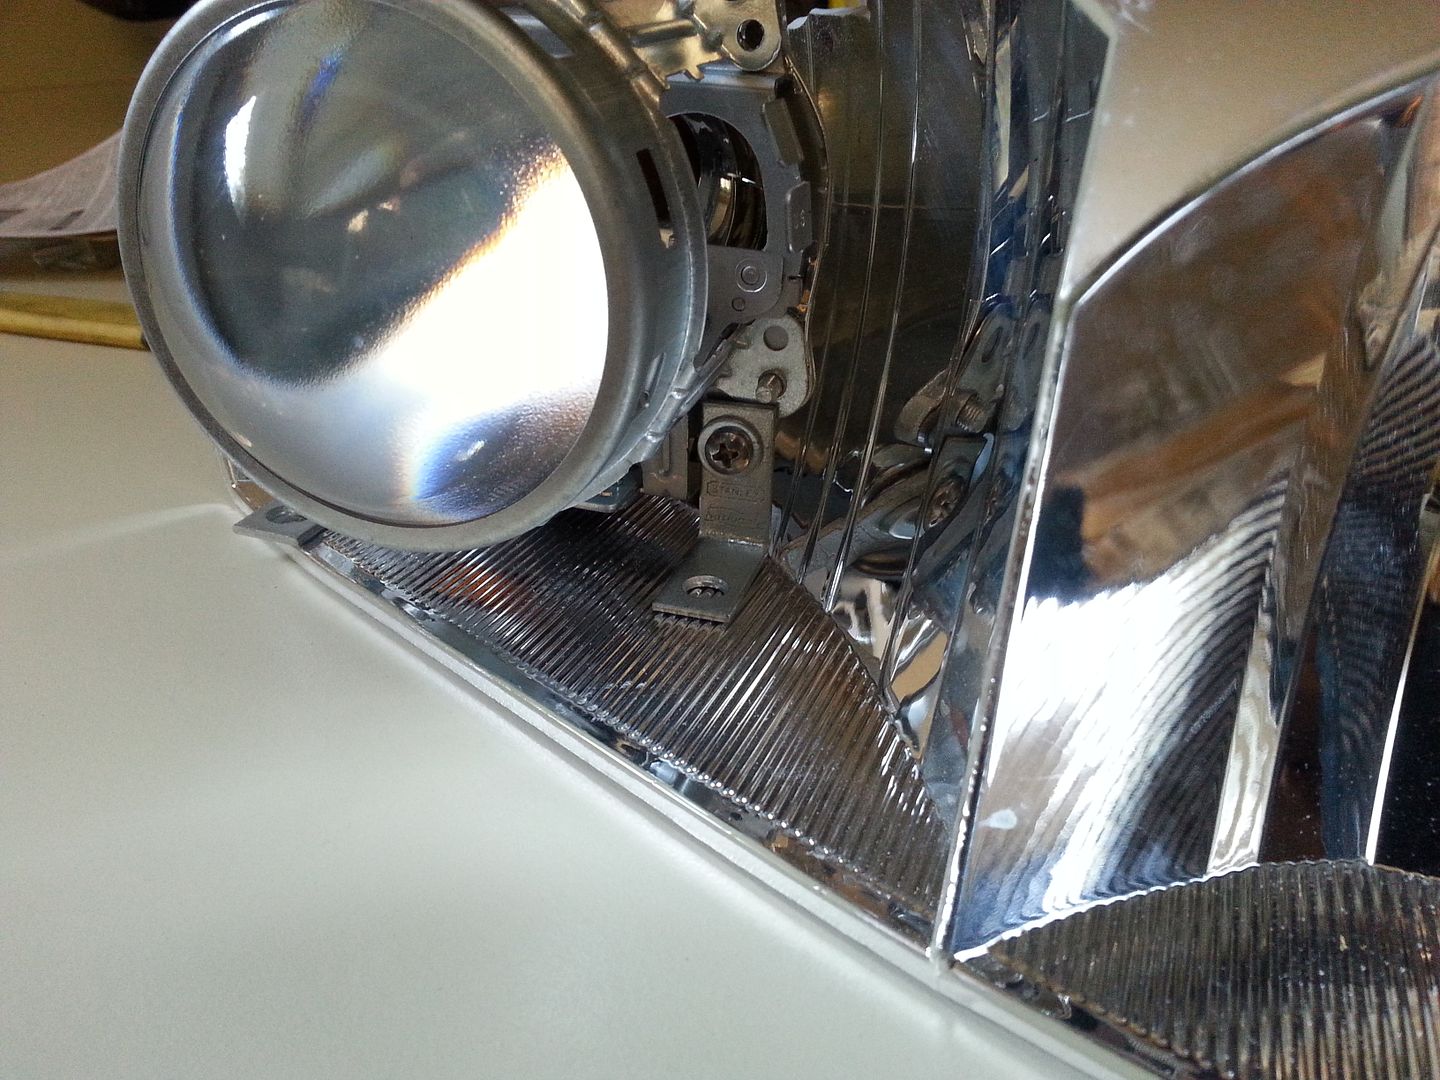
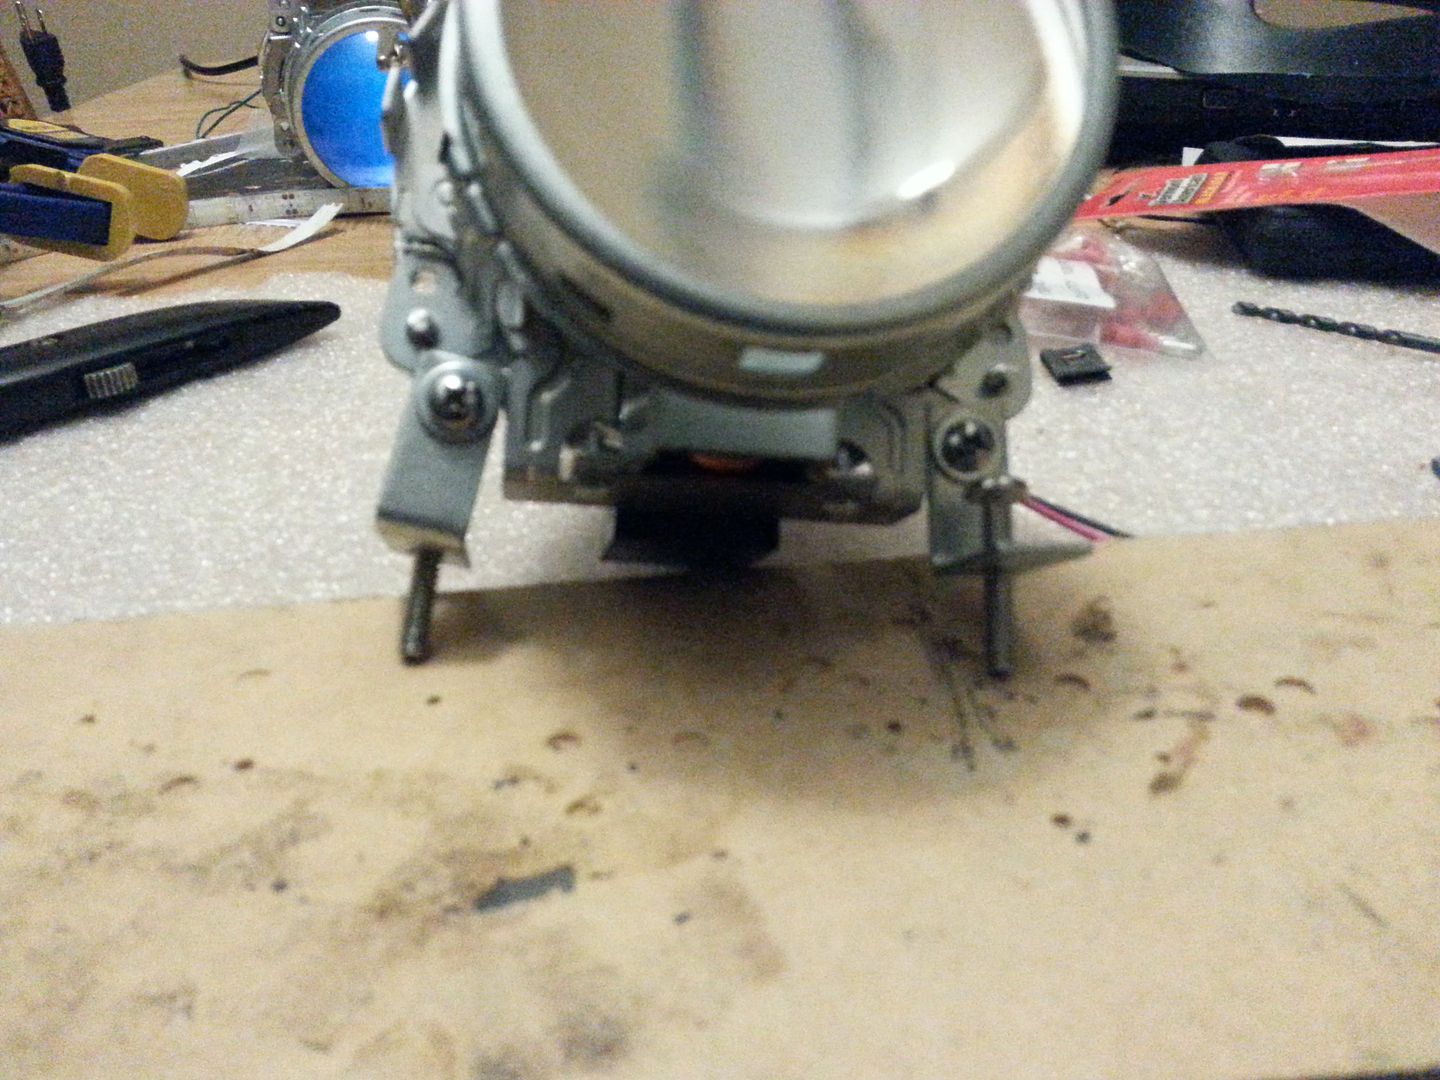
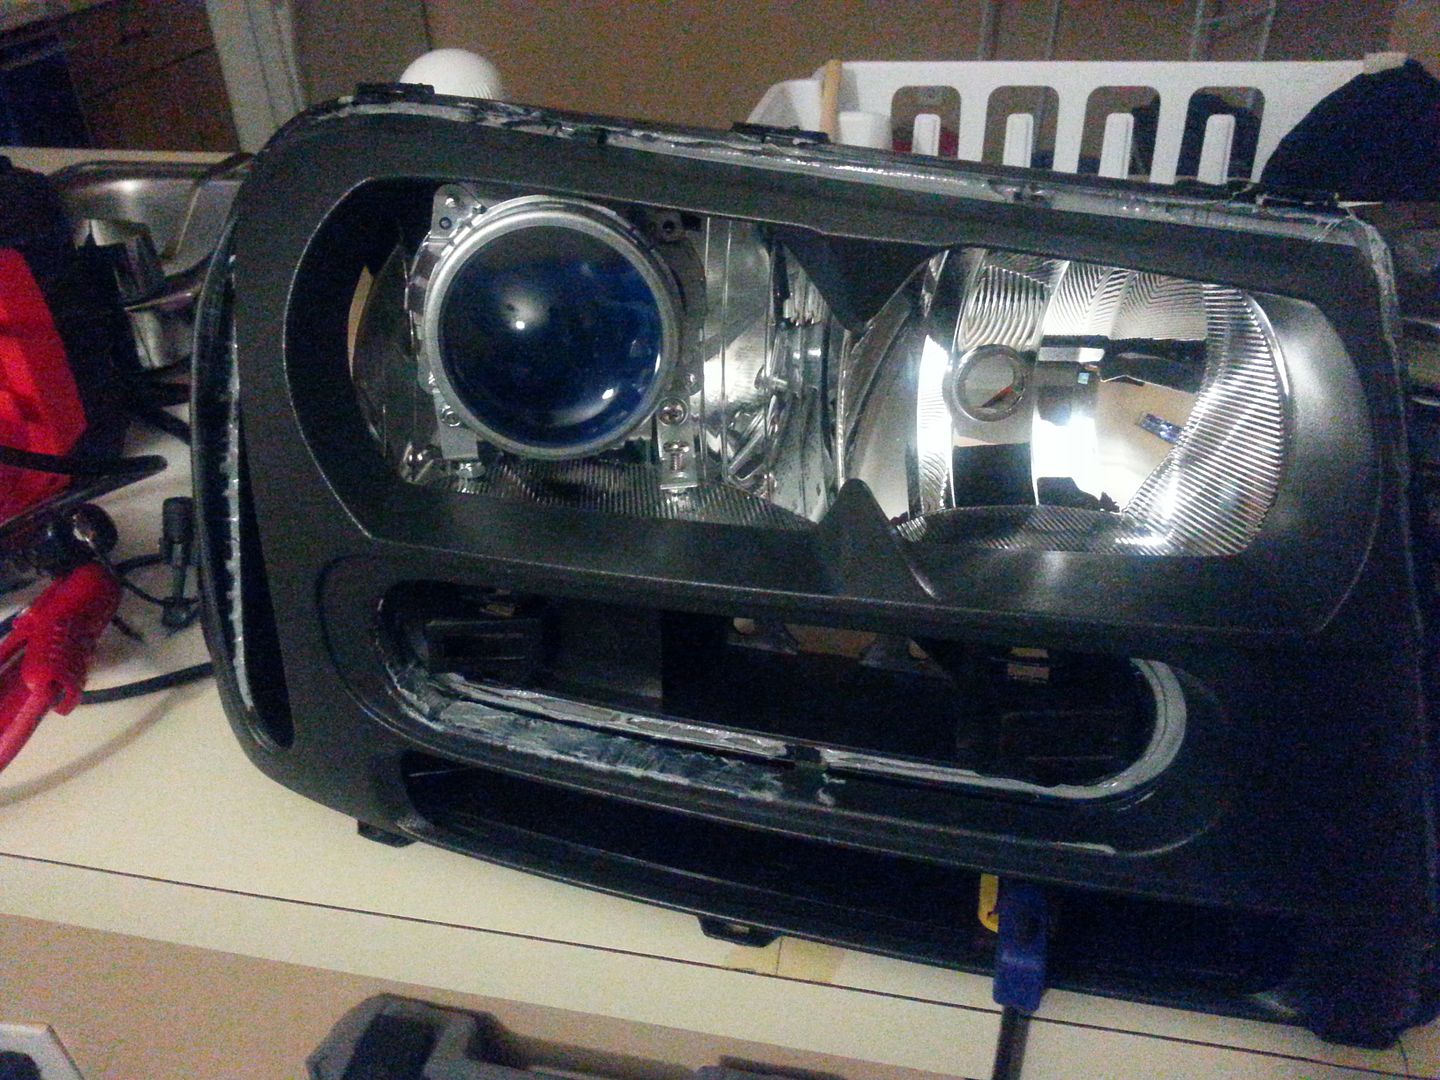
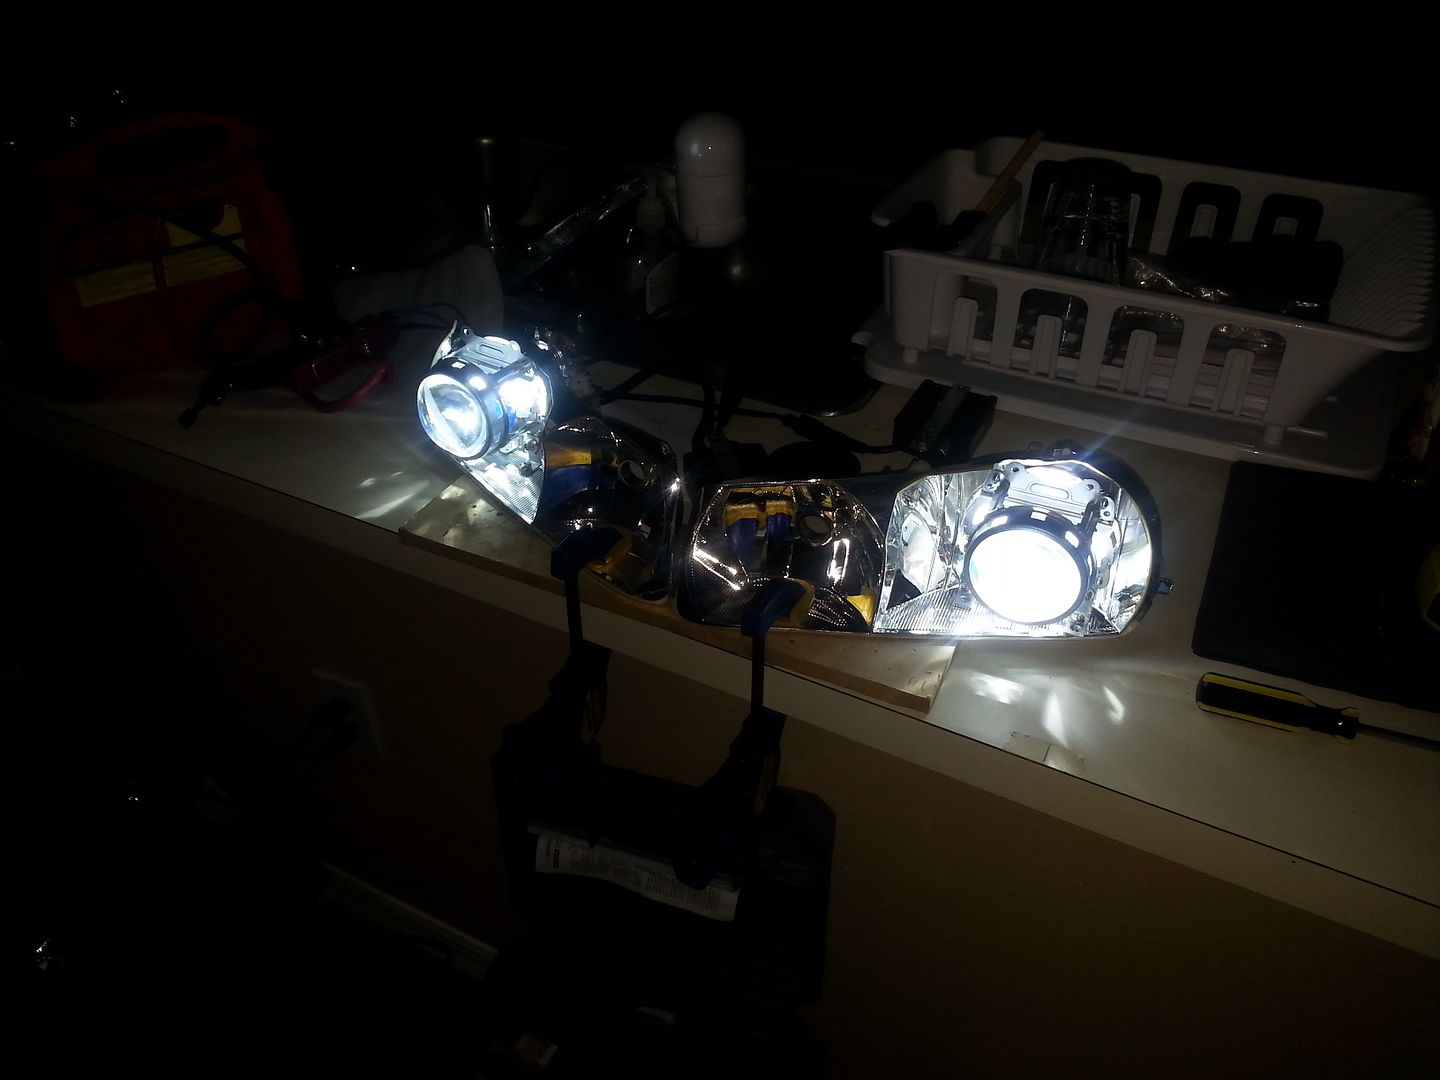
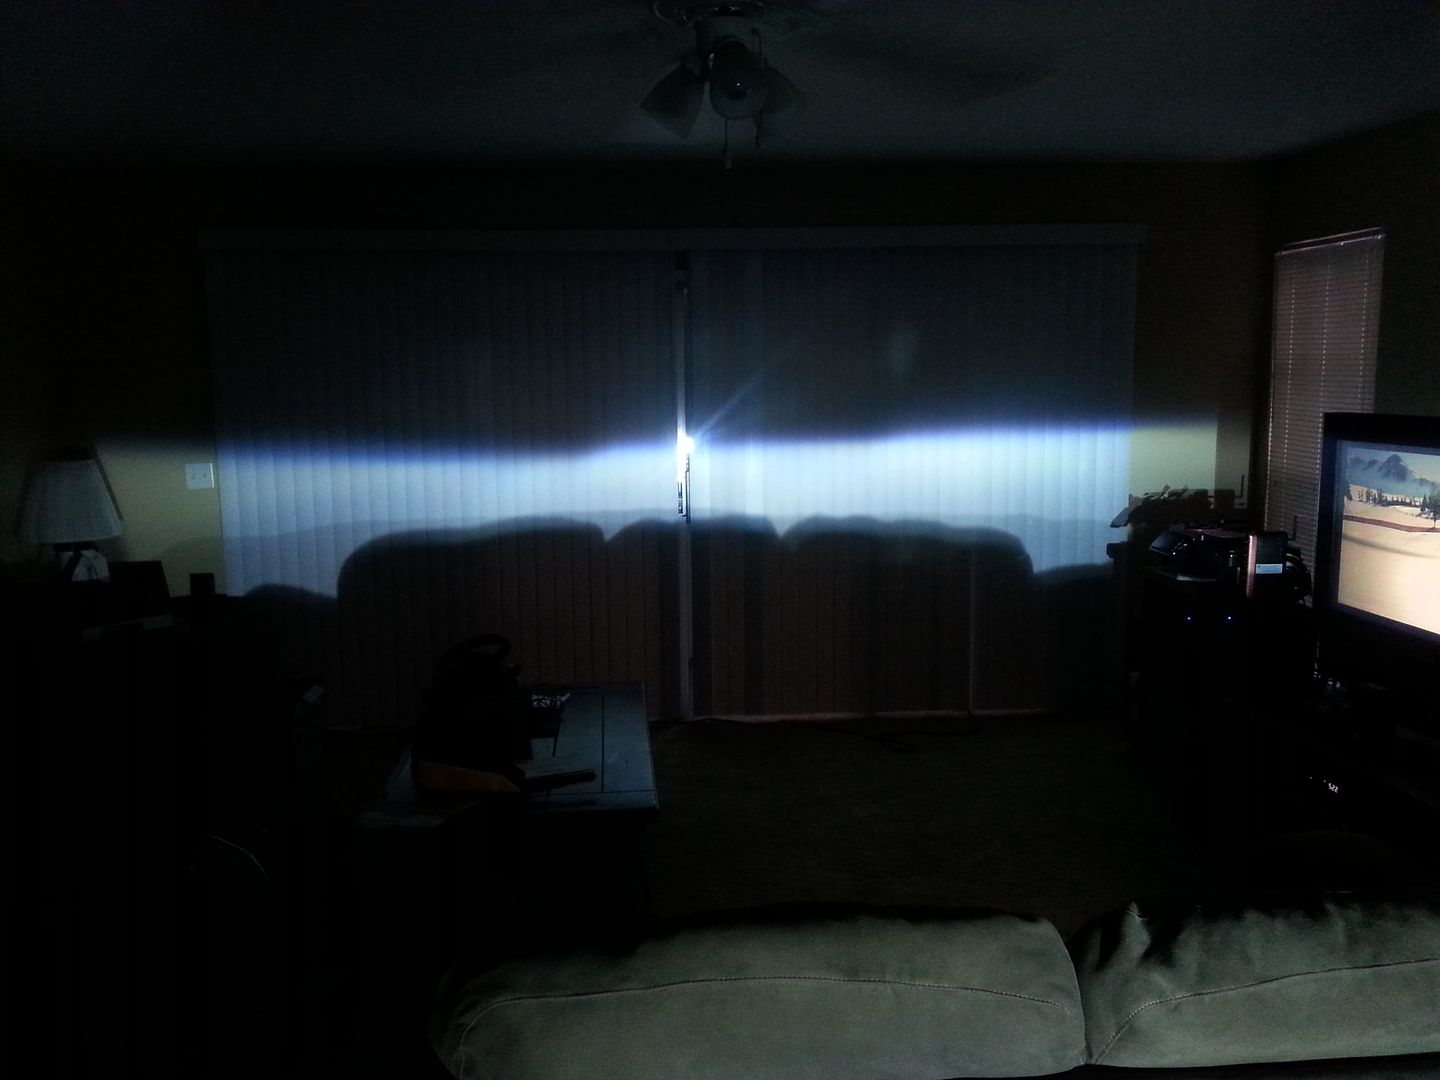
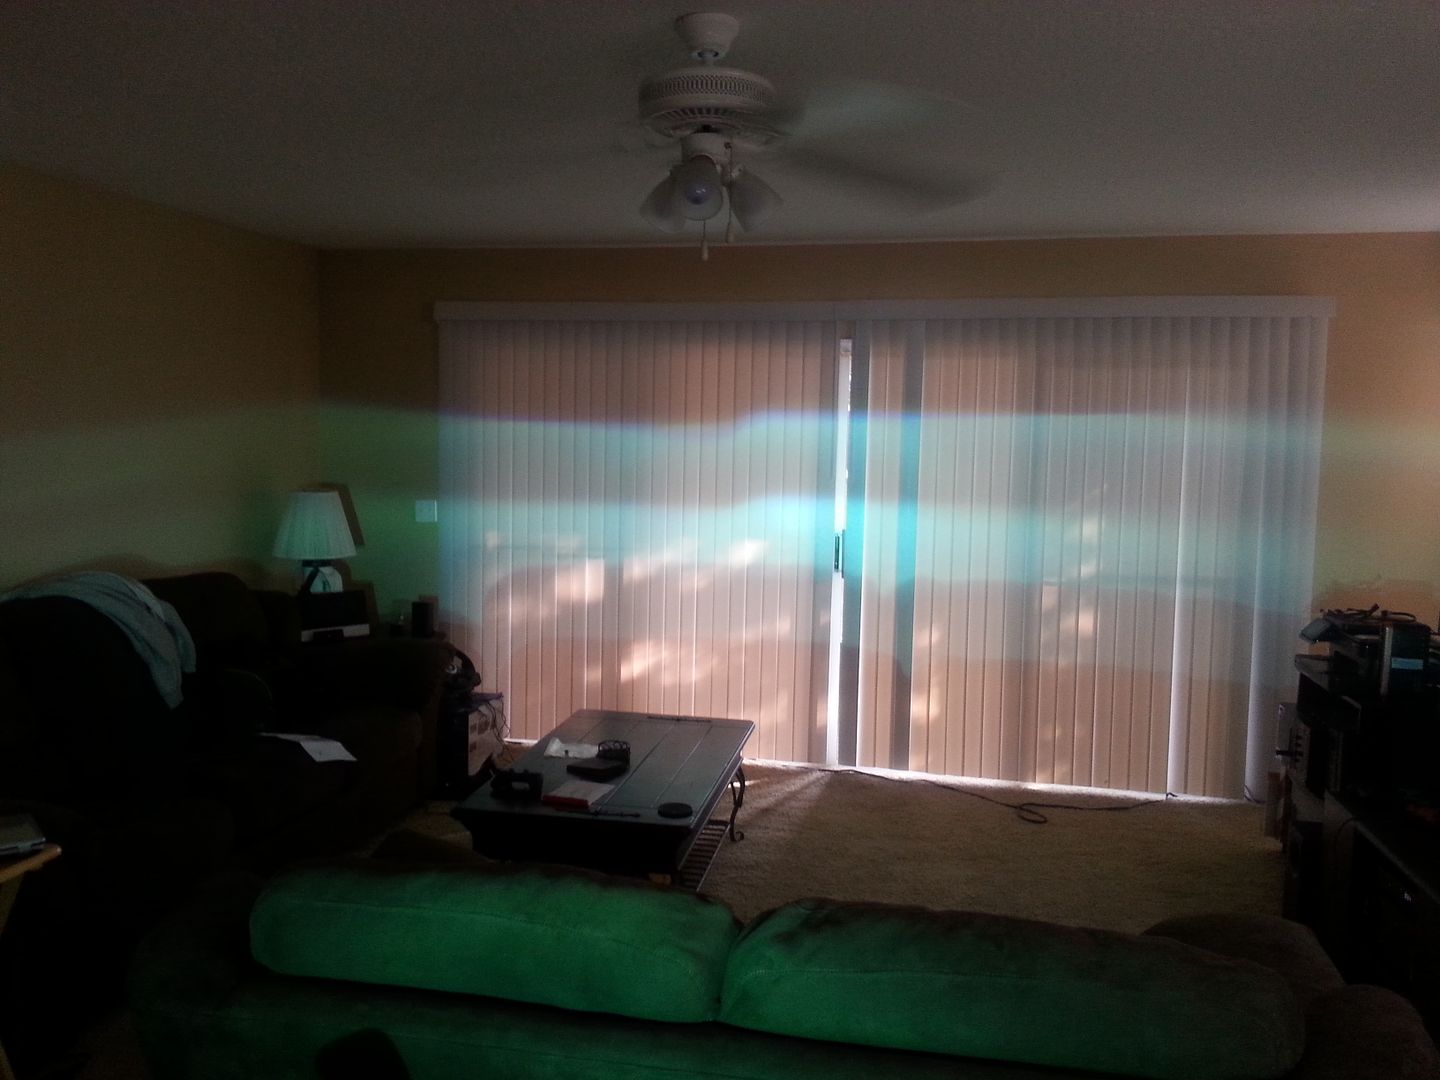
For the alignment process, I chose the indoor, living room wall method. Remove the reflector bowls from the headlight housings, clamped them to a bookshelf, powered up some halogen bulbs and marked the "cutoff and step" on the opposing wall with some painters tape. After marking where the reflector bowls were mounted on the shelf for later reference, it was time to get busy with the Dremel, and enlarge the bulb openings to fit the threaded shafts of the D2S projectors through.

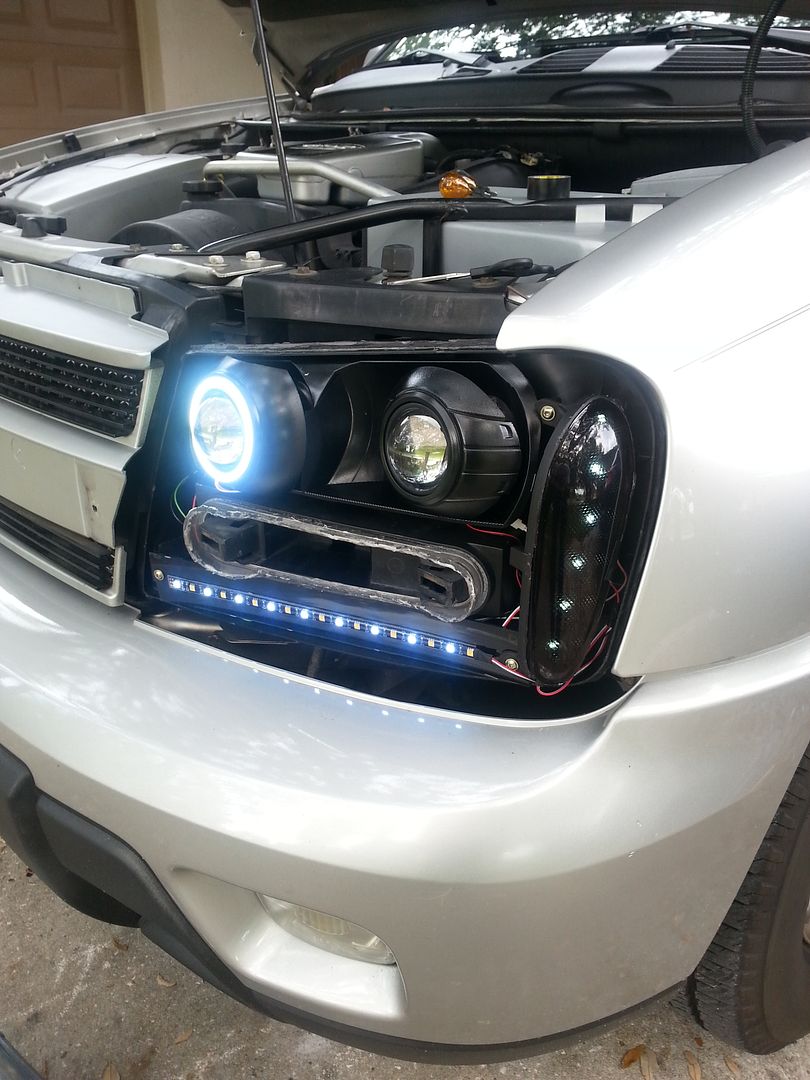
Note, the Morimoto Mini H1 projectors have a smaller shaft, and require minimal trimming if any. The D2S were considerable. Once the openings were large enough, it was time to install the projectors and make the necessary adjustments to align the beam patterns.

IMAG0605_zps71768da8.jpg


IMAG0606_zpse7efbc4a.jpg


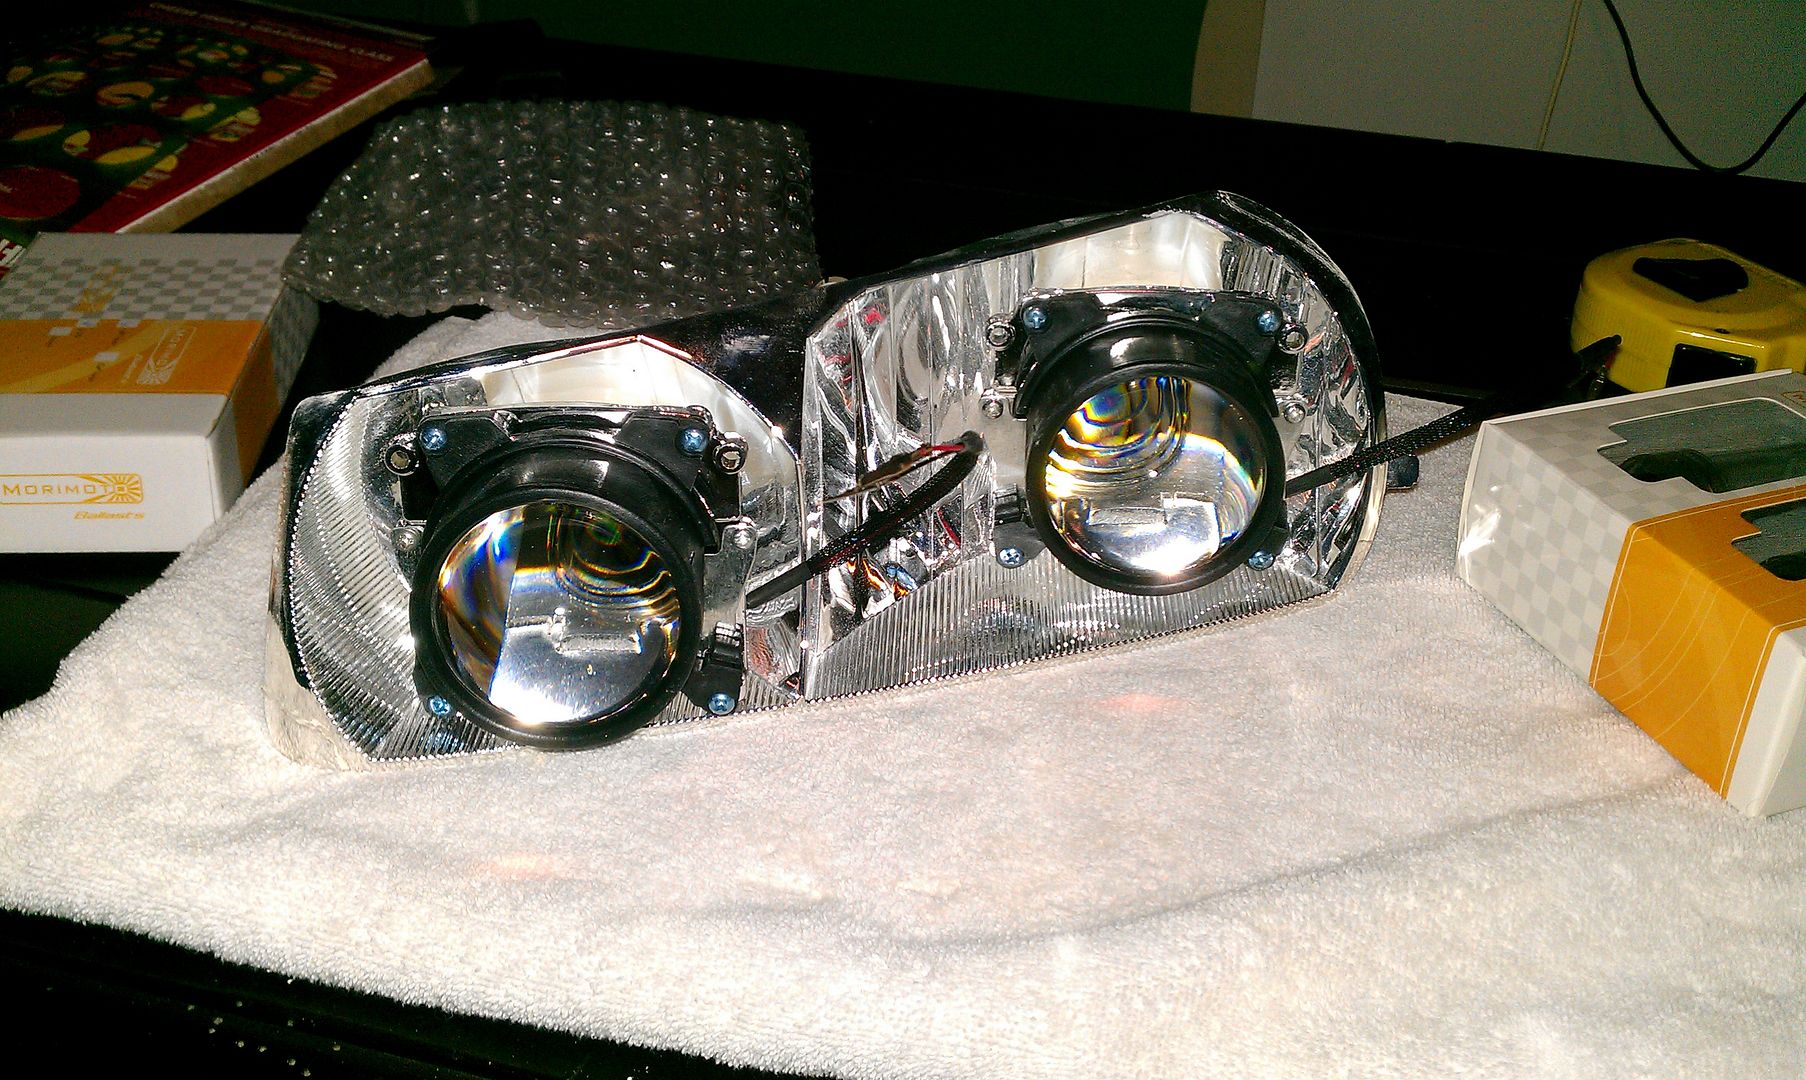
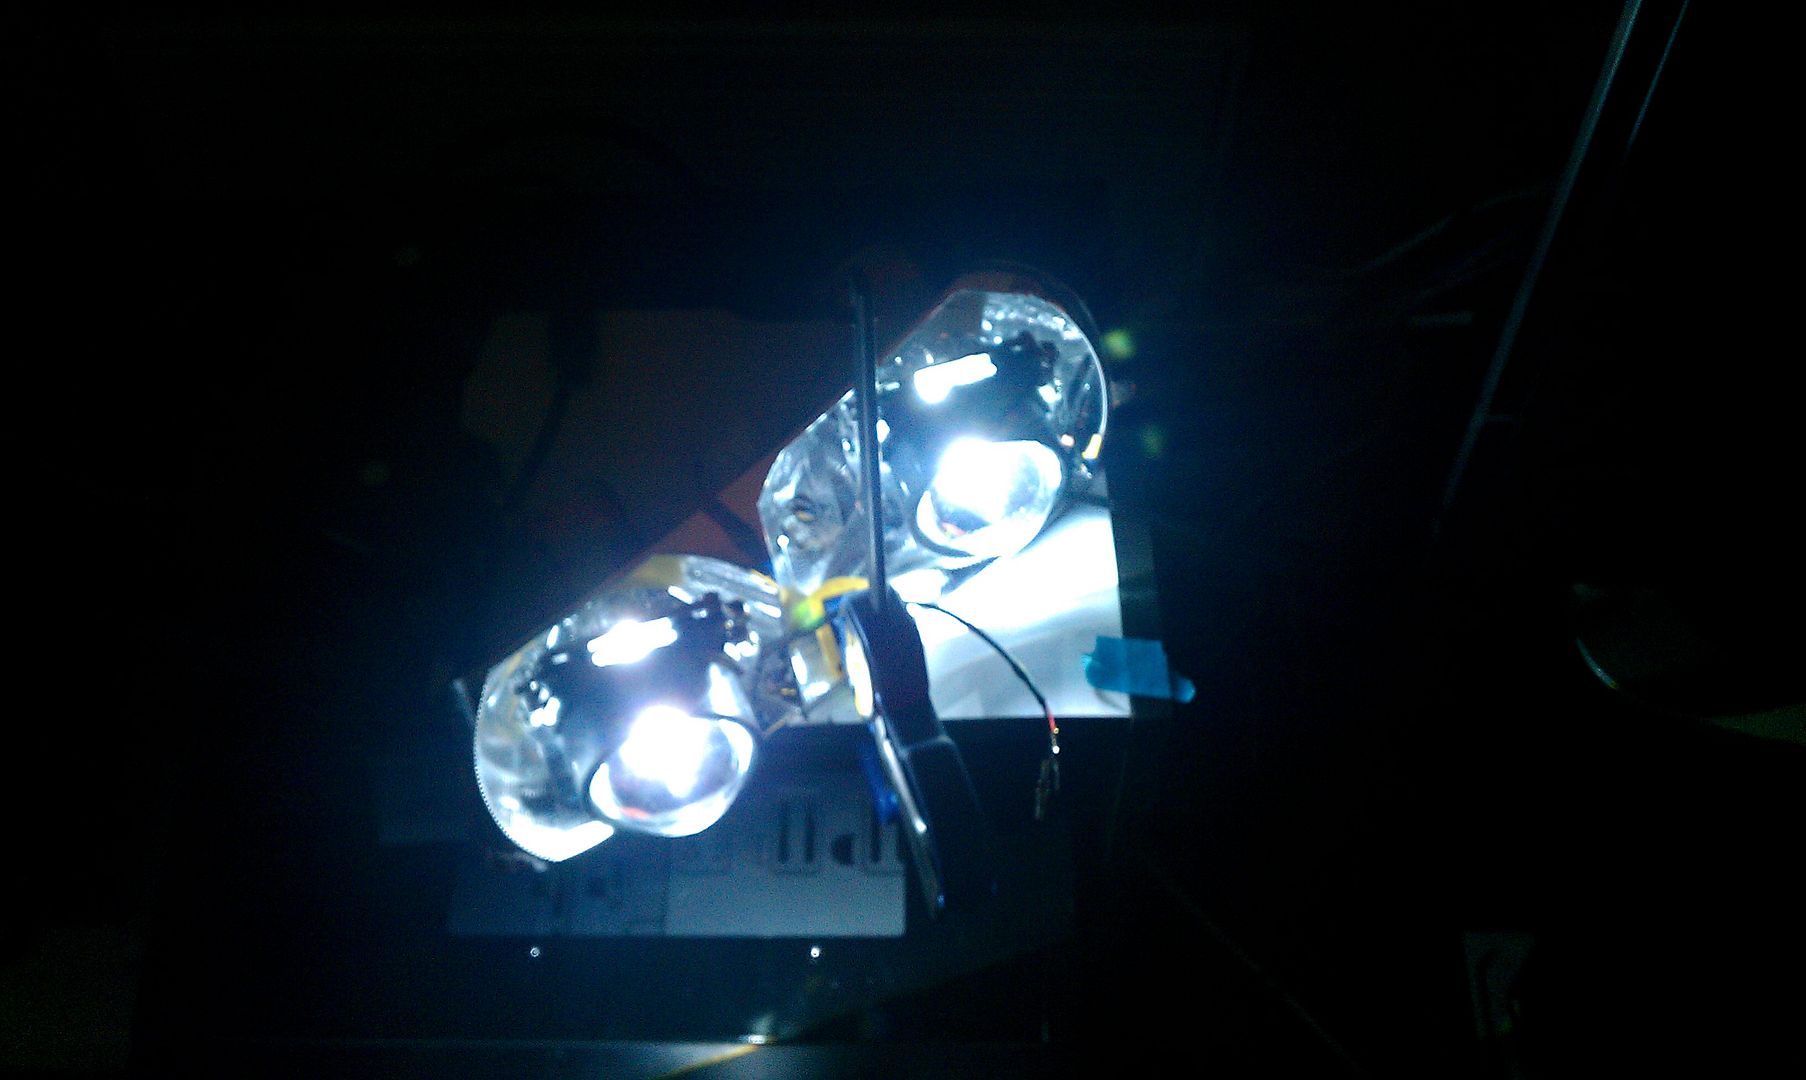
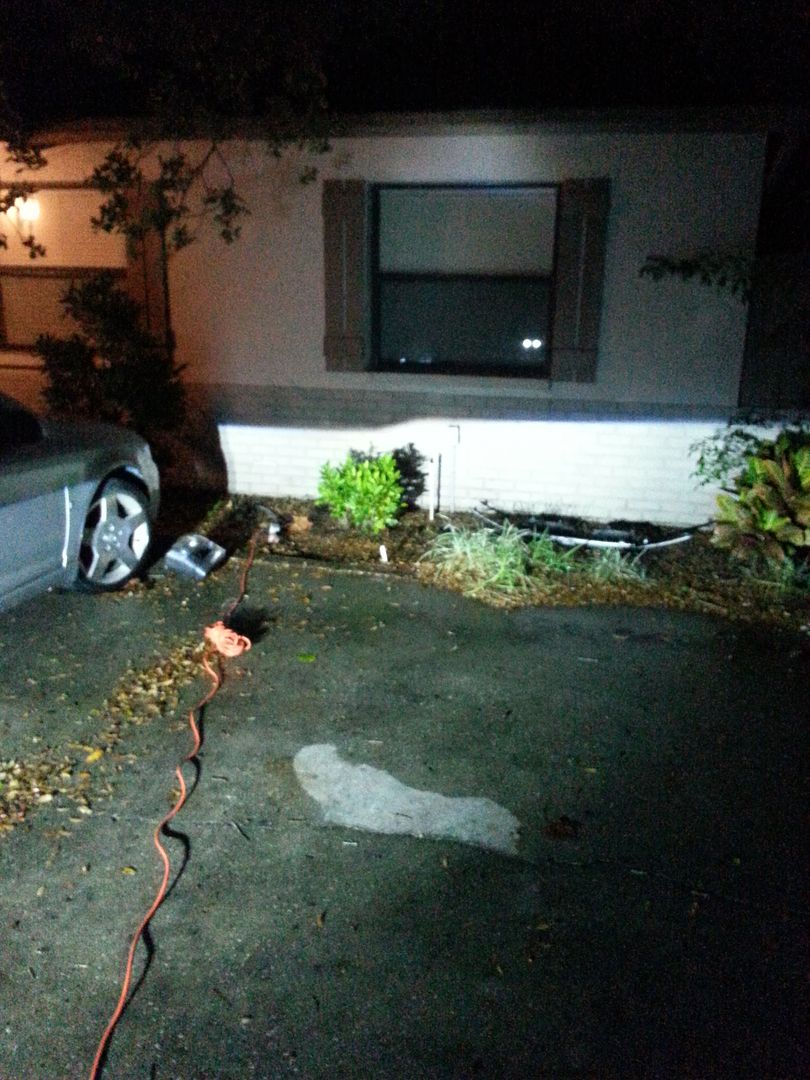
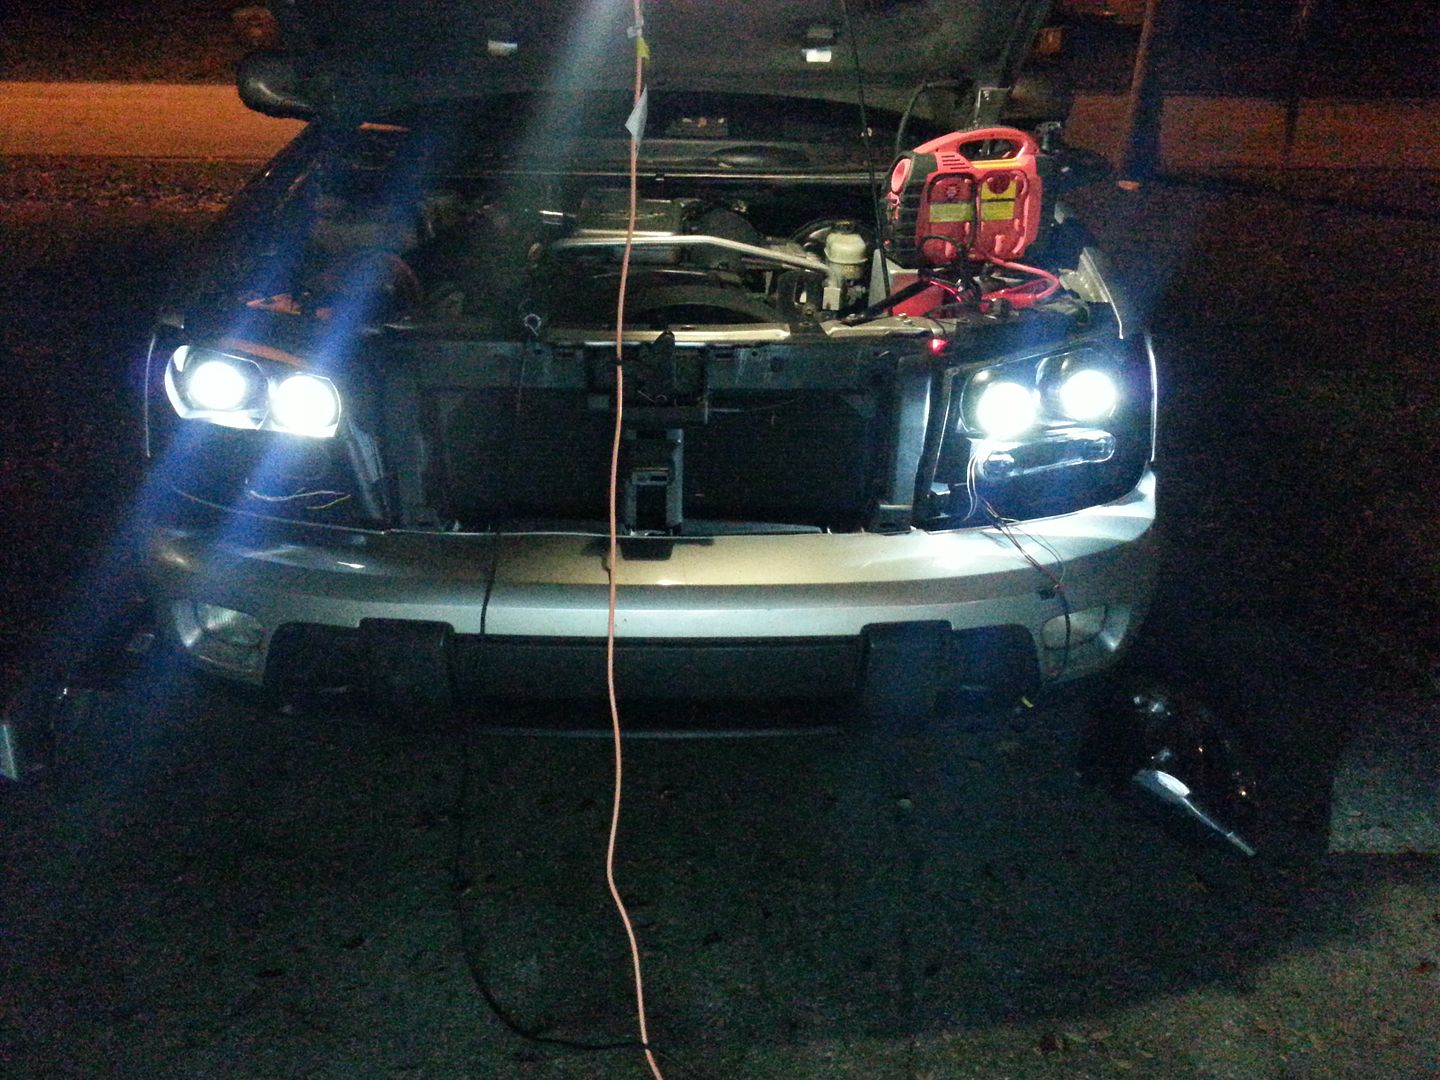
After removing them several times to shape the reflector bowl openings (the low beam projectors needed to be pointed higher, and the high beam projectors lower) I was able to get a good looking beam pattern on the wall.

IMAG0607_zpsc02891ac.jpg
 

Blckshdw

Original poster
Moderator
Nov 20, 2011
10,684
Tampa Bay Area, FL
Next it was time to test fit the shrouds, and figure out where, and how much would need to be trimmed there. I opted for the Ocular shrouds on the low beam sides due to their width.

IMAG0616_zps542af8c2.jpg


IMAG0617_zps12f3d1c2.jpg


IMAG0619_zps122abc46.jpg


IMAG0620_zpsf3e9bf9d.jpg


IMAG0626_zpsd6c45e4e.jpg


IMAG0627_zpsa83e810d.jpg
 

Blckshdw

Original poster
Moderator
Nov 20, 2011
10,684
Tampa Bay Area, FL
[SIZE=13.63636302948px]I had some pretty small shrouds initially for the high beam projectors, but as you can see there is very little coverage, so I scrapped them and went with the Iris for the high beams. [/SIZE]

20130922_114241_zpsed0582cf.jpg


20130922_120258_zps189de9e1.jpg


This looked much better

20130922_122353_zps319caa29.jpg


20130922_122416_zps1ac59808.jpg


After a mini assembly, I did another few indoor test fires to make sure the alignment was still good.

20130705_175851_zps73c26cd7.jpg
 

Blckshdw

Original poster
Moderator
Nov 20, 2011
10,684
Tampa Bay Area, FL
Next it was on to the switchbacks. I had some leftover acrylic from the failed vacuum forming project, so I cut a couple of pieces to mount the forward facing switchback strips to. Used some 3M double sided mounting tape to keep them in place as opposed to the adhesive the strips came with. Here they are test fitted.

20130928_161349_zpsdddfd2f6.jpg


And powered up...

20130928_161412_zps23b77d00.jpg


During the process of trimming the shrouds to get them to fit properly behind the bezel, I scuffed and scratched them in a few places that I couldn't live with, so I decided to paint the shrouds and reflector bowls black. Since I had my projector alignment set the way I wanted it, and didn't want to chip off the JB Plastic Weld on the lock rings and start over, I dismantled the projector faces, and put painters tape over the projector reflector blows and gave them a few coats of high temp paint.

20131005_183449_zpsfbce757f.jpg


While those were drying, I moved onto the demon eyes. Trimmed the strips to fit around the ring of the projector lens holder, and used more 3M mounting tape to keep them in place. Test firing them showed some promise.


20131010_211109_zps1e359607.jpg


Projectors reassembled

20131010_214736_zps487bf65e.jpg


20131010_214745_zpsbbab7e63.jpg
 

Blckshdw

Original poster
Moderator
Nov 20, 2011
10,684
Tampa Bay Area, FL
Now it's time to get the sides and corner lenses. Checking the light transmission through the dark lenses wasn't too bad.

20131012_141856_zps5c553525.jpg


When there's no backlighting though, they appear completely blacked out. Dremeled out an access slot at the bottom of the corner lens holder to feed the wiring, and spliced that in with the main strips.

20131012_141828_zpsc2607a43.jpg


20131012_141834_zps3ec98ae7.jpg


The halos were added to the high beam projectors, using a thin bead of RTV on the front of the shroud. Low power on the test bench to play nice for the camera.

20131019_180030_zps50f510ec.jpg


20131019_180057_zpsc2dbc38c.jpg


20131019_181115_zps7f4e4764.jpg


20131019_181155_zps3f59149d.jpg
 

Blckshdw

Original poster
Moderator
Nov 20, 2011
10,684
Tampa Bay Area, FL
Finally got to the home stretch, and it was time to do some fitting on the truck, and to wire up the LED strips to a 3157 pigtail.

20131024_151652_zps751edbba.jpg


20131024_151704_zps6a906548.jpg


20131024_151715_zpsb3b1906a.jpg


Halos are bright, a little too bright actually

20131028_190422_zps80e63480.jpg


20131028_190518_zps8057749c.jpg


When the projectors are fired up, the glare from the halo overshadows them when viewing them directly.

20131028_190545_zps88988639.jpg


Fall of 2013, the headlights were road worthy. But what really bugged me, was somehow, when connecting the D2S ballasts to the bulbs once mounted on the truck, all of the projectors cocked to one side.

20131028_191011_zps93de9f35.jpg


As long as I wasn't pointed at a flat surface, I could try to ignore it. Road coverage was awesome though, as you'd expect running 4 HID bulbs at once.

20131031_234826_zps8c1309e3.jpg
 

Blckshdw

Original poster
Moderator
Nov 20, 2011
10,684
Tampa Bay Area, FL
Everything ran nicely for several months, and then I noticed the demon eyes weren't very bright, and you could only really see them from up close and certain angles. I finally got bugged by it enough to crack the lights open again to have a look, as well as fix my alignment issues.

It turns out, the LEDs at the top of the lens holder, that were in direct HID exposure had essentially gotten cooked, even through the silicone cover.

20131229_152905_zpsfqz6f6j3.jpg


But the LEDs that were at the bottom of the lens holder, and protected by the shield and high beam solenoid were perfectly fine.

20131229_152914_zpsbhvf2wfg.jpg


Confirmed this on the test bench. Burnt LEDs first, a couple barely have some life left.

20131229_153050_zpspnhyk2dw.jpg


And then the ones at the bottom of the lens doing just fine.

20131229_153057_zpsnm7fvefz.jpg


Didn't really want to deal with figuring out how to fix that, since I didn't know at the time, which I do now :crazy: 
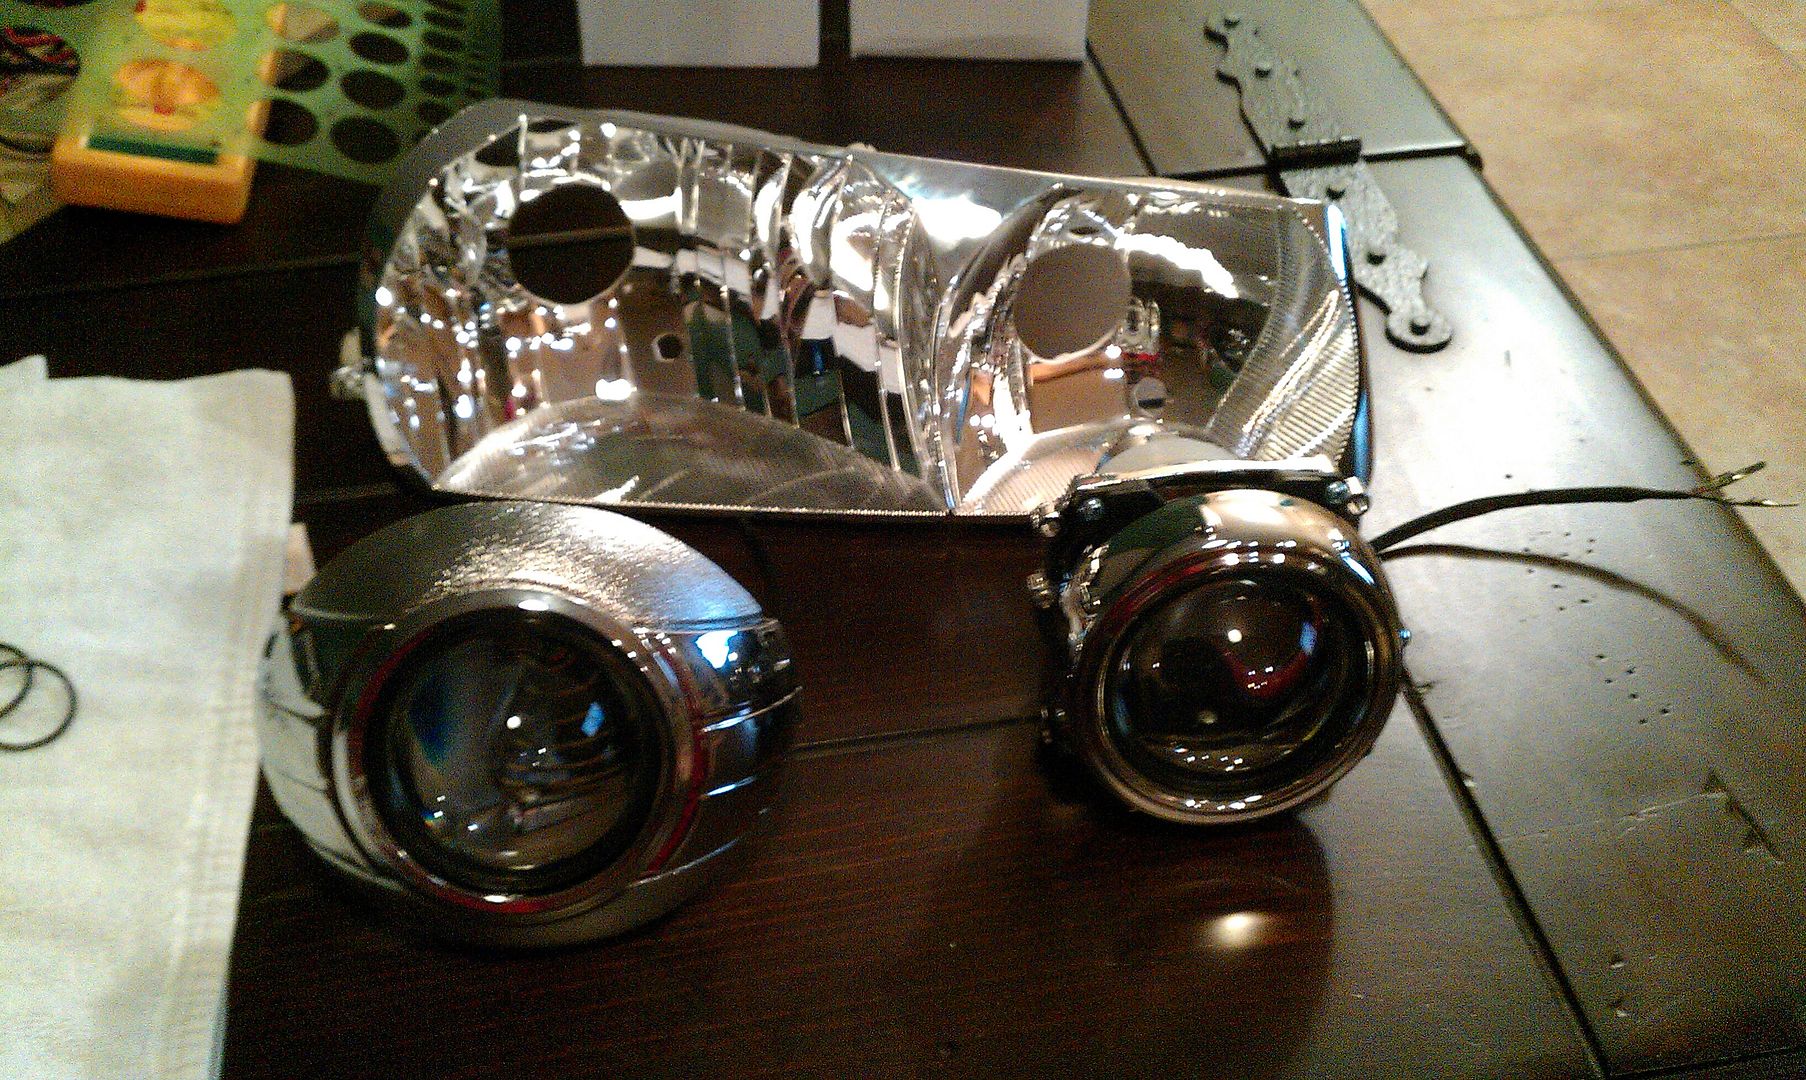
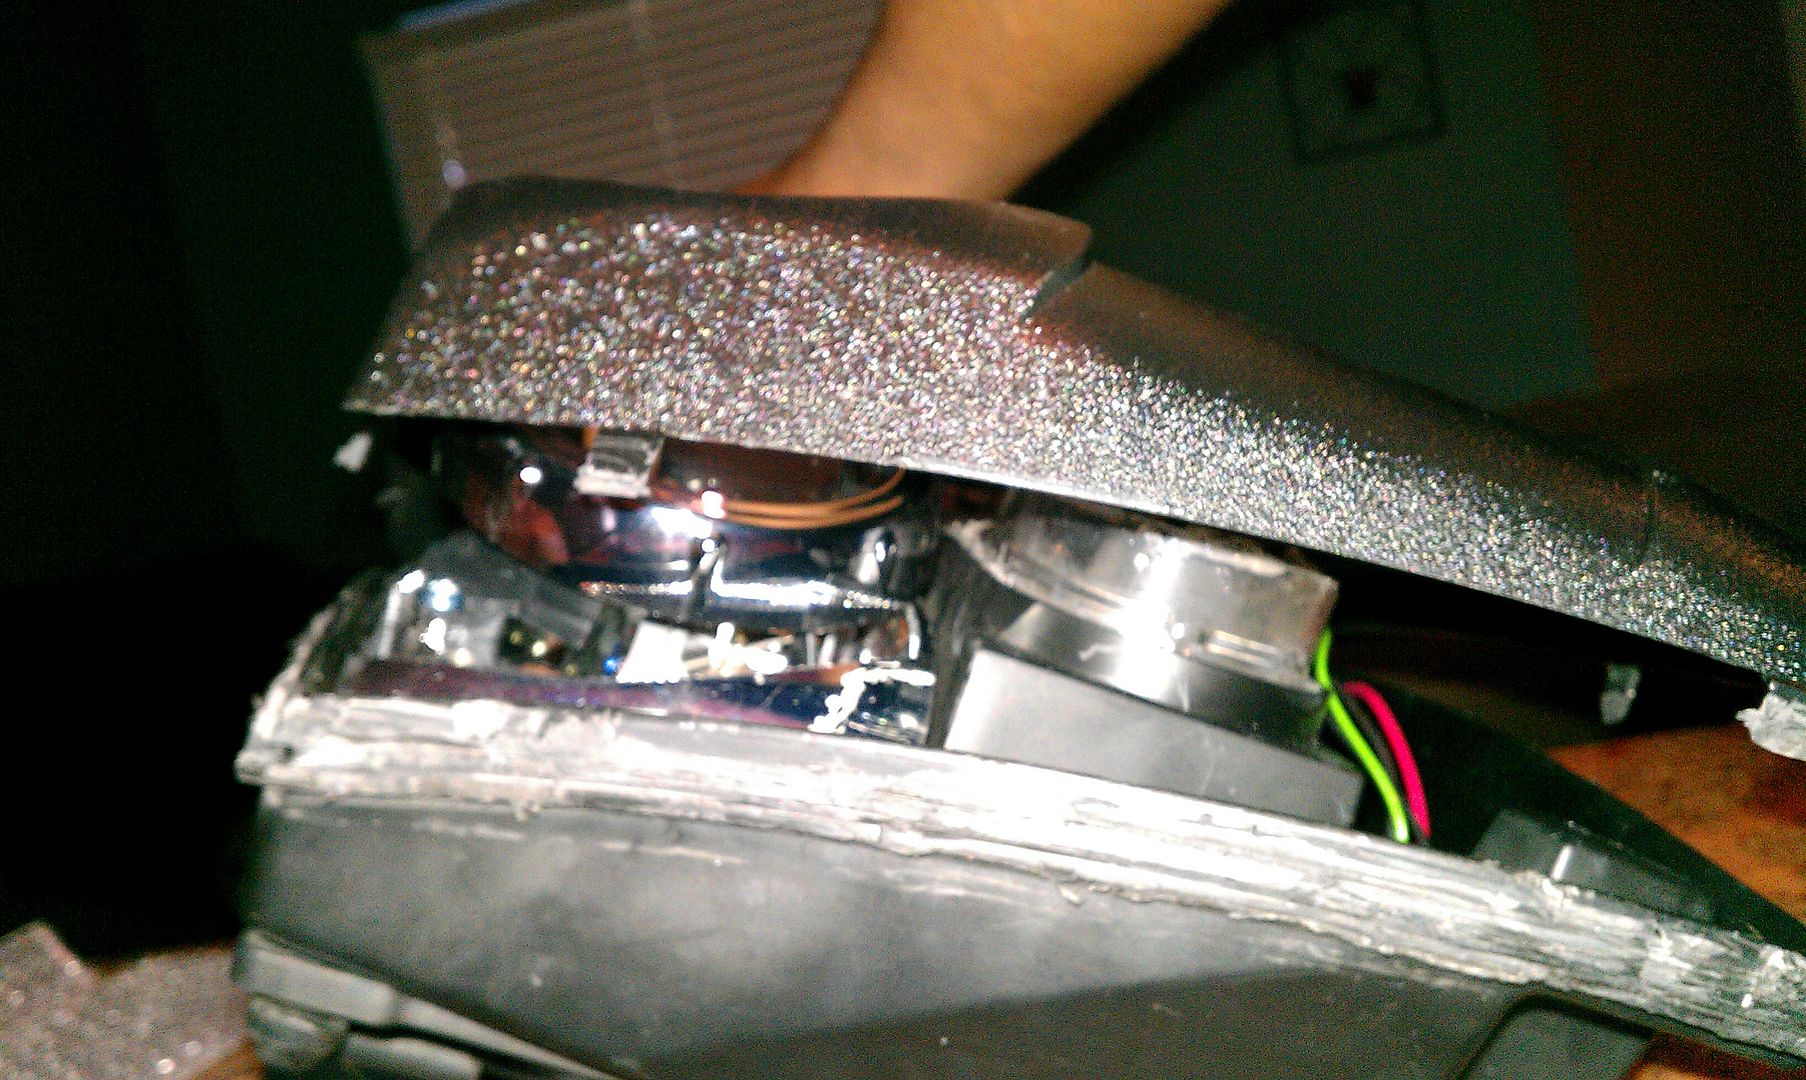
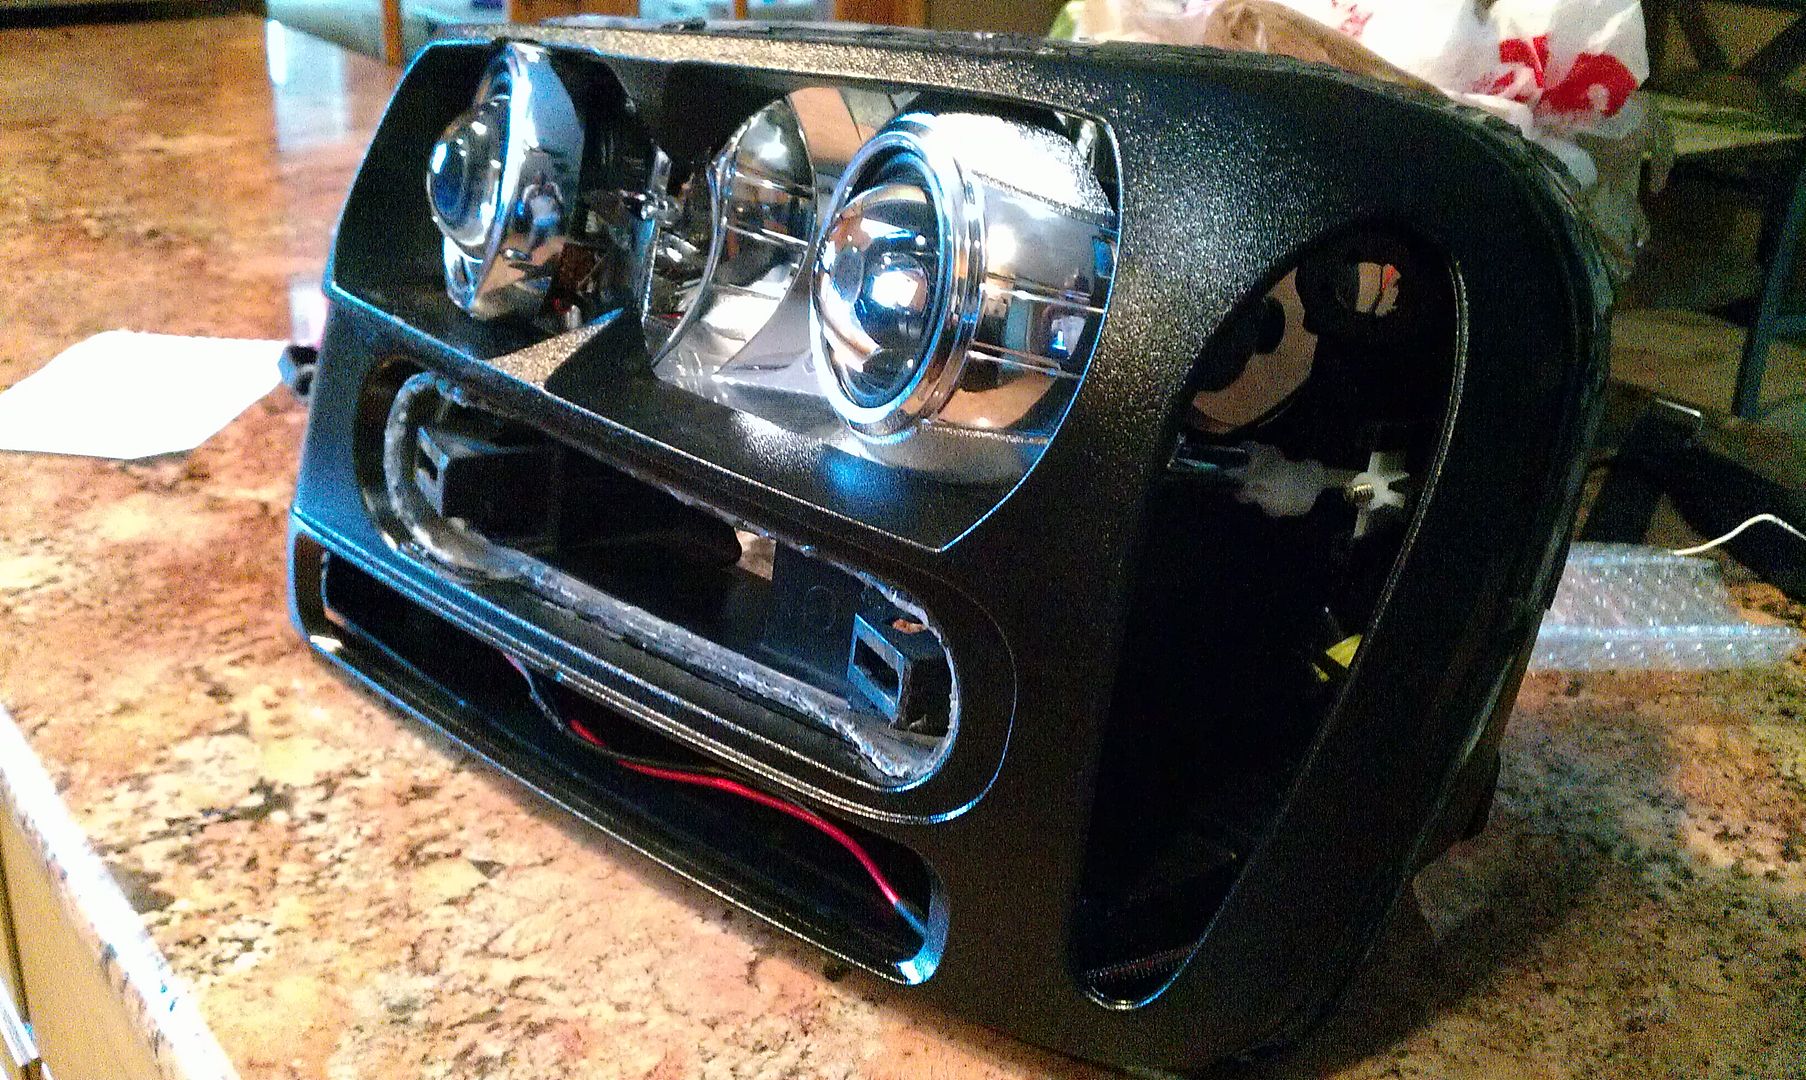
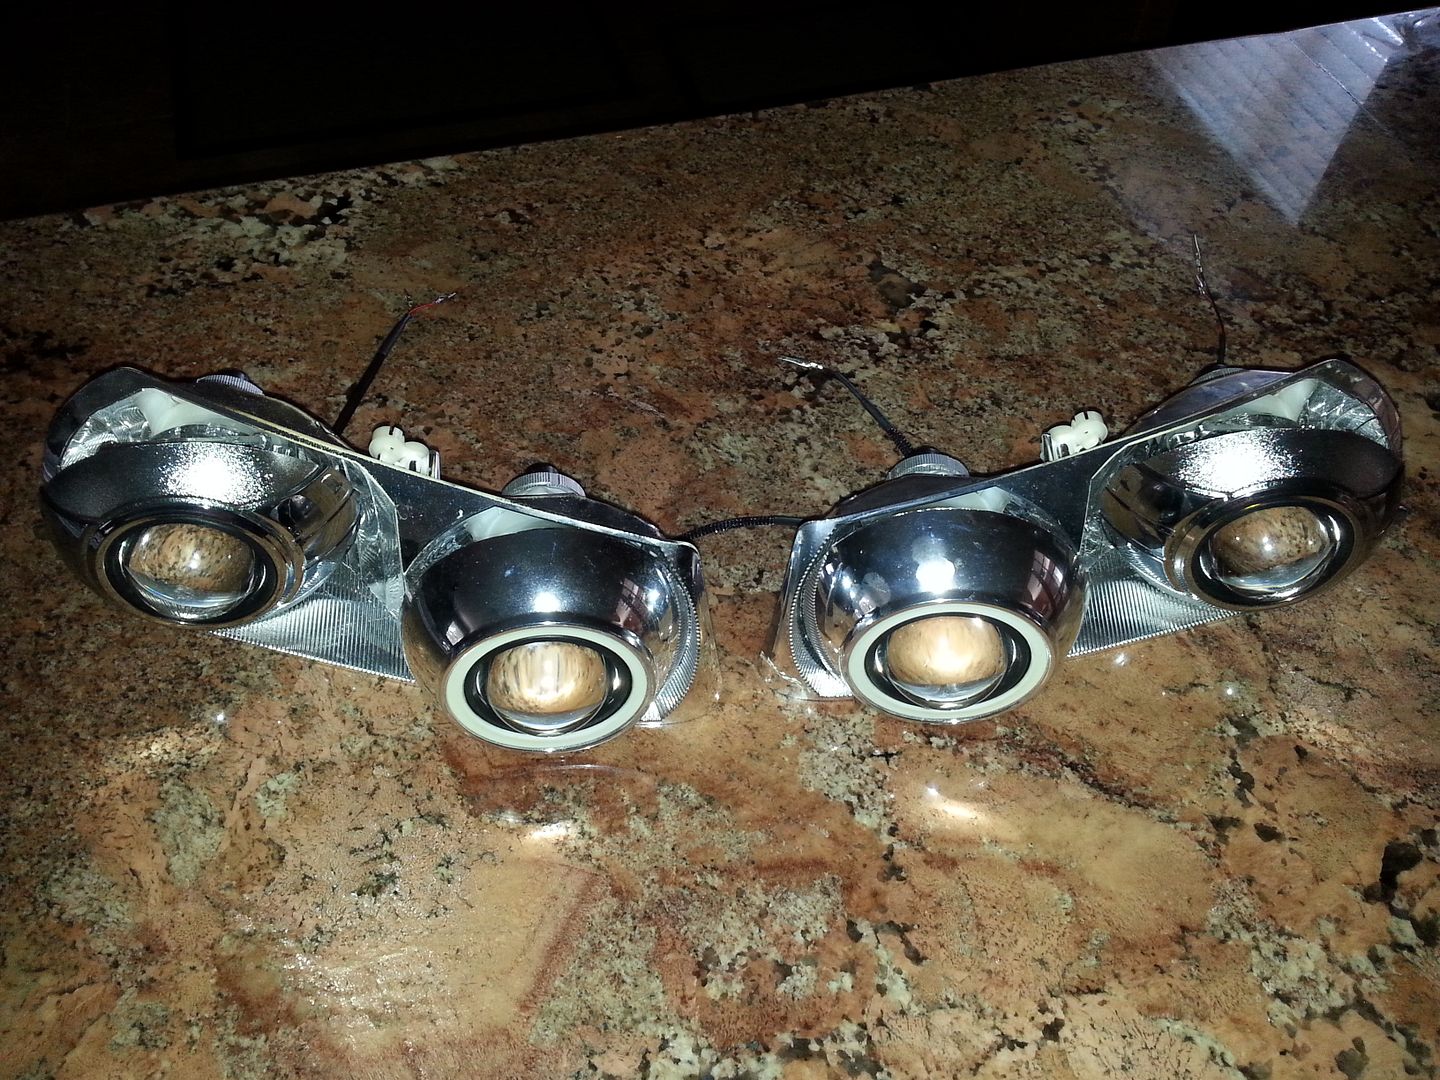
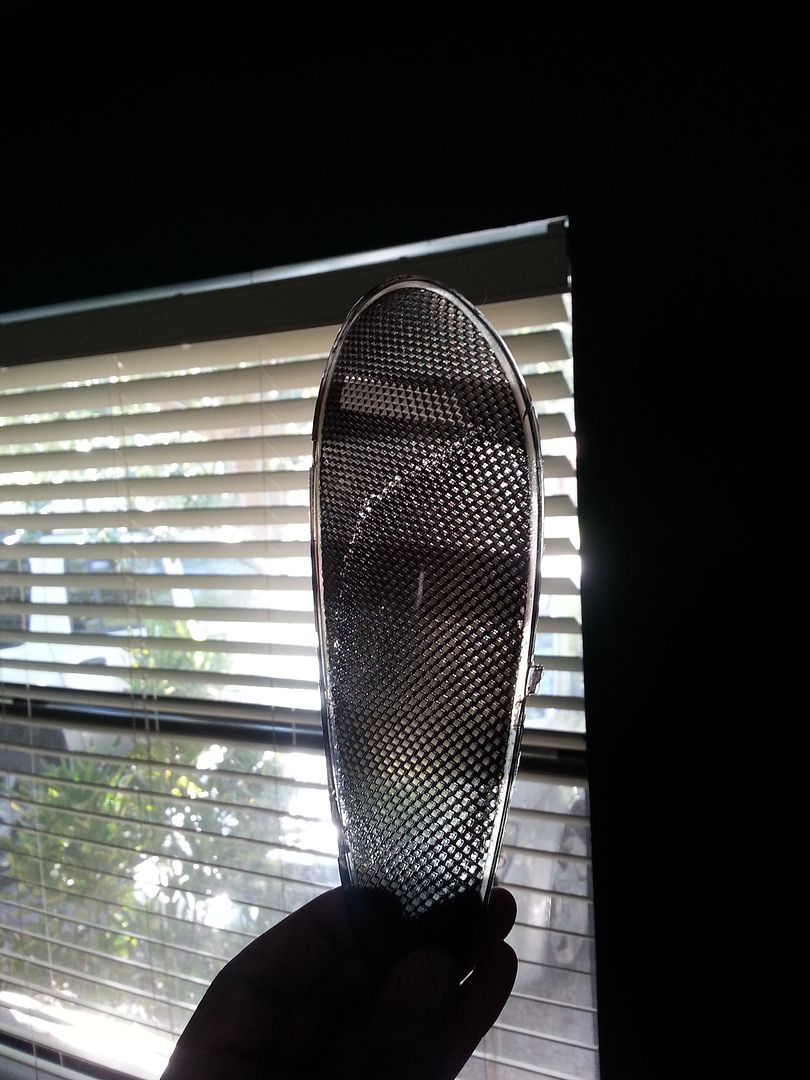
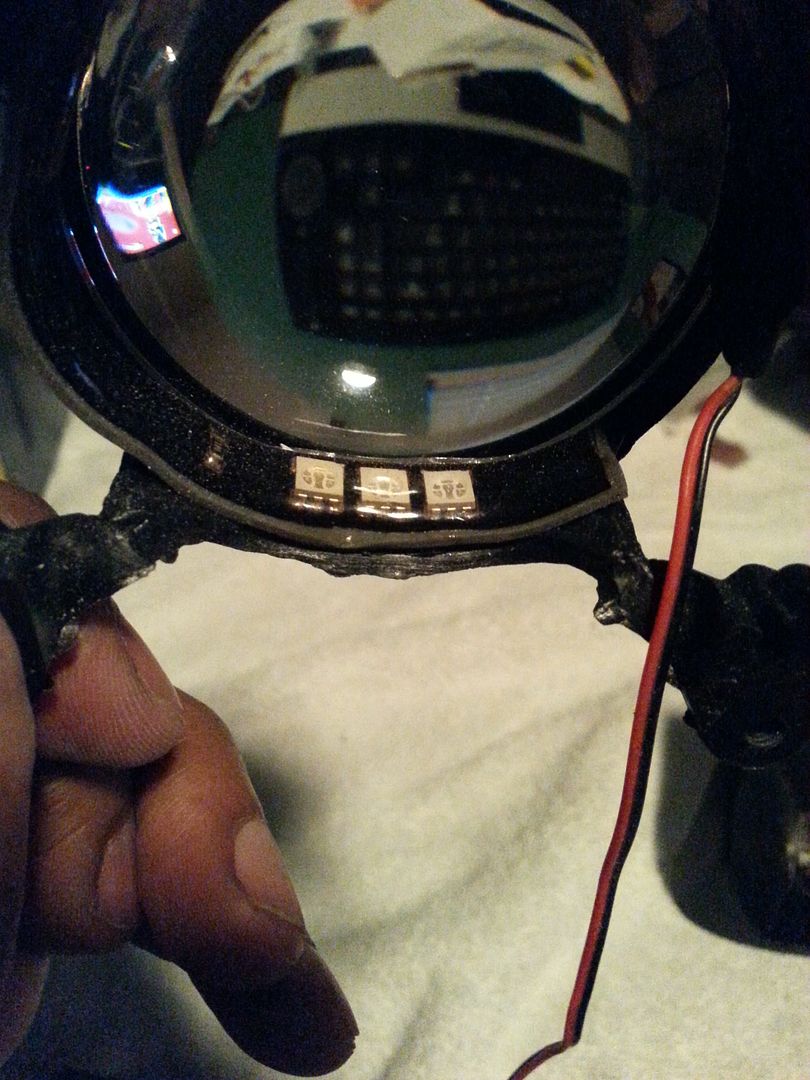
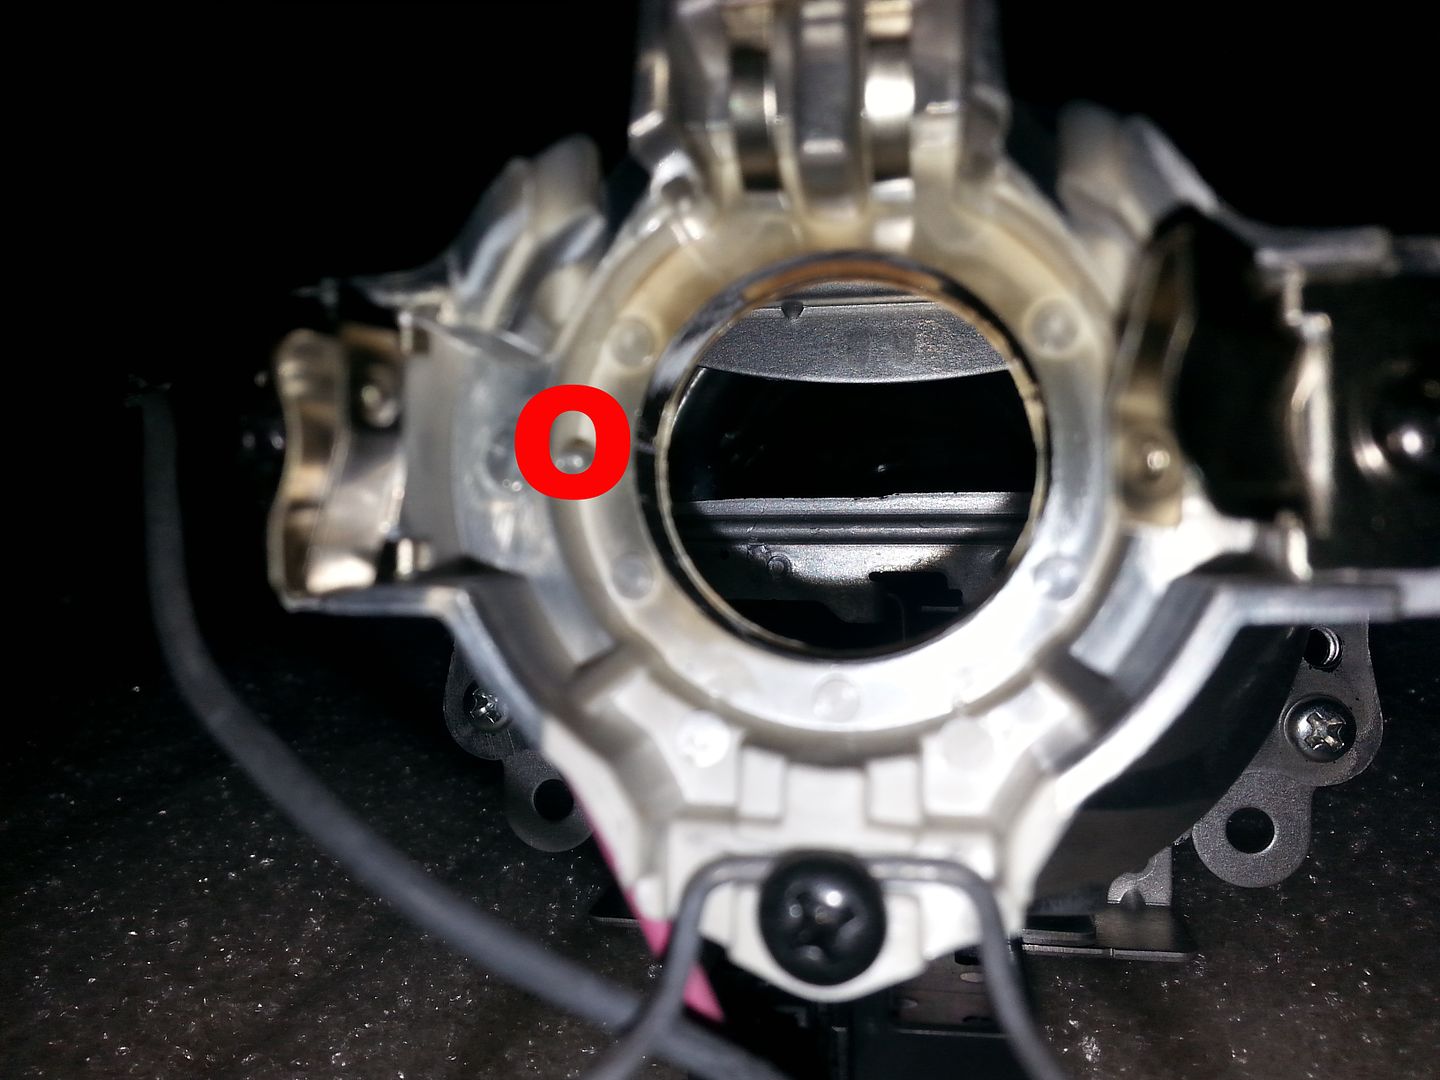
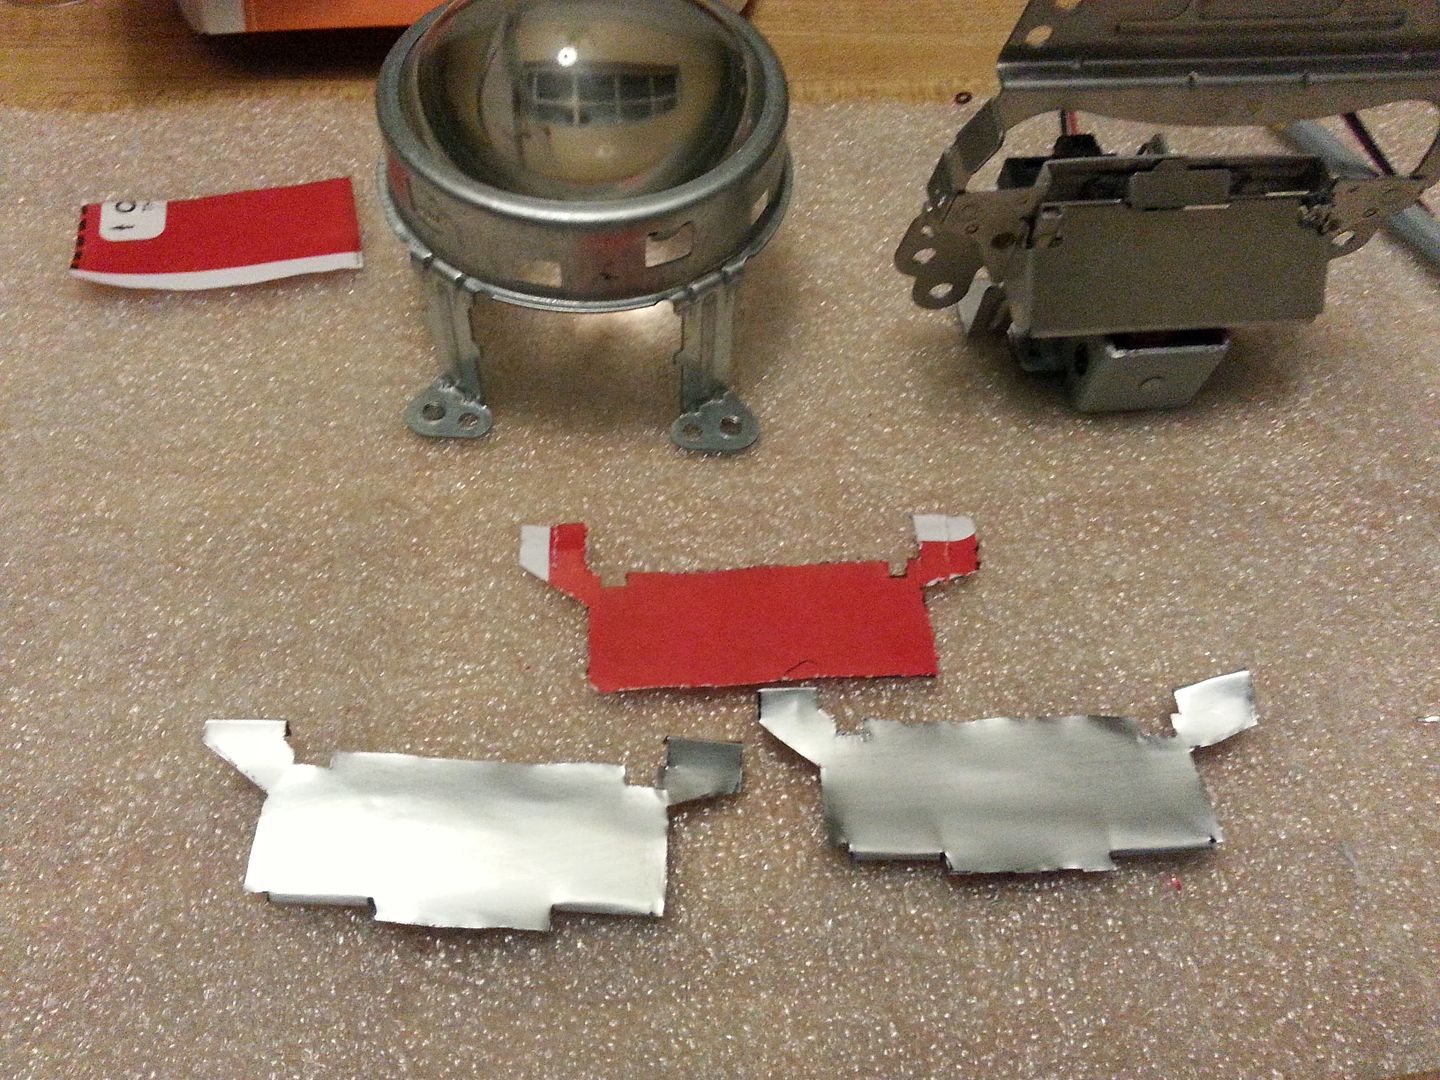
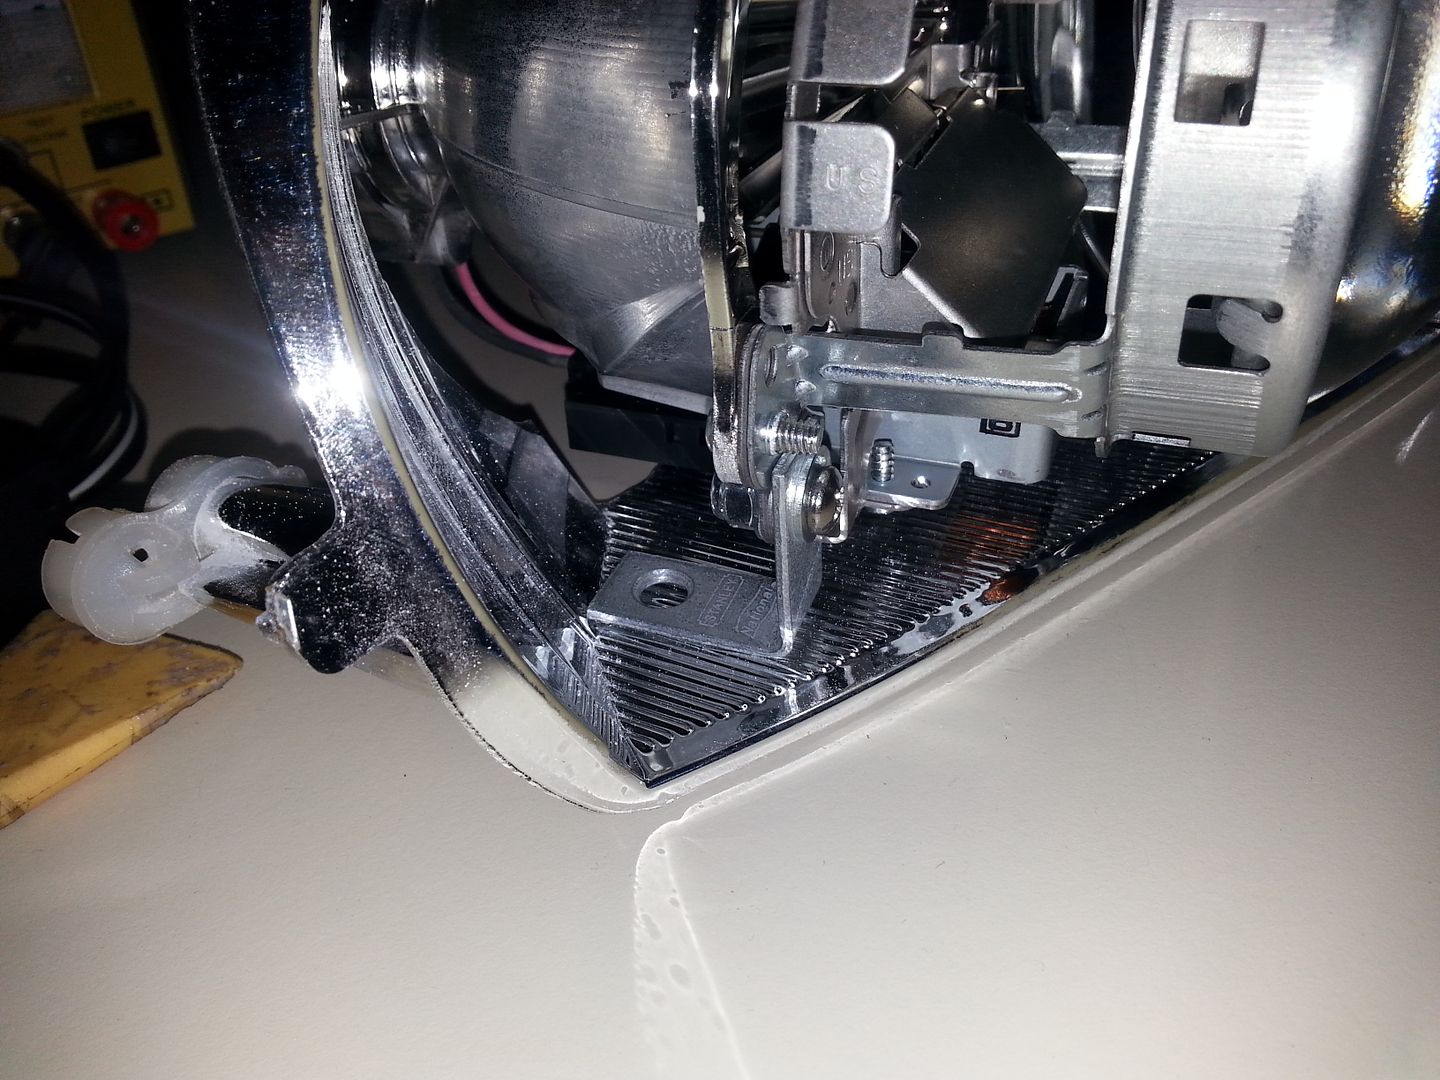
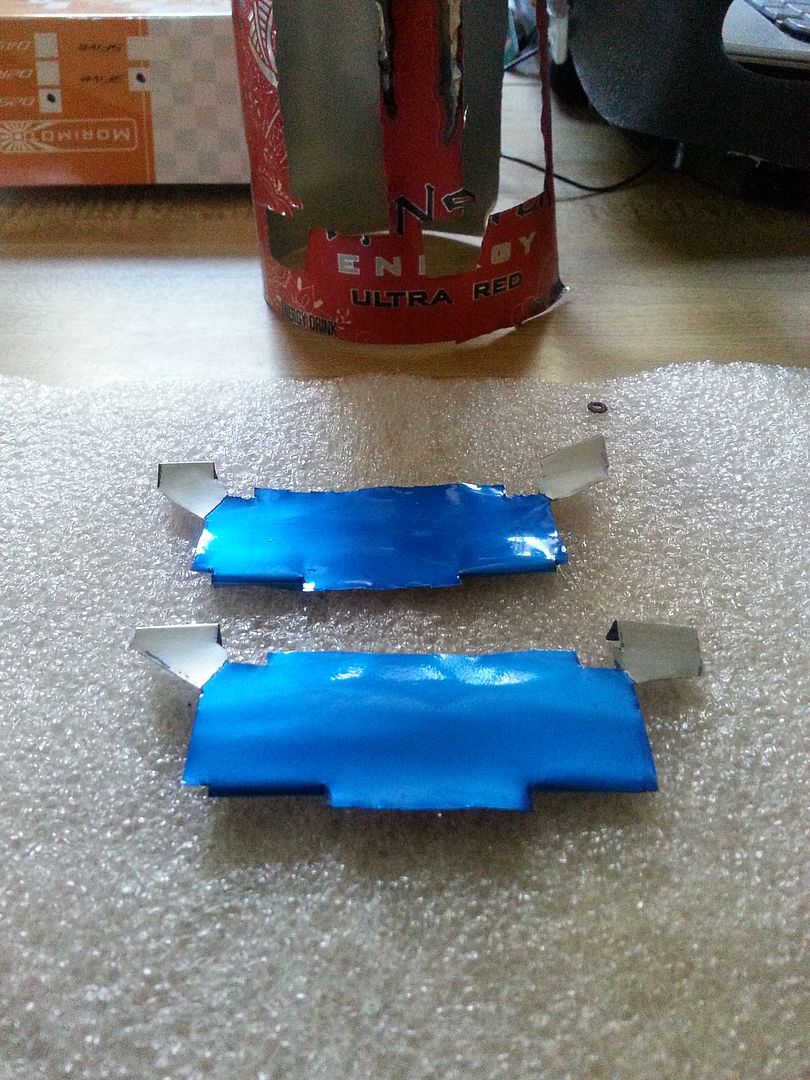
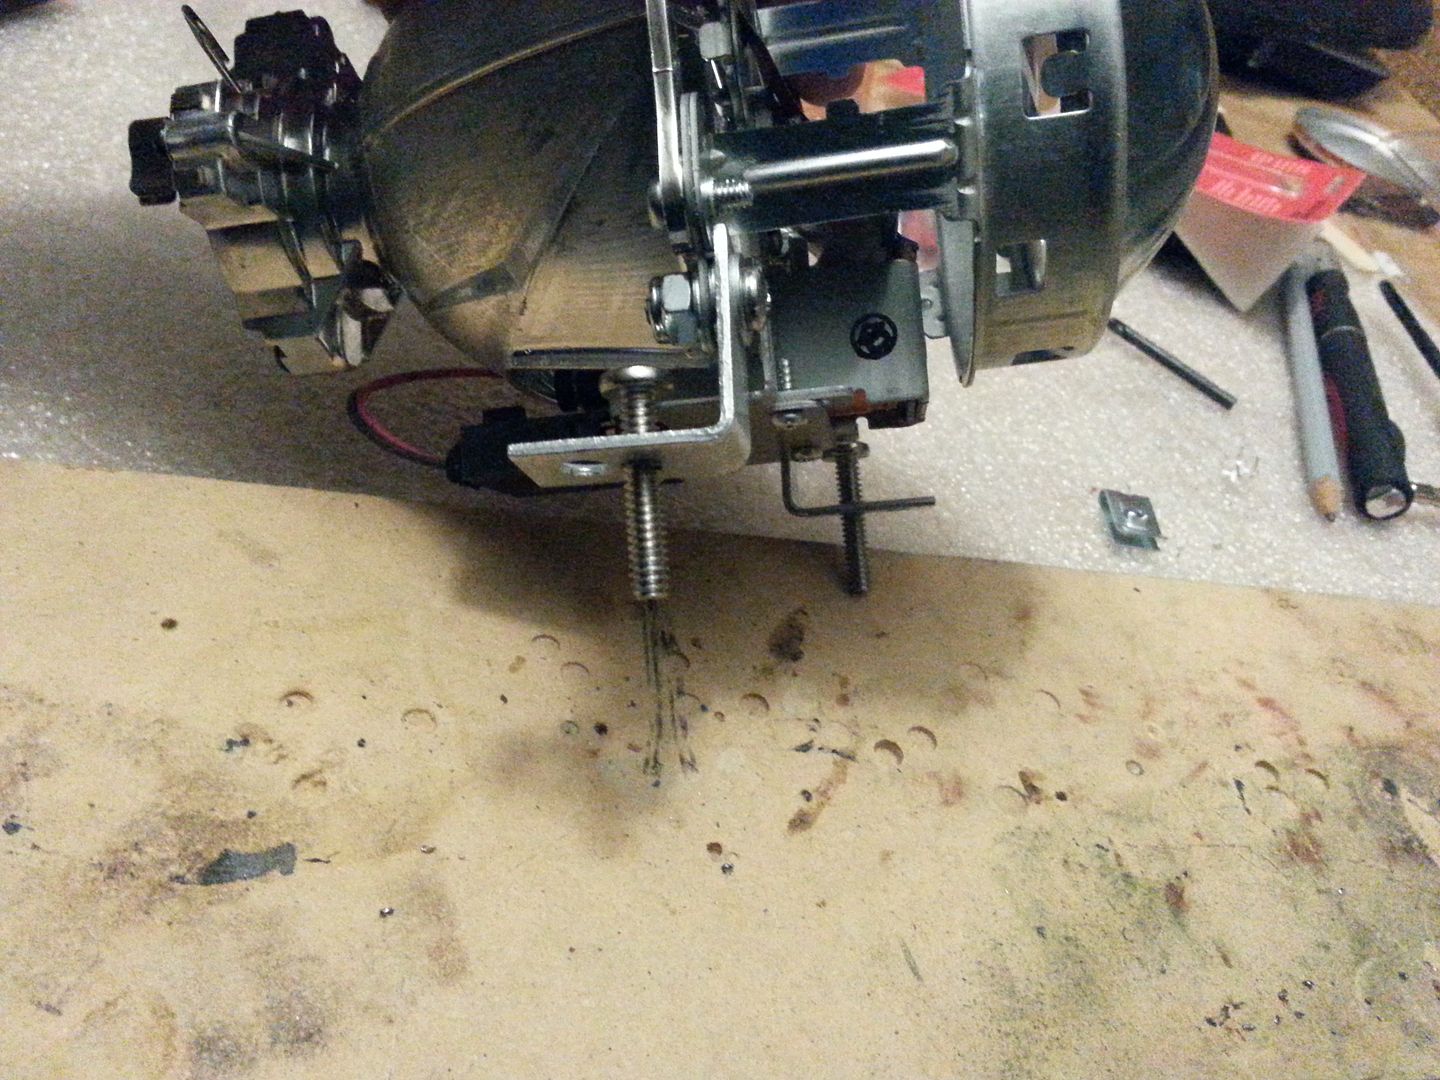
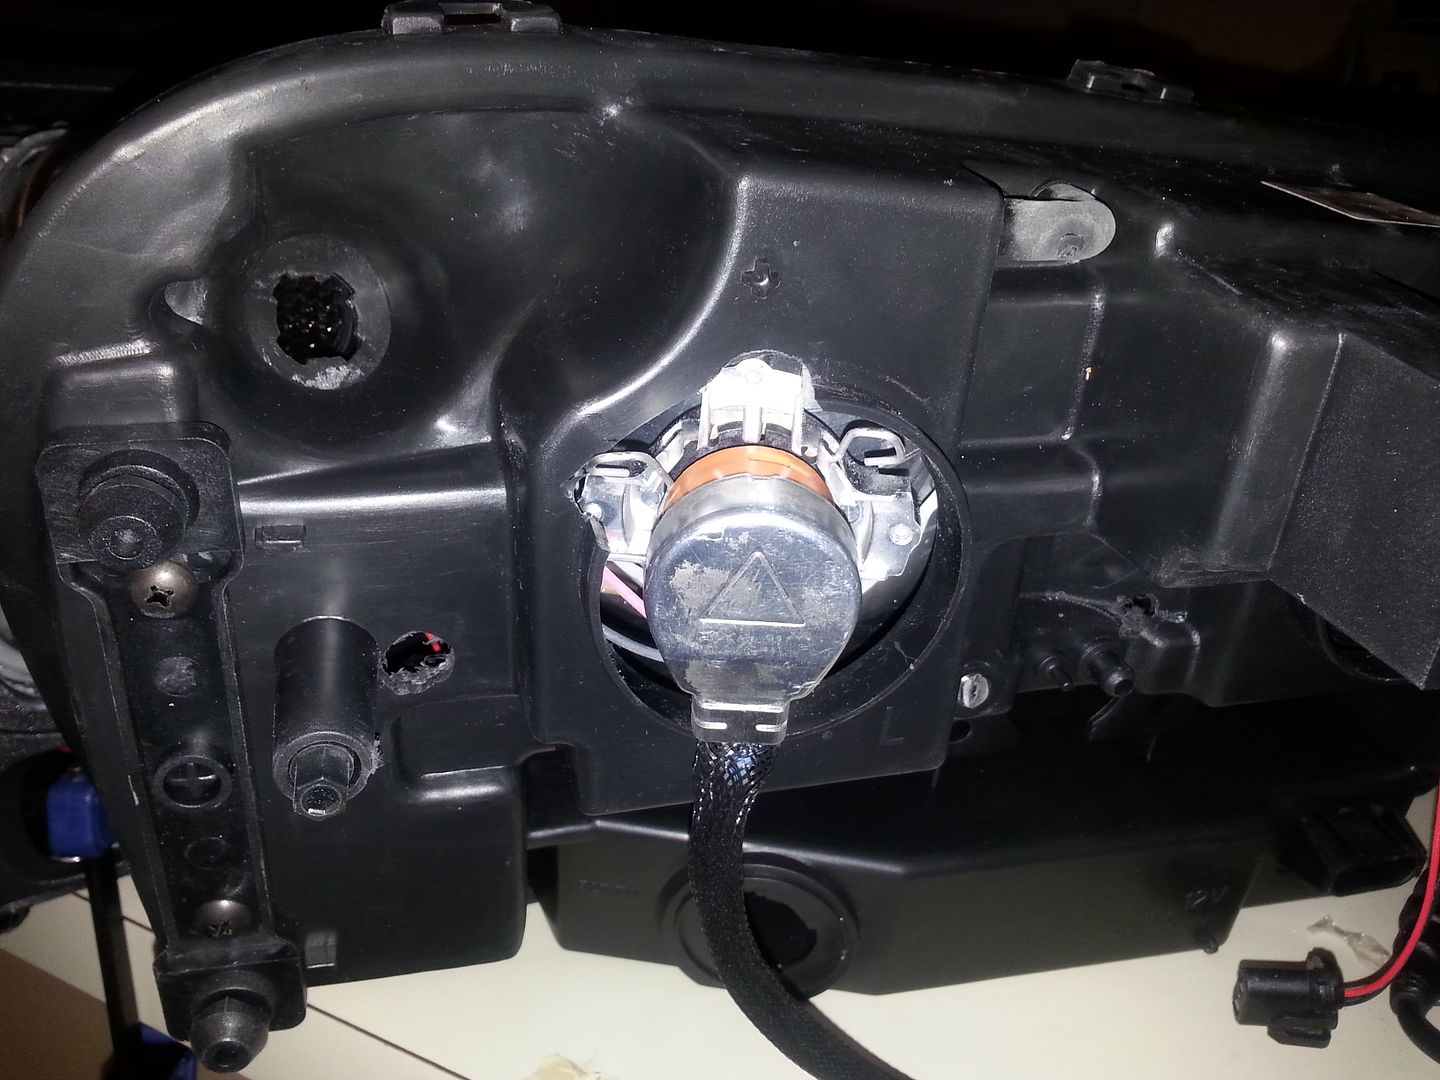
So I yanked them. Time to move on to the alignment issue. The bottom mounting screws on the high beam projectors were literally resting on the floor of the reflector bowls, and I needed a little more room to work with. The answer, was to notch the reflector bowl floors. That gave me enough room to rotate the projectors a little bit more.

20131229_152540_zpsd1tbqbel.jpg


I wanted to figure out a way to align the projectors while ON the truck, but there was no way to be able to tighten the lock nut. My solution was to apply some RTV between the rubber washer of the projector and the reflector bowl, then mount everything on the truck. Fire up all the HIDs and have about an hour of tweak time. This way, when I got them aligned, the RTV should hold the rotation enough, that when (dis)connecting the D2S connectors (they require a push inward and then twist like the child proof pill bottle caps), the tightness of the springs wouldn't cause the projectors to move.

Driver's side first

20140111_211815_zpsmermktqt.jpg


20140111_211825_zps39laiwxi.jpg


Then all of them.

20140114_184503_zpsszcd6re6.jpg


20140114_184513_zps0fuo7arq.jpg


Finished product. At least until I sold them to Aarkon...

20140202_121027_zpsrkgmpp18.jpg
 

Blckshdw

Original poster
Moderator
Nov 20, 2011
10,684
Tampa Bay Area, FL
With that money, I wanted to build another set of headlights, and this time go with the Lexus LS340 low beam projectors, which I've always wanted since I stumbled onto what projectors are. I picked up some used MD2S projectors, that I planned to use as high beam only. But after a lot of cutting to a reflector bowl, and trying to come up with ways to mount them in the headlight minus the reflector bowl with bolts and brackets, I need to come up with a plan C. I'm over driving around with stock lights, too boring, so I snagged a set of Lexus RX350 projectors to use as a backup retrofit.

20141103_191433_zpsmnrigyjk.jpg


20141103_184939_zpstqpqihg7.jpg


20141109_163646_zpsryorhuxs.jpg


So first things first, have to mod both projectors to be able to accept D2S bulbs. I think they typically take something like a D3S bulb. On the left side of the bulb holder is a small nub. Just had to grind that down. They have frensel lenses from the factory, I am contemplating if I want to do the Sti-R clear lens mod.

20141109_163718_zpsdjsqzkms.jpg


Low beam output

20141109_165340_zpspzcg3qn4.jpg


High beam output

20141109_165351_zpsia7geequ.jpg
 

Blckshdw

Original poster
Moderator
Nov 20, 2011
10,684
Tampa Bay Area, FL
Due to the nice sized foreground limiter on the shields, I decided that I wanted to try the demon eyes again. To improve the experience over the last attempt, I was going to add a custom shield, which would be painted. First step, make a paper template and get it fitted in place. Used the scraps from a Netflix envelope

20141109_190941_zps9jcamwuq.jpg


With the lense held in position, looks pretty good.

20141109_191011_zpsr4x1gzgu.jpg


Grabbed a soda can, cut it open, and transfered the pattern to aluminum.

20141109_211520_zpsemnmnsmp.jpg


Enough fun, time to address the problem with the other Lexus projectors, have to figure out how I'm gonna mount these. I picked up some 1" corner braces, and some #8-32 1/2" machine screws, #8-32 nylon lock nuts, and some #8 washers. The RX350s have a pair of vacant holes at the bottom that aren't used, so I opted for that.

20141110_160252_zpspzlgqk7o.jpg


20141110_160305_zpsyndalozp.jpg


Mock up in the reflector bowl

20141110_160451_zpsryagnteq.jpg


Outside edge won't fit that way...

20141110_160506_zpsx4ywbg1z.jpg


So had to flip that brace around, fits better, this should work

20141110_160914_zps0iq8qp73.jpg


20141110_160939_zpsts5xseyy.jpg


I used the #8-32 screws to mount through the holes on the projector, The #10-24 machine screws I already had on hand are too small for the holes in the bottom. I haven't decided if I want to go buy some #12 screws and see if they will fit well enough for the threads to catch, or just drill and tap the solid part of the brace and use my #10-24s.
 

Blckshdw

Original poster
Moderator
Nov 20, 2011
10,684
Tampa Bay Area, FL
Back to the fun stuff, today I decided to paint the custom shields with Duplicolor metalcast anodized blue. Got a couple of paint globs on them, but since you don't see them directly, it's not a big deal.

20141111_122422_zpsrozysglp.jpg


They look good in the sun...

20141111_145942_zps6tygxtwp.jpg


... as well as indirect light

20141111_150129_zps2ee5dwr4.jpg


But since the shields are small and don't wrap around to the lens like the ones I made for the LS430s do, you don't get any color when viewing from the sides or from above. I haven't made up my mind if I'm going to stick with these, or make some larger custom shields. I ordered some blue side emitting LED strips that will be mounted horizontally between those bolt holes at the top, shining down on the painted shield for a much better demon eye effect than the first retrofit, and they will be shielded from direct HID exposure so they won't get cooked. At least take a lot longer to get there.

20141111_150157_zpsedsuwv8y.jpg
 

Blckshdw

Original poster
Moderator
Nov 20, 2011
10,684
Tampa Bay Area, FL
Aarkon said:
Looking good man any ideas on shrouds though?
Thanks man. I'll probably go with Oculars again, for one I know how it fits behind the bezel, and for two, the reflector bowl is hacked to high hell from trying to fit the LS430 in it. So I'll need the coverage, unless someone donates a spare passenger headlight where I can get a fresh bowl out of.
 

Blckshdw

Original poster
Moderator
Nov 20, 2011
10,684
Tampa Bay Area, FL
Yeah we'll see what pans out with these. I'm gonna do the passenger side first, since I've done so much cutting up on that side. Depending on how that goes, buying a new light isn't out of the question. I can save this one for the LS430 build down the road.
 

HARDTRAILZ

Moderator
Nov 18, 2011
49,665
Freaking impressive Sir!!!

I just wish I could feel comfortable tearing the lights apart like I do the suspension and such.
 
  • Like
Reactions: BHAMER

Blckshdw

Original poster
Moderator
Nov 20, 2011
10,684
Tampa Bay Area, FL
HARDTRAILZ said:
Freaking impressive Sir!!!

I just wish I could feel comfortable tearing the lights apart like I do the suspension and such.
Thanks! It's definitely a learning process. I bumped my head and stubbed my toes quite a bit on the first one.

As for opening headlights, OEM ones require WAY more work and patience than aftermarket. I didn't document it, but I bought some Eagle Eyes headlights off Ebay for $85 shipped. They are sealed with butyl rubber, instead of permaseal.

I decided to try the bake method, since I heard it was easier with aftermarket lights, and it sure is. I removed the top oven rack to gain clearance. Laid a piece of cardboard on the bottom rack to keep the plastic off of the metal. Laid the headlight face down on the cardboard, and left it in the oven @ 220 degrees for about 20 minutes. (low and slow is the name of the game) Pulled them out and they were pretty warm to the touch but not hot. The plastic clips around the perimeter and inside the crossbar section would remain open when you pulled them, which was convenient. I used a trim panel removal tool to start prying the headlight apart along the high beam edge. It was pretty resistant at first, but once it started to give and you get the main lens far enough off to get your fingers under it, it just pulls right off.

Only thing you have to be careful of, is the butyl will be like bubble gum. Very stringy and will stick to anything. So as you're pulling the lens off try to make sure it doesn't get on the chrome surfaces when the strings break. I happened to have some adhesive remover, so I sprayed that on, and was able to get it off easily while it was hot. When it cools, not so much.
 

Blckshdw

Original poster
Moderator
Nov 20, 2011
10,684
Tampa Bay Area, FL
Canary2323 said:
How much did you sell lights for? Just asking in case you sell the next set...
I sold the first retrofit for parts really. My lenses were hazed up pretty bad, a couple of the LEDs in the halos on one side were burnt out, and the switchback strips on the other side were being temperamental. Ryan gutted them, and used the parts he wanted, or could fix.

With the RX350 set, I'm planning a pretty plain retrofit as these will be the 'backups' As many of the other members who've had projectors will tell you, once you experience that clean cutoff line, you won't want to go back to a reflector style headlight. I want to have these in place, while I work on something more fancy and complicated. And if I decide to change up the fancier ones, I can pop these back in, in the meantime.
 
  • Like
Reactions: Mounce

NinjuhhNutz

Member
Oct 15, 2012
720
Blckshdw said:
I sold the first retrofit for parts really. My lenses were hazed up pretty bad, a couple of the LEDs in the halos on one side were burnt out, and the switchback strips on the other side were being temperamental. Ryan gutted them, and used the parts he wanted, or could fix.

With the RX350 set, I'm planning a pretty plain retrofit as these will be the 'backups' As many of the other members who've had projectors will tell you, once you experience that clean cutoff line, you won't want to go back to a reflector style headlight. I want to have these in place, while I work on something more fancy and complicated. And if I decide to change up the fancier ones, I can pop these back in, in the meantime.
ahem^ lol he knows a guy that might be parting with his retrofit sometime soon :frown:
 

Blckshdw

Original poster
Moderator
Nov 20, 2011
10,684
Tampa Bay Area, FL
Got my tap wrench, so got to work on making the mounting brackets for the projectors. Really could use a bench vise, but I had to improvise with some 6" clamps and a piece of wood to drill through the corner braces and not put a hole in my table.

20141121_192022_zpsgbfbpmzx.jpg


Test fitting the brackets on the projectors.

20141121_193002_zpsoxjia2qs.jpg


[SIZE=13.63636302948px]It turns out the 1/2" screws for attaching the brackets to the projector are the perfect length, with washers between surfaces and the nylon lock nuts on the end. Left side will probably get flipped around so the lock nut is on the front, for easier assembly purposes. I may also cut off the 'tabs' on the horizontal surfaces, since it's wasted space and in the way.[/SIZE]

20141121_193019_zpsoq3zoqcs.jpg
 

Blckshdw

Original poster
Moderator
Nov 20, 2011
10,684
Tampa Bay Area, FL
I was starting to think the 1" machine screws I was planning to use to bolt the projectors to the reflector bowl were going to be too long. Today I finally got around to marking and drilling the holes in the reflector bowl (and goofed slightly) While holding the lit projector with one hand, and getting the beam into position horizontally, I marked the screw hole positions on the reflector bowl floor. Drilled out the holes, did a test fit and immediately :duh: 
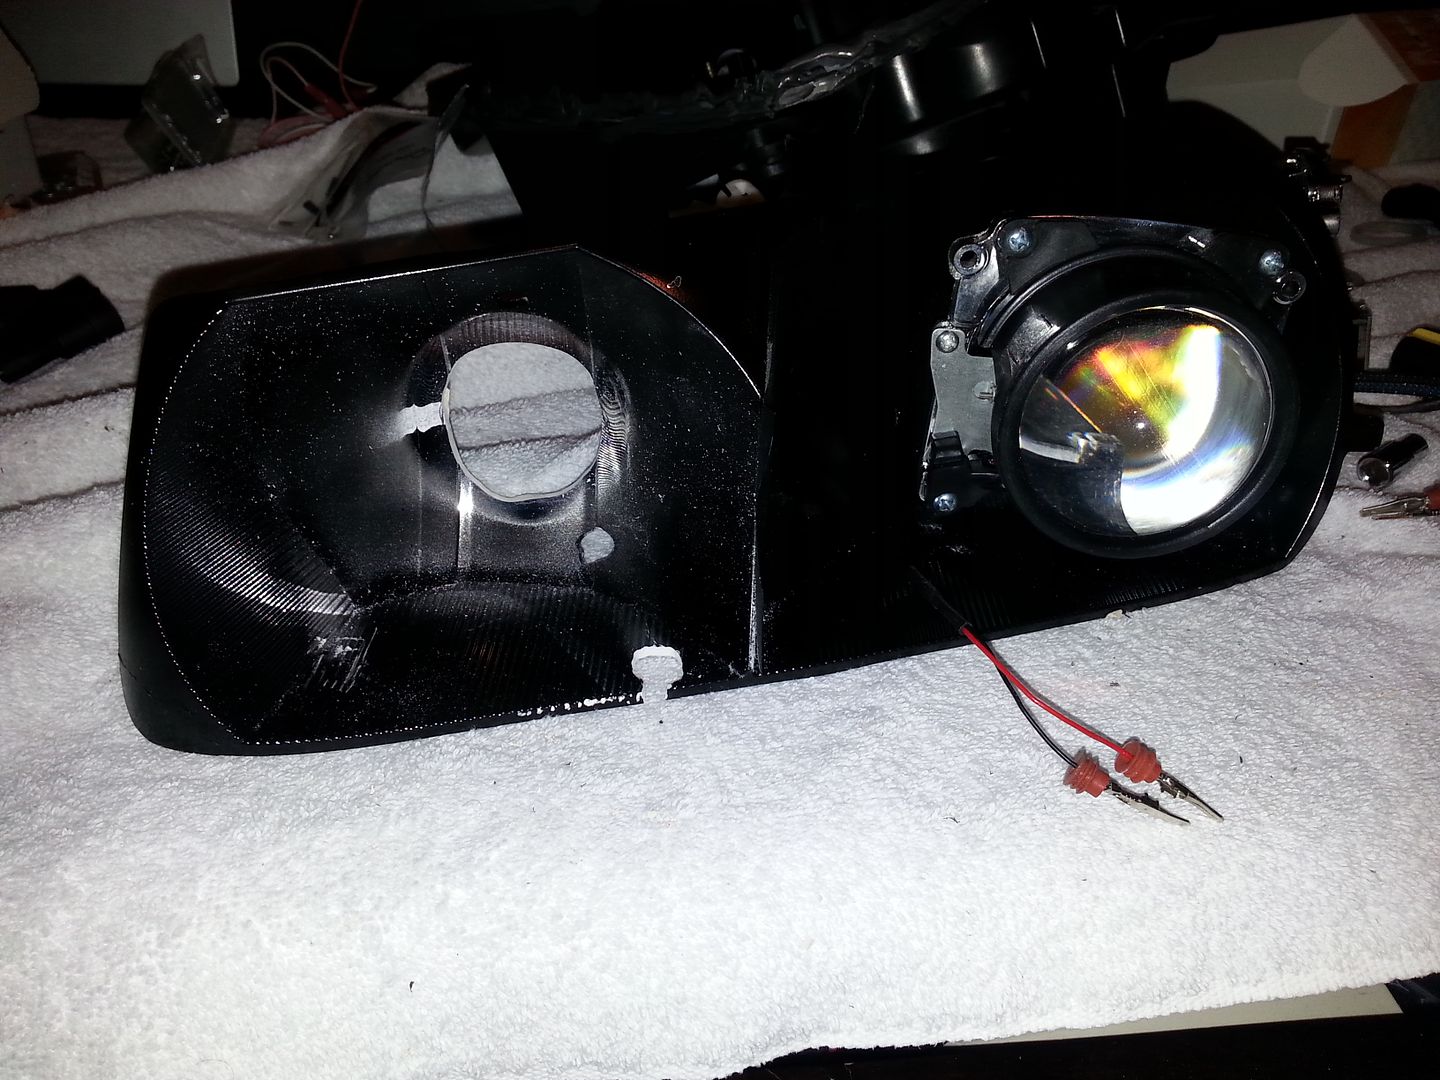
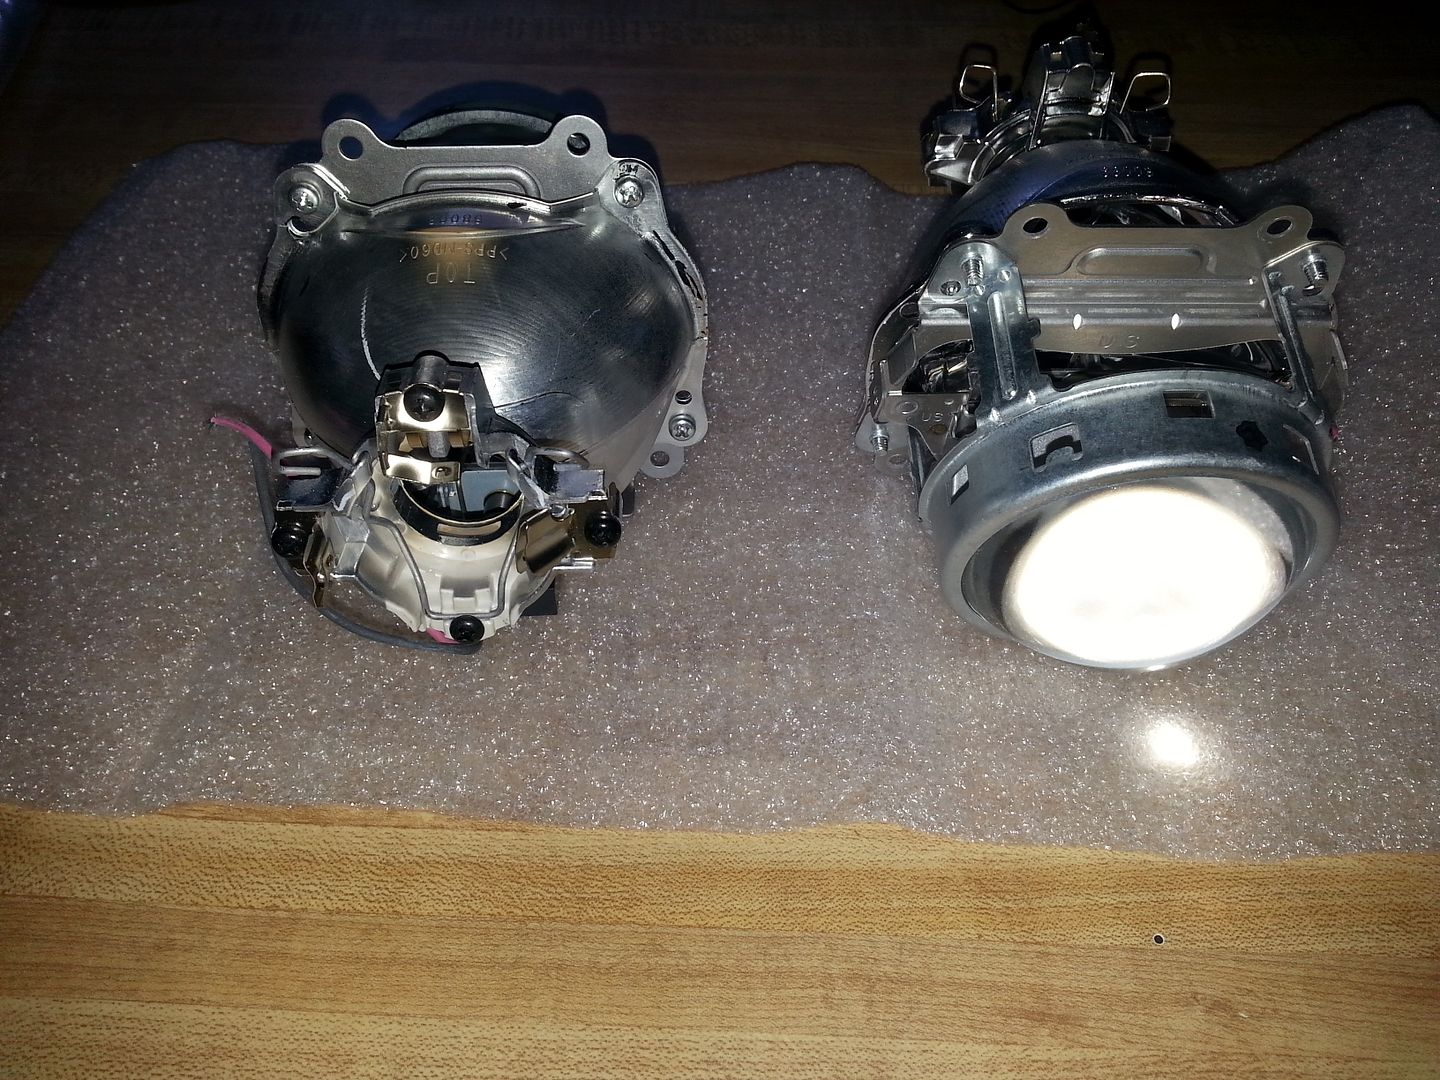
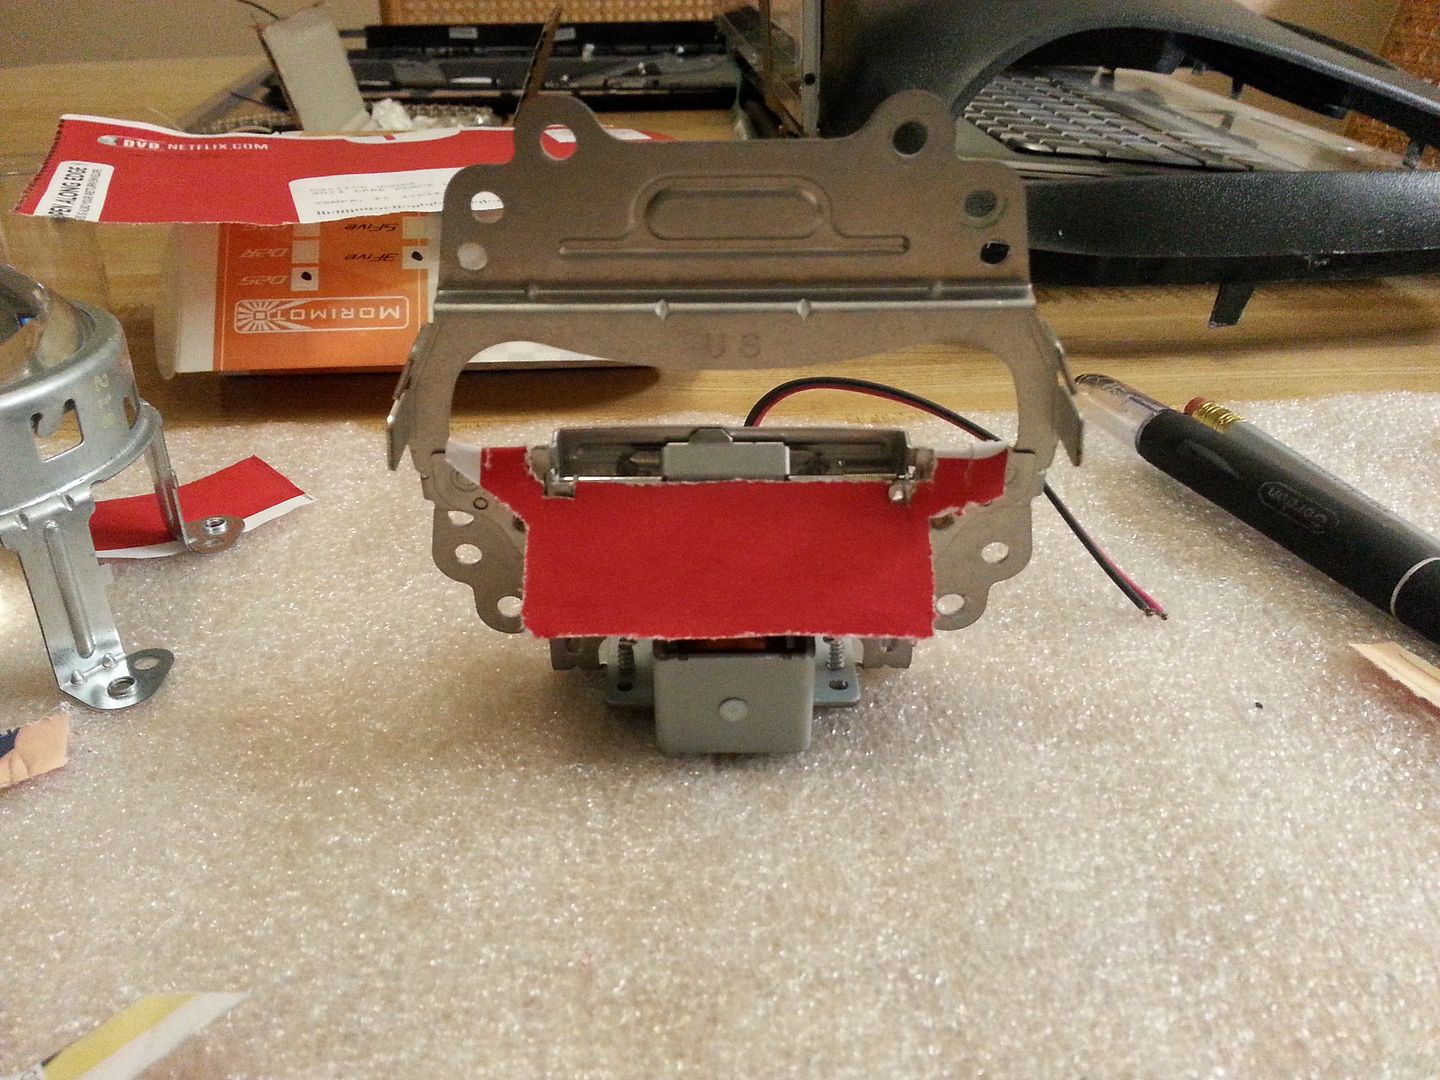
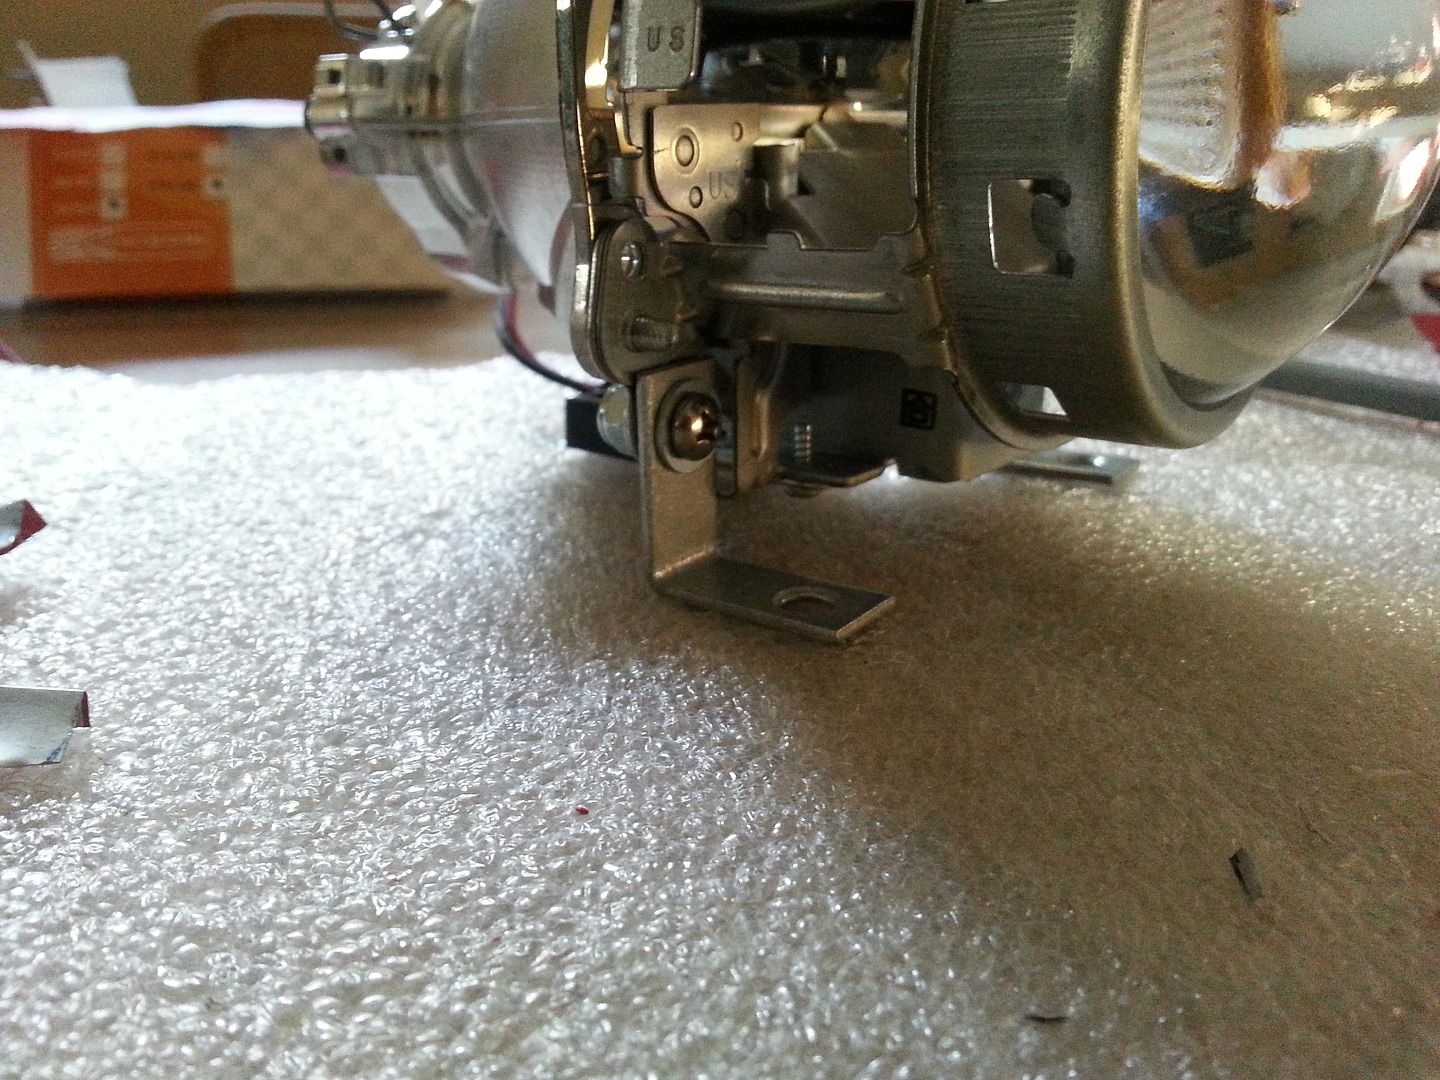
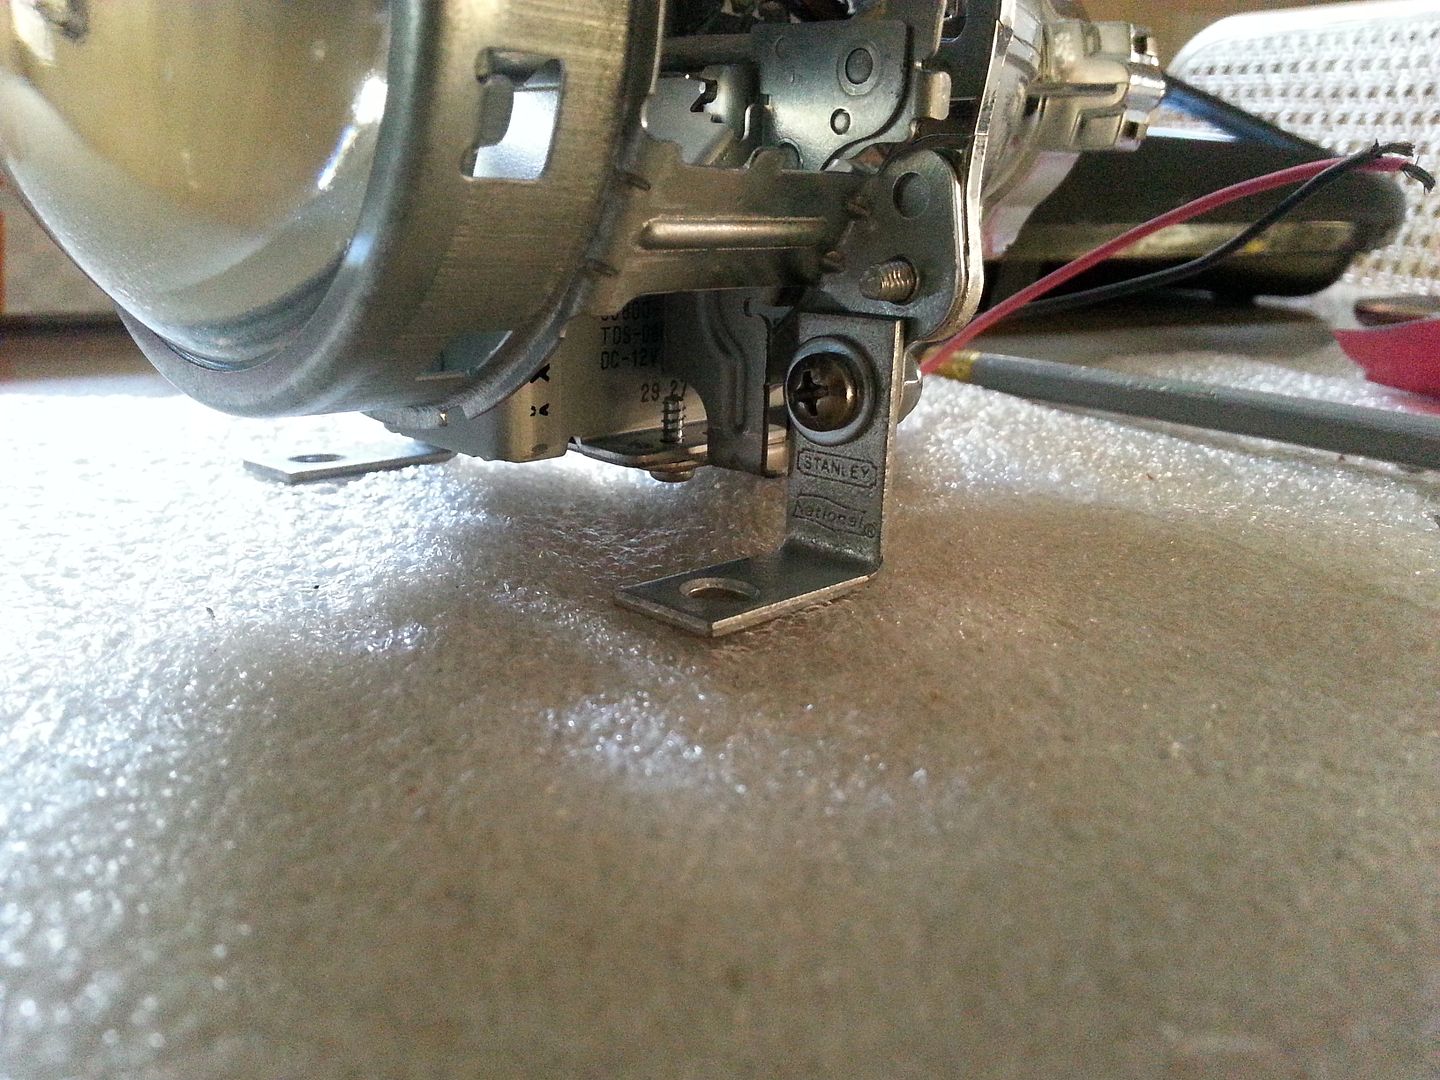
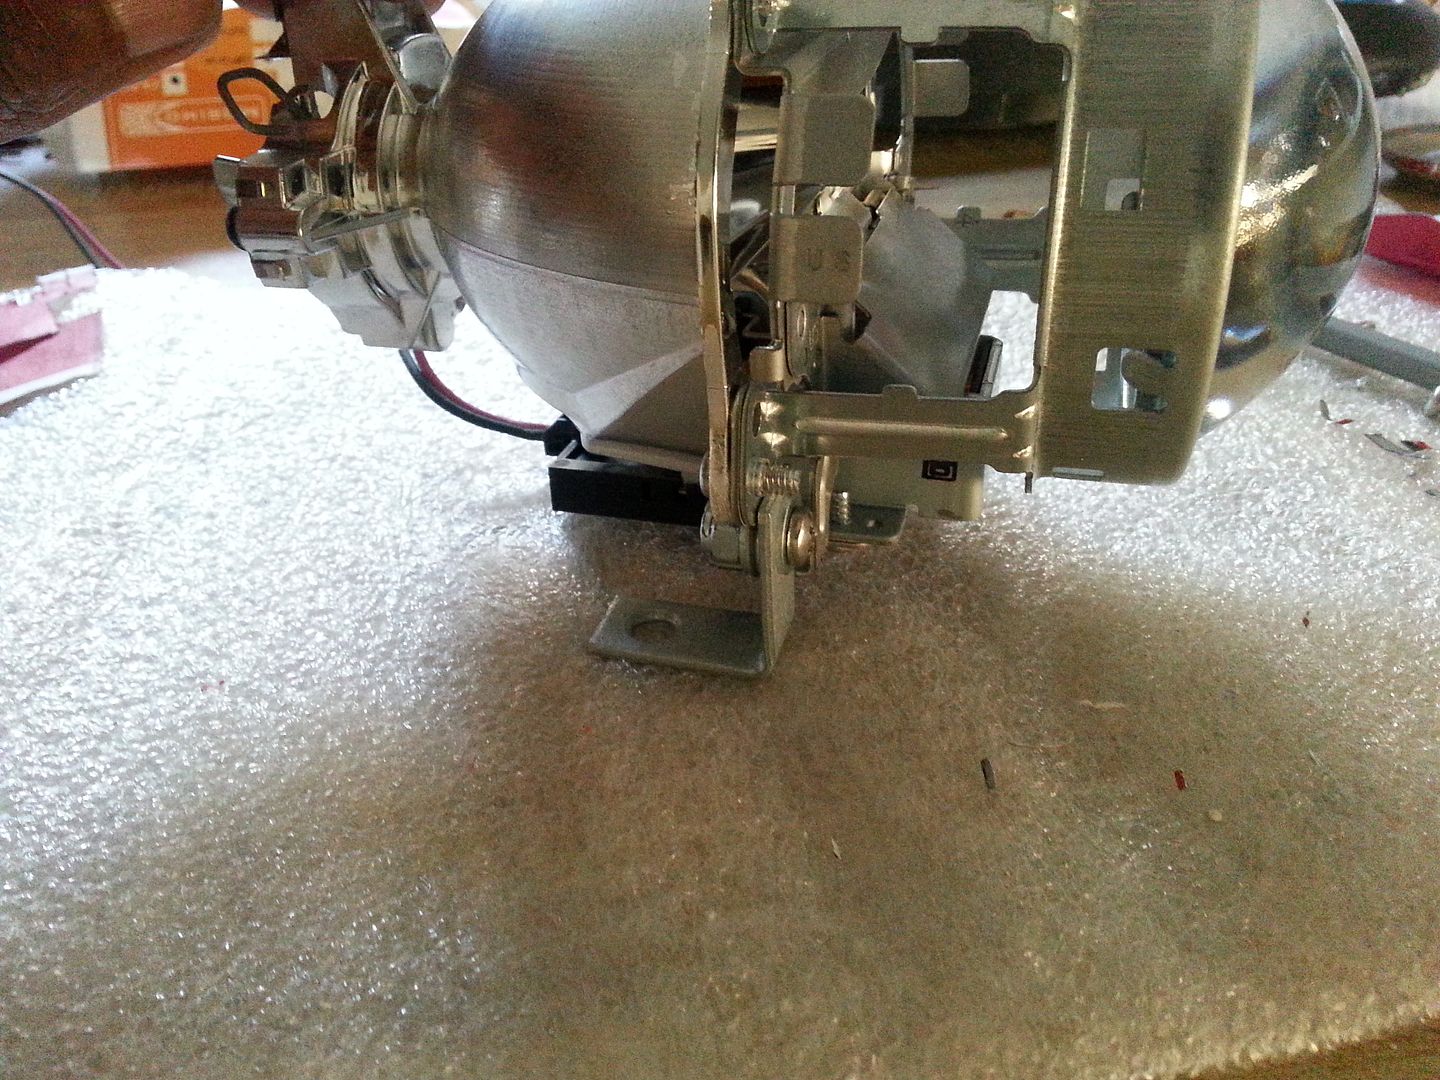
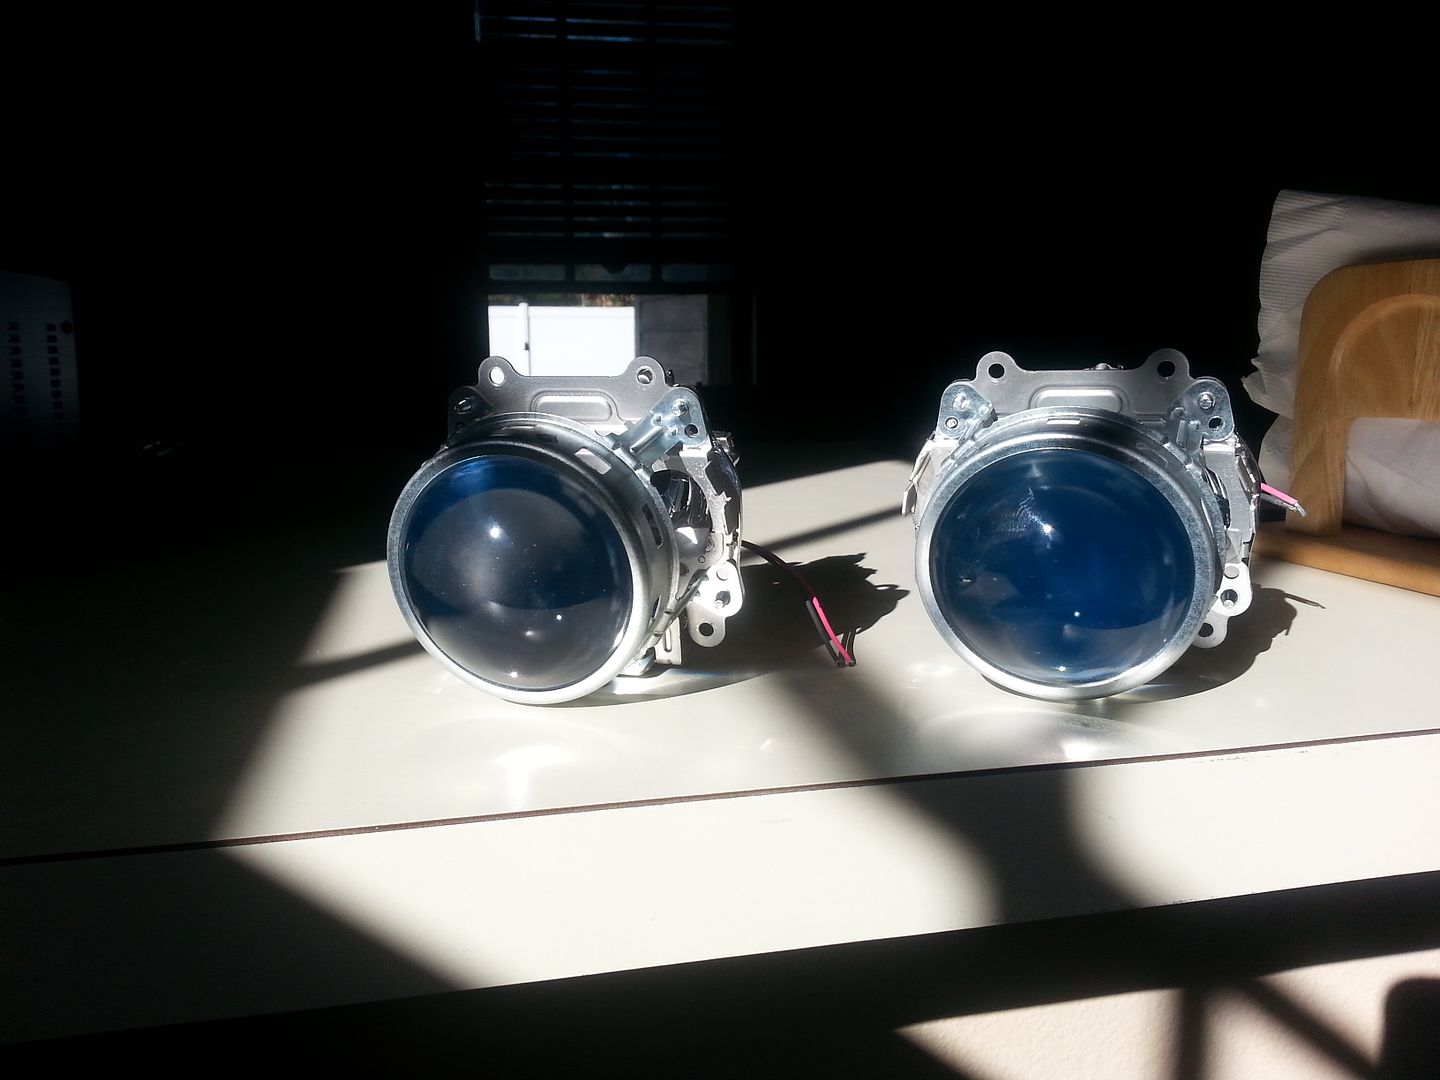
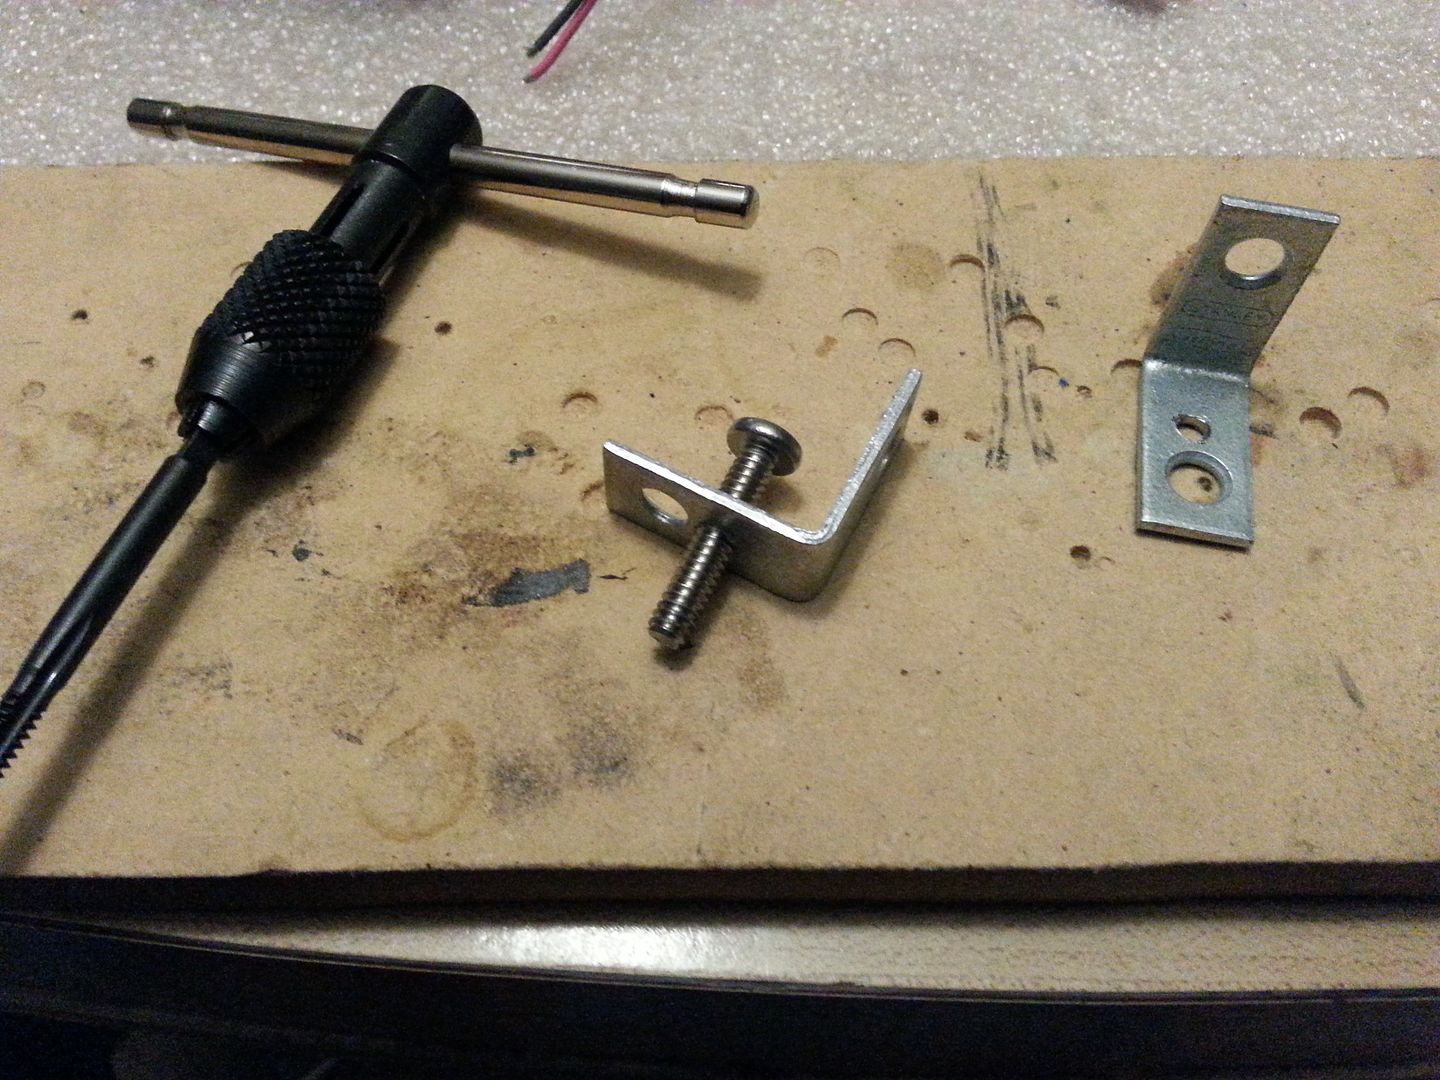
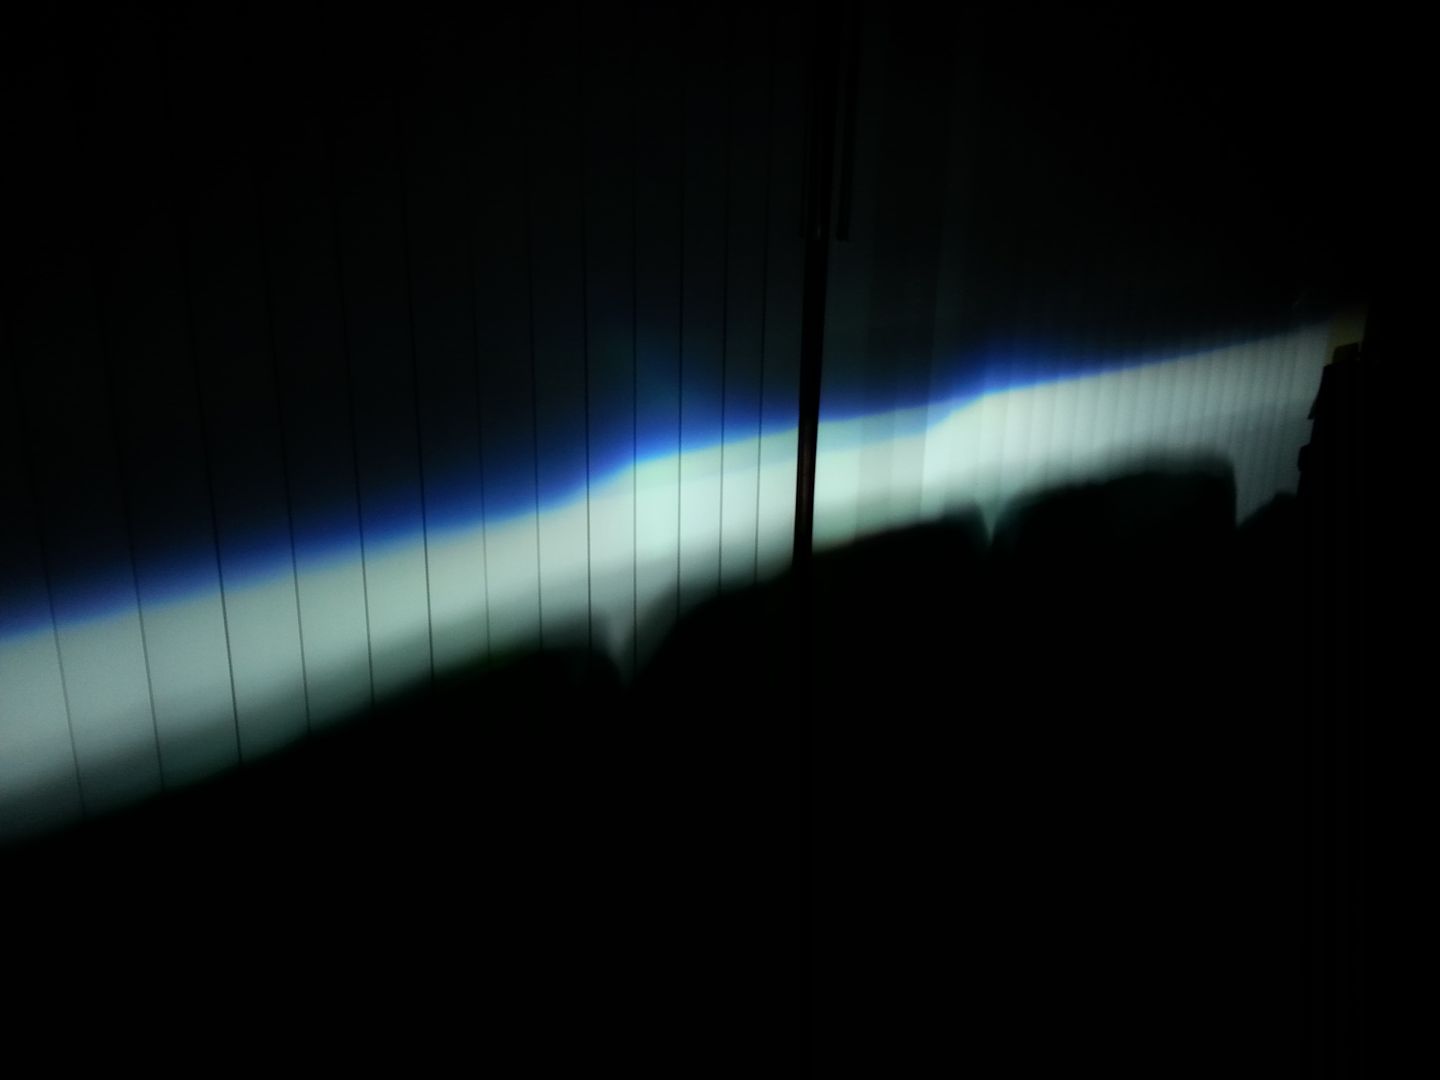
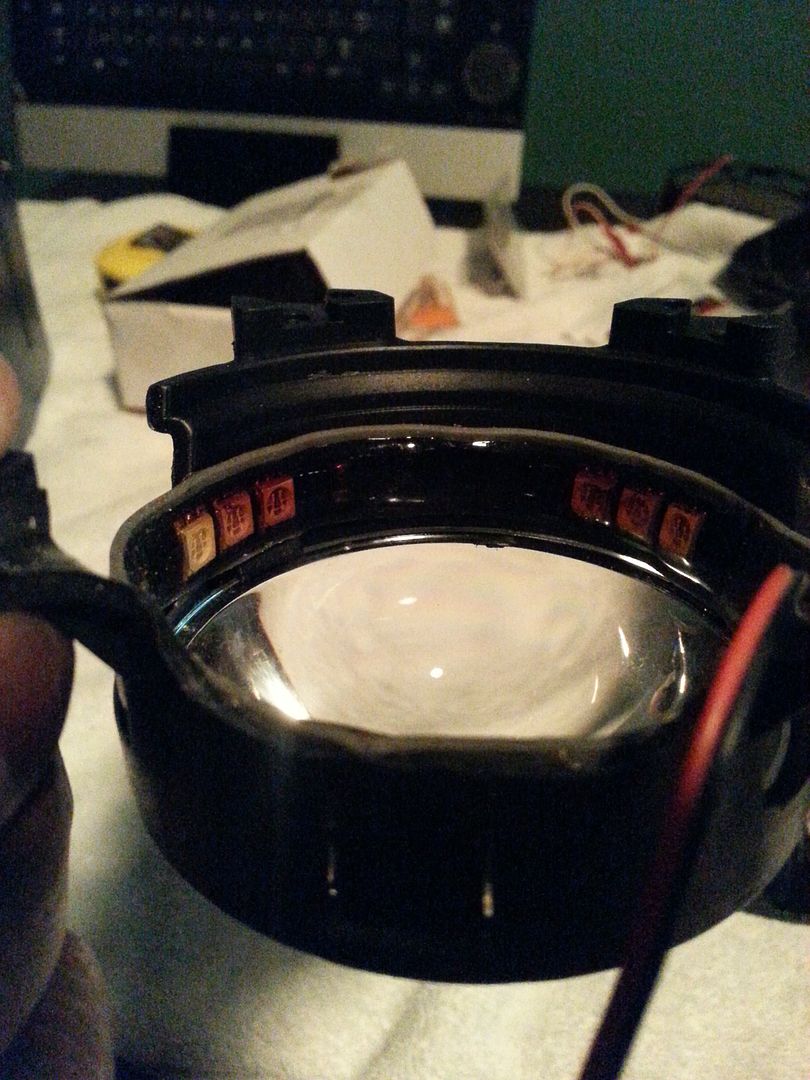
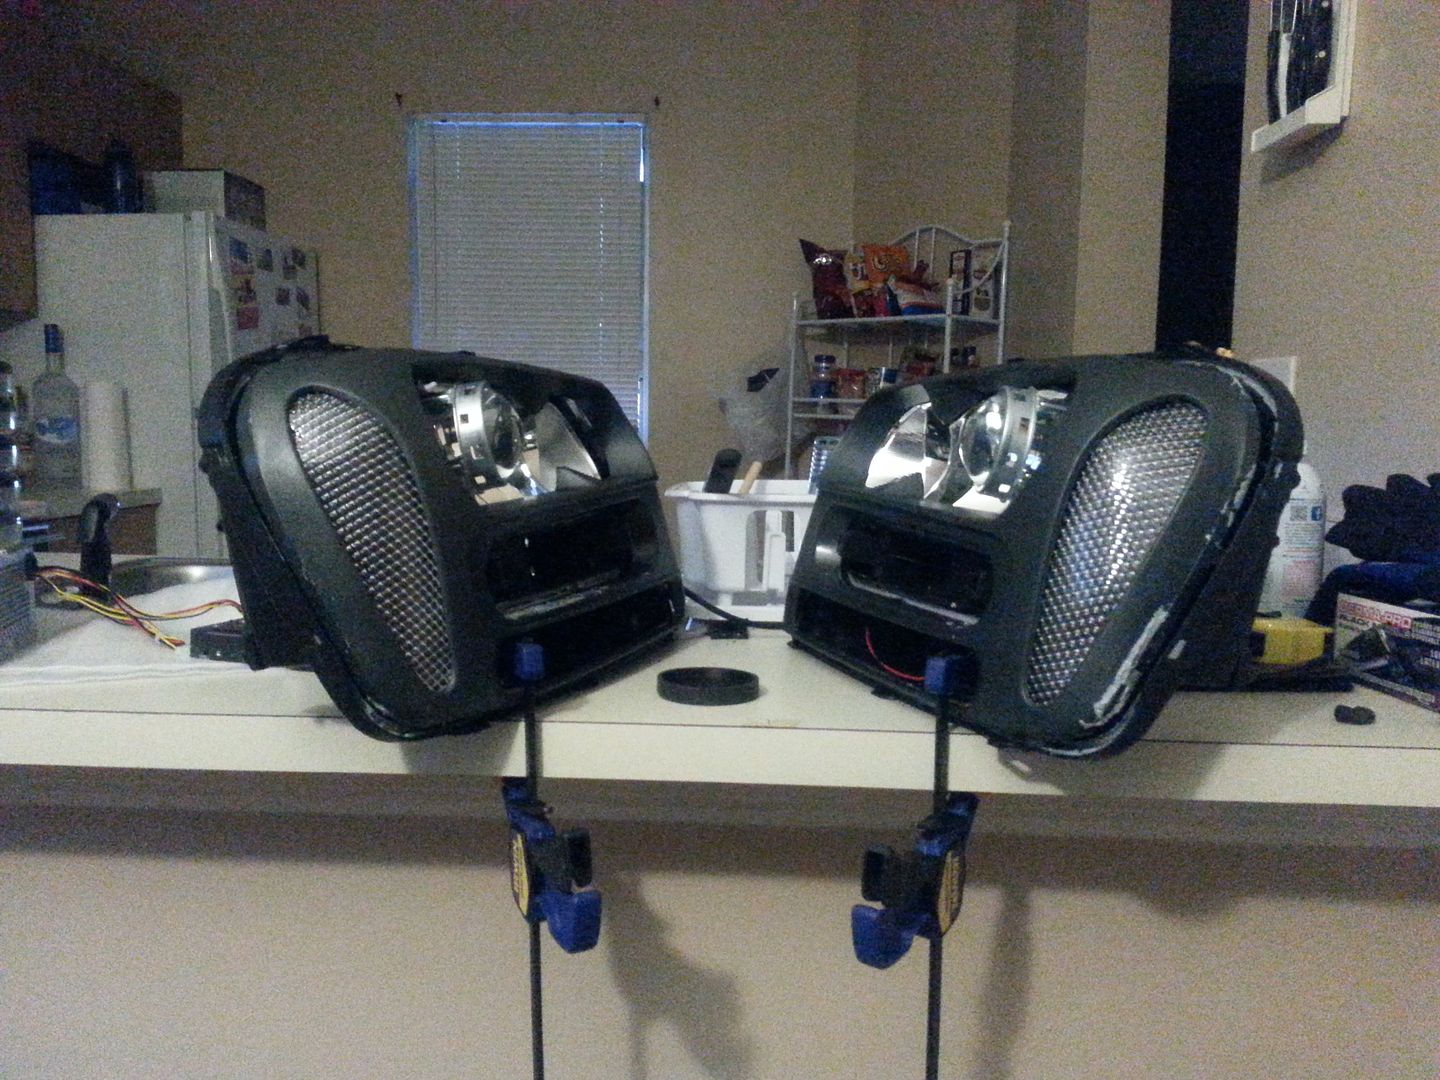
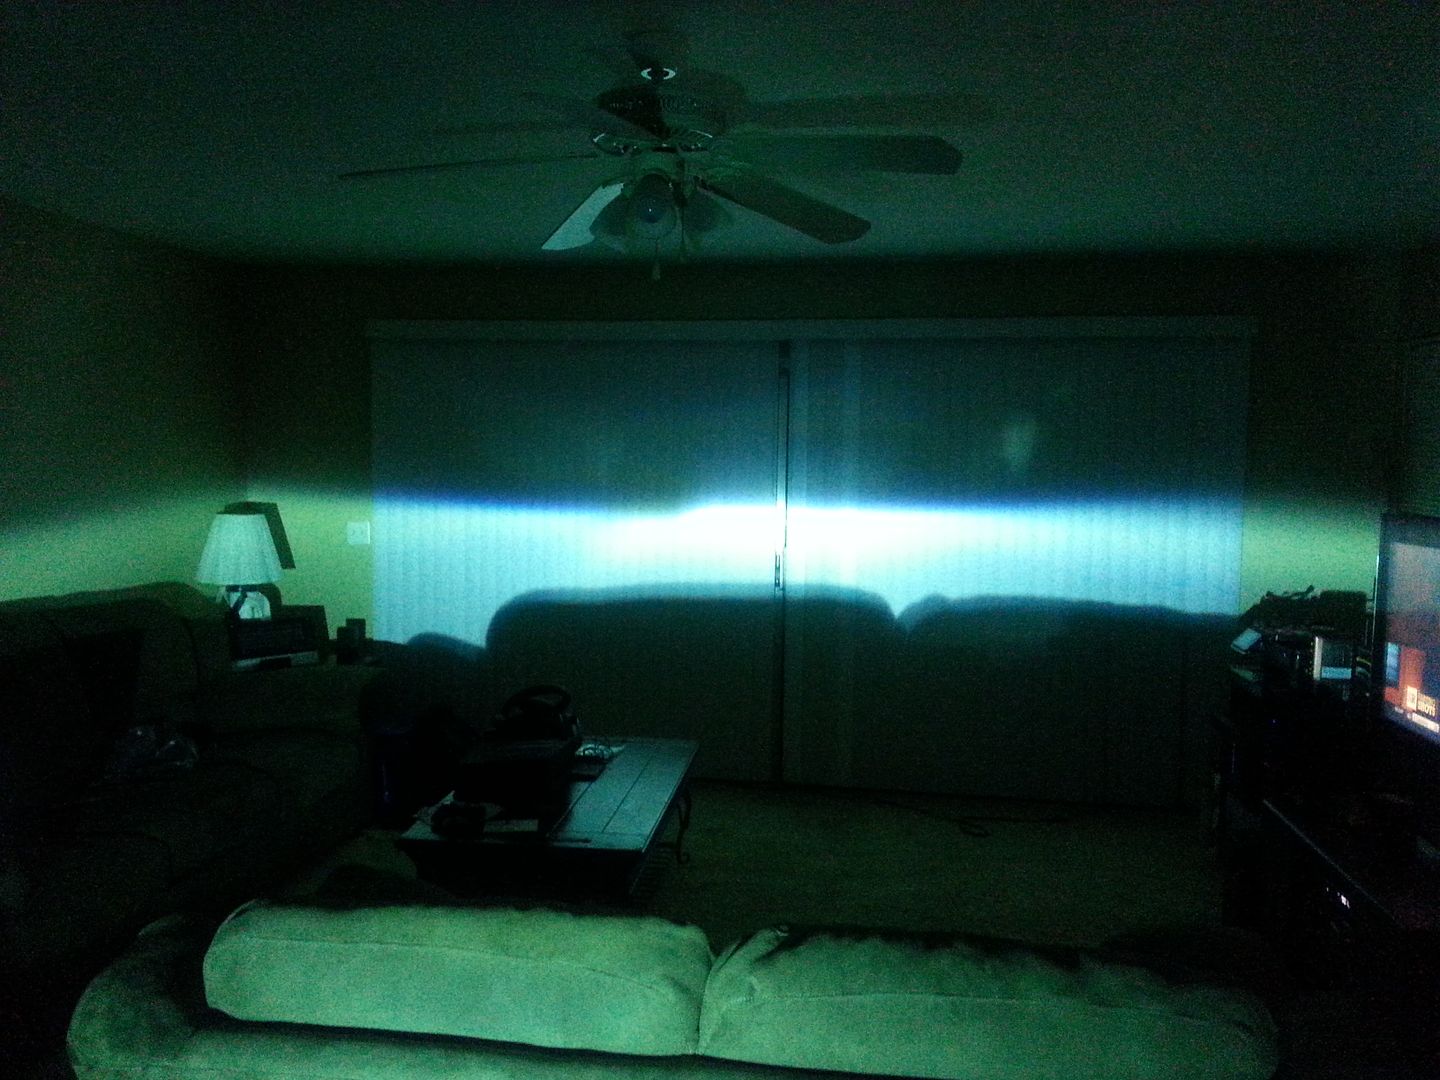
Somehow the position of the brackets weren't angled properly and the holes are too close together causing one side (left side of the pic) to not be straight up and down.

20141130_175055_zpsets5v5tv.jpg


As hacked to hell as the reflector bowl is, I was already considering getting a donor headlight to cannibalize the bowl.
Decided to move forward for the hell of it. Put the topside lock nuts on the bolts for the resting support, seated the projectors in the bowl and added the bottomside lock nuts for the clamping support. Tightened everything up, and these are SURPRISINGLY secure, even with one of the screws being slightly off. After snapping them into the housing (top and side mounts only, not the bottom one) and firing up the projector, I wasn't able to shake the beam from moving the projector on it's own.

I was considering using my 3" screws to go through a mounting hole at the top of the projector, through the reflector bowl to keep it from wobbling. Then I noticed the projectors are not side specific, and the open mounting hole I planned to use, which worked with the #10-24 screws, is on the same side on each one, so it wouldn't be mirrored mounting. I'll probably still use it, just as a precaution.

Another thing that came up, when I test fitted the bezel to check clearances, is that the projector sits higher than I'd like, and really close to the bezel. Granted the stationary (bottom) mount isn't snapped in, so it will come down some, and the beam was a bit higher than my mark on the wall, so it would be tilted down a little, this means there will be a lot of trimming of the top of the shroud, so I won't have to notch the bezel like last time.

20141130_175234_zps4enaaigu.jpg
 

24v 4.2

Member
Jan 16, 2013
430
What is the best adhesive/sealant to use to reattach the lens that can be easily removed later on to add more modifications?
 
  • Like
Reactions: Capote

Blckshdw

Original poster
Moderator
Nov 20, 2011
10,684
Tampa Bay Area, FL
When I cut my lights open, I put down some RTV between the lip of the main lens and the base, and then after mounting the lens, put another layer of RTV on the top side of the lip, overlapping the base. That held up fine for years, and if I ever wanted to go back in, which I did on a number of occasions, all I needed was a razor blade to cut through it. Apply a little more RTV in the seam, press it together, and let it cure, good as before.

This time around, I'm going to reuse the butyl rubber sealant that came with the aftermarket lights. The biggest complaint about aftermarket is they aren't sealed properly, and allow moisture to get in. I bought some additional butyl (3M brand) from a guy on HIDPlanet that bought too much. TRS sells OCI for $15 per roll, and Koito for $35 per roll.

Since I will be just adding a little bit to what's already in the channels, the 1 roll I got should be good for 2 pairs of headlights from what I've been told. Only drawback to using butyl, is to reopen the headlights, you have to throw them in the oven and bake them again, so it can be time consuming.
 

24v 4.2

Member
Jan 16, 2013
430
Ok. Sounds like I should go with the RTV until I am done then.

Any recommendations on RTV brand?

Do you have any pics of where/how you cut open your OEM lights?
 

Blckshdw

Original poster
Moderator
Nov 20, 2011
10,684
Tampa Bay Area, FL

Blckshdw

Original poster
Moderator
Nov 20, 2011
10,684
Tampa Bay Area, FL
:raspberry:

Well, I got some shorter machine screws for securing the mounting brackets to the stock reflector bowls. Going with 1/2" instead of 1", since I'm only going with nylock nuts beneath the reflector bowl, and not also having it between the reflector bowl and the bracket. That was going to be my method of rotational adjustment.

Instead, I will be securing the L brackets firmly to the reflector bowl floor floor. Where the brackets mount to the projector, the holes are 1/4" and the screws are #8-32 so there's some play when the nylock nuts are loose. I'll use that for my rotational adjustment, and hope there's enough room. If not, I would have to Dremel out those mounting holes and make them taller to allow more range of motion.

As part of my Lowes run today, I picked up a ceiling light diffuser panel to make the clear corners. Cut up 8 equal sized pieces and dove in. Good lord I forgot how annoying and finicky this process is :hissyfit:

Had a major :duh: moment. When grabbing a pair of reflectors out of my box, I didn't really pay attention, and got 2 passenger side ones. So tomorrow, I will jump back in and make a couple of driver's side ones. I did crack one while re-clamping, but if the rest go well, I'll have 2 extra pairs if anyone wants them.
 

triz

Member
Apr 22, 2013
746
You need to come retrofit these motor mounts. Drivers side screwed with me in the afternoon. :hissyfit:
 

Blckshdw

Original poster
Moderator
Nov 20, 2011
10,684
Tampa Bay Area, FL
Got the driver's side reflector bowl Dremeled out and test fitted the other projector. Since the passenger side had that huge section cut out from the low beam bulb access, seating the projector far back wasn't an issue. On the driver's side, I ended up having to do some notching so one of the bulb clips, and the top of the bulb holder would seat properly when the reflector bowl was snapped into place. I need to enlarge the notch for the outside bulb holder so it clears properly

20141230_172107.jpg


With the latest version of mounting the brackets, the projectors sit as close to perfectly centered between the top and bottom surfaces as they are gonna get. I'll have to go out one of these nights and get the beams aligned and then lock the projectors down, then I can start working on the shroud fitment and trimming.

20141230_164201.jpg


I skipped over fine trimming of the clear corners. I figured the edges sit behind the bezel, so more trimming really isn't necessary. This way I can line the rim of the lens holders with a thin bead of RTV, or maybe apply it in a few strategic points, attach the clear lens to the holder, and the bezel will hold it in position until the RTV cures. :thumbsup:

20141230_165425.jpg


Next up, I need to shim the bulb seats so the D2S bulbs are in their proper spot. Currently, they are tipped a little on the high side, resulting in the cutoff being bowed instead of flat. Need to break out the heat gun, and get to work on the bezels to get the butyl off them, clean em up, and shoot them with some gloss black. After that, wire up the demon eye LEDs.

Gonna need you guys to stay on me, so I can get this done already :yes: :deal:
 

Blckshdw

Original poster
Moderator
Nov 20, 2011
10,684
Tampa Bay Area, FL
Decided to do a little more tinkering while listening to the TV. Got my automatic demon eye killer modules built, and tested.

I was originally going to use a pnp transistor to open the positive feed to the demon eyes, when the low beams activated. But while testing on my breadboard, it looks like the transistors I got would open the circuit when energized, as planned, but when it was de-energized, it wouldn't close the circuit again. I had to ground the gate pin for that to happen. :mad:

I happened to have a couple of PCB relays in my parts bin, and was going to wire them in... Then I realized if I HAD to use a relay, the transistor wouldn't be needed after all. So cut up a small perfboard, grabbed some 20 AWG wire and soldered up the connections.

The demon eyes will consist of a [SIZE=13.63636302948px]three [/SIZE]side emitting, 355 LED strip. The 194 bulb is for reference. I plan to mount these in the open space behind the corner lens holder, where the low beam wires pass. Hopefully shutting the demon eyes off when the HIDs are on, as well as having them mounted on the foreground limiter, not being in direct HID exposure, [SIZE=13.63636302948px] will prolong their life[/SIZE]. Time will tell.

20141230_230557.jpg
 

Aarkon

Member
Nov 6, 2013
5,607
Are you still running them inside the glass or did you find a new location inside the shroud?
 

Blckshdw

Original poster
Moderator
Nov 20, 2011
10,684
Tampa Bay Area, FL
Aarkon said:
Are you still running them inside the glass or did you find a new location inside the shroud?
Yeah, these will still be behind the projector lens similar to before. The OEM projectors have a foreground light limiter built into the shield. Basically it's extra material at the top section of the projector bowl. The strip will be mounted there, shining downwards onto the custom painted shields I made, and reflecting through the lens.

Much better result than lining the ring of the lens with LEDs, since not much light comes out the side (it needs to reflect off something) and the ones exposed to direct HID light get cooked. :no:
 
  • Like
Reactions: Mounce

Blckshdw

Original poster
Moderator
Nov 20, 2011
10,684
Tampa Bay Area, FL
Bench test beam alignment... Almost perfect off the bat. Still need to do it on the truck, but this is reassuring that only a minor adjustment should be needed, besides making sure the vertical adjusters are set on the housings. You can see the slight upward bow of the cutoffs. Forgot to shim the bulbs today while cleaning up and painting the bezels.

20141231_172148.jpg


20141231_172206.jpg


I also forgot that I still need to do the clear lens swap mod on the projectors. :slacking: :dunce:
 

Blckshdw

Original poster
Moderator
Nov 20, 2011
10,684
Tampa Bay Area, FL
Got around to shimming the bulb seats. Picked up some aluminum sheet metal for this, as well as to fab up some topside mounts for the projectors onto the bowls. Since cutting out tiny pieces of metal is pretty boring, straight to the output shots.

Before: notice the slight upward bowing, you can't tell in the picture, but the hotspot isn't focussed, most of it exists above the cutoff line

20150104_210144.jpg


After: The cutoff line is now flat, and the hot spot appears right at the step as it's supposed to

20150104_210333.jpg


This week, I'll be cutting up the top of the driver's side reflector bowl as the top mount screw hits right at the perpendicular edge :no: So that will get Dremeled back to open up some space, and then fabbing up a mount out of aluminum for the screw to grab and hold onto so the projector doesn't rock back and forth. The plate will be JB welded to the back/top of the reflector bowl.

Keep meaning to do the STi-R clear lens swap too. :duh:
 

Blckshdw

Original poster
Moderator
Nov 20, 2011
10,684
Tampa Bay Area, FL
Got around to doing the clear lens swap as planned, although it did not go as smoothly as planned (is anybody really surprised by this? :no:)

The process is supposed to be simple. Remove OEM lens, option 1: use stone grinding drum to grind the ID of the lens holder to fit the slightly larger clear lens. Option 2: add paper spacers to the lens holder so the clear lens sits flat, then use washers to space the lens holder further away from the shield, so the lens sits in the approximate same position as it would if no paper spacers were used.

I opted for option 1. How-to thread said the Dremeling process should take about 10-15 minutes. Took me closer to an hour just for 1. I guess I wasn't putting enough pressure on it, but whatever. Finally got the lens holder opened up, seated and secured the lens, and got this result (clear lens on top, OEM on bottom)

20150111_153439.jpg


There's a dim spot just to the left of the step, and again, the hotspot is incorrectly positioned above and to the right of the step, which will require another shim :mad: Reading back through the how-to, there's an RV shield on the front of the main shield, that needs to have a small piece cut off. I don't know enough about the optics to understand how something on the opposite side of the shield from the light source can cause this, but I put my cutoff wheel on and carefully removed it. The result was some crazy looking double stepped pattern, which I didn't take a picture of, but spacing the lens holder with a set of washers, one on each corner got me to this point.

20150111_183659.jpg


Kinda hard to tell from the pics, but a much sharper cutoff, and a little bit of blue color flicker to go with it, compared to stock :cool: 
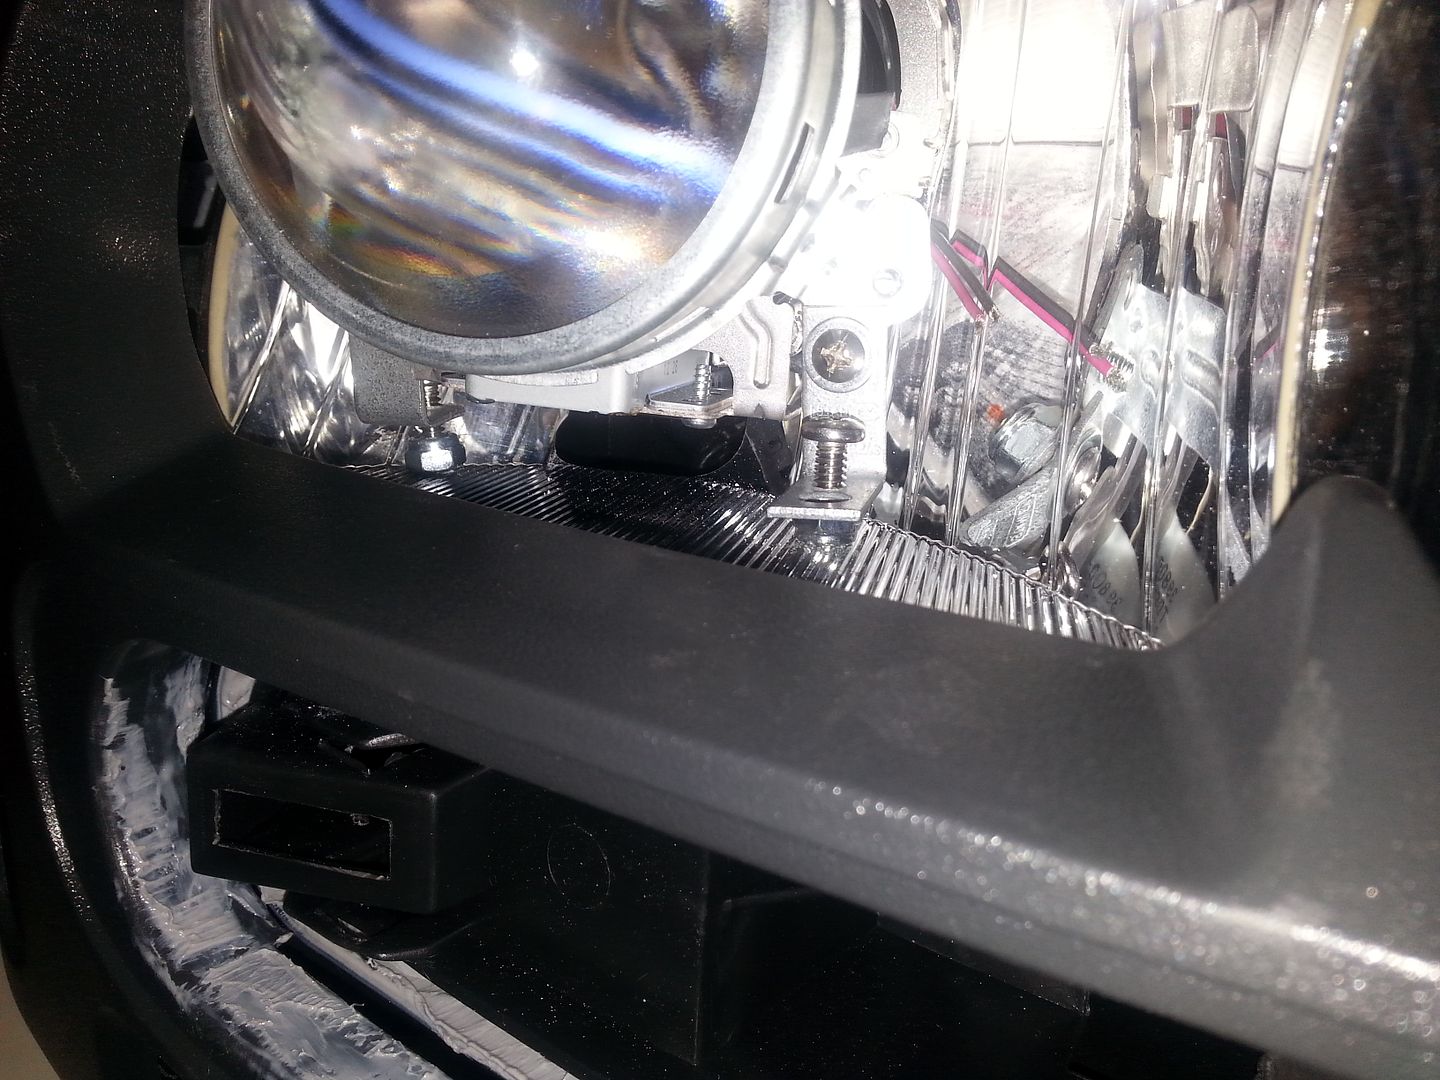
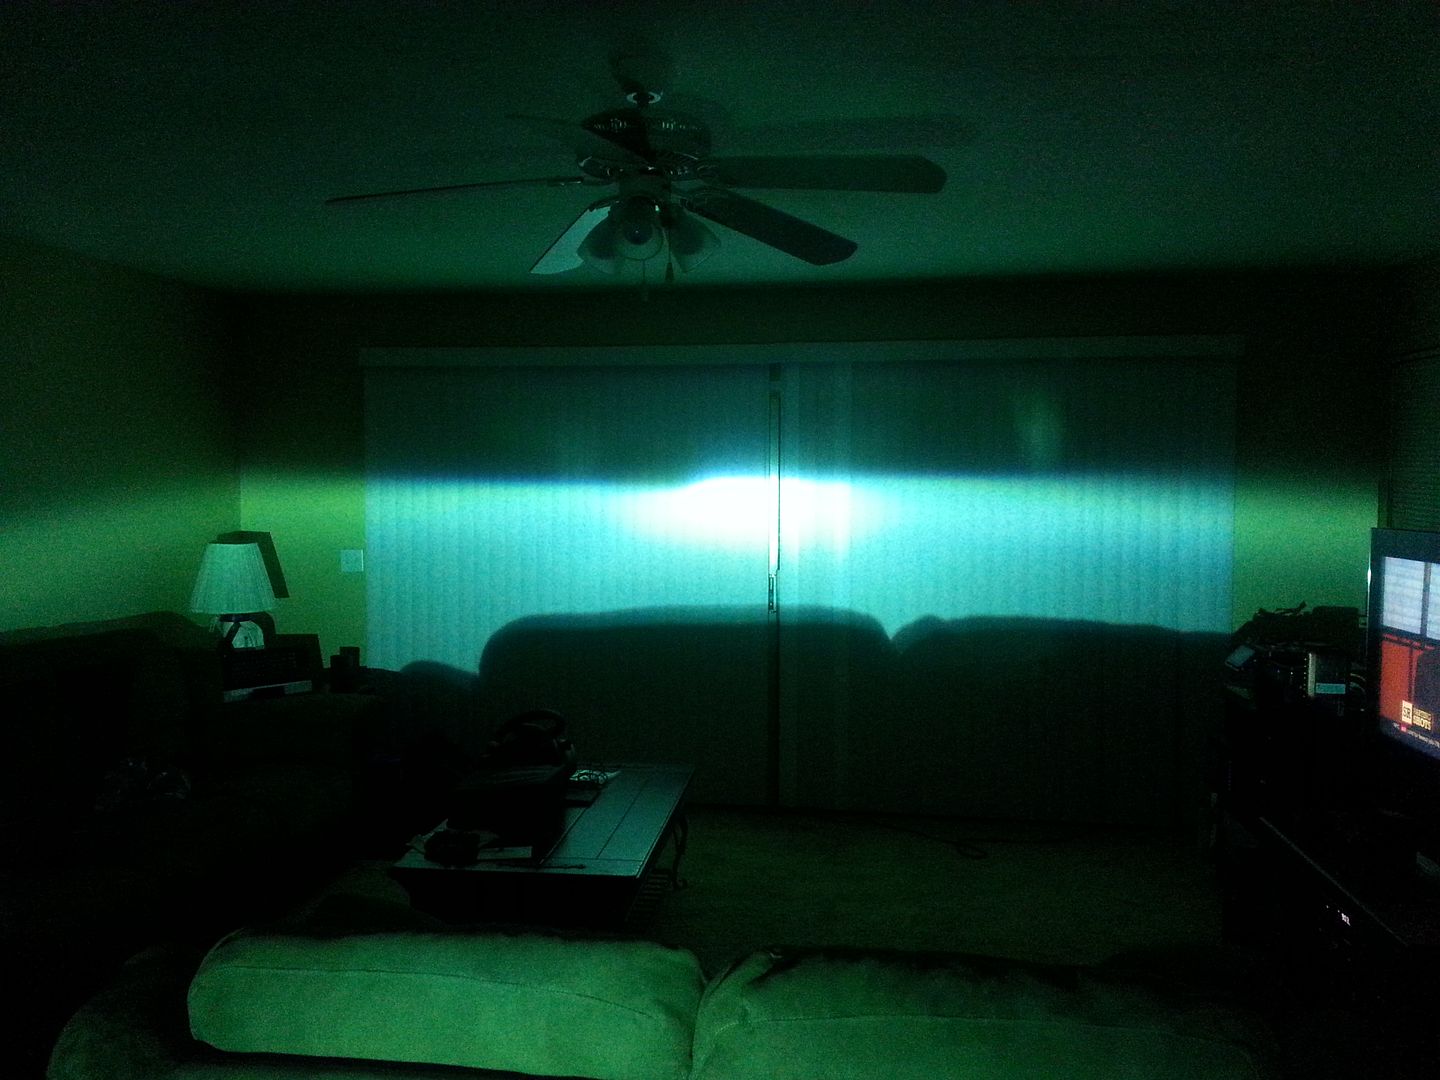
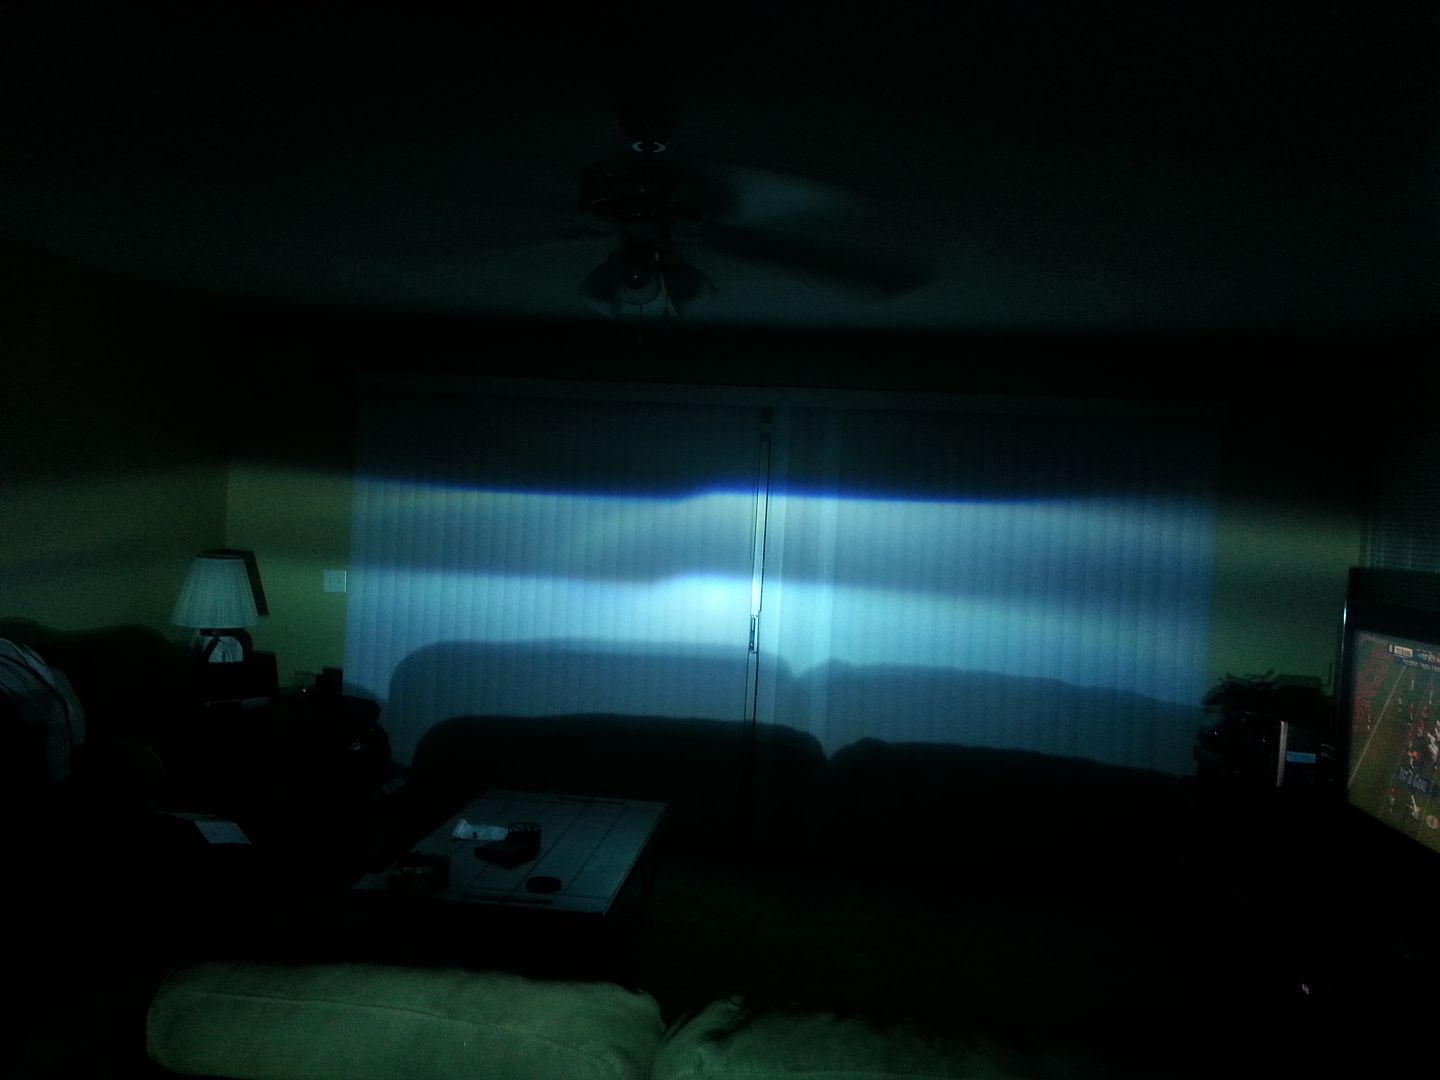
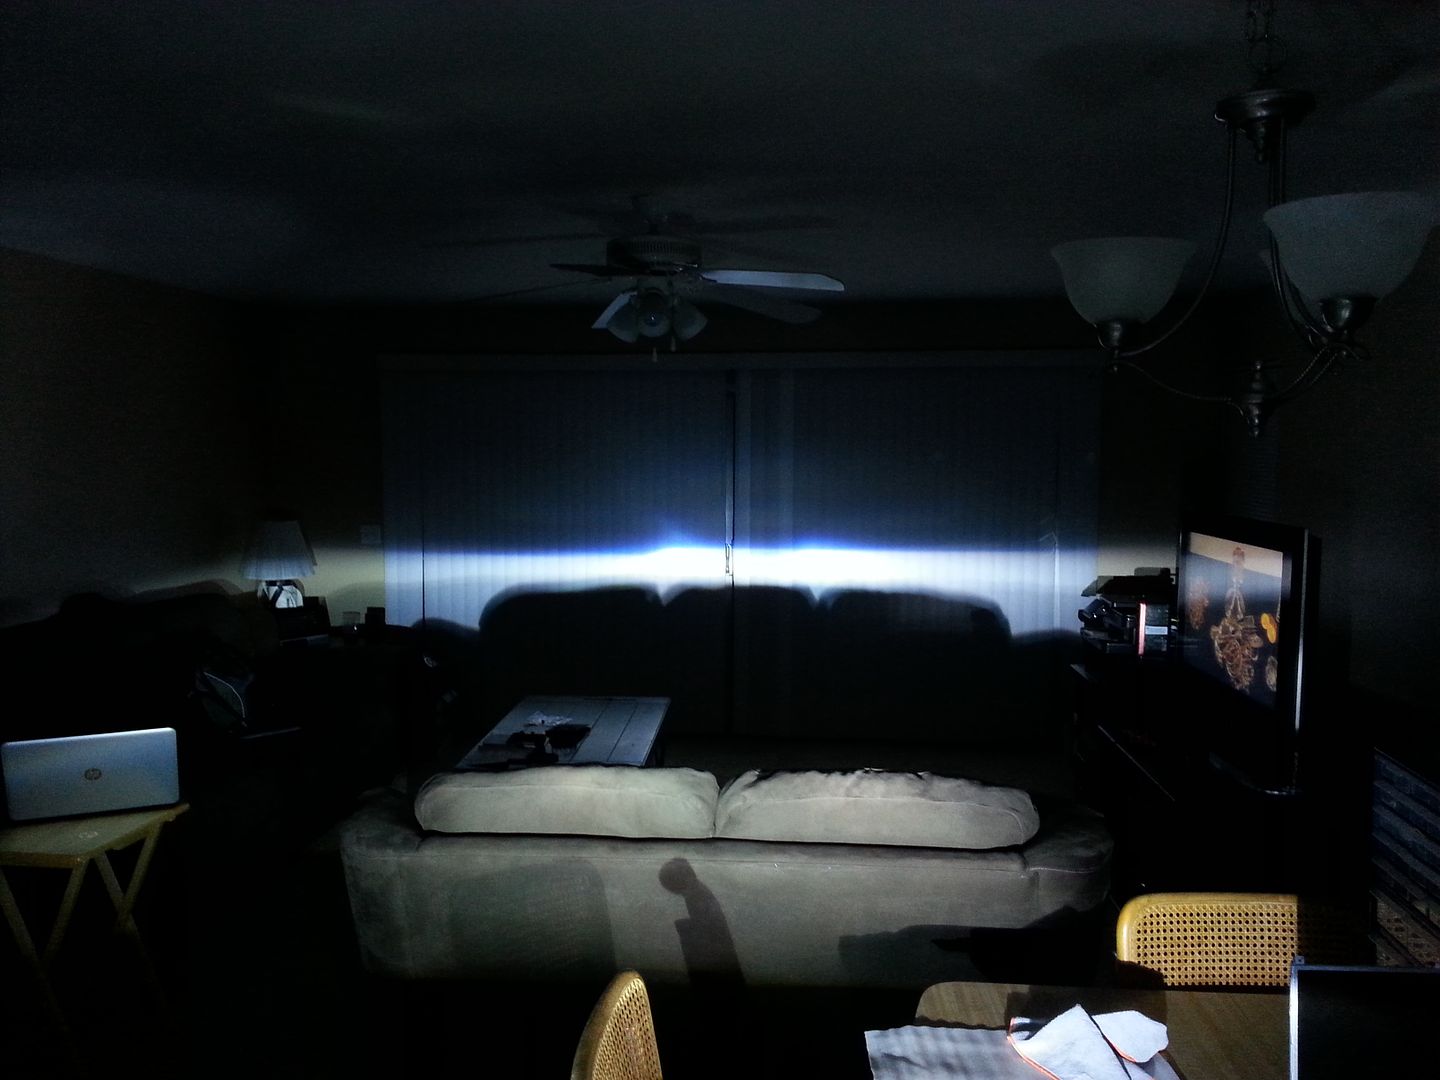
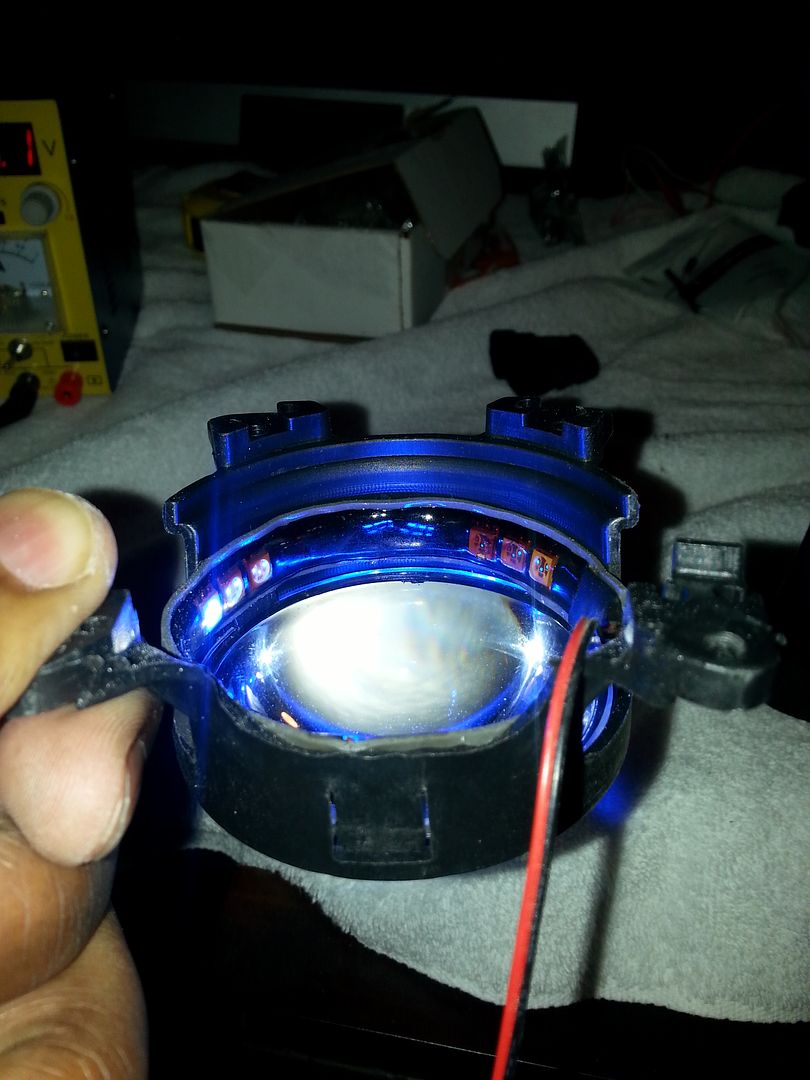
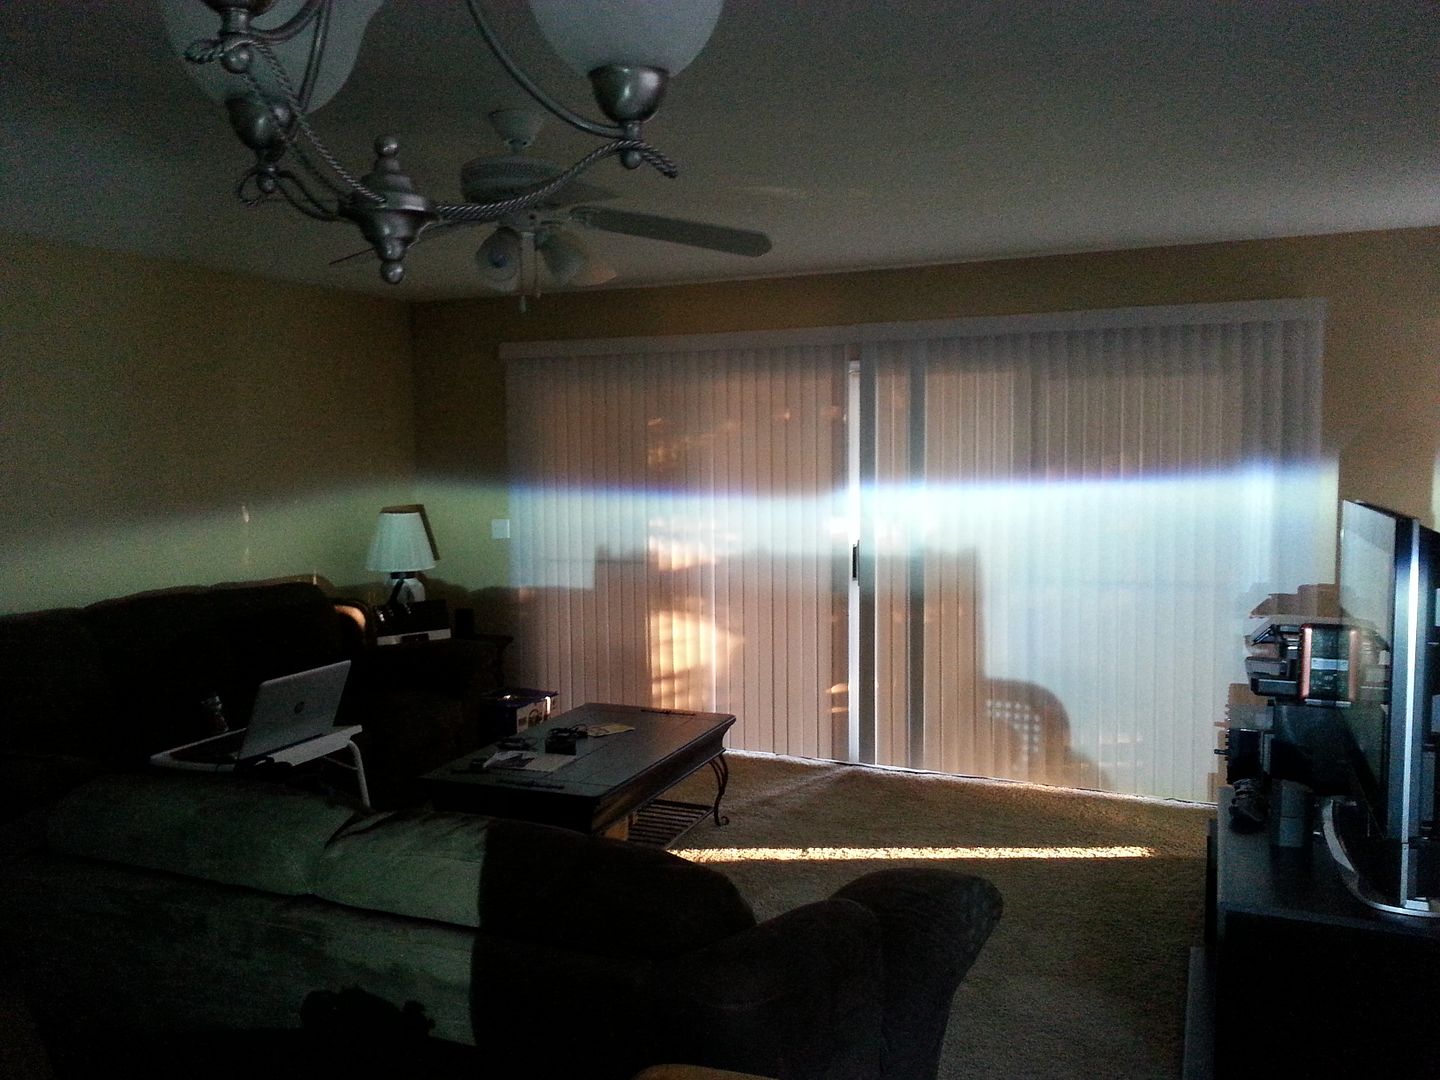
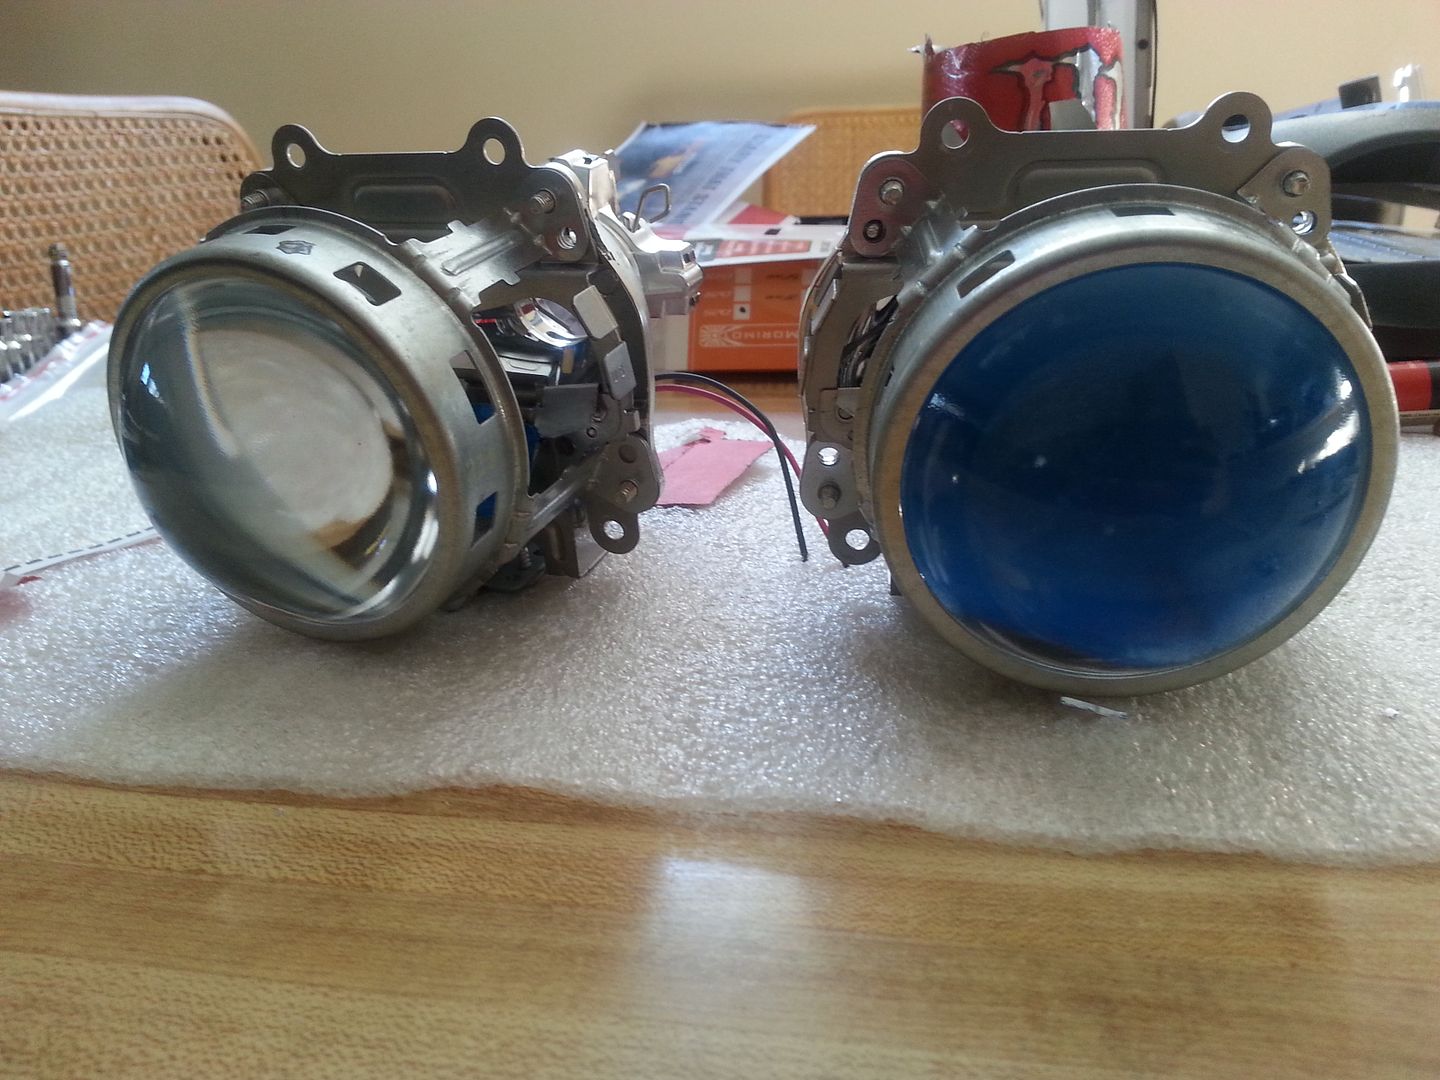
Here's a shot with 2 washers. A little bit more color above the cutoff, but also a bit more upward bowing.

20150111_184322.jpg


I'm going to play with spacing the shield vs spacing the lens, and see what combinations work the best. Hopefully I can space the shield, instead of the lens, and that will solve my bulb alignment issue so I can take the shims out. I didn't want to get into projector tuning just yet, but here I am, neck deep in it... So much for keeping this a simple build :hopeless:
 

Blckshdw

Original poster
Moderator
Nov 20, 2011
10,684
Tampa Bay Area, FL
After playing around with different combinations of washers spacing the shield and/or lens holder, as well as rotating the clear lens, I think I've got these tuned about as well as I'm gonna. There's a little bit of flaring on the driver's side one, another bulb shim would have the hot spot too low I think, so I may leave it there.

Color flicker up close :cool:

20150206_231637.jpg


Cutoff alignment with hotspots in the right places

20150206_231659.jpg


I'm starting to consider ditching the active demon eyes, and just going with the passive ones for the sake of getting this done and out of the way. Maybe if I buckle down this weekend I can do something with those. Guess we'll see how motivated I get.
 

Aarkon

Member
Nov 6, 2013
5,607
Good to see them up and running i was about to jab you and make sure you still had interest in these[emoji12]
 

Blckshdw

Original poster
Moderator
Nov 20, 2011
10,684
Tampa Bay Area, FL
These things were such a pain. If I had stayed with the stock lenses, I would probably have been working on the demon eye wiring and circuitry during my vacation, and possibly be done by now. I'll admit, a few times I got pretty frustrated with it, and thought about scrapping it. But I'd lose a ton of money in the process, and we can't have that. :nono:

Need to do an alignment check on the truck, so I can finally start on trimming and mounting the shrouds next.
 
  • Like
Reactions: Mounce and Aarkon

Forum Statistics

Threads
23,330
Posts
637,974
Members
18,530
Latest member
jvest

Members Online

No members online now.