4L60e assembly tip

Dr.Fiero

Original poster
Member
Dec 7, 2017
161
S. Alberta
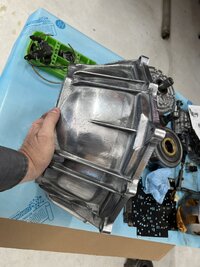
Still building my trans back up (get like an hour a day to play with it! Damn 'job' that gives me 'money' - sigh).

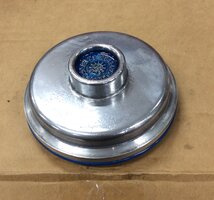
Anyhow, I was sticking the low/reverse piston in, and of course didn't want to damage it, rip seals etc. I know air checking is the norm for testing it after (to see if you DID fuck it up!), so thought.... hmmm.... I wonder if negative air would help install it?!

Well I'll be damned if it wasn't that easy! I was doing some AC on one of my other whips so had the vac right there. Stuck a rubber hose down the port you would use for air checking, fired up the vac and just pressed the hose against the SAE fitting (figured if things started going south I could just move the hose away!). But it just slowly, gently and gracefully sucked the piston into place! Zero drama!
 

Dr.Fiero

Original poster
Member
Dec 7, 2017
161
S. Alberta
Yeah yeah, it's only a transmission. But when you own buffing machinery and supplies, it's like a legal requirement (or something) that a few bits of whatever you're working on have to be shiny.
 

Attachments

  • 0E94F714-B44A-43AA-9B2A-39545D0F54DD.jpeg
    0E94F714-B44A-43AA-9B2A-39545D0F54DD.jpeg
    480.7 KB · Views: 9
  • 7F80ACA7-C712-41D1-9623-B5A42367DB19_1_201_a.jpeg
    7F80ACA7-C712-41D1-9623-B5A42367DB19_1_201_a.jpeg
    464.3 KB · Views: 9

Dr.Fiero

Original poster
Member
Dec 7, 2017
161
S. Alberta
I'm resisting the urge to go further back. Can't see anything past the bellhousing anyhow from up top.

Think I'm going to do a "chrome" powder coat on the exterior of the pan. If it'll fit in my oven in the shop. Ooooorrrrr.... Hey! Wife! You need to drive into town right? Ignore any sparkly stuff you see in the oven when you come home. :biggrin:
 

flyboy2610

Member
Aug 24, 2021
466
Lincoln, Ne.
Think I'm going to do a "chrome" powder coat on the exterior of the pan. If it'll fit in my oven in the shop. Ooooorrrrr.... Hey! Wife! You need to drive into town right? Ignore any sparkly stuff you see in the oven when you come home. :biggrin:
That could give a new meaning to the term "Last Supper"! ☠️
 
  • Haha
Reactions: Matt and Dr.Fiero

59840Surfer

Member
Apr 19, 2020
85
Montana
I also used a high speed vacuum pump to install caliper pistons all the time.
 

Dr.Fiero

Original poster
Member
Dec 7, 2017
161
S. Alberta
I forgot all about this thread! Ooooops....

IMG_0067.jpeg


Trans went back together, worked flawlessly - added some utterly useless "artwork" to it to match the engine, just because I was there. And it's what I do. :biggrin:
 
  • Like
  • Wow
Reactions: 808 and Mooseman

JayArr

Member
Sep 24, 2018
504
Mission BC Canada
Right away I notice the 90's on the trans fluid connectors instead of the stock quick connects.

My question is: did you replace the hard lines with some type of braided soft line? Was it custom or a kit? That seems like a great upgrade if it can be done for a reasonable price.
 
  • Like
Reactions: TJBaker57

Dr.Fiero

Original poster
Member
Dec 7, 2017
161
S. Alberta
Right away I notice the 90's on the trans fluid connectors instead of the stock quick connects.

My question is: did you replace the hard lines with some type of braided soft line? Was it custom or a kit? That seems like a great upgrade if it can be done for a reasonable price.
Yes - bought a semi generic kit off "the jungle site", then added a few bits to make the upper fitting fit better. With my fat long tube headers things were a bit tight, and... well... the braided lines just look cool. :smile:

Honestly it also makes getting the starter in/out WAY easier!

Up front I just added a few more bits (AN to barb fittings) to attach where the OE lines did.

Heres the kit I got: https://www.amazon.ca/gp/product/B09VSXSHKW/?tag=gmtnation-20
 
  • Like
Reactions: 808 and Mooseman

Forum Statistics

Threads
23,310
Posts
637,782
Members
18,516
Latest member
Ramzo358

Members Online