'06 engine ring/bearing/valve job

Mooseman

Moderator
Dec 4, 2011
25,324
Ottawa, ON
@Mooseman I followed your suggestion and bought a Ranier 97X rear axle assembly from LKQ. I fitted it with 4:11 gears and removed all the parking brake bits. The total cost was about $450 USD, as I found the axle within a 2 hour drive, thus saving about $300 in shipping costs.

Thanks for the suggestion, I think the beefier axle is money well spent.

Rick


I suggested that? Well, in general, I do recommend using the bigger diff for any performance or wheeling situation. And that is a G86 limited slip instead of the G80 locker, which has less tendency of exploding. I have a 3.73 8.6 from my Saab waiting to go in my TB.
 
  • Like
Reactions: rchalmers3

JayArr

Member
Sep 24, 2018
504
Mission BC Canada
If all I was going to work on was the Envoy I'd do that too, I also rebuild Olds Rockets from the 70s (5.0l, 5.7l and 6.6l) and Nissan engines from the late 80s. I need a little more versatility.
 
  • Like
Reactions: rchalmers3

mrrsm

Lifetime VIP Donor
Supporting Donor
Member
Oct 22, 2015
7,700
Tampa Bay Area
Don't forget ... to follow Eric "O"s idea from "South Main Auto" and consider adding in an attachable Flex-Hose to route the Exhaust-CO outside and well away from the Garage Doors so that stuff cannot collect up through the Roof Eaves for extended Idling and Tune Ups... Just to be on the Safe Side.
 

rchalmers3

Original poster
Member
Jul 11, 2020
207
Irmo, SC
The short block is assembled, with no problems encountered. As I mentioned previously, it came back together with std/std bearings and a light cylinder hone. I opened up the ring end gaps to .065mm on the top ring, and .075mm on the second ring, anticipating the addition of a forced induction system to feed this bone stock engine.

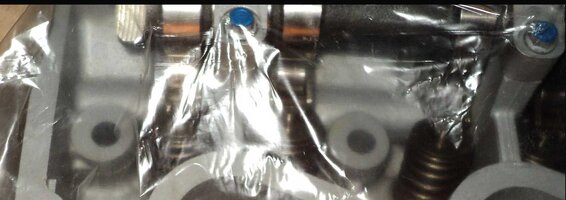
I set the head with a Felpro head gasket and have it torqued down, again with no issues. However I believe I pulled the threads on one of the intake cam cap bolts. So I must stop and back up a bit to pull that cam and have a good look at the damage.

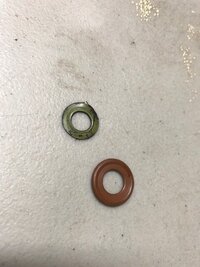
Guys, I need your help identifying a sealing washer. I found this as I was inventorying parts after a 4 month gap between disassembly and reassembly. It's a green washer, about 12mm on the outside, pictured with a similar brown washer out of the Felpro gasket kit. Can you please tell me what this washer is?
 

Attachments

  • IMG_0220.jpg
    IMG_0220.jpg
    54.3 KB · Views: 3
Last edited:

mrrsm

Lifetime VIP Donor
Supporting Donor
Member
Oct 22, 2015
7,700
Tampa Bay Area
Those "Washers" look like the ones needed to attach the Battery + Power Cable to the Starter Solenoid.

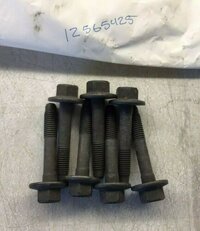
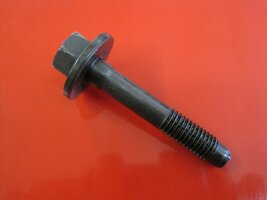
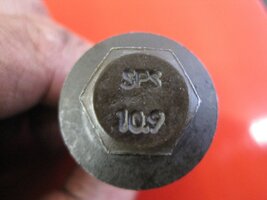
As for finding replacement GM OEM 10.9 Hard Camshaft Cap Screw Fasteners, there are some available here on eBay:

https://www.ebay.com/sch/i.html?_fr...70.l1313&_nkw=GM+4.2L+CAMSHAFT+BOLTS&_sacat=0

USEDCAMSHAFTCAPSBOLTS.jpgCAMSHAFTCAPSBOLTS1.jpgUSEDCAMSHAFTCAPSBOLTS3.jpgCAMSHAFTCAPSBOLTS.jpg

If the secondary issue is that the Bolt Hole for the Camshaft Fastener(s) got completely stripped out... I've penned a Thread here that addresses how to perform a TIME-SERT Repair. You WILL need to completely remove the Camshaft in order to do this work.

Note:

The Metric Thread Count and Pitch MUST be Double Checked so that you can obtain the Proper Tool Sizing and In-Serts needed for this particular repair.


If so...Unwind ALL of the Camshaft Caps Fasteners just a little at a time in their REVERSE Torque Pattern, as they will be under Valve Spring Pressure and the long-slender Camshaft may flex or bend if not removed by following this pattern. The same applies for re-installing the Camshaft Aluminum Caps.
 
Last edited:
  • Like
Reactions: rchalmers3

rchalmers3

Original poster
Member
Jul 11, 2020
207
Irmo, SC
Thanks for the prompt reply. I was able to fit a thread repair without any drama, and the long block is now fully assembled. For future reference the cam cap screws are 6x1.0x35mm. And the first (top) thread in the cam support area of the head casting must be recessed at least 5.75mm down into the cavity. I used a heli-coil type thread repair, as that is what I had on hand. A time-sert, as you mentioned, would have been preferable.

On to the other issue: any idea on that green seal pictured above?

This weekend I'll fit the front cover. That will be the final part of the stock motor assembly, as the valve cover and oil pan will require modifications for the intended purpose.
 
  • Like
Reactions: mrrsm

rchalmers3

Original poster
Member
Jul 11, 2020
207
Irmo, SC
Guys, I'm about to enter into new territory on this build. I need to consider a few potential modifications that will require me to gear up for TIG welding Al-U-MINIUM. I have never TIG welded before but many decades ago I used to weld with OXY/ACT on mild steel. That was before MIG welding became a thing. So I'm willing to give it a go.

With forced induction, I'll need to swap the PCV system to a catch can. Easy enough. I can cap the existing hose nipple on the valve cover and weld in an AN fitting further back on the valve cover, staying above the existing windage shield.

For turbo drainage, I'll need to create an oil drain fitting back into the crank case. No worries there. I can fit an AN fitting up high on the oil pan for that purpose.

The management of the oil in the sump under acceleration is another issue. I'm inclined to fit some baffles to trap oil near the pickup tube, AND fit an external accumulator as an insurance policy. I need your thoughts and recommendations on this, as I am aware of the oil pressure issues present in the motor design, and wish to meet those shortcomings head on!

Thanks guys, I look forward to reading your thoughts and suggestions.
Rick
 

mrrsm

Lifetime VIP Donor
Supporting Donor
Member
Oct 22, 2015
7,700
Tampa Bay Area
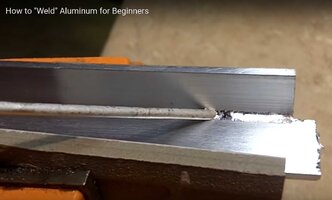
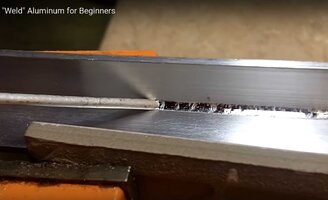
Without knowing precisely WHAT sort of Aluminum Plates and Shaped Pieces you intend to use for making Modified Intake Manifold... Why not try Brazing With Aluminum Rods" ?

You could practice welding up a Test Box that you can install either a Pneumatic Fitting into and either fill the container with Water & some Compressed Air and increase the pressure until it FAILS ...and/or put in an AC Vacuum Fitting and us an HF 2.5 CFM Vacuum Pump to pull enough of a Vacuum to collapse the Test Box...and see if the Welds HOLD.
WELDINGPLATESWITHALUMINUMROD.jpgWELDINGPLATESWITHALUMINUMROD1.jpg

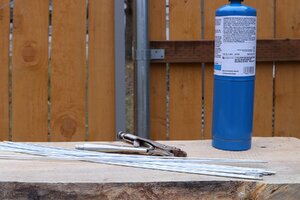
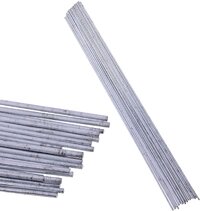
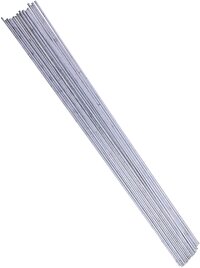
If this stuff is STRONG enough to hold the shape and NOT get above 500 Degrees Fahrenheit... Using Alumalloy Rods might prove to be the Inexpensive Solution:


This approach is One Hell of LOT Less Expensive than having to buy a pricey "TIG RIG" at an Air-Gas Counter while you empty out your wallet... and THEN some. It follows on that you'd have to learn and practice the Basics of TIG Welding while using Mixed Gas to the proper levels to TIG Weld effectively.

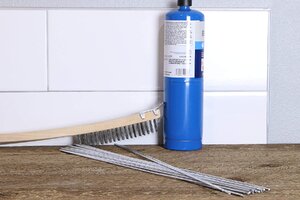
But with this alternative, you would have very little to lose by experimenting with this idea using some scrap Aluminum Plates, some 1/8" Alumalloy Welding Rods and some MAPP or Propane Gas and using a Typical Propane Torch... or better yet, for more control...Get the Pistol Grip version with an extended hose:
81EhOz1BBVL._AC_SL1500_.jpg81nvbHZhRwL._AC_SL1500_.jpg717Hdd48iWL._AC_SL1500_.jpg71E0QuBC3QL._AC_SL1500_.jpg


But... If you've "Got The Gold Ingots" to drop on some heavy weight TIG Welding Apparatus like the PrimeWeld Machine shown below... the VERY BEST Instructor on the Internet for How To TIG Weld Aluminum is THIS Dude.

He has a Dedicated Welding School on line called "The Fabrication Series" that might be worth investing in... or find a stack of his Training Videos...Download them all and Study to your Hearts Content.

This Next Video is a PERFECT Example in TFS #5 on "How to TIG Weld Aluminum Coupons" of the same Gauge and type of Aluminum Plates needed for virtually ANY kind of Aluminum Container Fabrication:

 
Last edited:

rchalmers3

Original poster
Member
Jul 11, 2020
207
Irmo, SC
@MRRSM, Thank you for your suggestion. Thankfully I'm in no rush to decide a solution to this challenge. Having recently bought inexpensive (Chinese) metal working tools (welder and plasma cutter), I have come to realize that it is more difficult, (but not impossible) to produce acceptable metal cutting/joining work using bargain basement tools. I simply must decide on improving the potential for quality results vs spending less money.

Today I received the AN fittings to be welded into the valve cover and oil pan. I'll let you know what I come up with.
Rick
 

JayArr

Member
Sep 24, 2018
504
Mission BC Canada
You can weld aluminum with the rods shown but it's not easy and the results aren't great. I've used them for years and if you want to stick two pieces of angle aluminum together or fix your patio furniture they are OK. I think you would need to be a real pro to get a good seal on a valve cover. As the guy in the video says, you need to preheat the aluminum and a valve cover is huge so It will be hard to get the whole valve cover hot enough to melt the rod.

I did see some interesting you tubes a week or so ago that explained that you can mig weld aluminum if you buy a stiff wire so it doesn't tangle. Buy 53/56 wire which is stiff (as opposed to the regular 40/43) use a .030 tip to allow for the wire's expansion rate, turn the wire speed to max and gas has to be pure Argon (not the argon/CO2 mix). Apparently if you do these things you don't need a spool gun.
 
  • Like
Reactions: rchalmers3

rchalmers3

Original poster
Member
Jul 11, 2020
207
Irmo, SC
You can weld aluminum with the rods shown but it's not easy and the results aren't great

Cheers Jay, that's exactly the dilemma I wish to avoid. I am sure a Miller, Lincoln or other name brand TIG welder would provide the best possible results. I just don't have any spare organs to sell in order to be able to purchase one.

I have completed the rebuilding of the 2006 engine. I will post subsequesnt developments on this thread: https://gmtnation.com/forums/threads/drag-racing-the-gmt360-with-the-ll8.21472/#post-605903

Thank you,
Rick
 

gmcman

Member
Dec 12, 2011
4,656
Sorry for the late reply, I re-read the last couple months, but wanted to ask, are you using the old pistons? If so, what is the wall to piston skirt gap?

Again, this is now likely a moot point, but maybe not.
 

rchalmers3

Original poster
Member
Jul 11, 2020
207
Irmo, SC
... are you using the old pistons? If so, what is the wall to piston skirt gap?

Cheers GMCMAN,
Yes, I'm reusing the stock, pristine pistons with new std rings. All 6 cylinders looked excellent both at the top and all the way down. The machine shop gave them a light honing. I did not measure the skirt gap. I think I'm good to go.

Rick
 

Forum Statistics

Threads
23,314
Posts
637,846
Members
18,520
Latest member
Firebaugh86

Members Online

No members online now.