Rough idle and knocking noise from bottom of motor

mrrsm

Lifetime VIP Donor
Supporting Donor
Member
Oct 22, 2015
7,686
Tampa Bay Area
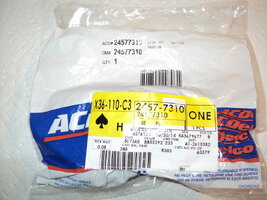
This is such a "finicky' piece of wonderful machinery that my personal R&R Philosophy does NOT follow the Popular Prejudice of "...just throw it on and slap the damned thing together" approach. My feeling (and all the time, energy and money I devote to my own repairs) is to use Brand New OEM components at every single opportunity because I do not want to have to take anything apart and put it back together more than once.

But I also am loathe to spend another man's money. If you look and listen to the comments being made by our Hispanic VOP (Video Original Poster) Friend on the videos I mentioned earlier (Post #81).,.. He too observes... "This is my Mother's vehicle ...so it has to be right...". When I am done here... My son and his family will ride down the road in a virtually renewed 2002 Trailblazer... so for my situation...no expense to make that happen is too much.

The last idea here is that I also do not want to endure any risk of part failure that I could have taken care of when I had the damned thing completely apart. It is a personal choice here... but mine is to "Always R&R every single thing you can access with New, OEM Components" so I don't have to worry about it after the last fastener gets snugged down.
 

holytornado84

Original poster
Member
Feb 21, 2013
111
One other question I had is, do I need to use a certain tool to remove and replace the front seal or can I just use a screwdriver or something easy to access to remove and a rubber mallet to install?
 

mrrsm

Lifetime VIP Donor
Supporting Donor
Member
Oct 22, 2015
7,686
Tampa Bay Area
This is where the people who hate me for being such a stickler for using "The Proper Tool for the Proper Job" will want to take a swing at my chin...

Once you have removed the Front Cover-Gerotor Oil Pump unit... you can either lay a thin piece of wood as a 'fulcrum" over the area adjacent the lip and use a Screw Driver to pry it out uniformly from the outside area of the Cover...or... use a slender punch and carefully drive the Cover Seal out from the inside. Once it is out... My favorite solvent for cleaning the "seat" here is Lacquer Thinner. Some people like to use either oil or grease on the outer edge of the Rubber-Ribbed coating on the outer metal ring of the seal. But my preference is to level the cover on something stable (the presence of the Gerotor HW inside will make this wobbly and problematic) and support the wide edges with two short 2" X 4" s and without getting too enthusiastic... use a Plastic or small Brass Mallet to align the seal inside th the Cover and just tap uniformly around the edges until the Seal "bites".

... then use a 4" X 4" square of Two By Four to evenly drive the seal down until the outer metal section is flush with the front of the Timing Chain Cover. THE MOST IMPORTANT THING TO CHECK IS THAT YOU HAVE THE RIGHT SEAL and Bring your NEW HARMONIC BALANCER ALONG TO CHECK THAT THE ALTERNATIVE SEAL IS THE ONE THAT MUST BE USED WITH THE NEWLY DESIGNED HB. GM decided upon making TWO different seal designs... so when you are standing at the Parts Counter double check the one you removed vs the new OEM replacement in a side-by-side comparison before you begin the seal replacement. If you install the wrong one... you will pour motor oil all over the driveway as soon as you start the engine.
 
Last edited:

holytornado84

Original poster
Member
Feb 21, 2013
111
Thanks @MRRSM for all of the helpfull information. I actually have two front main seal's that I have purchased because my 07 has a front seal leak along with hers. Not sure if they are the right one, but I will compare with the one I pull off of each car.

I however did not know that I was going to have to remove the front cover on the engine. I figured I would be able to pry out the old seal and install the new one after removing the harmonic balancer. Will I have to drain the oil for this procedure and will I need another gasket for the front cover if it has one?

I'm also not quite sure if I understand the 15 mm socket and ratchet procedure that you said @Mooseman suggests to keep the crankshaft from moving with the flywheel. I am not installing the transmission until I have finished replacing the front seal. I figured I would just use the vice grip method, but I'm trying to give his method some thought. What bolt would I be putting the 15 mm socket over to apply pressure while loosening the harmonic balancer bolt? Would I need an extra person for this method?
 
Last edited:

mrrsm

Lifetime VIP Donor
Supporting Donor
Member
Oct 22, 2015
7,686
Tampa Bay Area
I was under the impression you were going to either replace the Timing Chain Tensioner or the Gerotor Oil Pump or the Pickup Tube... If not......unless the Front Seal is actually leaking....then there is no real reason to remove the Harmonic Balancer or disturb the Front Cover at all. But...if you must R&R the HB... you can either get an inexpensive "Blind Hole Seal Puller" from Harbor Freight as a more technical means of yanking the Front Cover Seal ...but using a "Basic Screw Driver" down there to get it out that seal is a hazardous enterprise if you should Nick the Outside Diameter of the Crankshaft. But if you see no signs of any Oil Leaks and are not fixing anything else inside of the engine...I think you can leave it alone.

When and if it becomes necessary to remove and replace the front cover... you will not be using any "Formal Gaskets" anywhere on the Major Block and Cover Plate Assemblies on the GM 4.2L Atlas Engines you own...because their assemblies are built to sort of "cross-buttress" each other and form one unified "building"...and in order to get that kind of close tolerances between these co-supporting Case Structures... GM use a Special OEM RTV that vulcanizes within 10 minutes after it gets applied in a special way in one continuous "3 MM Bead" on the Block or Covers or Crankcase Oil-Pan so as to essentially "Rubber-Glue and Seal the Engine" together in a very strong, lasting and durable way. Standard, Off the Shelf Permatex, Blue or Black HT RTV will NOT make the grade here... (More proof of just how 'finicky" this engine can be... the more you take it apart)

They have never made any seal that would not be ripped to shreds if the Crank has any gouges or sharp edges digging into the seal after making contact when exposed to relentless RPM. But... if you manage to get the seal off and do no harm...using a Large Deep Socket to fit over edges of the metal seal and clear the Crank snout (pretty flush in this engine) to seat the last few MMs and drive it home. So I guess I'll end this reply by asking...

"Why were you removing the Harmonic Balancer...?"
 
Last edited:

holytornado84

Original poster
Member
Feb 21, 2013
111
She was having to add oil quite regularly. Here are some photos from underneath, in front and on top of the motor where I see darkened areas as if something has leaked onto the surface for a while:

Bar at the rear of motor below oil pan, forward of the bell housing IMG_2076.PNGoil pan IMG_2077.PNG front of oil panIMG_2087.PNG front of oil pan further up with balancer in shotIMG_2088.PNG area to the right of balancerIMG_2080.PNG same shot but lowerIMG_2081.PNG front of engine "standing"IMG_2082.PNG top of engineIMG_2083.PNG same shot but further rightIMG_2085.PNG Not really sure were she is loosing her oil, but from looking at the front, I figured the seal had gone bad. I've never had to fix an oil leak though.

Also, what is this item in your pics used for? Do I need it?

Kent Moore Crankshaft Button Plug J-38416-2
 
Last edited:

mrrsm

Lifetime VIP Donor
Supporting Donor
Member
Oct 22, 2015
7,686
Tampa Bay Area
Okay... to answer the latest questions:

Okay... with so much oil leaking, I suspect a combination of Worn Crankshaft/Thrust Bearings and a problem of the Outer Ring of the HB losing its grip on the core of the HB because of some slippage of the Elasto-Meric "Rubber Glue" in between... and the excessive wobble and engine vibrations have taken their toll on the Front Cover Seal. If it were me... getting a replacement HB would be included in this repair.

No... you do not have to drain the oil... However you can anticipate that whatever residual Engine Oil is still up inside of the Gerotor Oil Pump and the Oil on the Upper Chains will attempt to drain down once the airtight Front Cover Seal to Crankshaft is removed and the Oil on the Upper Timing Chain Segments will also attempt to drain down to the lower opened point.

Have a look at this link to a Modified Image of my Engine Block (inverted on an Engine Stand) and you can see an illustration of @Mooseman 's Idea... by following the Red Arrow after pulling out the Black Plastic Plug (inside Big Yellow Circle) from insid of the curved bottom ledge at the back of the Crankcase at the center of the engine.

After lining up one the of the Three Torque Converter Bolts (inside Small Yellow Circle) of the Flywheel that are spaced 120 Degrees apart... Insert a 15 MM Deep Socket that has an OD small enough to pass through that hole in the Crankcase and snug it up over one of the aligned TC Bolt Heads.

Then, during both the removal and the replacement actions, have someone holding a Ratchet plugged into the 15 MM Socket in a position to fight against your efforts to R&R the Large TTY Bolt from the Harmonic Balancer. There is No Woodruff Key on the Crankshaft in this engine design and therefore the outside of the HB cannot be used to restrain the shaft from turning while you tightening down the Brand New Bolt.

http://s557.photobucket.com/user/60...EREPAIR/GM42LHOWTOREMOVETCBOLTS?sort=3&page=1
 
Last edited:

mrrsm

Lifetime VIP Donor
Supporting Donor
Member
Oct 22, 2015
7,686
Tampa Bay Area
HOLD UP>>>>>
 

mrrsm

Lifetime VIP Donor
Supporting Donor
Member
Oct 22, 2015
7,686
Tampa Bay Area
That oil is NOT COMING FROM THE CRANKSHAFT FRONT COVER SEAL... WHAT YOU ARE SEEING IS THE OIL THAT IS ESCAPING FROM THE PCV VENT IN THE TOP OF THE VALVE COVER DUE TO EITHER AN ABSENT OR LEAKING SMALL "ELBOW HOSE".... STAND BY AND I WILL POST THE IMAGES OF THE OEM HOSE!!!!

Let's try something more conservative first...


The fact that you have so much Engine Oil all over the top of the Valve Cover and around the hole in the top of the small plastic PCV Vent Hose protrusion makes me suspect that the Oil might be present there either because the PCV Hose that connects from that plastic tube to the front underside of the Resonator is LOOSE, Not ATTACHED OR IS MISSING ENTIRELY and the Engine Oil is flowing out and getting on top of the engine head and then flowing down the top front of the engine.

That amount of Fresh Oil is not normally how Leaking Engine Oil Seals behave... and it is WAY TOO FRESH AND CLEAN to be seepage. You could also have some leaking from loose Valve Cover Fasteners as well... or it could be any combination of these problems. But... Let's work the problem from the Top Down and see what gives.

The attached images are of the GM OEM PCV Elbow Hose that should be replaced between the Outlet on the Front Top Valve Cover and the Front Underside of the Resonator. Then... after spraying off the Oil and Dirt front from the top of the Valve Cover and from the Engine Block to get rid of all that built up Oily Dirt... Do the same clean-up around the sealing area at the front of the Valve Cover. Look inside the Resonator for any build up of Fresh Engine Oil as well... Try to pour it out into a white plastic container and if there is a lot of it present... snap a picture of the stuff and let us have a look at it.

Once you have the vehicle ready to drive... you can test this theory for a week or so and unless right now... you have completely removed the Radiator and have all of the rest of the front end torn down and insist upon replacing the Front Cover Seal... Less is Best if you don't have a leak there. But... If you have Definitive Proof that the Front Seal is leaking... than by all means proceed... but doing that repair alone will not solve the problem of having engine oil all over the top of the engine. Please get as many clear and distinct images of the Oil Flow patterns as possible in their present status and post them all here for a more conclusive view ...Top, Front...Sides and Bottom... and maybe... just maybe... you'll solve the Oil Leak...and save some time, money and "Elbow Grease" to boot!
 

Attachments

  • DSC03651.jpg
    DSC03651.jpg
    241.8 KB · Views: 7
  • DSC03654.jpg
    DSC03654.jpg
    202 KB · Views: 7
Last edited:

holytornado84

Original poster
Member
Feb 21, 2013
111
I just took some pictures of the resonator and the elbow hose that is attached. There is oil present in the resonator, but not enough to get some to pour out to show. Clean looking oil though. I guess the elbow hose is just loose.

What would you suggest for me to use to clean the surfaces of the engine before I put everything back together and run it? IMG_2090.JPGIMG_2091.JPGIMG_2092.JPGIMG_2093.JPGIMG_2094.JPG
 

Mooseman

Moderator
Dec 4, 2011
25,310
Ottawa, ON
I got some catching up to do.

1. With no transmission in the way (forgot about that), you have some options for holding the flywheel. You could just do something simple like this to hold it:
2010%20project%20flywheel%20lock.jpg

2. New balancer is not required if your old one is in good condition. Just inspect the rubber ring's condition.
3. I'd just use a thin style hook seal puller if it's still on the engine. With the cover off the engine, I just used a flat screwdriver with a hammer.
4. To install the balancer, I just used the redneck method by lightly hitting it a few times with a hammer enough to get the bolt started and use the bolt to bring it home. You could try heating the balancer in boiling water to expand the metal. This would not be any hotter than a running engine so no harm to the part will come and may expand it just enough to slide it on the interference fit snout without having to hit it.
 

mrrsm

Lifetime VIP Donor
Supporting Donor
Member
Oct 22, 2015
7,686
Tampa Bay Area
It will help to photo-document the present "Oily Conditions" and try to establish if there are any patterns between the presence of the Dirty Oil patches wherever they originate from the top and follow any gravity and engine vibration flow pattens downwards where things eventually collect and drip to the ground. To establish a complete picture...slide a Fresh Piece of Cardboard that completely reaches the areas that the engine and transmission occupy above and see if any oil at all drips down and points back to the source. Loose Fasteners holding down the Valve cover and the Intake Manifold can be involved and so checking them over and first before cleaning and tightening them will be necessary. You definitely require "Before and After" imagery so you have a baseline from which to work the problem.

So far, the fact that the Resonator and its "Elbow" Hose are very Oily, Slickand Dirty is just the beginning. You'll need to know if the connection between the Small Plastic Valve Cover-to-Hose fittings are very loose and the same applies for where the Upper Hose Elbow plugs into the bottom of the Resonator. If these connections are excessively loose... they form an unfiltered pathway for Dirty, Unfiltered, Unmeasured Air to get ingested inside the engine and as such... both should be replaced with New Hose and a Good, Used Resonator if there is obvious damage to it and a Brand New Elbow Hose will not snugly attach. Oily Air is constantly being expelled through the small Plastic Valve Cover due to Engine Blow-By Gases pressurizing the inside of the Motor and will carry that mess outside of the engine if not contained.

If the ordinarily sealed hosing fails... the Warm Oil Laden Air ( and LOTS of it) will condense either under the Plastic Resonator or on anything that cools down the Misty Oil enough to allow it to eventually collect in quantity. It has got to go somewhere and that contaminated Oily Air would ordinarily be aspirated out of the Resonator and get vacuumed into the Air Column of the Throttle Body where those Oily Fumes can re-enter the Combustion Chambers and get burned, rather than being expelled to the open atmosphere.

However... in the present circumstances... that activity is being shunted by these leaks in between and must be repaired and the Oil and Dirt cleaned wiped up with a light spray of a solvent like Brake Cleaner . When the external surfaces have been photographed and are cool... the Oily Dirty can be sprayed off the Aluminum Surfaces with the same Brake Cleaner Solvent and while it not necessary to make the appearance spotless... and place that exhibits collections and any oil should be sprayed down.

Do Not Spray Brake Cleaner on any HOT or Running Engine with any incandescently hot components like the Exhaust Manifold because if ignited, it will burn and create Very Toxic Phosgene Gas vapours.

The Resonator can be cleaned out by masking off one end with 2'-3" Blue Painter's Tape and then filled with Hot Soapy Water and agitated well enough to dissolve and loosen all of the Old Oily Contaminants. The final cleanup can be done in the sink using Dawn Dish Soap as the best Oil Cleaner available and pressure sprayed inside and out with Hot Water and allowed to Air Dry. The Before and After photos that capture all of this will help in figuring What is Leaking Where...and Why.
 
Last edited:

holytornado84

Original poster
Member
Feb 21, 2013
111
So I've got a quick couple of questions as I am installing the transmission back to the engine. My Chilton says that before I remove the transmission to mark the relationship between the flexplate and the torque converter. It also says that when removing the flexplate from the crank shaft to mark that relationship as well. None of which I have done. Whoops!!!!

Is there a certain alignment or pattern that the torque converter/flexplate/crankshaft are supposed to be installed by or can I just slap everything back together? Also, I think I am supposed to apply locktite on the flexplate/crankshaft bolts. Is this true? Are there any other fasteners that need loctite as well?
 

m.mcmillen

Member
Apr 29, 2016
554
Wisconsin
I wouldn't sweat not marking the torque converter. Also, I'm fairly certain that the bolt pattern on the flex plate is arranged in a way that allows the flex plate to be installed in one position only.

I used locktite on the flex plate bolts and on the torque converter bolts.
 

Mooseman

Moderator
Dec 4, 2011
25,310
Ottawa, ON
I'm pretty sure it can be installed in any of 3 positions. I think their thinking is that if it was together that way from the factory and it was balanced, to put it back exactly the same. But you can't do that if you are replacing the torque converter or flexplate. They are both independently balanced so it's a moot point.

Basically, no worries :2thumbsup:

Loctite is always a good thing but I'd just use blue.
 

Sparky

Member
Dec 4, 2011
12,927
If that hose is loose it can cause some PCV issues apparently - my coworker's hose on her 2007 was loose and it was actually causing excessive oil usage that would gum up her throttle body something terrible, and fast. Replacing that hose slowed down oil intake considerably. Why, I don't know, but hey.
 

holytornado84

Original poster
Member
Feb 21, 2013
111
Another quick question. (The AC line that runs over the top of where the bell housing joints up to the motor) Is the brace mount supposed to fit in between the bell housing and motor when your inserting the bell housing bolts at the top or is the brace mount supposed to be on the rear side of the bell housing bolt holes?

I am trying to get the bolts at the very top to go through the bell housing, then the brace mount and then the motor bolt holes and it is being a pain in the neck for everything to line up correctly. I don't exactly remember how it came off whenever I pulled the two bolts out but it almost seems as though it should be mounted from the rear of the bell housing.
 

mrrsm

Lifetime VIP Donor
Supporting Donor
Member
Oct 22, 2015
7,686
Tampa Bay Area
During an R&R of my 02 TB 4L60E, what worked for me to be able to elevate the Aluminum Heater Hose dual bolt hole tabs out of the way was to go in through the Driver's side Wheel Well with a long piece of Furring Strip wood and with a notch cut in the end of the stave, wedged it up under the Aluminum Pipe from underneath and lifted the pipe high enough to get the Bell Housing mated to the Block. Then I quickly installed a few Bolts in the Lateral side positions of the Bell Housing.

This method helped to get around the PITA of the Tabs dropping down in between the Block and the Bell Housing. As you proceed... If you look for any brackets such as for the Trans Cooler Lines first... you won't anxiously or prematurely install the Bolts that hold things in place before getting the brackets put back in their correct positions as I have done myself while struggling under the TB. The brackets will naturally indicate where to align themselves to their prior locations.
 
Last edited:

holytornado84

Original poster
Member
Feb 21, 2013
111
Well I have everything going together quite nicely. I did have an issue of small concern about something I may have broke. There is a black hose hanging from the transmission that has some sort of plastic end to it. I somehow managed to break a plastic piece off of the end of that hose. I was just going to inquire back to you guys to see if I need to replace the plastic piece on the end. I'll attach a few pictures of it for y'all to see.

I also kept getting hit in my safety glasses and forehead by a liquid very similar to oil in color and texture but upon smelling it, I'm not quite sure it is oil. I have captured a few pictures also of where it is dripping from and will include them as well. It is dripping off of some metallic lines that are right underneath what I believe is the tie rod end bar that goes from one side to the other. Those lines have connection pieces that screw on very similar to the transmission fluid cooling lines.

The hose in question that I broke (under the transmission fluid cooling lines)IMG_2114.PNGZoomed in IMG_2112.PNGThe plastic piece I broke off IMG_2113.JPGArea where the oily substance is leaking from IMG_2115.PNG Zoomed in on the line it is leaking off ofIMG_2116.PNG

Could there be a substance leaking out of those lines or do y'all think that this is still just leaking motor oil?
 
Last edited:

mrrsm

Lifetime VIP Donor
Supporting Donor
Member
Oct 22, 2015
7,686
Tampa Bay Area
If you can run a "finger trace" of the Power Steering System starting from the PS Pump and follow the lines down to the PS Steering Hydraulic Cylinder... you might find that in addition to the fluid level being lower than nominal... one or several places have the concentrations of slow seal leaks of line connectors that are a bit loose. A paper towel wipe down can pinpoint their locations. HT....Glad to see you are nearing the Finish Line... ;>)

EDIT: Sorry about the Duplicate Post...

If I've watched this video from RealFixesRealFast on Youtube Once... I've seen it a Thousand Times because it shows a 10 Minute View of what the Trailblazer looks like with the Engine, Transmission, Wiring, Piping and Hosing completely intact because Duane completely removes the body of the vehicle. When downloaded and played in slow-motion... you can study a multitude of places and see things as they would appear with uncommon clarity. Perhaps you can use this film to trace out what that Hose Fitting is...and where it needs to be re-attached:

 
Last edited:

Mooseman

Moderator
Dec 4, 2011
25,310
Ottawa, ON
That plastic piece looks like the vent cap. Did you break it on top of the tranny or just the end? If the end, just pop that cap back on. IIRC, the end of that hose clips somewhere at the top rear of the engine.
 

holytornado84

Original poster
Member
Feb 21, 2013
111
Yeah @Mooseman, the line that I broke the end on comes out of the transmission somewhere at the top I believe. I just broke the plastic cap.

Thanks for the video @MRRSM. I'll have to look that over when I get a chance. I got to work in the morning.
 

holytornado84

Original poster
Member
Feb 21, 2013
111
Well, I am slowly getting everything back together but ran into a small problem. The hose that I was talking about that I broke the end cap off of was hanging off the right/passenger side of the transmission to where it would drain right on the catalytic converter and possibly cause a fire. I tried angling it towards the rear, but the hose is too old I guess and split right where it slips onto the other line and fell off.

I was wondering if anyone knew where this hose is supposed to be pointed or directionally laid. I have cut off the end and I am thinking about slipping it back on and seeing if it doesn't crack/split again so I can just reuse it, but I have also found a replacement part if necessary as well.


IMG_2147.PNG


Does anyone have any information on how this hose is supposed to be mounted?
 

Mooseman

Moderator
Dec 4, 2011
25,310
Ottawa, ON
It should be vertical, attached at the top of the bellhousing.
 

holytornado84

Original poster
Member
Feb 21, 2013
111
OK. I got all that out of the way. I am now on replacing the transmission fluid filter and filling the transmission back up with fluid. Has anyone ever reused the same transmission pan gasket without any hiccups? I cannot seem to get this gasket off. It is practically welded to the pan.
 

Mooseman

Moderator
Dec 4, 2011
25,310
Ottawa, ON
I'd recommend taking it off. It is likely hardened and would probably leak. Use a blade scraper and fine wire brush.
 

Sparky

Member
Dec 4, 2011
12,927
Yeah scraping it down sucks. I've done 3 of them, and it always takes me forever to clean the old one off, and not nick up the aluminum pan too badly. Some sort of nasty cardboard/cork like material...

All the replacement gaskets I've used have been rubber which are far nicer.

At least (in my experience) the nasty gasket usually sticks to the pan and not the transmission housing!
 

Mooseman

Moderator
Dec 4, 2011
25,310
Ottawa, ON
Or a nylon type wire wheel on a drill. Makes short order of the gasket without scratching the metal surface. Get the rubber type gasket as a replacement.
 
  • Like
Reactions: Redbeard

holytornado84

Original poster
Member
Feb 21, 2013
111
IMG_2153.JPG IMG_2157.PNG IMG_2158.PNG So I went and grabbed a nylon wheel to grind the old gasket off. I had a question for anybody that's changed transmission fluid on a high mileage transmission. The transmission fluid is pretty dark. Also, in the bottom of the transmission pan there is all of the gunky material coating up the whole bottom with sludge. I am already going to have to replace about 4 to 5 quarts of transmission fluid from the first time I drop the pan and discarded that fluid. Since then I have started the engine after mounting the transmission back to it and a lot more fluid has flowed back into the transmission pan. I have saved that fluid though and plan on putting it back in the transmission. Is this gonna be ok to put some of the old fluid back in there along with 4 or 5 quarts of the new dex6?
 

Mooseman

Moderator
Dec 4, 2011
25,310
Ottawa, ON
The black sludge is pretty normal. It's shiny chunks that you need to worry about. With fluid that dark, I'd be doing a full fluid replacement (or flush) as per @MAY03LT 's videos.
 
  • Like
Reactions: Redbeard

holytornado84

Original poster
Member
Feb 21, 2013
111
I was kind of afraid that the transmission would start slipping if I didn't put that material back in there but figured I would inquire first.
 

Sparky

Member
Dec 4, 2011
12,927
If it somehow did, then your trans was dead already.
 

Mooseman

Moderator
Dec 4, 2011
25,310
Ottawa, ON
Exactly. It's not new fluid that will kill it but the old stuff may just be delaying the inevitable by masking the issue.
 

holytornado84

Original poster
Member
Feb 21, 2013
111
Well, I have everything back together now. Took me a lot of time and effort to get the transmission fluid level to show up on the stick right. It was barely touching it. Then, I would add maybe not even a cup and there would be fluid all the way up the stick. It was pretty weird.

The car seems to be driving just fine besides the misfire still exists. I just figured I would try and end this thread with a comment that would point someone else with the same symptoms and maybe the same problem in the easiest direction that I can see possible.

If you have a knock or an engine noise of any sort, the utilization of a stethoscope can and will only point you in a better direction in the success of the diagnosis of your problem. Mine was narrowed down almost instantly after the purchase of one, but in the end, overlooked as a different problem in the same general vicinity. After the removal and reinstallation of my 4L60E transmission, my diagnosis ended up being exhaust ping from material, originally installed inside the exhaust at manufacture, breaking down and rattling against the walls during the exhaust strokes of my motor's normal operating processes.

Lastly, I would like to thank all of the awesome folks here at GMTNation for being so kind and interested in helping me resolve all of my problems that I had initially, and encountered along the way. If it wasn't for all of your experience and desire to help others, I would be kicking this car off a cliff in hopes that the landing would work out a few kinks.

Thanks everyone!
 
Last edited:

Forum Statistics

Threads
23,310
Posts
637,781
Members
18,516
Latest member
Ramzo358