Blckshdw
Moderator
 My 2005 manual has the same thing in it, but it doesn't work for me. Maybe it's the way the DRL killer with auto lights is hooked up that's overriding that function? Oh well My 2005 manual has the same thing in it, but it doesn't work for me. Maybe it's the way the DRL killer with auto lights is hooked up that's overriding that function? Oh well
I use my parking brake 100% of the time, they still try to fire.Put your park brake on before you start the truck, that will stop the lights from trying to turn on. When you release the park brake, the lights will turn on.
I have no idea why muricans don't like using the park brake.
So I did a continuity test on the corrective splitter and on the wire with the diode, there's no tone on the other end. Did I just find the problem?Also, you could do a continuity test on the wires of the splitter to make sure there are no breaks in the wire.
So I did a continuity test on the corrective splitter and on the wire with the diode, there's no tone on the other end. Did I just find the problem?
I did, I just used my DMM to check it.Not necessarily. A diode will allow electricity to flow in one direction, but not the other. I thought that you said you have removed all correctional splitters from the setup?
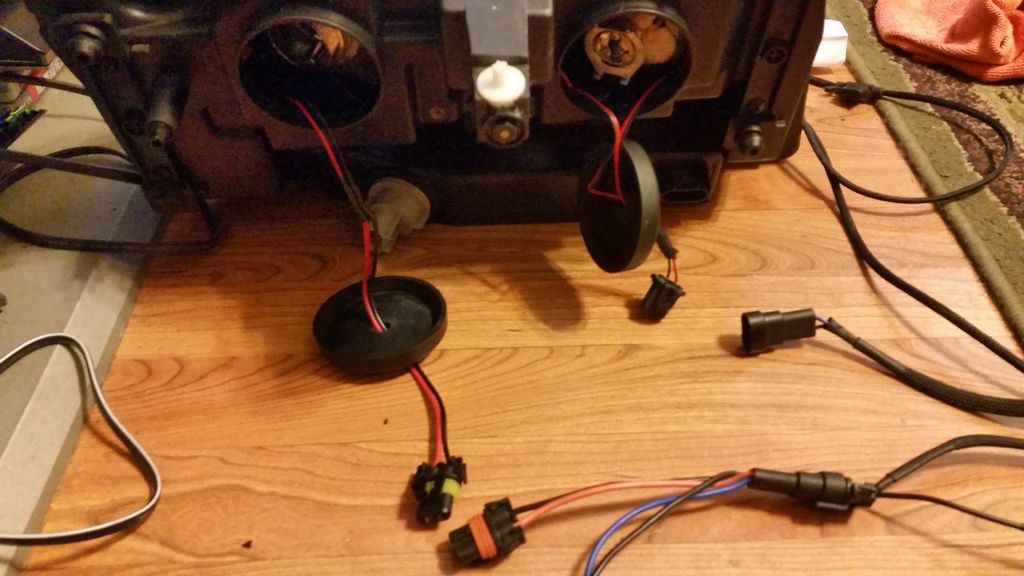

Yea, I checked for signal at both the factory hi/low harness, then plugged it into the housing and also checked at the harness coming from the cover puck or whatever it's called.Did you check for power at the plug that's exiting the high beam area when you flipped the stalk as well? I know when you had that plug connected via splitter and it saw power, your high beams were always activated. So I think that junction is your problem area to fix.
Yea, I don't know what's going on with it. Would that hi beam harness hanging out make sense if the lights were setup to be easily converted to a non quad hi/low setup? I'm planning on taking the thing off the truck tomorrow and see if I can isolate the solenoid wires and ensure they run to the high beam wire of the female plug at the bottom the housing.Obviously, the DS should operate (and the wiring look) just like the PS. I can't figure out why the high beam wiring is exposed like that, other than what I suggested previously.
If it was my retro, I would open up the DS light, remove the lower turn signal reflector bowl, and investigate the wiring. You shouldn't need splitters, or any external power source to trigger the high beams. It should be self contained within the headlight, using the stock wiring, just like the PS is.
Would that hi beam harness hanging out make sense if the lights were setup to be easily converted to a non quad hi/low setup?
I just mean like, maybe they were designed to be easily converted to a non-quad setup and thus the hi beam harness hanging out? I'm just stabbing in the dark. Even BFC said they weren't really sure how these were originally hooked up because GM wiring is crazy. That's the response I got when asking for a wiring diagram, anyway.Can you talk me through your logic here?
maybe they were designed to be easily converted to a non-quad setup and thus the hi beam harness hanging out?
I'm just stabbing in the dark.
GM wiring is crazy.

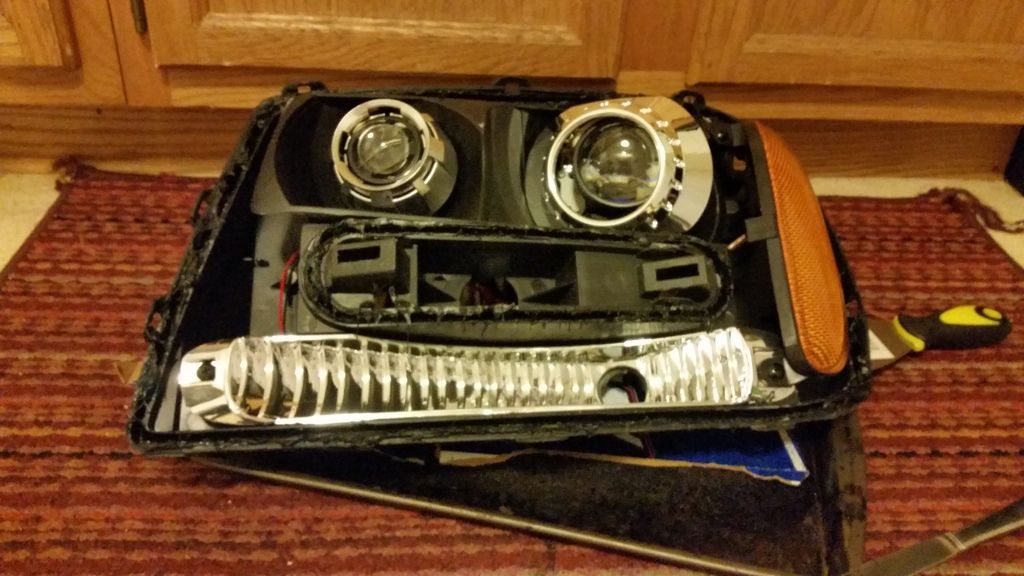
What started as simply swapping in the replacement ballasts turned into this:
Didn't have the PS locked in and it vibrated off the bumper and did a face plant on the pavement. Broke the adjustment mounts for the reflector bowl (like what UPS did to the DS) and ripped the wires for the bulb, one out of the base of the bulb and one out of the male AMP connector. Got the bulb fixed (confirmed operational) and now trying to repair reflector bowl mounts. It's just a never-ending battle.
The silver lining is that it didn't appear the 2 projectors were lined up very well so I'll have a chance to hopefully correct that. Is anyone able to offer some insight on best practice for this? Cracking loose old JB Weld and realigning them? Aim the MH1 to the D2S or vice versa etc?

Is this a safe condition to expose to the elements? I don't feel like this stuff is nearly sealed enough. I mean the bulb sticking out the back like that etc...
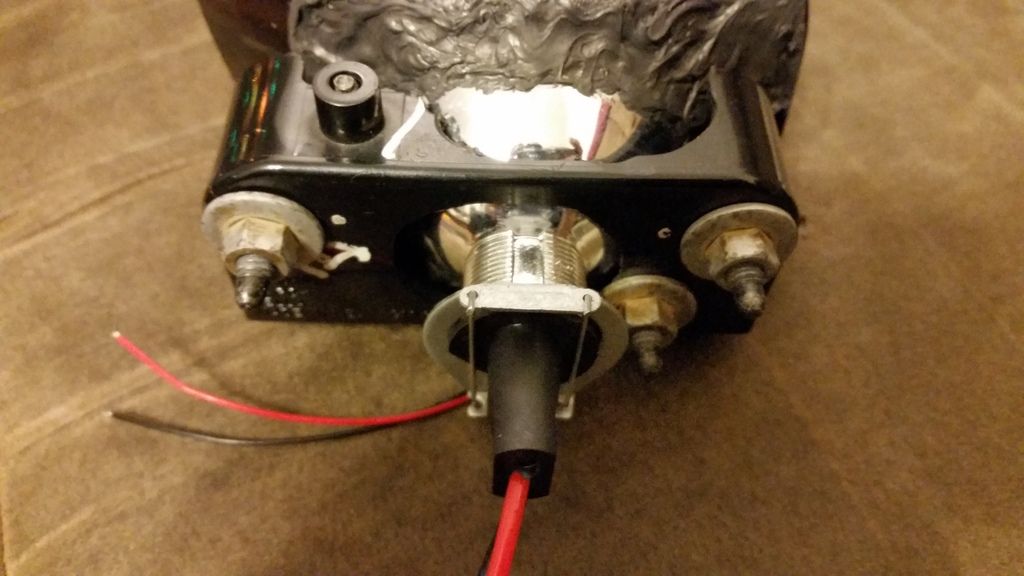
I'm anxious to bolt em up but this seems sketchy.


...when I'm done..
When it comes to retrofitting, are we ever... really... done? 


Hey. I finished mine in 2 days. I guess that's also why I'm forever tweaking them.
I'm also looking forward to seeing how those turn out, maybe my 4th retro won't take me more than a calendar year....
 don't be giving my mod bug any ideas it can be lazy now.
So I'm just throwing this in here, I ordered depo headlights for the envoy and ended up with eagle eyes. Anyone use these or should I send them back... they seem to be of good quality, the internal wiring is just a little on the thin side imo.So the guy in the white truck made a delivery today. And I was excited for about 5 minutes....
View attachment 75928
But then I opened the box...
View attachment 75929
That was actually my fear. Research said they could be permasealed. I'm not mad since they're about the same price, just expecting depo and getting them was interesting. It has 65watt high bulbs in it too which I think is interesting, thought mine were 55. So you'd say they're on part with everything else?That is the brand I used for my last retro. Baked apart quite easily. 200 degrees for about 15 minutes, and they came right open.
Mine will be here tomorrow.Depo and Eagle Eyes both use butyl. I used Eagle Eyes for my retro in the TB.
FYI - Mini H1 7.0 appears to be back in stock.


