- Jul 1, 2013
- 749
This article will show you how to replace the burnt out window switch lights on your 02-05 GMC Envoy with the direct replacement style incandescent bulbs. Bulbs can be found here: DNW1-DW10 JKL Components | Mouser.
Summary: Fix your burnt out window switch lights
Difficulty: Easy
Estimated Time: 20-30 minutes
Part Numbers: JKL Components DNW1-DW10
Cost: Varies with quantity
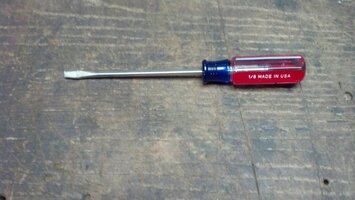
Step 1: Obtain a thin flat-blade screwdriver
View attachment 32317
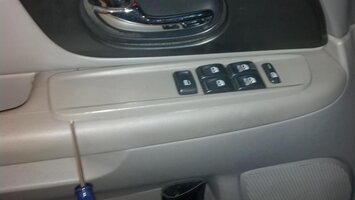
Step 2: Pop the switch plate up by inserting the screwdriver under the rear of the plate, and then again in the front
View attachment 32318
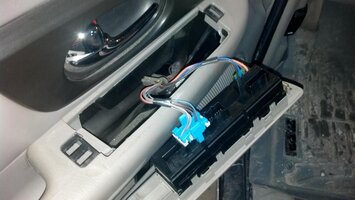
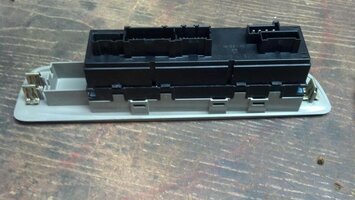
Step 3: Unplug the wires going to the back of the switches, when this is done take the now loose switch assembly to a workbench or table - someplace that is small parts-friendly (there are several and you don't want to lose them). Please excuse my dirty Weathertechs - it isn't always that way.
View attachment 32319
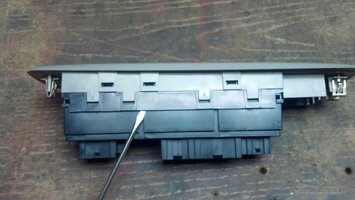
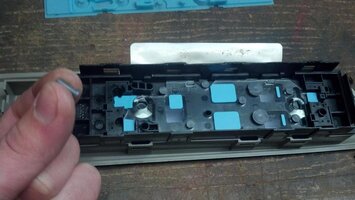
Step 4: Use the same screwdriver to pop the assembly apart all around the seam where shown, be gentle and take your time. Also, don't gap it very far apart yet.
View attachment 32320
Step 5: Set the whole thing just like this once you have it popped loose all the way around, and lift the loose part away. This is done to ensure you don't lose any small pieces that we'll see momentarily.
View attachment 32321
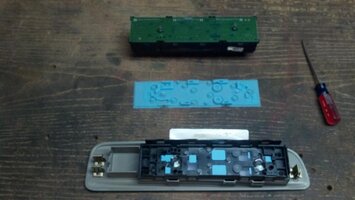
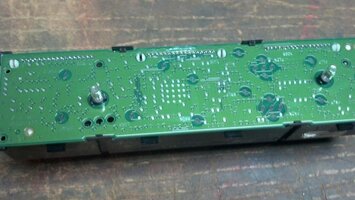
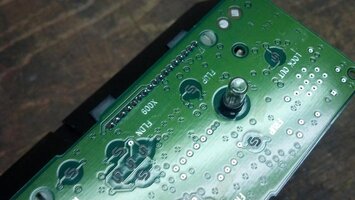
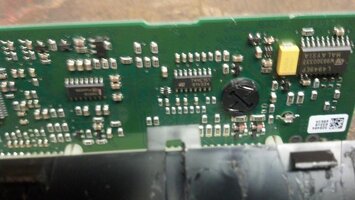
Step 6: You should now have 3 pieces: the circuit board, a blue gasket, and the actual switches with all their little plungers inside
View attachment 32322
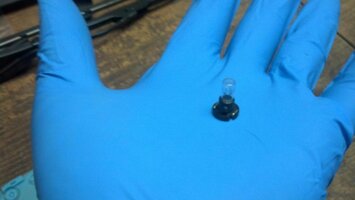
These little plungers are the small pieces that you'll be forever finding if you drop them and they scatter. (Ask me how I know)
View attachment 32323
Summary: Fix your burnt out window switch lights
Difficulty: Easy
Estimated Time: 20-30 minutes
Part Numbers: JKL Components DNW1-DW10
Cost: Varies with quantity
Step 1: Obtain a thin flat-blade screwdriver
View attachment 32317
Step 2: Pop the switch plate up by inserting the screwdriver under the rear of the plate, and then again in the front
View attachment 32318
Step 3: Unplug the wires going to the back of the switches, when this is done take the now loose switch assembly to a workbench or table - someplace that is small parts-friendly (there are several and you don't want to lose them). Please excuse my dirty Weathertechs - it isn't always that way.
View attachment 32319
Step 4: Use the same screwdriver to pop the assembly apart all around the seam where shown, be gentle and take your time. Also, don't gap it very far apart yet.
View attachment 32320
Step 5: Set the whole thing just like this once you have it popped loose all the way around, and lift the loose part away. This is done to ensure you don't lose any small pieces that we'll see momentarily.
View attachment 32321
Step 6: You should now have 3 pieces: the circuit board, a blue gasket, and the actual switches with all their little plungers inside
View attachment 32322
These little plungers are the small pieces that you'll be forever finding if you drop them and they scatter. (Ask me how I know)
View attachment 32323
Attachments
-
 IMG_20140125_183604_157.jpg67.5 KB · Views: 91
 -
 IMG_20140125_183838_217.jpg37.9 KB · Views: 86
 -
 IMG_20140125_184032_571.jpg65.8 KB · Views: 94
 -
 IMG_20140125_184243_198.jpg58.8 KB · Views: 103
 -
 IMG_20140125_184531_210.jpg72.4 KB · Views: 109
 -
 IMG_20140125_184738_336.jpg70 KB · Views: 136
 -
 IMG_20140125_184628_676.jpg54.7 KB · Views: 141


 I stopped reading when I got to 20-30 min. Still appreciate your work.
