- Oct 13, 2012
- 110
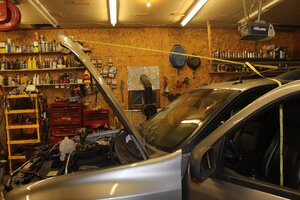
I replaced the thermostat in our Envoy last night so thought I'd post a how-to. I tried searching and couldn't find one. If one already exists let me know and I'll take this one down. I've had to the t-stat a few times and found it much easier to remove the alternator first. If you don't remove it the job will probably take you longer than if you had. Once the alternator is out you have all kinds of room. Although you don't have to, one thing I normally do when working under the hood is to lift the hood up even higher by using a ratchet strap hooked to the luggage rack. It gives you so much more head room and you don't have to worry about the hood prop rod being in the way. It only takes a minute. Just be sure to use a rag or something on the front of the hood to keep the hook from making contact with the paint.
1. Disconnect the negative battery cable.
2. Remove the belt. You don't have to take it off of all of the pulleys. Just slip it off of the alternator and position it out of the way. To remove the belt you use the square on a 3/8" ratchet. Insert it into the square slot located on the tensioner pulley. You can kind of see in the picture where the ratchet is inserted into the tensioner.
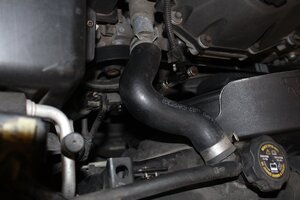
3. Drain the coolant. I'm not sure about other years but my Envoy doesn't have a petcock at the bottom of the radiator. I removed the lower radiator hose where it goes into the bottom of the radiator. Be sure to put the hose and clamp back on after it drains so you don't forget later on.
4. Remove the right engine lift hook. There are a total of 4 bolts. One is a 10mm that bolts to the a/c line mounting bracket. There are two bolts in the front and another on the backside. A 7 1/2" wobble extension comes in handy for the rear bolt.
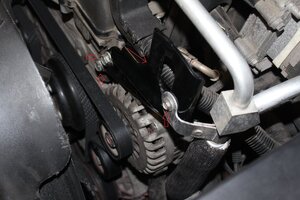
5. Remove the 3 alternator mounting bolts. All 3 are 15mm. There are 2 towards the top and one on the bottom. The bottom one is much easier to remove if you use a 15mm flex head gear wrench.
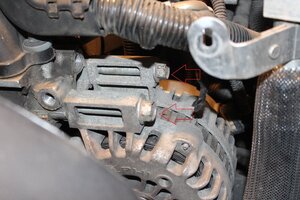
6. Gently lay the alternator on its side and remove the positive cable nut and wiring harness. According to the manual this is one of the first steps it says to do but it's much easier waiting until you can get to them. There is plenty of play in the wires but still be careful so you aren't tugging on them.
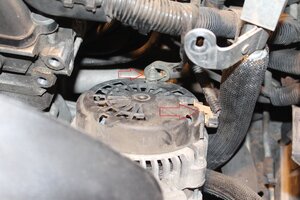
7. If you're replacing the alternator go ahead and pull it out of the engine compartment. If you're just doing the thermostat I recommend moving it up towards the fan or someplace out of the way. It's a really tight fit when removing it from the engine compartment and can be tough to get in and out because of the fan shroud. If you do pull it out pay attention to how you had it positioned when you wiggled it up and out so you can try and get it back through the same way.
8. Remove the hose clamp at the thermostat housing. Remove the outlet hose from the thermostat housing.
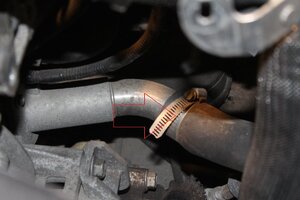
9. Remove the two thermostat housing bolts and remove the thermostat housing. There's one bolt on top and one on the bottom. Be sure to have a drain pan under the vehicle because there will be some coolant that will come out once it's loose.
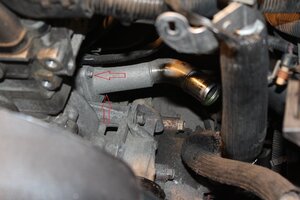
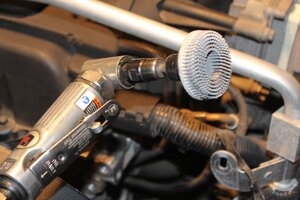
10. Clean the mating surface on the engine. There is usually some leftover residue from the old o-ring. What works really well on aluminum is a 3M Roloc Bristle Disc.
11. Install the new thermostat. Don't forget to install the new o-ring that should have came with the thermostat. If you forget the o-ring it will leak. Install and tighten the thermostat housing bolts to 96 inch pounds.
12. Install the outlet hose and hose clamp.
13. Install the alternator cable and harness to alternator.
14. Install the alternator mounting bolts and torque to 37 foot pounds.
15. Install the engine lift hook. Torque the lift hook to engine bolts to 37 foot pounds and a/c line mount bolt to 89 inch pounds.
16. Install drive belt.
17. Connect negative battery cable.
18. Fill coolant to correct level.
I believe that covers everything. If anyone notices a mistake, or that I left something out, please let me know so I can edit it. Also, if you have any tips or tricks that you can add please do. I will also list them in the steps.

1. Disconnect the negative battery cable.
2. Remove the belt. You don't have to take it off of all of the pulleys. Just slip it off of the alternator and position it out of the way. To remove the belt you use the square on a 3/8" ratchet. Insert it into the square slot located on the tensioner pulley. You can kind of see in the picture where the ratchet is inserted into the tensioner.

3. Drain the coolant. I'm not sure about other years but my Envoy doesn't have a petcock at the bottom of the radiator. I removed the lower radiator hose where it goes into the bottom of the radiator. Be sure to put the hose and clamp back on after it drains so you don't forget later on.
4. Remove the right engine lift hook. There are a total of 4 bolts. One is a 10mm that bolts to the a/c line mounting bracket. There are two bolts in the front and another on the backside. A 7 1/2" wobble extension comes in handy for the rear bolt.

5. Remove the 3 alternator mounting bolts. All 3 are 15mm. There are 2 towards the top and one on the bottom. The bottom one is much easier to remove if you use a 15mm flex head gear wrench.

6. Gently lay the alternator on its side and remove the positive cable nut and wiring harness. According to the manual this is one of the first steps it says to do but it's much easier waiting until you can get to them. There is plenty of play in the wires but still be careful so you aren't tugging on them.

7. If you're replacing the alternator go ahead and pull it out of the engine compartment. If you're just doing the thermostat I recommend moving it up towards the fan or someplace out of the way. It's a really tight fit when removing it from the engine compartment and can be tough to get in and out because of the fan shroud. If you do pull it out pay attention to how you had it positioned when you wiggled it up and out so you can try and get it back through the same way.
8. Remove the hose clamp at the thermostat housing. Remove the outlet hose from the thermostat housing.

9. Remove the two thermostat housing bolts and remove the thermostat housing. There's one bolt on top and one on the bottom. Be sure to have a drain pan under the vehicle because there will be some coolant that will come out once it's loose.

10. Clean the mating surface on the engine. There is usually some leftover residue from the old o-ring. What works really well on aluminum is a 3M Roloc Bristle Disc.

11. Install the new thermostat. Don't forget to install the new o-ring that should have came with the thermostat. If you forget the o-ring it will leak. Install and tighten the thermostat housing bolts to 96 inch pounds.
12. Install the outlet hose and hose clamp.
13. Install the alternator cable and harness to alternator.
14. Install the alternator mounting bolts and torque to 37 foot pounds.
15. Install the engine lift hook. Torque the lift hook to engine bolts to 37 foot pounds and a/c line mount bolt to 89 inch pounds.
16. Install drive belt.
17. Connect negative battery cable.
18. Fill coolant to correct level.
I believe that covers everything. If anyone notices a mistake, or that I left something out, please let me know so I can edit it. Also, if you have any tips or tricks that you can add please do. I will also list them in the steps.
