4.2 swap.

redline customs

Original poster
Member
Aug 25, 2016
171
northwest arkansas
Alright so here's the back story. I have an 03 trailblazer. A couple weeks ago, my motor had a bad knocking noise. It did not sound like it was coming from the bottom end. I was thinking that it was possibly the timing chain. After a few hundred miles, I developed a bad miss at idle. I also came up with code P0014(exhaust camshaft timing-over advanced). This was the only code that came up. I had no other vehicle to drive so I had to stay on it. With the code that came up and the miss only at idle, I was suspecting the vvt actuator solenoid(I had had a code for this before but it went away.) So I replaced it as well as a fresh oil change. This did nothing for the noise, but I figured it needed to be done anyways. I mad it about 100 miles before it started dropping oil pressure on takeoff. Still full of oil and no external leaks. I made it almost home when she popped and died. Had a friend tow it home and started tearing down. After getting the valve cover off, I discover my rocker arms were very loose. I thought maybe that was my problem, so I went and got some new lifters. I was trying to turn it over to tdc when I realized that number 1 piston was not moving. Some slight pressure on my extension and she dropped to the bottom. I knew then that I was screwed, so I started a search for a donor motor. I found one for $350 so I jumped on it. They said it was running great when parked just had electrical problems. Drove the 2.5 hours to get it and the damn thing was locked up. Kept searching and found another. They wanted $500 for it but it came with a 90 day warranty. So I drove the 3 hours to ohklahoma and picked it up. They said that it was tranny problems. Motor rolls over fine, no water in oil(clean) and wasn't too dirty. We picked er up an put in the truck.

So here is where I'm at. I'm getting the old motor out. I've got almost all of it unhooked(except starter) and am trying to decide whether to put the trans with the motor, then split, or to leave the trans. I already have my whole front clip off. What do you guys think? I'm going for easiest and quickest. If I have to choose, then easiest.

Right now I am pulling everything off the donor, to put my stuff back on(intake, throttle body, accessories, sensors, etc. This is for nothing more than assurance that she will start up(I know everything on mine was good,plus I just bought that new vvt actuator).

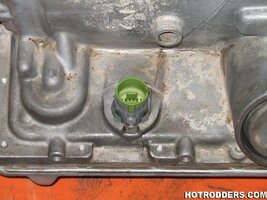
One question I do have. On the donor motor, there is a small canister type thing on the pass. Side. It is bolted onto the top where the trans dipstick bracket it bolted. It has a heater hose attached to it(not sure where it went, they already had it cut when I got there) an also an electrical plug. On my motor, it has a plate bolted there and no loose connectors just laying out. Anyone know what this is? I have an 03 an the donor came from an 04. Do I need this? I'm assuming that it is some sort of option since it appears that my motor has a hole for it, but is blocked off. I believe the only difference between the two vehicles is that mine is 2wd and the other is 4wd.

Thanks again
 

Mounce

Member
Mar 29, 2014
13,667
Tuscaloosa, AL
I'd leave Trans in if you're gonna use the current one.

Thing on passenger side sounds like SAIS solenoid. Google an image to be sure. Just swap your plate over and you'll be good to go. Probably need a new gasket, might be able to get one at a parts store since the solenoid is a common failure so the gasket should be available as well.
 

redline customs

Original poster
Member
Aug 25, 2016
171
northwest arkansas
Yup that's what it is. Not sure why mine wouldn't have it but, ohwell.

Yes I'm using my old trans. I will leave it in and see how much I can screw up.(kidding).

Also, I was wondering if anyone ad any problems getting their fan off? I rented one of those holder tools that go around the pulley bolts, and ended up bending and snapping one of the hooks off(voiding the rental) and was left with a $90 whiffle ball bat. I also bent one of the bolts and snapped the other. Ended up taking the pulley loose and taking the water pump bolts from behind it. Only reason I'm wondering is because, the place I got the motor from, had to do the same thing.

Thanks for the info @Mounce. I'm hoping I can have this done in the next couple weeks. I'm only able to work on it about 3-4 hours a day as I work at a turkey plant and we just started our holiday season. 40+ days of 7 days a week and 12-15 hour days. So, as I've heard before, the time tree isn't exactly fruitful. I been spending the last couple of nights working in the garage until 2 am or later. Decided to take a short night tonight lol. If anyone has any tips that will make pulling/reinstalling the engine, any easier, lemme know.
 

Mounce

Member
Mar 29, 2014
13,667
Tuscaloosa, AL
From what I've seen almost everyone has issues with the fan clutch nut. Couple threads floating around about it from over the years.
 

redline customs

Original poster
Member
Aug 25, 2016
171
northwest arkansas
Also was gonna ask, I am replacing the oil pan with Mine(was a bit dented) and when I roll the motor over, I get a hissing noise coming from the top into the crank case. Rings are bad maybe? It isn't just a poof, it goes for about 5-10 secs as if the compression is bleeding off somewhere.
 

mrrsm

Lifetime VIP Donor
Supporting Donor
Member
Oct 22, 2015
7,691
Tampa Bay Area
If the top of the engine around the Spark Plug Wells are blown out... you can pull the plugs and and read them and then carefully thread them back into the head to keep out the dirt and junk. If they all display a kind of "Fried Chicken Brown" or Tan colour... chances are your rings will be okay. The sound of hissing when you rotate the engine innards is normal... it is simply one or more cylinders gradually allowing the ingested and compressing air to escape at the very low velocity as the engine is being hand rotated.

There are a few other posts that cover aspects of "tidying up' things like examining The Water Pump for a Bad Bearing... The Flex-Plate for any obvious cracks and perhaps replacing the Rear Engine Seal while it is so much much easier to do with the Engine out of the vehicle. There are two other active posts that are both On-Going and "On Topic" that are also worth a look to help with your Swap Out.

If you decide to install the Engine and Transmission as a unit... with the SUV elevated and on Jack Stands at a fairly high position... lowering one side of the Transmission Mount Brace may be necessary to be able to pass the Tail-Shaft of the Transmission (wrapped up for protection from leakage and damage) far enough back at an angle as you begin to lower and move the entire assembly into the engine bay. It will be helpful to have a Floor Jack with a Block of Wood on top handy to slip under the bottom of the transmission as you lower your Engine Hoist and try to attach the Engine Motor Mounts. The jack can be used to adjust the position of the tranny better and ease the lowering of the motor in a more level manner.
 
Last edited:

redline customs

Original poster
Member
Aug 25, 2016
171
northwest arkansas
Cool thanks. Yeah I checked the plugs and they are tanish brown. I will be using my water pump and its good. I seen no crackes on the flex plate.

The intake has quite a bit of oil and gunk in the ports. Would it be OK to "hand" clean it with a rag and some sort of solvent? Or best to get it all together and run seafoam through the vacuum lines?

The whole inside of the valve cover has some sort of orange tint to it while mine was clean as a whistle. Any ideas of that?

Also the oil pan seems to be being held on by something at the very back.is there any hidden bolts or anything on the very back of the engine that I'm not seeing? I took all the bolts that I seen out and put them in the threaded holes on the back. The font popped off and is "hinging" toward the back. Is it possibly just that gasket hanging on? Would it be OK to put one of the bolts on toward the front to keep it from hinging so bad? I'm not worried about damaging the oil pan as its dented and scratched on the inside of the hole for the diff. Just don't wanna hurt the block.
 

mrrsm

Lifetime VIP Donor
Supporting Donor
Member
Oct 22, 2015
7,691
Tampa Bay Area
Assuming from your Original "Other" Post that the Intake Manifold has been removed from the engine... If the Throttle Body is completely removed and likewise...The PCM and Mounting hardware... There is nothing to prevent you from getting an inexpensive Large Coleman Cooler and filling it up with a 50/50 Mix of Water and some "Purple Power" and just let it soak overnight. All sensors, "O"Ring Intake Port Seals and anything that is NOT part of the Moulded Plastic-Nylon Body of the Manifold should of course be removed first.

I doubt that you need to worry about the Fasteners rusting for such a short dipping. Afterwards... you can drain out the Mix and Hose the Hell out of the inside of it and leave it sitting right side up in the Sun long enough for any water to evaporate. You can't really hurt anything inside ...and as long as it is absolutely Bone Dry in there before it gets re-mounted on the engine... and it will be as Klean as Kleenex inside.

As for the Crankcase-Oil Pan Removal and its relation to the back of the Engine Block and Rear Engine Cover...your question is timely and deserves a measure of caution here as THERE IS NO HINGE THERE! and it while it MAY be the Super Strong GM OEM RTV Hanging on for Dear Life back there... there may also be some other Fasteners related to the Rear Engine Cover that MUST come off first and might be hard to see near the Flange at the Back of the Engine. Until you know for sure.... Just re-thread a few Crankcase Bolts in long enough to support the weight of the Oil Pan. This topic was actually thoroughly covered today as a matter of fact at this post:

http://gmtnation.com/forums/threads/4-2-engine-rebuild.16080/page-2#post-516683
 

redline customs

Original poster
Member
Aug 25, 2016
171
northwest arkansas
Thanks for the tip on cleaning the intake. What should I do for the intake ports in the head? The oil pan has no more bolts or fasteners that I can see(I've checked from every angle I can) but it only hinges(only using that as an analogy) forward to back. There is no movement side to side. I was just wandering if maybe there was bolts holding it on from the inside of the block(I wouldn't think so but you never know). Thanks again for the link. I looked at it for a short time but will be reading thoroughly tomorrow on break.
 

mrrsm

Lifetime VIP Donor
Supporting Donor
Member
Oct 22, 2015
7,691
Tampa Bay Area
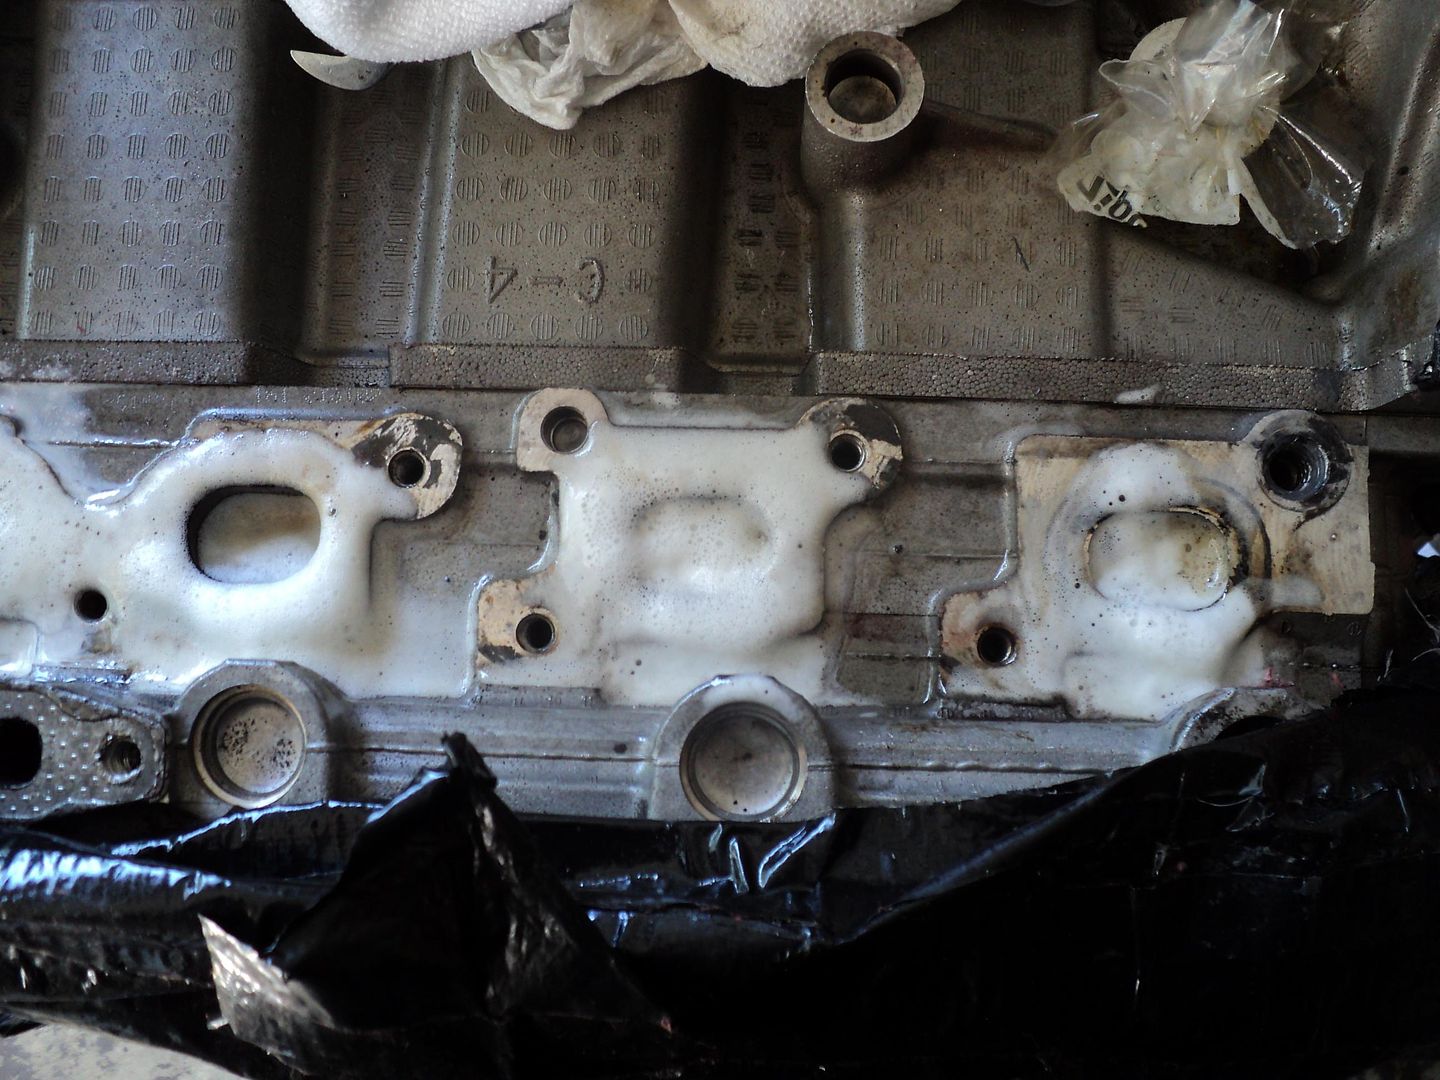
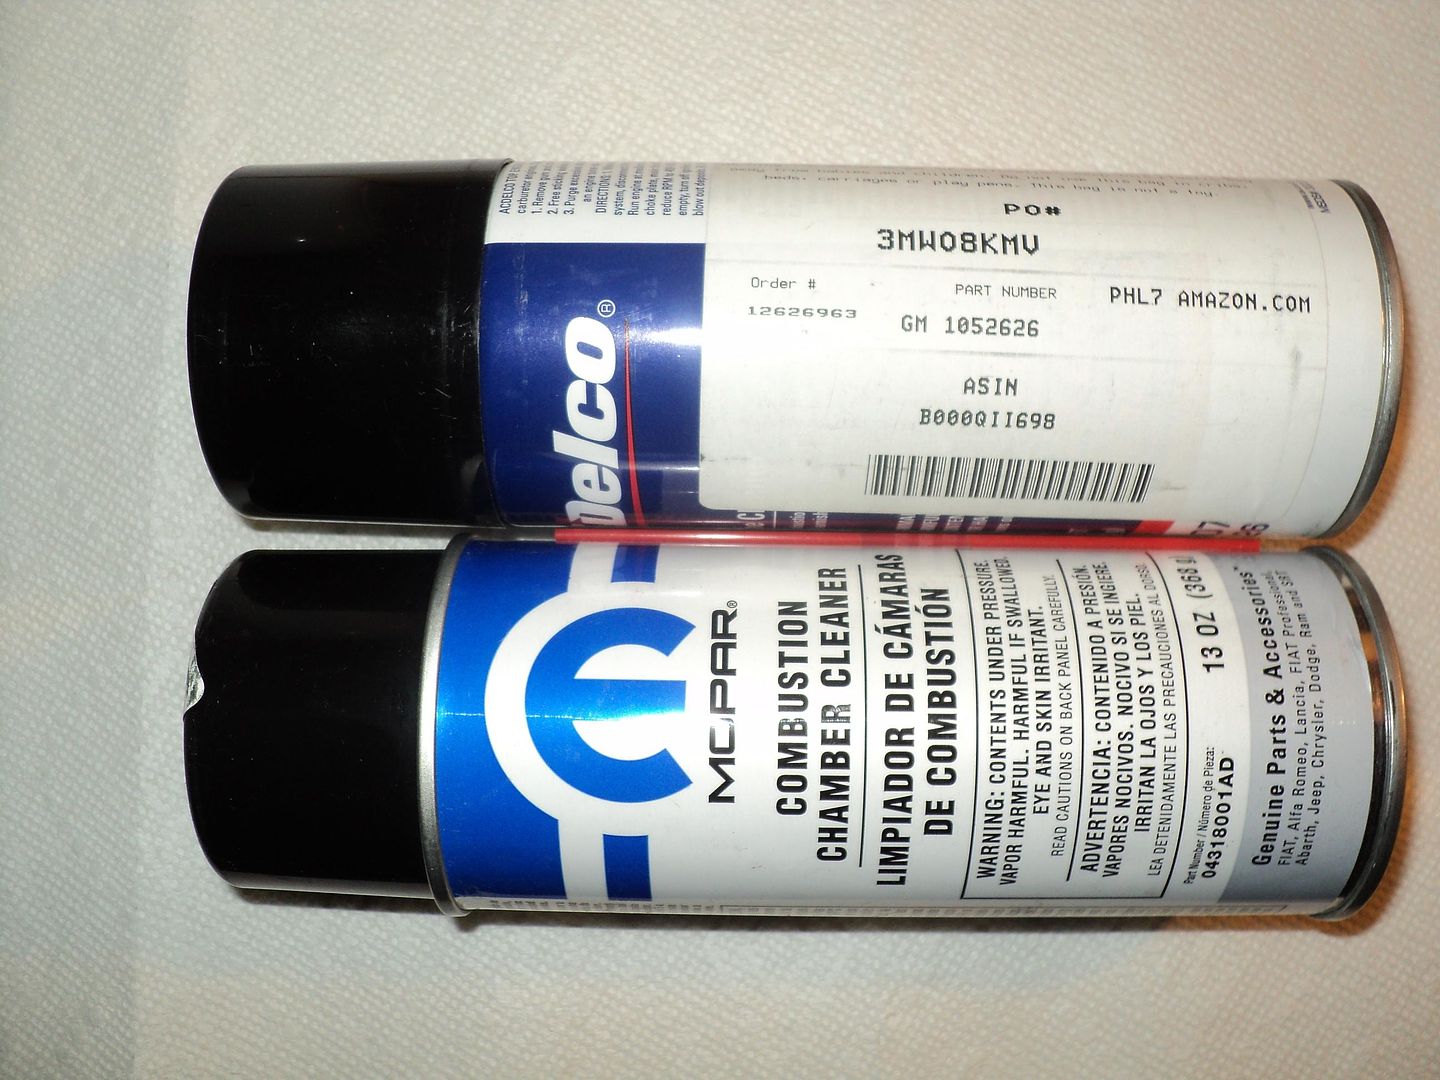
Cool Beenz... The Intake Ports can be cleaned a with a some Miracle Stuff I have been using that is recommended by @Mooseman ...a de-carbonizing Foaming Spray from GM AC-Delco...its called "Top Engine Cleaner" and sells for about $10.00-$12.00 a Can on Amazon and eBay. But you will have to watch how much you spray up towards the Open Valves of the Intake Port Sides of the Head. What you might try doing is soaking the stuff into Lint Free Cloths and stuff the cloths sideways into the Port Openings and let it sit for an hour or so,

Then pull the saturated cloths out and use Clean and Dry ones to wipe out all that softened Carbon and Dirt residue. If you think you have gotten too much inside the open valves...pull out the plugs and turn the motor over slowly by hand...with some rags in each spark plug wells to soak up anything that might squirt out. Too much liquid of any kind can damage the connecting rods and bend them if the engine becomes "Hydro-Locked" with any kind of fluid.

By the way...all that crap inside the Intake Manifold is coming from the PCV hoses... one by way of right in the front underside of the Resonator at the top front of the engine and the other from that strange little PCV Elbow Hose that plugs into the bottom centre of the Intake manifold and connects to the Engine Block/Head and inhales all the "Oily Vapours" that the EPA hates to allow escaping from inside our engines.

DSC06778.jpg


DSC06746.jpg
 
Last edited:

redline customs

Original poster
Member
Aug 25, 2016
171
northwest arkansas
Yeah figured it was the pcv system. Thanks for the tip. I will do this tomorrow. Any ideas on what the orangy residue is under the valve cover? Its also on the crankshaft. I'm assuming it something from the oil but what?. Mine was clean as could be and this one just looks nasty. Was so bad even my wife asked about the difference.
 

mrrsm

Lifetime VIP Donor
Supporting Donor
Member
Oct 22, 2015
7,691
Tampa Bay Area
@Blckshdw (Carlton) occasionally puts the Diagnosis Process in perspective with his coined expression that I am paraphrasing here:

"If you Don't Have Pictures... Then...It Did NOT Happen..."

So when time permits...Image Documenting this issue will benefit you if you need to backtrack any steps in the process... and many other Members in the future who will read this later on and appreciate your efforts.


The only thing that bears an Orange Colour on purpose that works inside of this engine ...is the OEM Coolant called Dexcool. If you suffered a Head Gasket failure...the Coolant Jacket could become compromised and allow the Dexcool to migrate into the cylinders. Normally when this happens you will see either Oil Droplets floating around inside your Radiator when the Cap is removed ...or there will be Plumes of White Smoke billowing from your Tail Pipe.

The Smoke will herald an Impending Seized Engine because Anti-Freeze in Motor Oil is Highly Acidic and its presence will cause the Babbitt Bearings to dissolve and seize onto either the Crankshaft Journals... or on the Connecting Rods and spin these bearings in place inside the block. So if it gets into the Engine Oil... it will turn the Best Oil that $$$ Can Buy...into Orangey-Brown, Useless Pudding that will cause Oil Pump cavitation...and soon afterwards its... "Buy Buy Engine"...
 
Last edited:

Mooseman

Moderator
Dec 4, 2011
25,317
Ottawa, ON
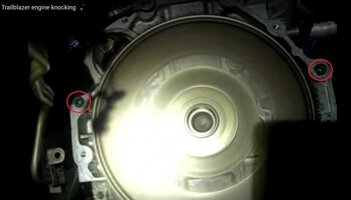
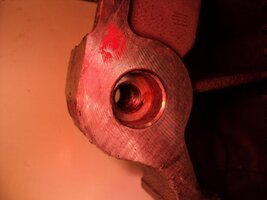
For the oil pan, there are two hidden bolts at the very back of the pan. They are accessed by pulling the two rubber plugs at the botton of the oil pan/bellhousing. Need an extension to get at the bolts inside the holes. Then, thread two of the oil pan bolts in the outer bolt holes at the rear of the pan. They are used specifically to pry the pan away from the block.
http://gmtnation.com/forums/threads/how-to-remove-i6-oil-pan-in-vehicle.12230/
 
  • Like
Reactions: mrrsm

mrrsm

Lifetime VIP Donor
Supporting Donor
Member
Oct 22, 2015
7,691
Tampa Bay Area
-^- X2 (My Favourite GMT Nation Article!)

This image shows the straight on view of the two concavities (tubes) leading to the Two Hidden Bolts...and these are impossible to imagine being there when the Flex-Plate-Torque Converter and Transmission are all "Married to the Motor":

DSC03840.jpg


This Image was taken by @Capote during his recent R&R Posting of a ruined Flex-Plate clearly showing the Last Two Crank-Case-Oil - Pan Bolts remain installed. Note that he replaced all the Rear Cover Bolts to keep track of them after removing the Seal Cover Plate:
98302_8f9f7ce8ff367254a1aabf514d21e3b8.jpg


The RED CIRCLES Highlighted below echo @Mooseman 's Technique for Breaking the RTV Seal using "The Two Bolt Method" once the Last Two Hidden Bolts are undone... Be sure to Keep a Few Bolts Threaded in at All Four Corners when doing this action so the Heavy Crankcase - Oil-Pan won't suddenly drop down on you:

DSC03841.jpg
 
Last edited:

redline customs

Original poster
Member
Aug 25, 2016
171
northwest arkansas
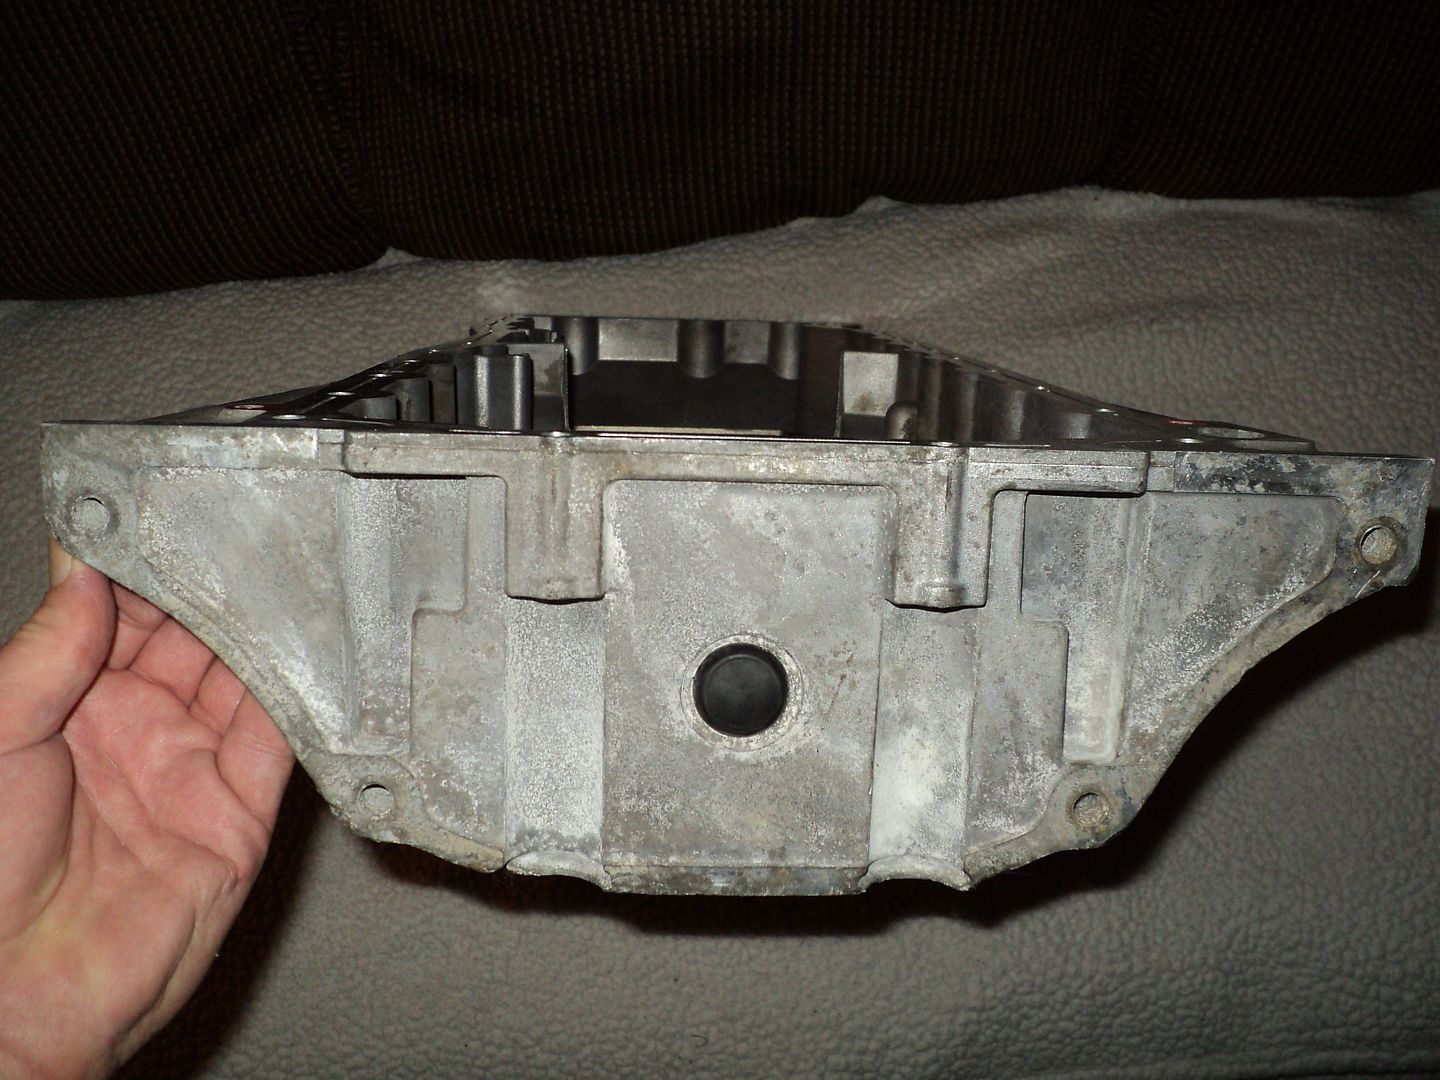
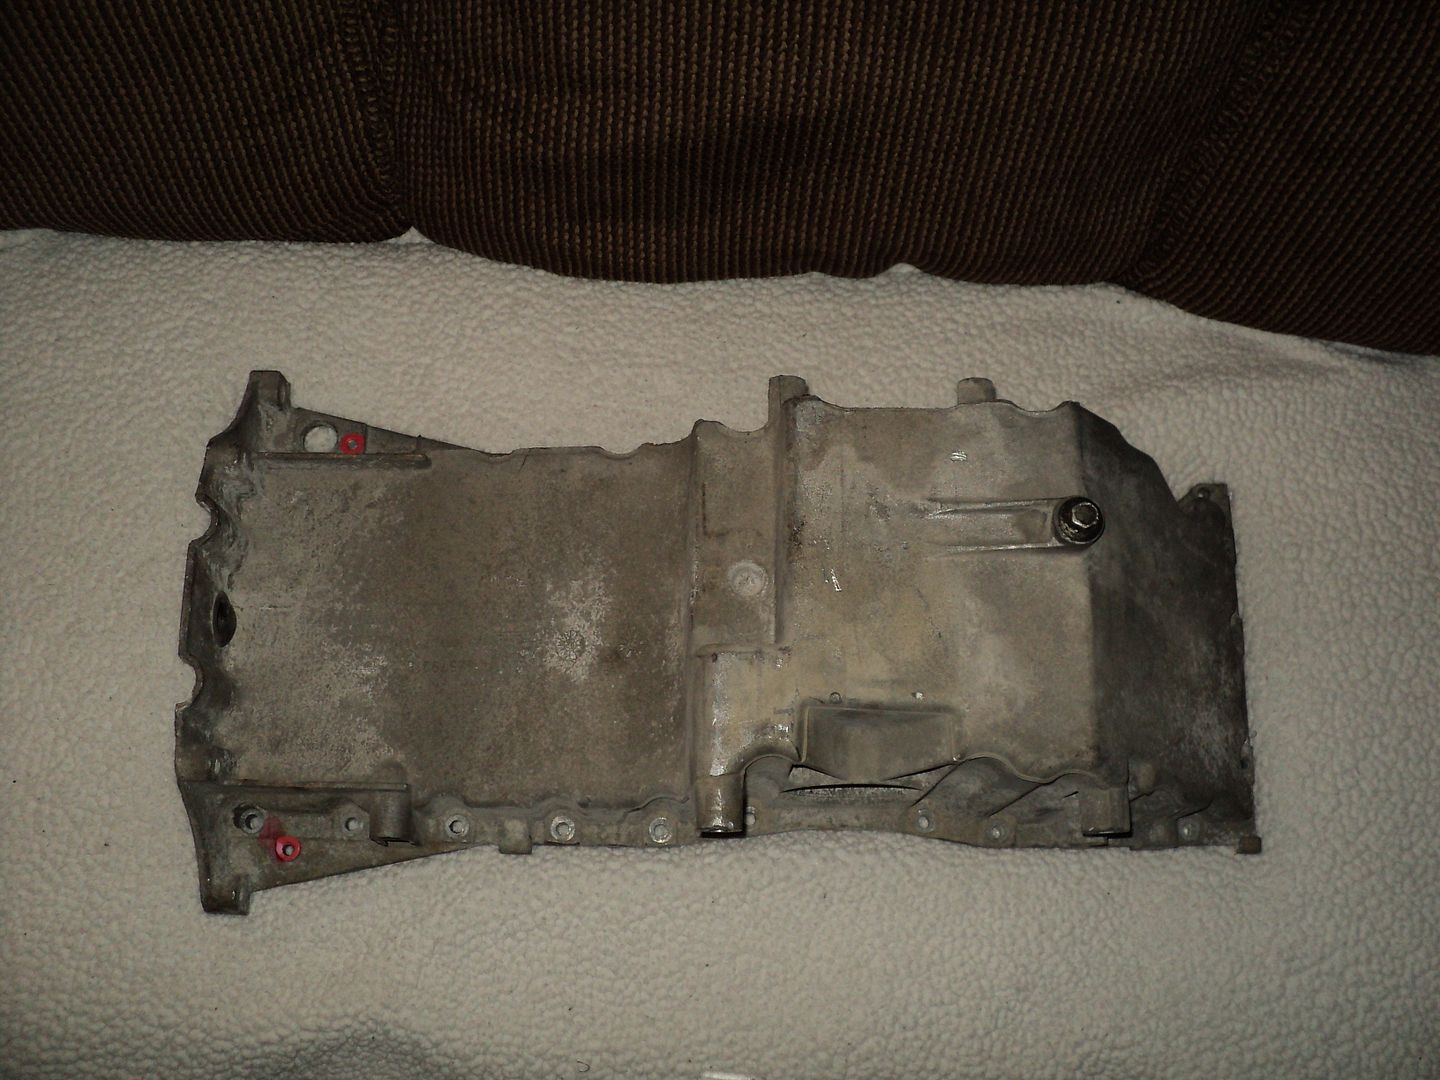
Thanks, yeah I found them. Got the pan off. The oil looked good not milky or anything. I will try to get pics if I get off early enough to have some light. I tried taking some but it was dark and my shop lights wouldn't hit it.
 
  • Like
Reactions: mrrsm

mrrsm

Lifetime VIP Donor
Supporting Donor
Member
Oct 22, 2015
7,691
Tampa Bay Area
You might want to check out Post Message #65 in this similar On Topic Engine Rebuild...as the OP discovered his two back Rear Cover Plate Bolts were hidden and still in place...a little too late ...and he also found some damage that has consequences to your own circumstances of finding that your own Crankcase - Oil-Pan was "behaving like a hinge" Apparently... his was too ...right up until he discovered THIS had happened:

http://gmtnation.com/forums/threads/4-2-engine-rebuild.16080/page-2#post-517068
 
  • Like
Reactions: m.mcmillen

Sparky

Member
Dec 4, 2011
12,927
38 bucks for that part isn't bad. Might be worth doing to have a new rear seal anyway.
 

redline customs

Original poster
Member
Aug 25, 2016
171
northwest arkansas
Sorry I haven't been on in a minute. Busy at work and on the trailblazer.

I have finally manage to get all my parts from the old engine onto the new one. I've got the motor in and on the mount studs. Right now I'm trying to wrestle the trans into alignment. I can get all the bolts in, but it keeps trying to suck together crooked(drivers side will got to block but have about 3/4 to 1" gap on pass side. I have retried a couple of times and it always the same. I'm guessing that it is the locating dowels aren't going in properly
 

Mooseman

Moderator
Dec 4, 2011
25,317
Ottawa, ON
Maybe put a bolt on each side and gradually pull each side a little at a time starting with the pass side. Maybe the dowel got nicked?
 

redline customs

Original poster
Member
Aug 25, 2016
171
northwest arkansas
That's what I been doing. Imma pull it completely apart and check that. Its very tiring having to do this over and over again. Hopefully next time it'll go. After that I just have to put my accessories back on, plus fan, radiator, ac condersor, core support, headlights, hood, and grill.
 

mrrsm

Lifetime VIP Donor
Supporting Donor
Member
Oct 22, 2015
7,691
Tampa Bay Area
That 3/4" to 1" Gap represents the distance the nose length of the Torque Converter is that MUST be in Perfect Alignment with the Hole in the back of the Crankshaft ... before attempting to draw the Engine and Transmission Flanges together. If you do not have the Two Aluminum Heater Pipe Flanges situated on the OUTSIDE of the Upper Transmission Flanges... The Engine and Transmission Mating will be impossible because the Flanges may have dropped down in between the Gap!

Take a closer look up inside there before using any Fasteners to tighten anything (Loosen them ALL if you have tightened any) ... and if the Heater Pipe Flanges have dropped down in between... Get a Long, Thin Piece of Wood or a Slender Broom Handle shaped for this purpose and use it to Pry and Elevate those Flange pieces up and out from between that space. When they finally come up and out of the gap...You might have to Wedge that damned Heater Pipe up and out of the way as high as possible to keep those damned Tabs from dropping into the gap and becoming a nuisance once again.

Please Do Not Attempt This Procedure if you are already Tired and Exhausted from other Labors… Many of which you may have already done:

DOUBLE CHOCK BOTH REAR WHEELS TO PREVENT THE VEHICLE FROM ROCKING BACK AND FORTH. I'm assuming you have been using a Transmission Scissor Jack to support it from underneath… with the Safety Strap securely fastened. If this is the case... you should be able to get underneath the Truck and if the Transmission does not slide in easily Roll Forwards on the Trans Jack Wheels to close the Gap... as long as the vehicle is on Very Sturdy Jack Stands and with a Floor Jack under a Major Support on either side of the Lower Frame for Extra Protection to ensure that any of these physical exertions do not allow the vehicle to slip off of the Jack Stands and cause you any harm.... and now you can safely proceed.

Okay... if everything is at the ready... Straddle the Trans-Jack from underneath and slowly push forwards on the back of the Trans-Jack with your feet while moving the Tail Shaft of the Transmission slightly back, forth and up and down until the Dowel Pins align ...and the Transmission and Engine Block finally Clam-Shell Together. You might have to either Raise or Lower the Trans-Jack to make a better alignment from top to bottom and ensure that the gap between the Top and Bottom of that 3/4" to 1" Space is as close to being even as possible to ease the Guide Pins straight in. DO NOT USE THE CASE BOLTS TO DRAW THE TWO TOGETHER WHILE DOING THIS PROCEDURE.

In the absence of getting a Sober and Competent Friend to assist you... Doing all of these very physical actions should only be attempted after you are Very Well Rested and have Better Strength and Patience to "coax" them together. This will yield a better result which you will feel as a decidedly pleasant "clunk". Once that happens... DON'T MOVE THAT TRANS-JACK EVEN A FRACTION! Crawl out from underneath there and get a Bright Flashlight and Examine the position of the Transmission and the Back of the Engine Block. If they have mated up nicely.... install One 15 MM Transmission Bolt in Mid-Case on either side adjacent the Guide Pins ...and slowly tighten them down a little at a time... First one side ...and then the Other... until you are certain that they are perfectly closed up TIGHT together.

Take a short Victory Break and get ready for the NEXT difficulty which means removing that Piece of Wood or Broom Handle you were using to elevate the Aluminum Steam Pipe Flanges at the areas near the Tow Top Transmission Bolts... and adjust the position of the Pipe to align the Flange Holes with the Outside Upper Two Transmission Mount Holes. Then... Get a Wobbly 15 MM Deep Socket and the Longest Extension(s) in your tool Box and tape the 15 MM Transmission Case Bolts into that socket with some Scotch Tape and then reach up and over the spine (top area) of the Transmission from behind and underneath and thread those bolts THROUGH the Two Flanges and into their Casement Holes along the Top Two Holes of the Transmission ... being Very Careful NOT to Cross-Thread them in as you do so. After tightening all of the Transmission Mount Bolts snugly... Follow the Manual Fastener Torque Table and use a Torque Wrench to Tighten ALL the Bolts in a Cross Pattern until you are certain all TEN (or was it Eleven...?) Double Check every single one to make sure and you can't go wrong!

Best Of Luck!
 
Last edited:

Mooseman

Moderator
Dec 4, 2011
25,317
Ottawa, ON
Another thing to check is that the torque converter is completely into the oil pump shaft. Try turning and pushing on it to be sure it's fully seated.
 
  • Like
Reactions: mrrsm

redline customs

Original poster
Member
Aug 25, 2016
171
northwest arkansas
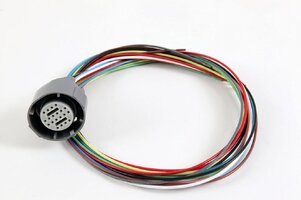
I've been dicking with this for too long. I'm just gonna pull the motor back out then the trans and mate them together outside the vehicle, then stab in together. I've got all the cables and what not undone except the one electrical plug on the pass side and goes into the top of the tranny pan. It is a fairly large round plug and with the limited visibility I cannot seem to find any obvious means that it is attached(or how I can get it off) anybody know how this comes off? Aldo does anyone have any tips for plugging the drive shaft hole to keep fluid in? I need to get one of those plugs that slide in where it goes but I don't want to wait on shipping. Don't really wanna have to get all new fluid to put in either. Thanks again
 

Sparky

Member
Dec 4, 2011
12,927
Sounds like the transmission wire harness you're talking about. The locking tab isn't visible I don't think, but the round/ovalish plug has two flat spots that you squeeze that should release the tab and let it pull straight up and out.
 
  • Like
Reactions: mrrsm

mrrsm

Lifetime VIP Donor
Supporting Donor
Member
Oct 22, 2015
7,691
Tampa Bay Area
X2 --^-- If you look closely at the Harness Coupler... There are two Squeeze Pads that have to be used to disengage the "Hook" and it can be a bear without "feeling" them before any twisting or yanking happens that can damage both harness and loosen the internal harness seal and cause sketchy transmission problems down the road from a Transmission Fluid leak into the Green-Gray Coupler:

4L60EHARNESSCOUPLINGLOCATION.jpg 4L60EHARNESSCOUPLING.jpg


As for how to keep the Transmission Fluid Inside.... After Spraying the area around the end of the Tail Take Off End with Brake Cleaner...then wrap it up snugly with some Saran Wrap and tightly tape it circumferentially with Black Duct Tape at the the closest portion near the Tail Shaft Seal...with enough additional tape above that point to "Keep the Cap" on the end and resist the weight and pressure of the fluid trying to escape when the Tail End is tipped downwards.
 
Last edited:

redline customs

Original poster
Member
Aug 25, 2016
171
northwest arkansas
Ah thanks guys but I figured it out. One of the bolts was hung up and wasn't going into the block correctly. I was removing all the bolts and as I started on that one I noticed it was going to get her. Looks like I don't need to pull it after all
 
  • Like
Reactions: xavierny25

redline customs

Original poster
Member
Aug 25, 2016
171
northwest arkansas
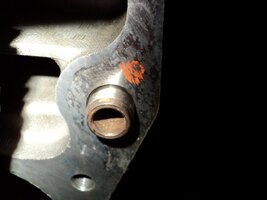
I also found another problem. When they pulled the motor out of the other tb, it left the locating dowel in the block on one side. So basically I realized I was trying to fit then into each other. Where is the dowel supposed to be? In the block or tranny? Thanks
 

mrrsm

Lifetime VIP Donor
Supporting Donor
Member
Oct 22, 2015
7,691
Tampa Bay Area
Here are the two locations for the Dowel Pins:

GM42LDOWELPINS.jpeg
 

redline customs

Original poster
Member
Aug 25, 2016
171
northwest arkansas
OK so they stay in the tranny not the block correct? I had 2 extra. 2 in the tranny and 2 in the block. I think that it probably just left them in there when it was split unless they moved them from 03 to 04. Tranny is from my 03(I'm assuming its original) and block is from 04
 

mrrsm

Lifetime VIP Donor
Supporting Donor
Member
Oct 22, 2015
7,691
Tampa Bay Area
Okay... Just to clarify what these are supposed to look like and where they go...

The Two Beveled Steel Guide Pin Dowels are actually designed to do just that... They Guide the Soft Aluminum faces of the Engine Block and the Transmission Bell Housing together ...with PRECISION in order to keep the "Two Halves" well enough aligned so that the energy from the Crankshaft is being directed precisely outwards ...through its Dead Center ...into the Dead Center of the Torque Converter as it rides upon the shaft of the Transmission Fluid Pump.

But that is not all... the interior of the Engine Block where these Two Guide Pin Dowels are nested on either side ...are Threaded for the induction of two 15MM Transmission Case Bolts... and so of necessity, the inside of the Two Beveled Guide Pin Dowels MUST be Hollow. Each Pin is JUST long enough to fill the interior space that is formed after the Bell Housing and the Engine Block Transmission Mounting Flanges solidly butt up against each other at those opposite locations.

And so... There is only room enough for One Beveled Guide Pin per side... and it will make no difference whether these Guide Pin-Dowels are stuck inside the Engine Mount Sides...or the Transmission Bell Housing Sides... as long as you don't try to install Two Pins on the Engine Sides... and Two Pins on the Transmission Bell Housing Sides ... as they will never get along with each other.
DSC07553.jpg DSC07560.jpg
 
Last edited:

redline customs

Original poster
Member
Aug 25, 2016
171
northwest arkansas
Yeah I got that. Just wasn't sure if it mattered whether they were in engine or tranny(apparently not). I got the motor and tranny together and restabbed. I've got it all bolted up and tightened down. Now I'm just putting the wiring back on and the accessories, then should be close to fire. I'm having a bit of trouble figuring out where all the sensors are(stupid me got in a hurry and didn't take pics or note) but I'll find them. Thanks for y'all help. I'll let you know what comes about.
 

Forum Statistics

Threads
23,312
Posts
637,815
Members
18,517
Latest member
javier perez

Members Online